Learn how to create a stunning rose flower pot paper craft with this easy tutorial. Perfect for decorating your home or giving as a thoughtful gift, this DIY project is sure to impress.
In this tutorial, we will be exploring the art of paper crafting by creating a unique and beautiful spiral flower pot. By following along with the step-by-step instructions, you will be able to create your own stunning paper flower pot that will surely impress your friends and family. Let’s get started on this fun and rewarding craft project!
Rose Flower Paper Craft Tutorial For Kids

Must Read: Paper Flower Bouquet Artwork Craft Tutorial For Kids
Supplies & Tools
- White sheet, Yellow sheet, Blue sheet Paper
- Green marker
- Glue
- Scissor
Flower Paper Craft Instructions
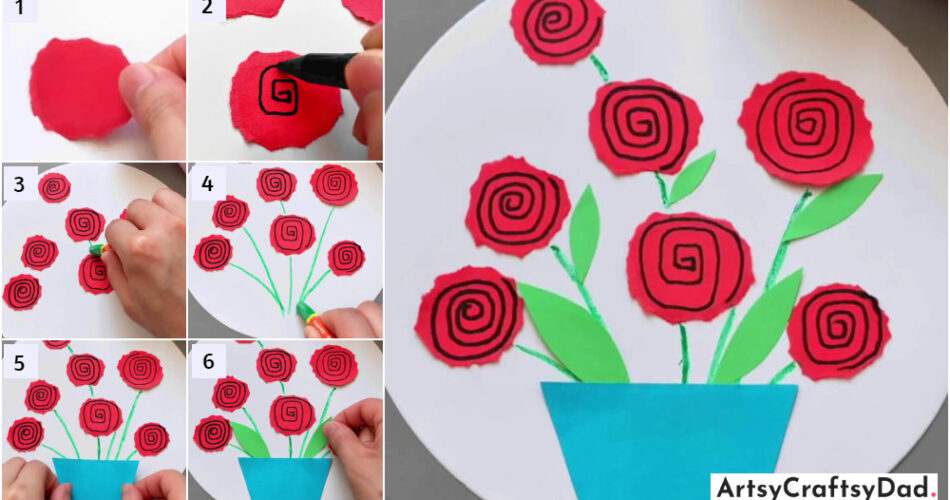
Step #1: Prepare Background And Shapes
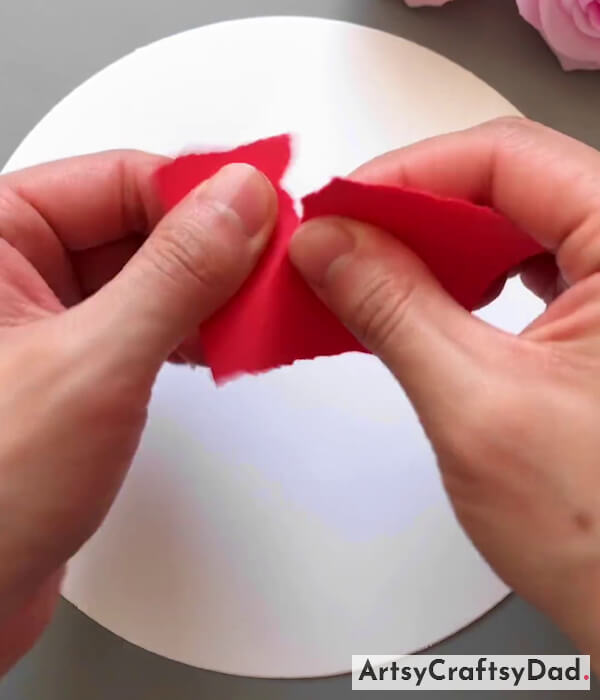
Firstly, we use a white sheet and cut that into a circle shape for the background, then use a red sheet and cut it with your hand and make a circle shape with a zig-zag border.
Step #2: Pasting The Shape
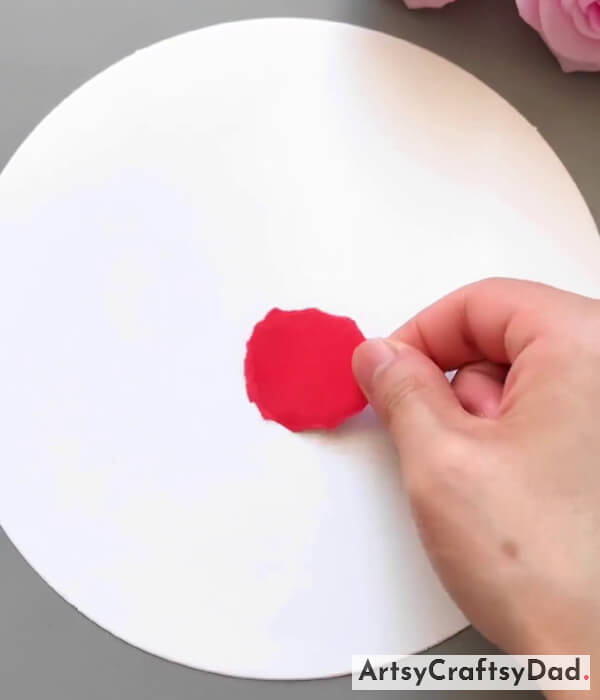
Start pasting that circle in the middle of the background sheet.
Step #3: Make More Shapes A Like

Make more shapes with the same sheet with zig-zag corners and paste them near each other.
Step #4: Completing Pasting The Shapes

Here, I paste seven circles according to my sheet, you can paste according to yours.
Step #5: Drawing Design In Between
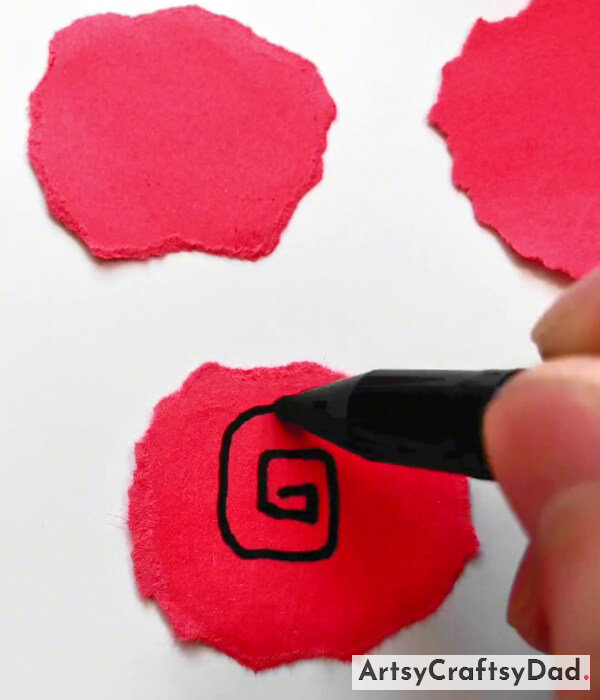
Use a black marker a start making a drawing in between every circle. Here I am making the design of concentric circles.
Step #6: Completing The Design Process
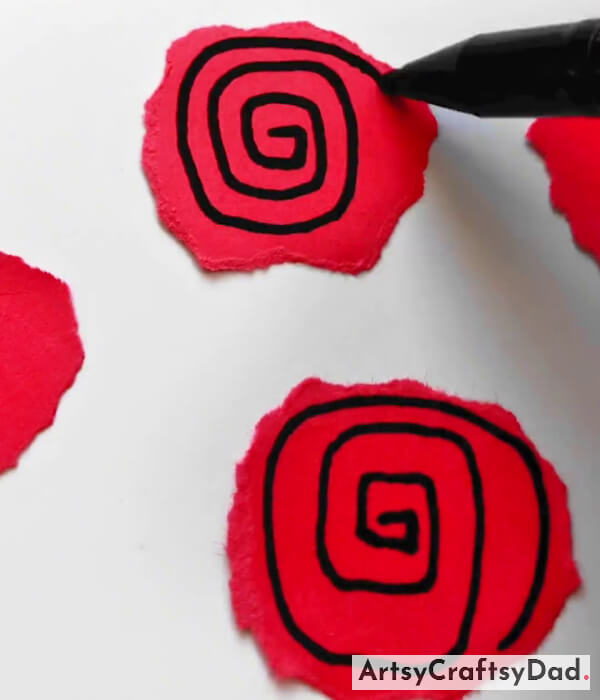
Complete the designing process in every seven shapes, remember the design should be the same in every circle through which it looks beautiful and semantic.
Step #7: Connect Flowers
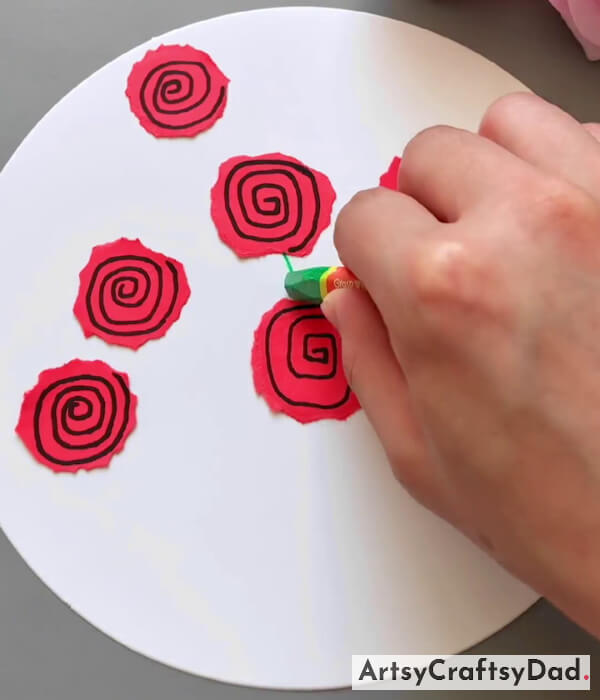
Use a green marker just to join the circles with each other.
Step #8: Bring Line To An End

All the lines drawn by the green marker should come to an end at the bottom.
Step #9: Pasting A Pot

Use a blue sheet cut it into a pot-like structure and paste it at the end where we merge the green lines.
Step #10: Paste Leaves To The Pot

Use a green sheet cut two leaves and paste exactly attached with the pot pasted over there.
Congratulation! Your Beautiful Flower Pot Is Ready

Finally, your spiral flower pot paper craft is ready!
In conclusion, creating a spiral flower pot paper craft can be a fun and creative project for both kids and adults. It allows for customization and personalization, making it a unique addition to any home or garden. So gather your materials and get crafting to bring a touch of springtime beauty into your space!
You Might Also Like This
- Sewing Ribbon Rose Decor Craft Tutorial For Home
- Oil Pastel Rose Bouquet Drawing Hack Craft Tutorial
- Paper Flower Garden Craft Tutorial For Kids
- 3D Paper Roses: Flower Pot Craft Tutorial
- Paper Pinwheel Flower Craft Tutorial For Kids


