Do you know you can make a mini, 3D-looking garden of your own with the help of this tutorial? You can also make as many flowers as you want.
This is a step-by-step tutorial for Paper Flower Garden Craft Tutorial for Kids. This craft activity is apt for kids of ages around four and above. Kids can make their own choice of flowers. This activity will give them an idea and some tricks as an example of how they can make 3D crafts in a creative manner. Kids will have fun doing this and they will also learn the techniques that they can put to use in the future.
Easy Paper Flower Garden Craft For Kids
Must Read: Red Flower Garden With Bees Clay Craft Tutorial
Tools & Supplies
- A White Sheet Of Paper
- Green Sheets Of Paper
- A Set Of Markers Or Sketch Pens
- A Pair Of Scissors
- A Glue
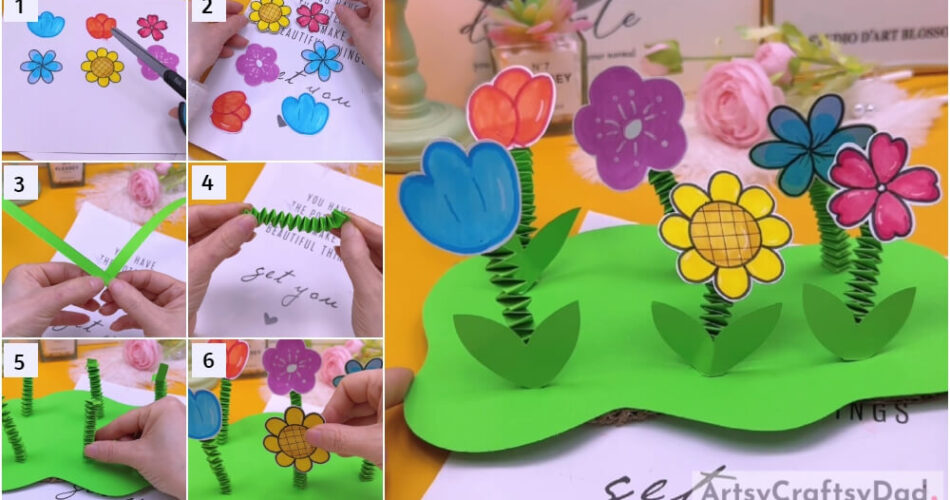
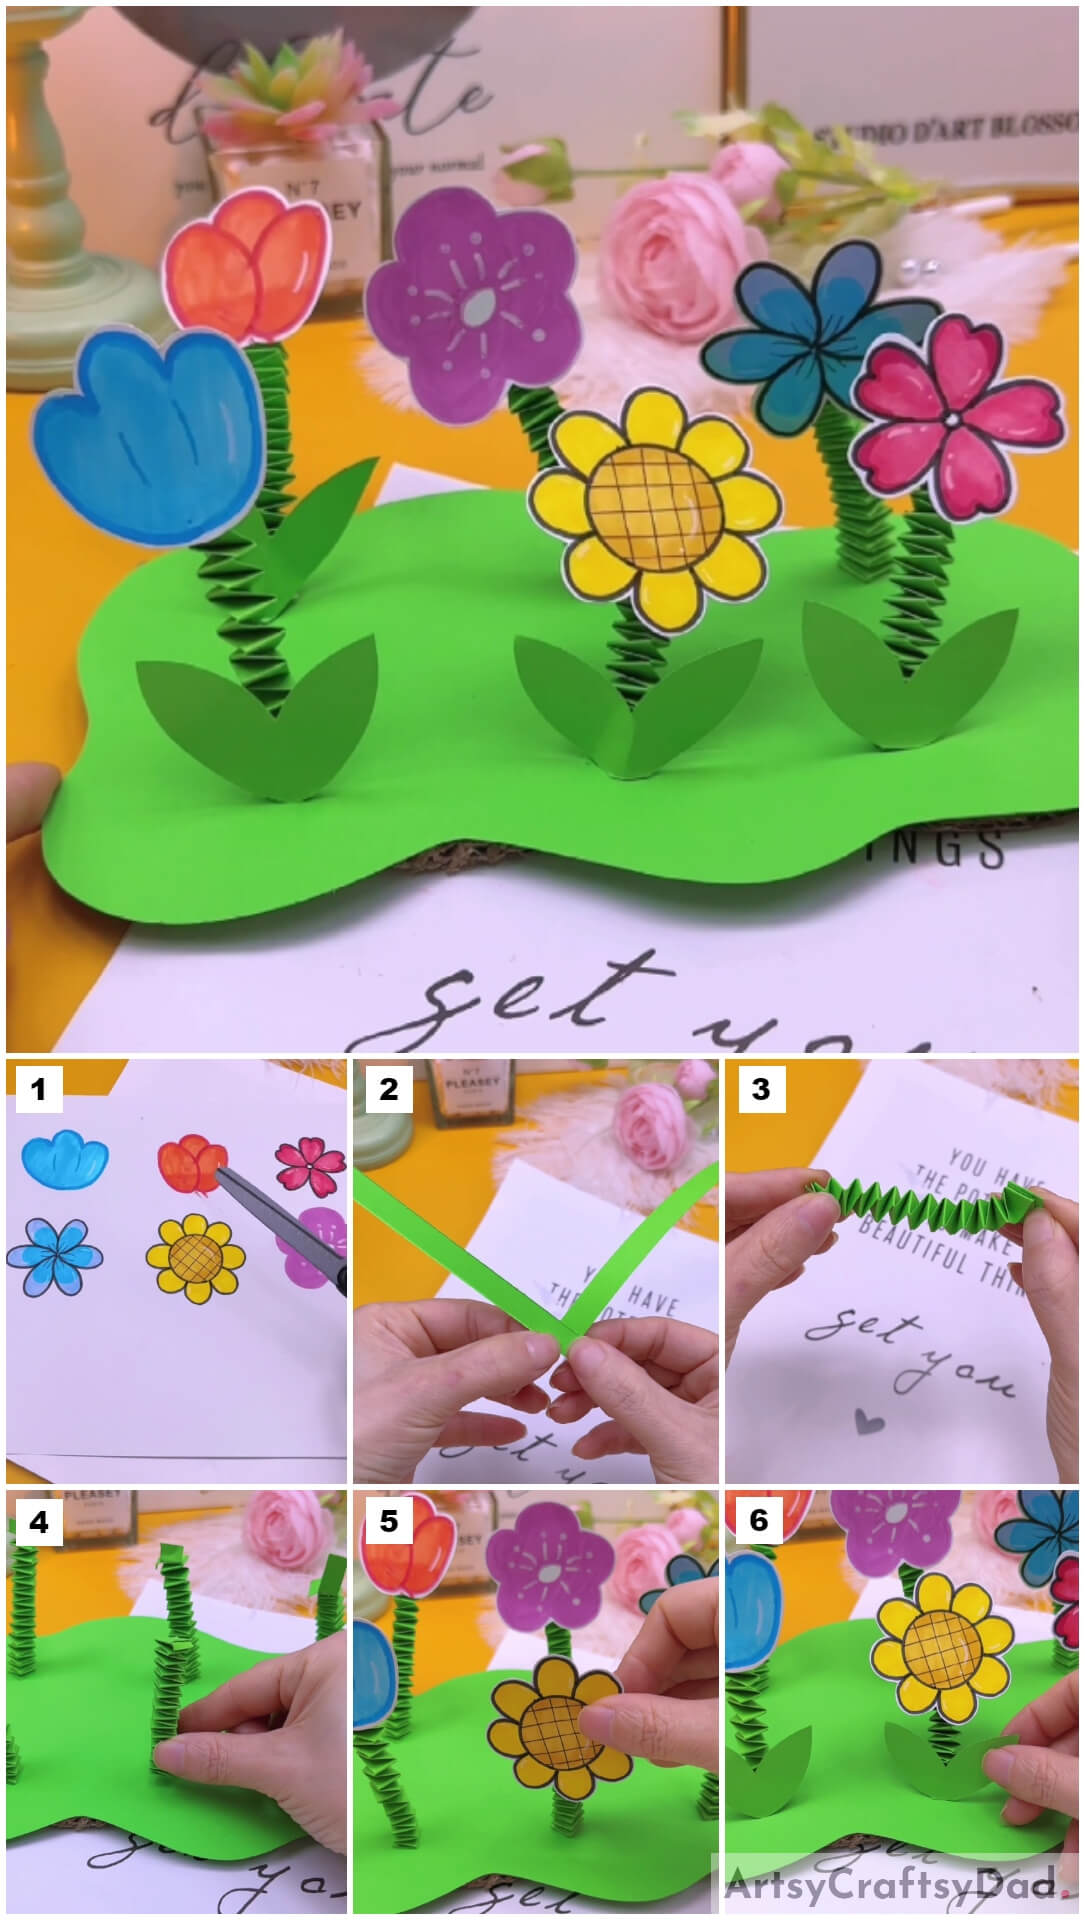
Paper Flower Garden Instructions
Step #1: Draw And Color Some Flowers On A White Sheet Of Paper
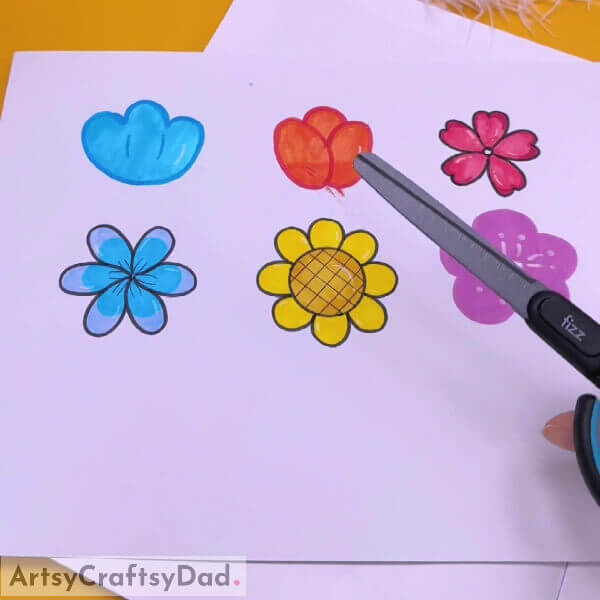
Take a white sheet of paper. Draw six flowers on it. You can draw even more if you want. Color the flowers using sketch pens or markers. Before coloring, trace their outline using the required color of sketch pen or marker and erase the pencil outline.
Step #2: Cut Out The Flowers
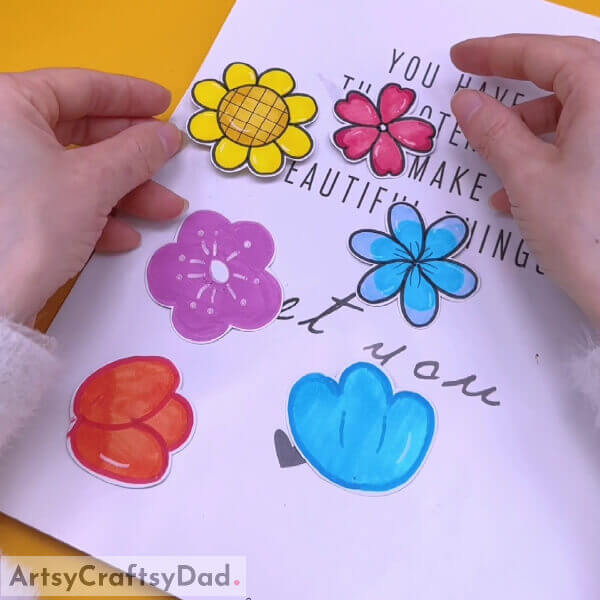
Using a pair of scissors, cut the flowers. You can leave a little white outline on the sheet while cutting as done in the above image.
Step #3: Make A Zig-Zag Pattern Using Green Paper Stripes
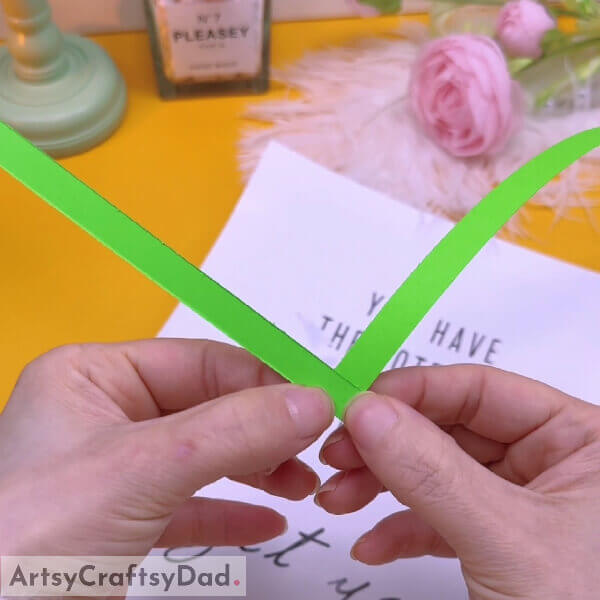
Take a green-colored sheet and cut two equal stripes out of it. Keep the stripes in the above-shown position fold one strip on the other and keep the process going.
Step #4: You Should Get A Pattern Like This
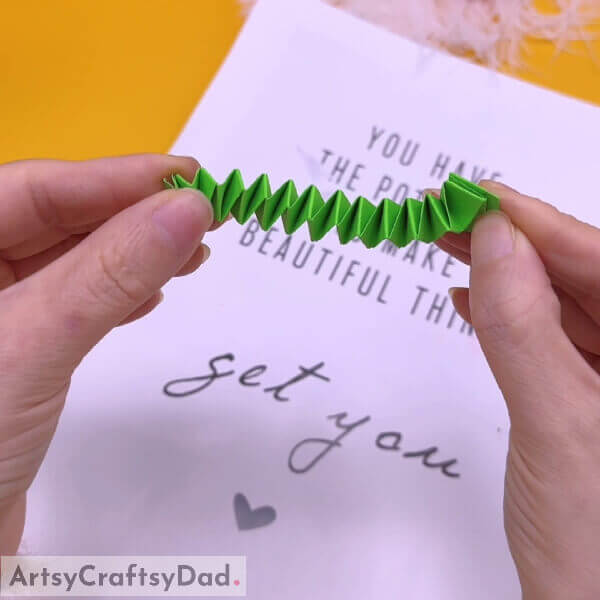
After folding the strips in the above-said pattern, you must get a pattern like this. If not, retrace your steps and do it again.
Step #5: Make Six Similar Patterns
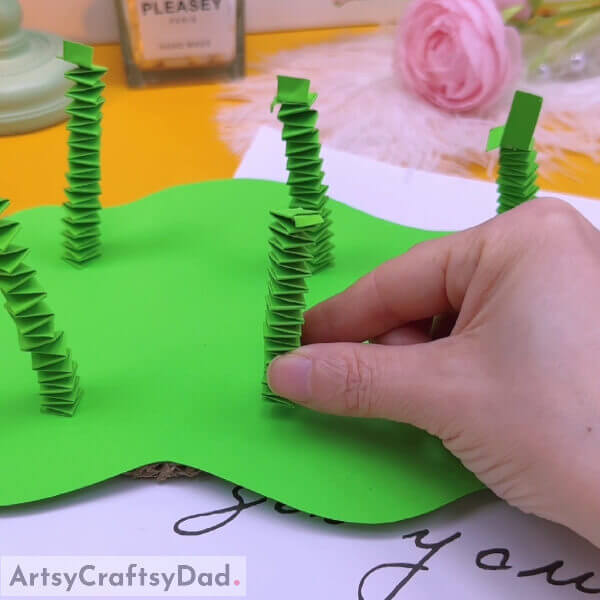
Now, after that one pattern is ready, cut out more stripes from the green sheet so that you get six similar patterns. Use the same technique and if a reference is needed, visit the previous steps. After that, take a fresh green sheet and stick all these patterns on it as in the above image.
Step #6: Paste The Flowers On The Top Of The Green Stems
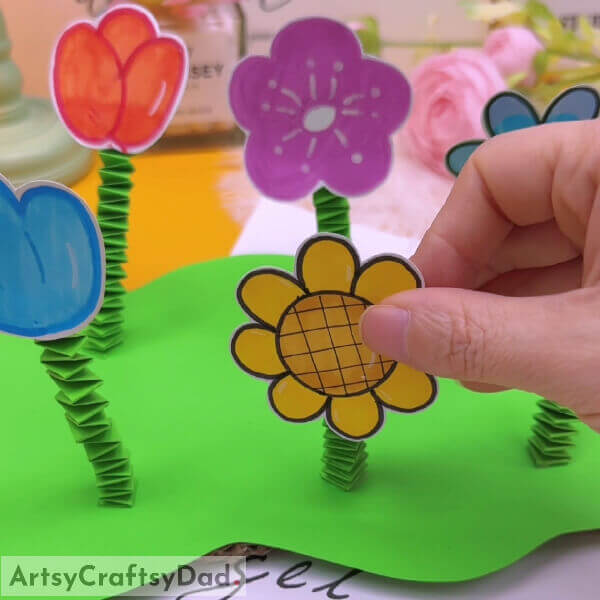
Take the flower cutouts and paste them on the green pattern, which will act as stems.
Step #7: Make The Leaves And Paste Them
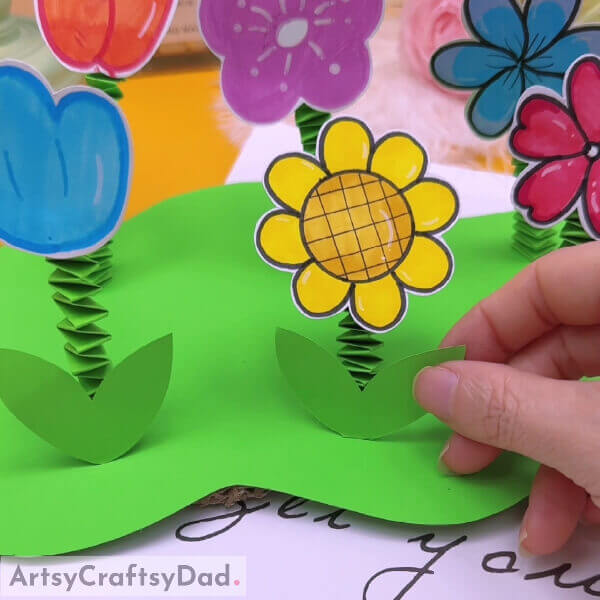
Make leaves on a green sheet of paper and cut them out using a pair of scissors. Now, paste them in front of the stems in the same manner as in the image presented above.
Final Image: Here It Is! The Final Look Of The Garden
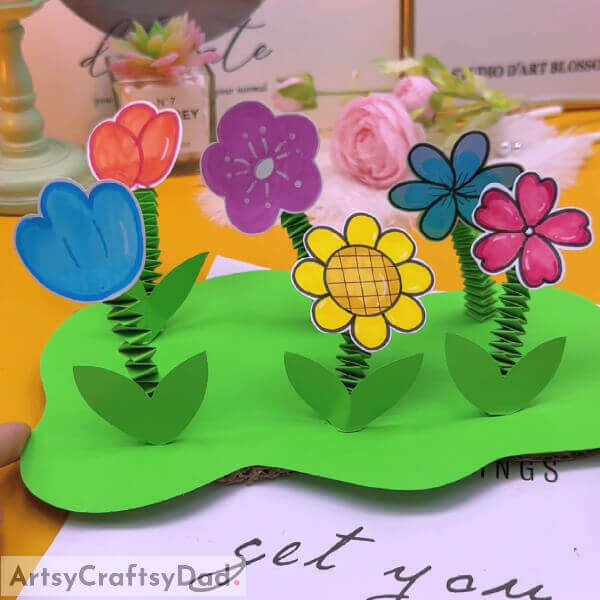
This is the final image. Now, you can add more flowers or plants if you want, using the same technique. If you are looking for more arts and crafts ideas, tutorials, suggestions, etc.
This paper flower garden craft is a great way to get your kids to be creative and have a lot of fun at the same time! Whether you’re looking for a rainy day activity or a craft to do with your kids on a summer day. check out the main website; there are abundant resources present there. Mention your suggestions, reviews, etc., in the comment section. Thank you for your time and support. Keep up the art.
You May Also Like
- Paper Cutting Cute Tigers Craft Tutorial For Kids
- Colorful Hedgehog Paper Craft Tutorial For Kids
- Clay Flower Garden With Bees Craft Tutorial
- Palm Cutout Paper Duck Craft Tutorial For Kids
- Crayon Flower Garden On Black Base Drawing


