Seriously, you don’t wanna miss this one! This tutorial has brought you a paper craft on making a colorful pinwheel of flower shape!
This one is a perfect combination of craft and origami! This step-by-step tutorial will guide you through each and every step of this paper pinwheel in a flower design! A fun and amazing craft to make on a boring afternoon while learning too as it is full of motor skills! Making this craft will be a hands-on sensory experience for the little ones! The results of this craft will definitely stun everyone! So, what are you waiting for, grab the listed materials to begin!
Adorable Paper Flower Craft For Kids
Must Read: Clay Flower Pot Model Craft Tutorial For Kids
Supplies & Tools
- Colored Paper Sheets
- Scissors
- Glue
Paper Flower Instructions
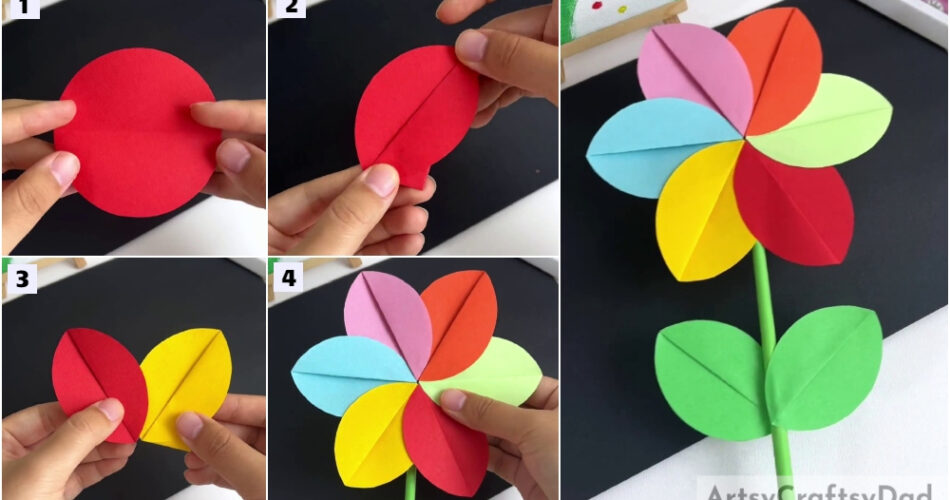
Step #1: Cutting Out Circles
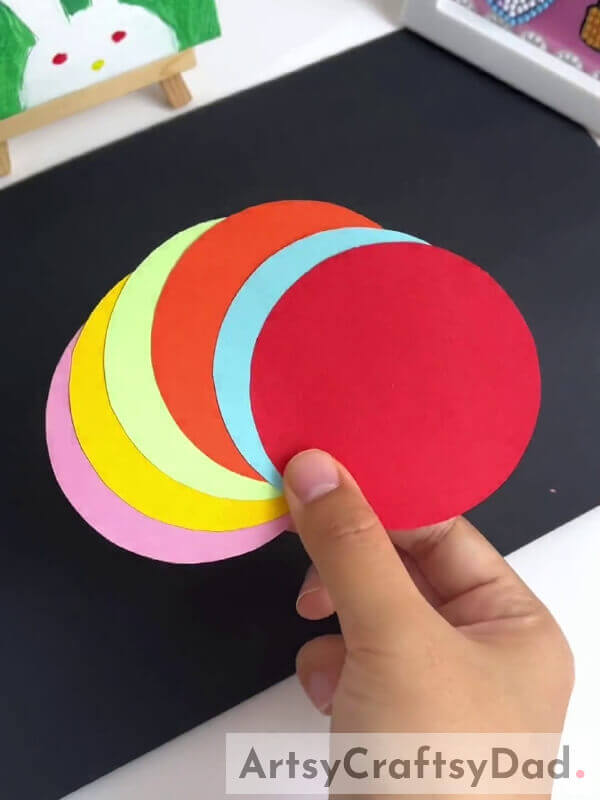
Begin this craft by taking pink, yellow, green, orange, blue, and red colored paper sheets and a pair of scissors. Using the scissors, cut circles from each paper sheet of the same sizes as shown in the image.
Step #2: Making A Crease On Red Circle
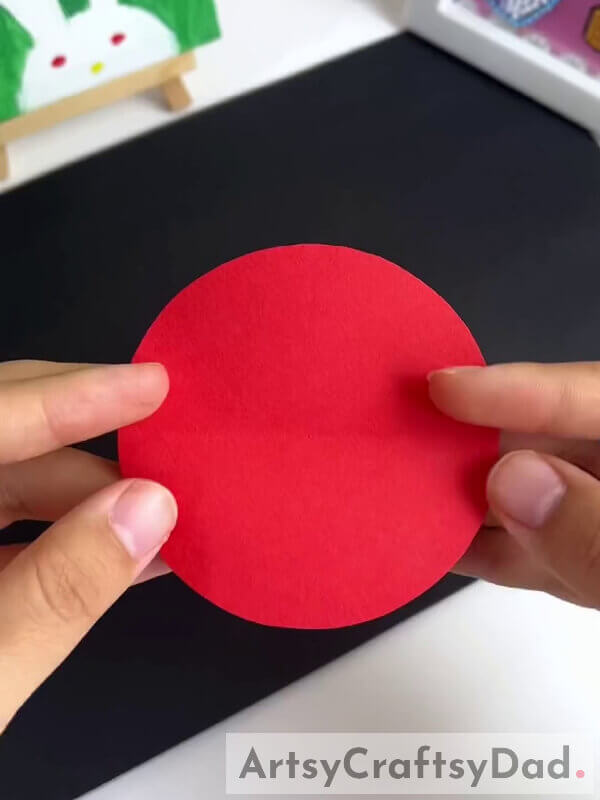
Take the red circle fold it in half to form a crease and unfold again.
Step #3: Folding The Edge Of The Folded Circle
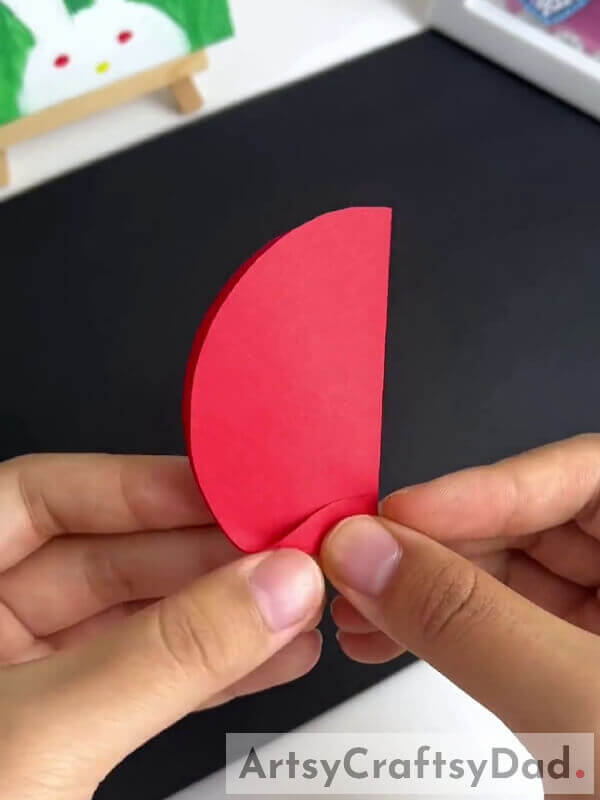
Fold the circle in half along the crease and then fold the bottom edge of the circle from the folded side over it and make a crease.
Step #4: Making A Petal
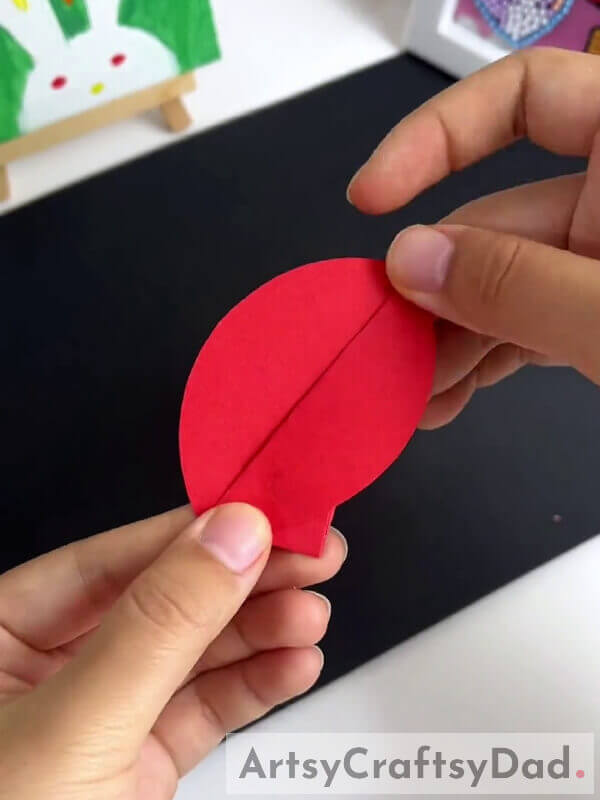
Fold the folded side of the circle to make a tilted crease from the end of the folded edge to the opposite edge and open the circle from the curved side along the circle. You will see a petal formed as shown in the image.
Step #5: Making More Petals
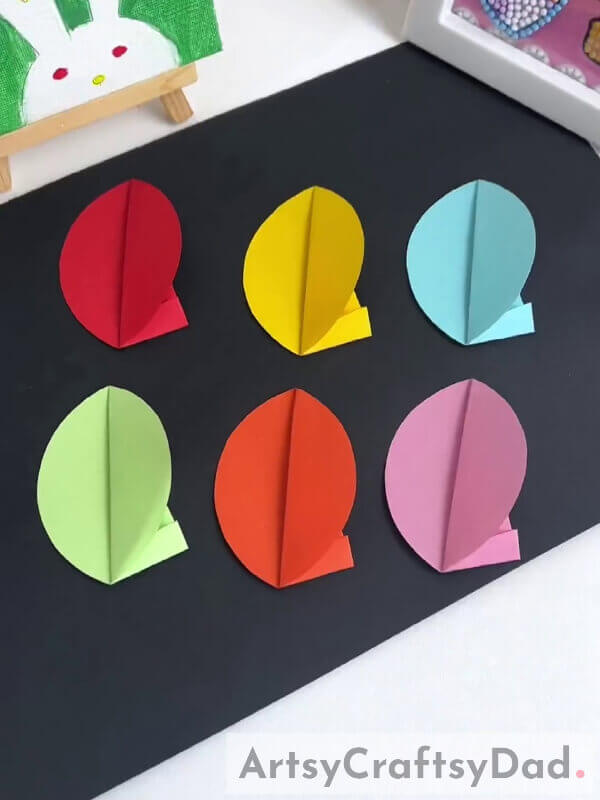
In the same way, make the petals of all the colorful circles.
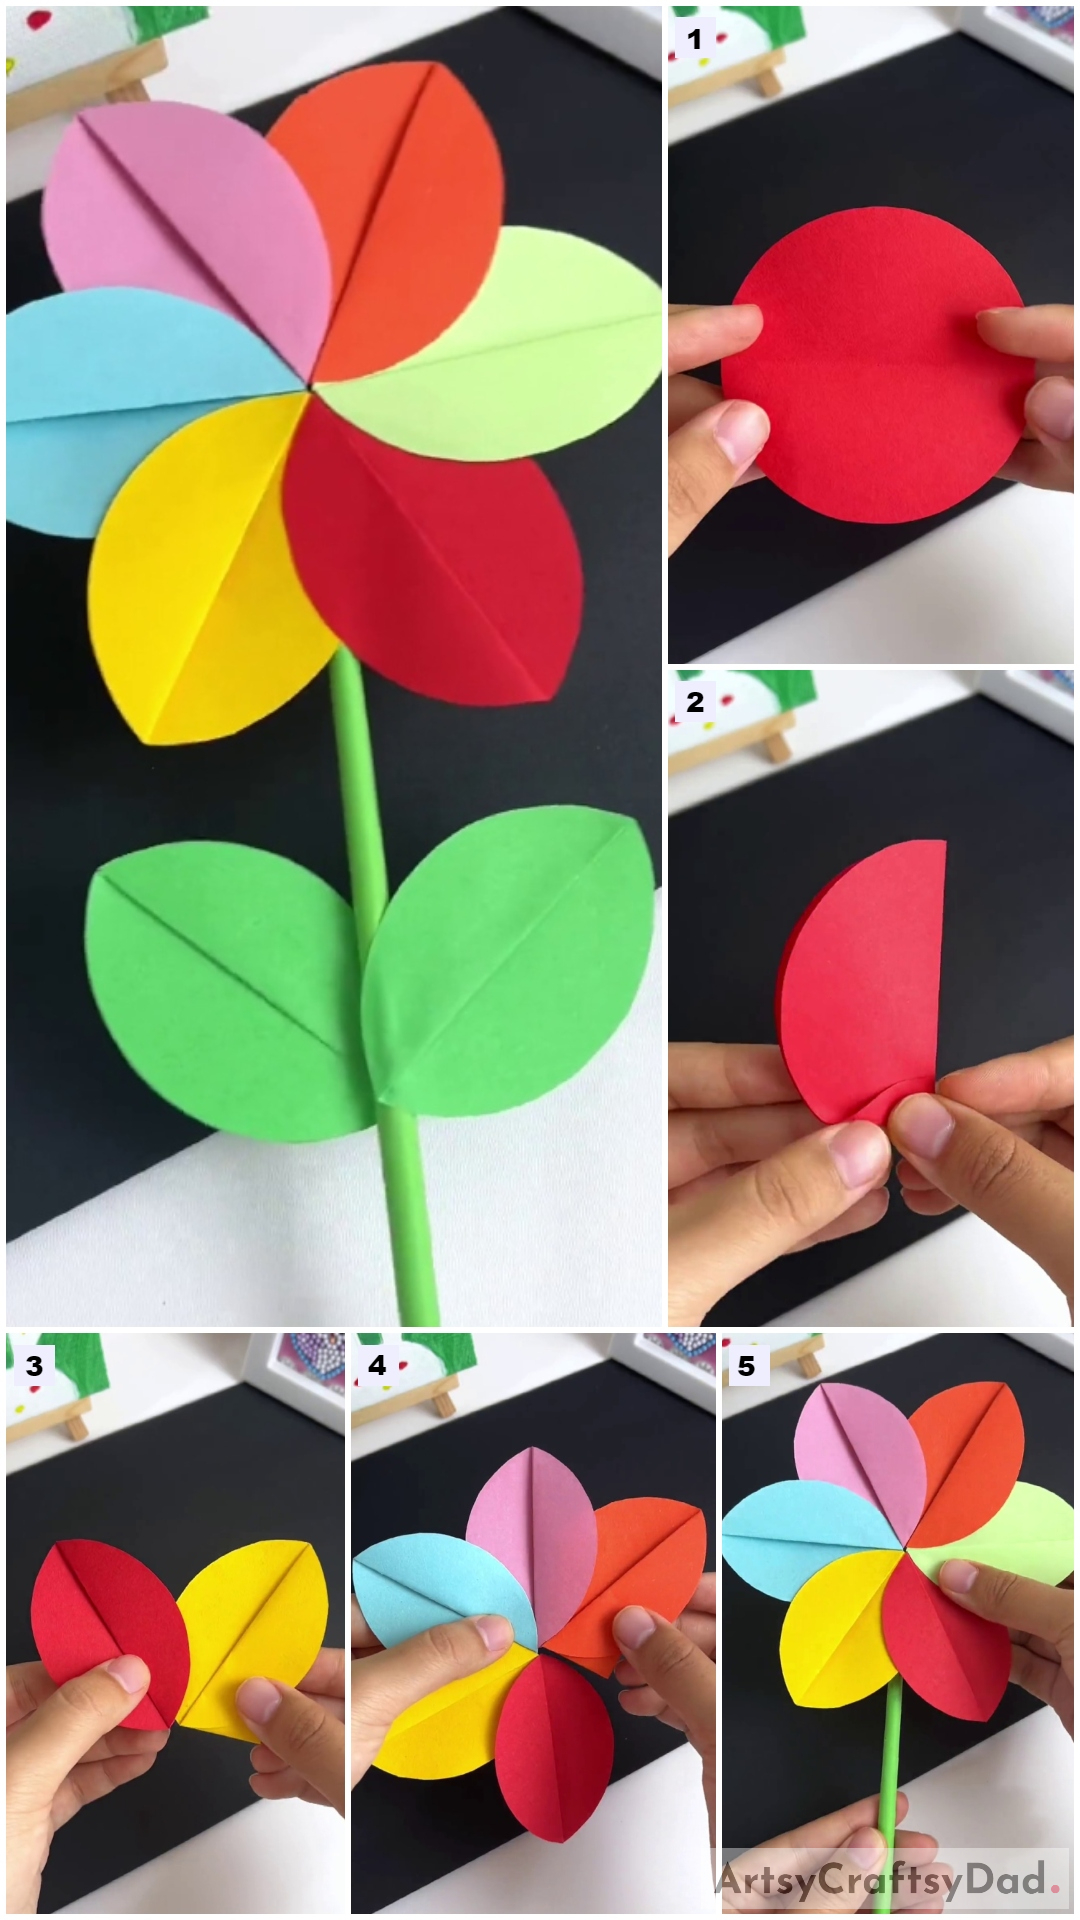
Step #6: Inserting The Yellow Petal In The Red One

Take the red petal and the yellow petal and put the yellow petal in the red one from the back folded edge.
Step #7: Inserting Petals To Make A Flower
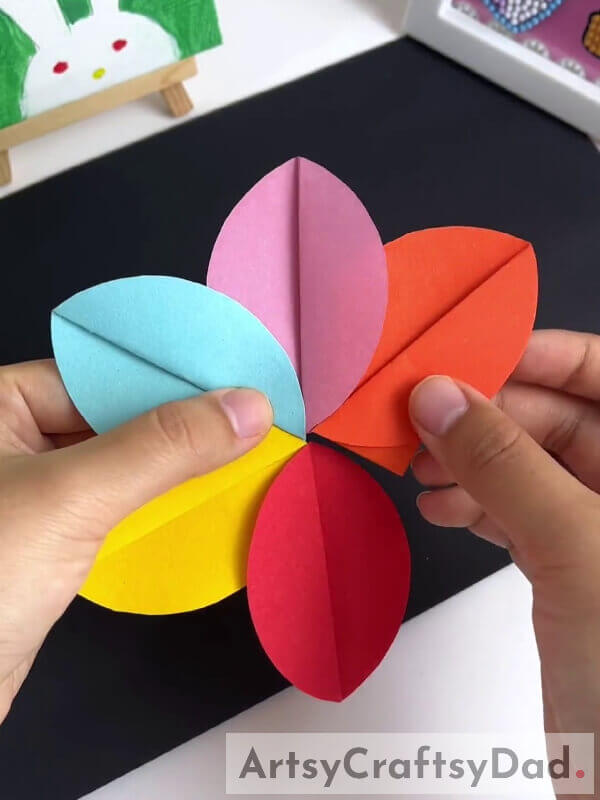
One by one, insert all the petals into one another from the back to form the circular pattern and form the flower shape. See the image for reference.
Step #8: Securing The Last Petal
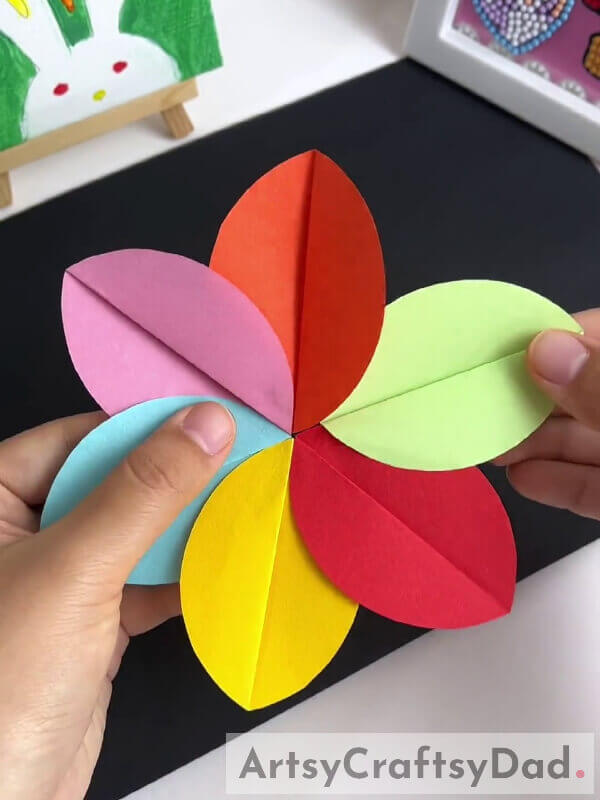
Insert the last green petal into the previous one i.e. orange and then insert the red one into the back of the green one. This completes your flower petals.
Step #9: Pasting A Stick To The Flower
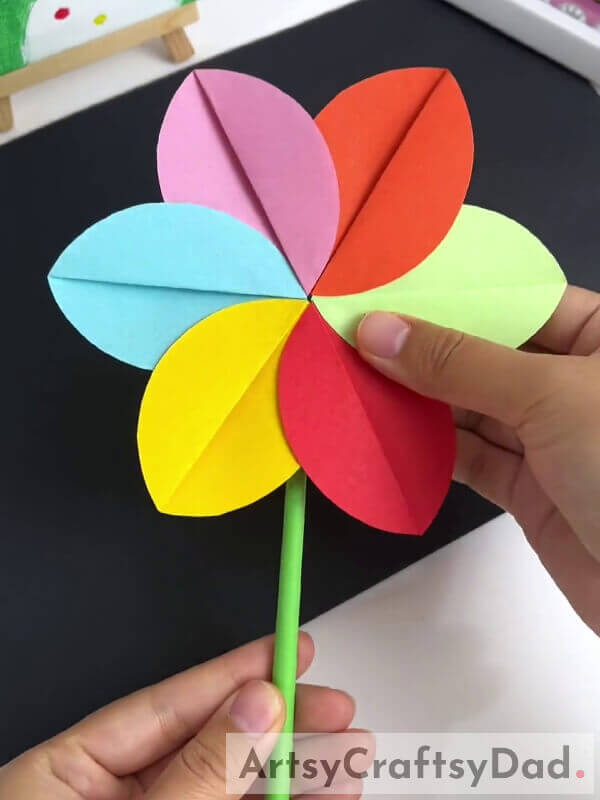
Take a green sheet of paper roll it to form a round stick and secure it with glue. This will be the stem of your flower. Now, stick the stem to the back of the flower using glue to make its stem. See the image for reference.
Step #10: Sticking Leaves To The Stem
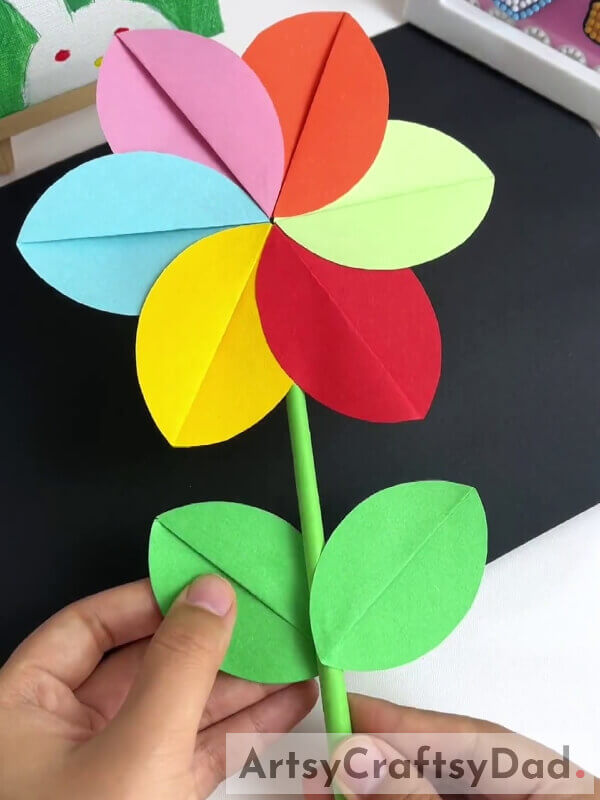
As you make the petals, make 2 more of them from green circle sheets and stick them to the stem from front and back on both sides to act as the leaves of the flower using glue. See the image for reference.
This Is The Final Look Of Your Paper Pinwheel Flower!
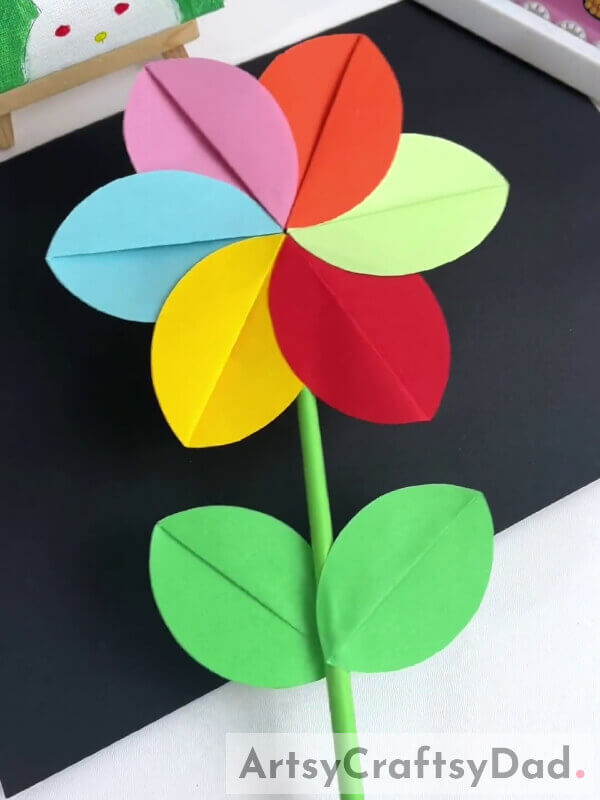
Tada! Your colorful pinwheel flower is thriving!
You can now show it off to your friends and family and let them admire your crafting skills and creativity! You can also flaunt your skills by teaching them to make it too! You can also make more of these pinwheel flowers and decorate them in the drawing room in a vase to have a unique flower vase! You can also customize this craft by adding your touch of creativity to it, like giving textures to it, changing the colors of it, or anything! Your imagination is the limit!
We are hoping you liked the craft and article! If so, give it a like and share it with your buddies as well! Also, drop your feedback in the comments section below!
You May Also Like
- DIY Origami Paper Designer Frock Craft Tutorial
- Colorful Hedgehog Paper Craft Tutorial For Kids
- Paper Cutting Cute Tigers Craft Tutorial For Kids
- Chick Hatch Fun Paper Craft Tutorial For Kids
- Red Poppy Flower Drawing Tutorial For Kids


