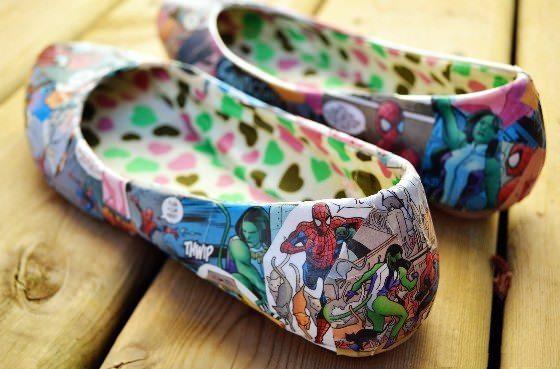
This technique, like decoupage, makes it possible to change beyond recognition almost any item of household goods, clothes and even shoes. To understand how the decoupage of shoes is performed , we will consider a master class with step-by-step photos.


How to decorate shoes with decoupage
If your wardrobe has boots or shoes that you are rather tired of, you can turn them into new ones, changing the coloring with the help of decoupage techniques. In order to perform such needlework, prepare the following materials and tools:
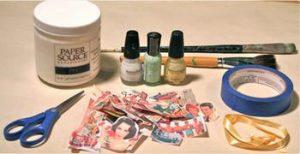
- one pair of shoes;
- glue acrylic;
- Scotch tape;
- brushes;
- scissors;
- tape and pictures for decoupage.
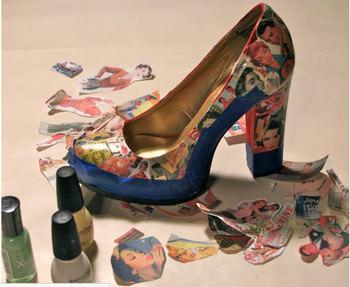
Decoupage shoes should start with training. A pair of shoes for a good clean with a washing liquid, then dry and wipe with cotton wool soaked in alcohol. We need alcohol for degreasing. After that, we cut out our own pictures that fit us in the plot. To decoupage out successfully, we must harmonize the color and style of these fragments. Images are selected from napkins, special cards, printouts or illustrations in the magazine. From any given material, cut out individual fragments that are combined with each other.
After completing the selection of images, proceed to their gluing on the back and the heel of one of the shoes. We try to glue the fragments neatly together, forming one solid pattern. The work on attaching pictures to the shoe using glue is quite difficult, and requires patience. Each fragment and the surface of the shoe must be covered with glue completely, the pictures are pasted. After this, it is necessary to glue along the whole shoe for the second time, covering the pictures from above, and leave the shoes to dry. And now in the work we introduce a paint tape, which will close the entire bottom part of the shoe, as you see in the photo.

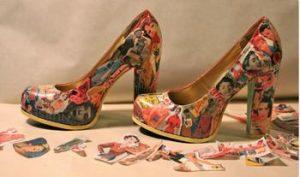
Continue the process of decoupage, and cover the bottom of the shoe with acrylic paint, which is compatible in color with the images. Let us turn to photographs that perfectly demonstrate the result of this coloration. After that, it remains to decorate the top edge of the shoes, for which you can use satin ribbon, as well as PVA glue. The ribbon is selected in the same color as the one you painted on the bottom of the shoe. Bring the ends of the ribbon to the center of the shoe, and make a bow from it. We’ll drop the glue in the center of the bow to fix it. We have finished decoupage of shoes with our own hands, and updated old shoes, turning them into new ones. The first master class has come to an end, and the right moment has come to move on to the next topic.
Decoupage on the skin
The next master class will tell you how to make decoupage on your own hands. For this purpose we should prepare such materials:
- leather bag;
- rice paper ;
- acrylic paint;
- PVA glue;
- contour for fabric;
- brushes;
- scissors;
- lacquer for fabric.
Decoupage on the skin begins with the selection of a suitable pattern, as well as its measurement with a ruler. Measuring, we draw on the skin a figure of the same size and shape, and paint it with white acrylic paint. In a particular master class, an example is a rectangular drawing. Draw a rectangle on a leather bag with acrylic paint, making several layers, and put the skin to dry. While the bag dries, we proceed to cut out the rectangular image with scissors. Cut out the picture, and put it aside. After drying the acrylic paint on the prepared rectangle, apply PVA glue, and paste the prepared plot.
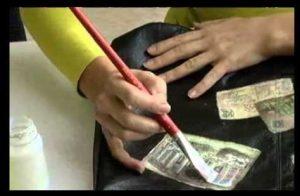
The glued picture must also be covered with PVA glue. Applying glue with a brush, we try to simultaneously remove all the formed bubbles, and again leave the bag to dry. If there is a need to speed up the drying process, you can use a hairdryer, but it’s best not to do it, because with natural drying the quality of decoupage will be better. We will wait for the drying out of the plot, and cover it with varnish for the fabric. Put it on the leather part of the bag to avoid having a visible transition. Having completed this operation, we again put aside the bag for drying.
Our product has withered, and now it’s time to mask the border between the image and the leather part, because there will certainly be defects on it. We will use the so-called contour for tissue. Look at the video to see how it’s done. The contents of the bottle are pinpointed on the contour of the plot, forming small beads, which harden when dried. And now the master class is finished. You learned how to do leather things by yourself.
Video: How to decorate a bag from the skin with decoupage
Decoupage cover on the passport
The next master class is devoted to how to do by yourself the decoupage of the cover on the passport. Prepare for the needlework:
- cover for the passport;
- acrylic paint white and black;
- polyurethane wool;
- alcohol or acetone for degreasing;
- decoupage map with a picture;
- acrylic lacquer;
- varnish finish.
Degrease the cover of the passport with alcohol or acetone, and then begin the process of staining it with white acrylic paint. We collect the paint on a small piece of the usual kitchen sponge, and begin to paint the surface of the cover. In the place where the picture will be placed, it is necessary to impose more paint, and on the sides of it paint can be applied with a slight haze. We need to achieve a smooth transition from white to black on the edge of the cover. When the paint dries, proceed to applying the acrylic lacquer. We just need it to prevent contact of acrylic paint with water, in which we will soak the decoupage map. To glue the decoupage card to the cover, you must first place the cut motif in a bath with water, and leave it there until the adhesive layer that is on the decoupage paper is activated.
Check with your fingers, whether the film of the decoupage card is shifted from the lining. If so, then you can start sticking it on the cover. We take out the image from the bath, lightly soak with a napkin, bring it to the cover, and begin to move the film. When one end of the film is released from the lining, apply it to the cover in the right place. After that, we move the film further and gradually gluing to the cover. When all the film is glued, take a napkin and press it to the base, pushing out all the bubbles and smoothing the folds. The finished glued film is covered with the same acrylic lacquer, making a very thin layer of this coating, and drying the product.
When the coating is completely dry, take a sponge and black paint to tint the corners of the cover and visually align the color transitions. We must darken the corners of the picture, making a gray haze on them. When the tinting of the corners is finished, it remains only to cover the working surface with the finish, and the decoupage of the cover on the passport can be considered complete. If there is a desire to give the cover a little femininity, you can decorate its corner with a shiny monogram with a stencil and a special paste with sparkles, as was done in the video, and finish with a master class.
Video: Decoupage lesson on the cover for a passport
Decoupage of the phone case
The last master class of this lesson is devoted to how to do the decoupage of the phone case with your own hands. First, we list the materials that will be needed for this task:
- any cover that fits the phone;
- printing on the printer pictures;
- primer;
- PVA glue;
- paint type acrylic;
- brushes;
- lacquer varnish (which is applied in two sets);
- oil paint;
- varnish;
- lighter, adhesive tape, scissors.
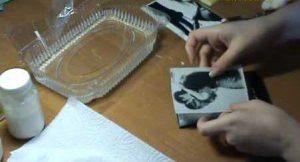
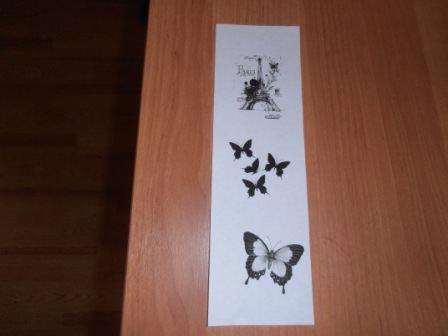
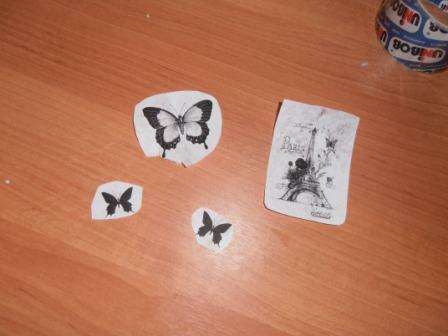
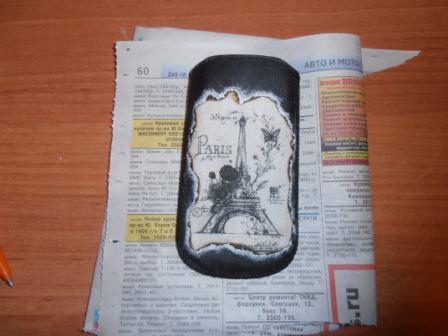
Print a picture preferably in a double copy, in case the first picture deteriorates. The piece of paper where the image is printed should be made as thin as possible using a sticky tape such as “Scotch tape”. After thinning, it is necessary to cut out individual episodes of the image, leaving a small margin for roasting. Burnt edges will give the product some shade of an antique thing. After that, the primer is applied on the cover, which we prepared earlier, and after it dries immediately PVA glue, which is glued to the paper printout.
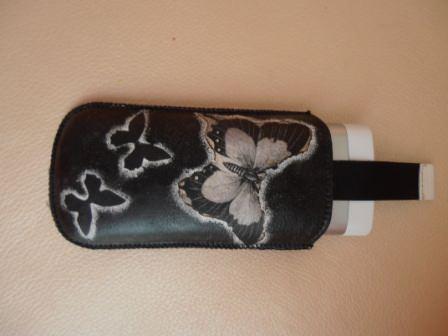
After the glue and the picture dry, take the usual dish sponge, soak it with black acrylic paint, and apply it to the areas of the cover that are free from the pattern. Between the picture and the paint you need a small lumen, which should remain light. Decoupage of the second half of the cover is performed in the same way as the first part. After that, the main side is applied one roll of varnish, forming a crack, and called craquelure. We let it dry, and we apply the same layer one more time. Now it will take a whole night for the cover to do its job, and lead to the formation of cracks that mimic the past. In the morning, we apply a dark oil paint on the varnish lacquer to slightly soften the product. The back side of the cover is covered with an ordinary finish, and this is the end of the last master class.
Video: We decorate the case for a mobile phone
https://youtu.be/F4qz0OTUCC0
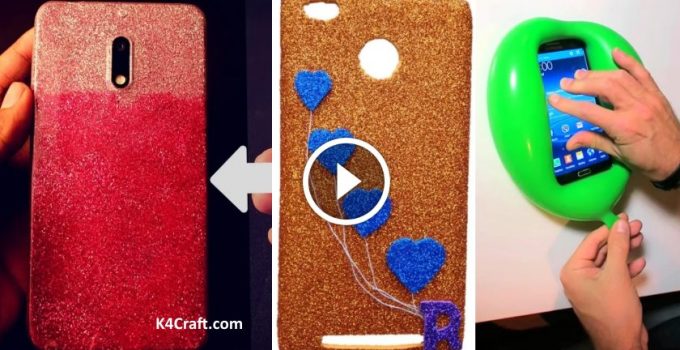
Useful Mobile Cover DIYs To Try At Home
You’ll also like:
- How to make a felt shoe at home
- How to make a thread organiser from shoebox
- How to Make Origami Book Cover Ideas
- How to make trendy handbag from plastic cover
- How to make pillow cover using shopping Bags


