Discover a captivating bubble wrap drawing craft that will spark your child’s imagination and provide an engaging, hands-on activity. Explore the joy of crafting with this step-by-step tutorial.
Start your child’s creativity as they transform ordinary bubble wrap into a unique and visually striking work of art. Guide them through the step-by-step process, fostering their imagination and developing their fine motor skills. Dive into a world of color, texture, and artistic expression with this engaging activity.
Creative Design on Bubble Wrap
Must Read: Bubble Wrap Carrot Artwork Craft Tutorial For Kids
Supplies & Tools
- White Sheet
- Black Marker
- Bubbled Sheet
- Watercolor (Yellow, Dark Green, Light Green, Blue)
- Glue
- Scissor
- Bottle Cap
- Red Marker
Bubble Wrap Drawing Craft Instructions
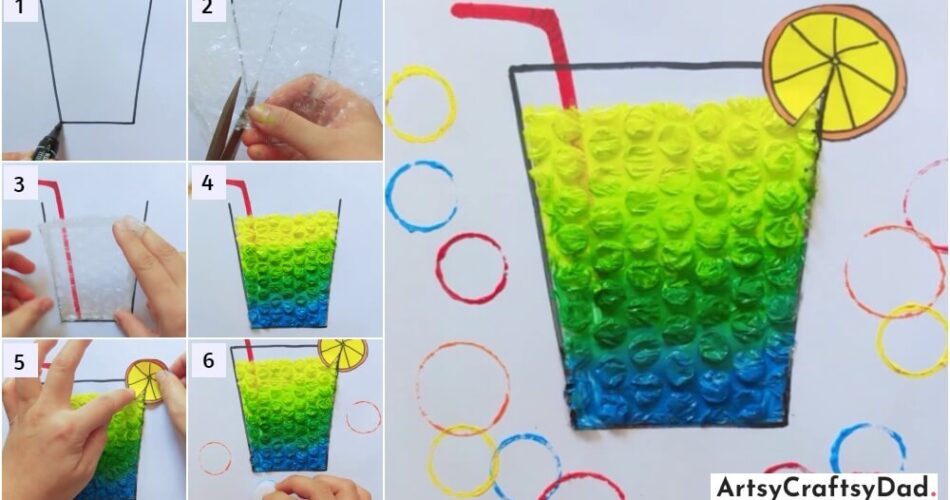
Step #1: Initialize With The Craft

Firstly, we will take a plain white sheet and draw a glass on it with the help of a black marker.
Step #2: Use Bubbled Sheet

Use the bobbled sheet and mark a landmark so that we can easily cut it.
Step #3: Cut The Bubbled Sheet

Now, cut the bubbled sheet and cut it till the mark with the help of a scissor.
Step #4: Draw A Straw

Now, draw a straw with the help of a red marker.
Step #5: Paste The Bubbled Sheet
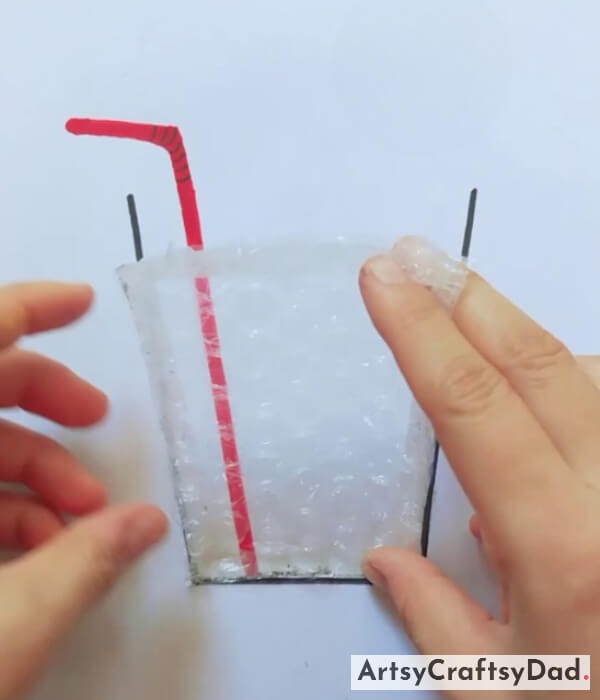
First, we will color the straw with the help of a red marker and then we will paste the bubbled sheet on the glass.
Step #6: Start Coloring The Sheet

Use watercolor to paint the bobbled sheet, you can choose different different colors to paint it. Here, I am using blue and green colors to paint the bubbled sheet.
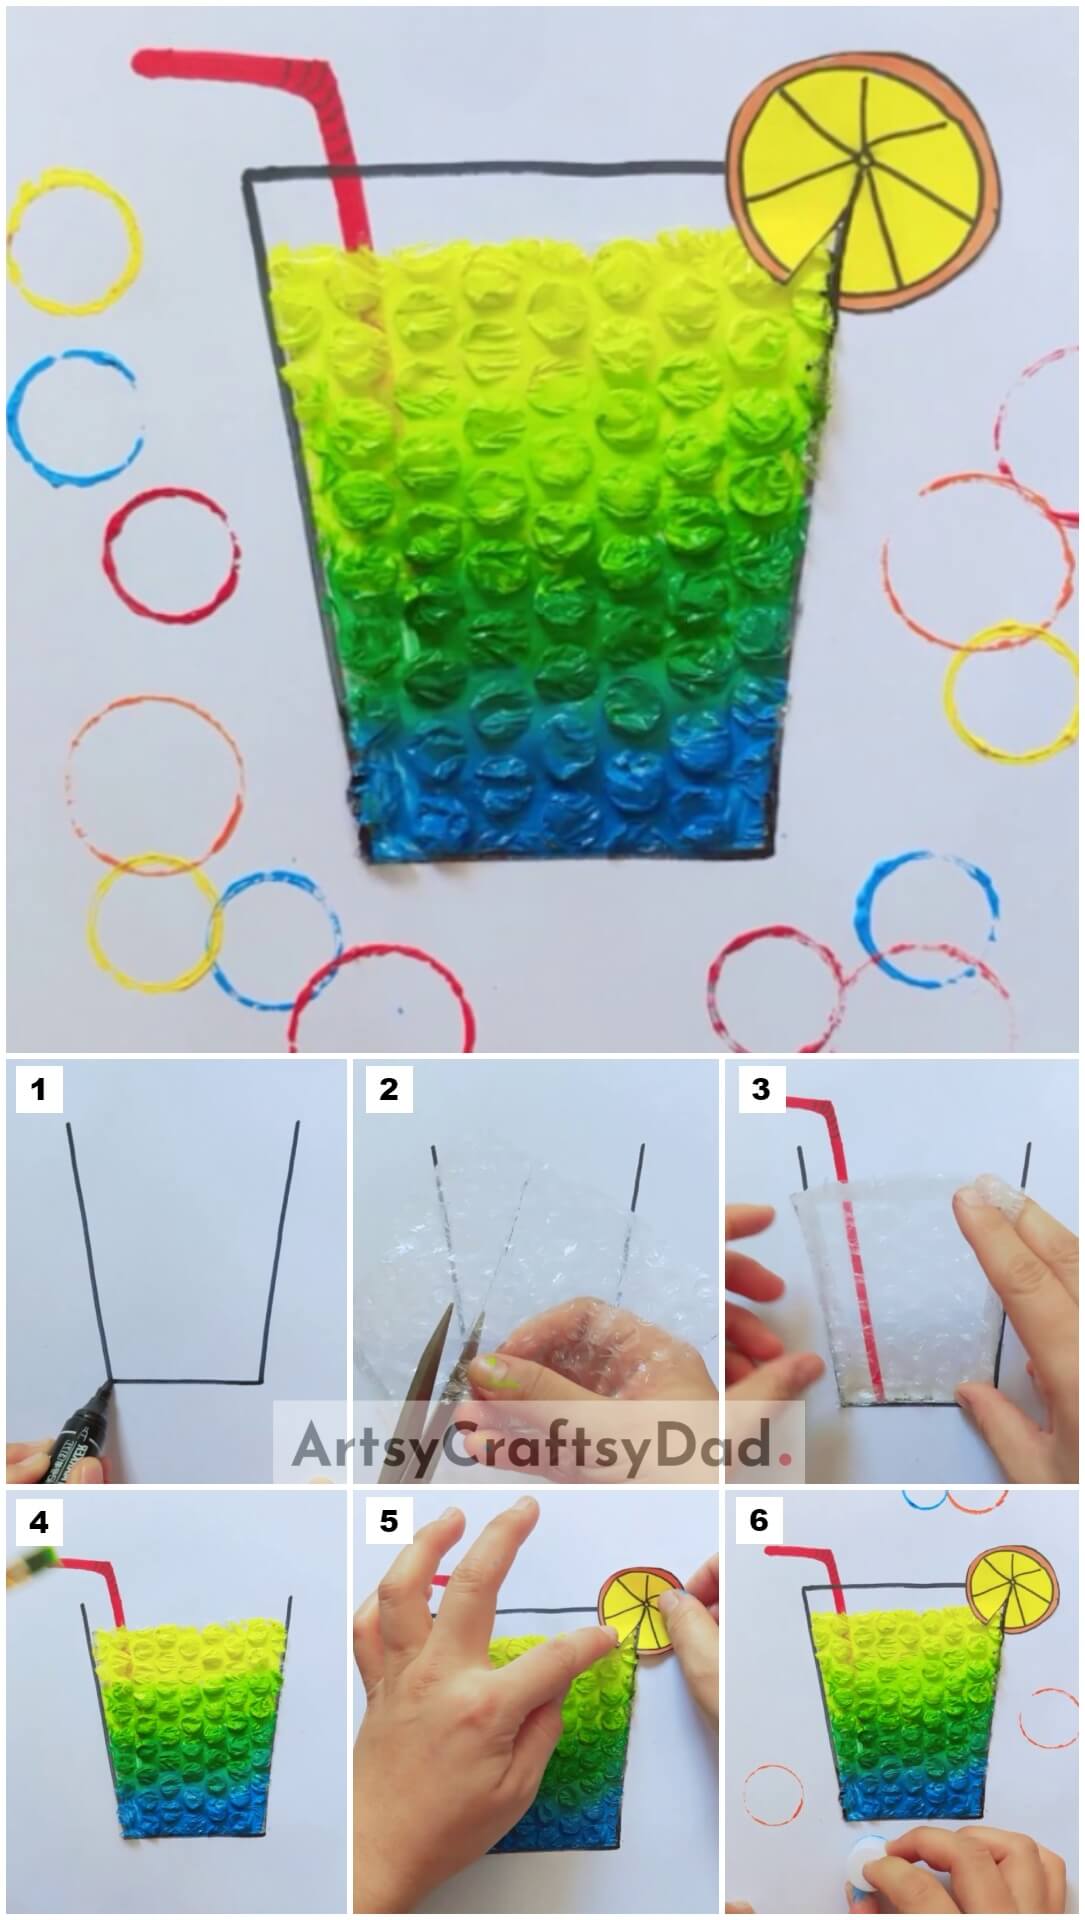
Step #7: That Is How It Should Be Looked

The glass drawing should look like this.
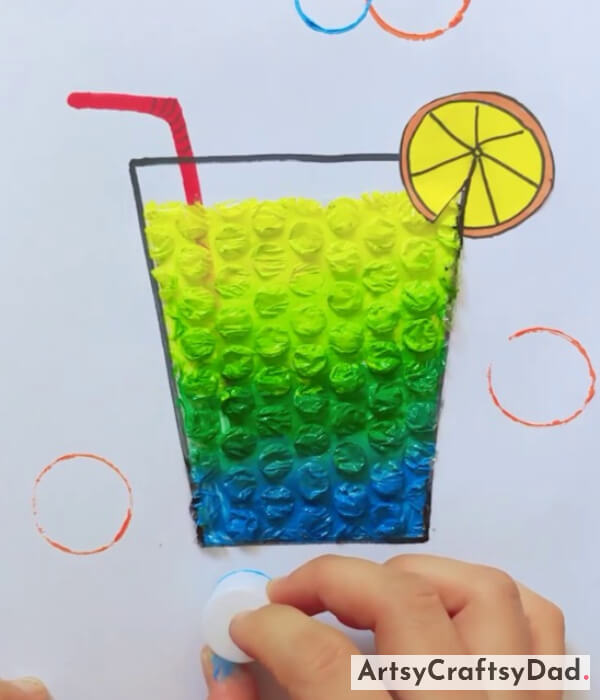
Step #8: Add More Colors

Now add more colors to the glass here I just added a green and a yellow color.
Step #9: Close The Glass

With the help of a black marker close the glass from the top.
Step #10: Add Lemon To The Glass

With the help of a white sheet cut the circular shape then use the black marker and make a design of a lemon with one side cut and stuck along with the glass.
Step #11: Decorate Boundary
Now at the end use a bottle cap dip it in different colors and paste it in the surrounding of the glass.
Congratulation! Your Craft Is Complete
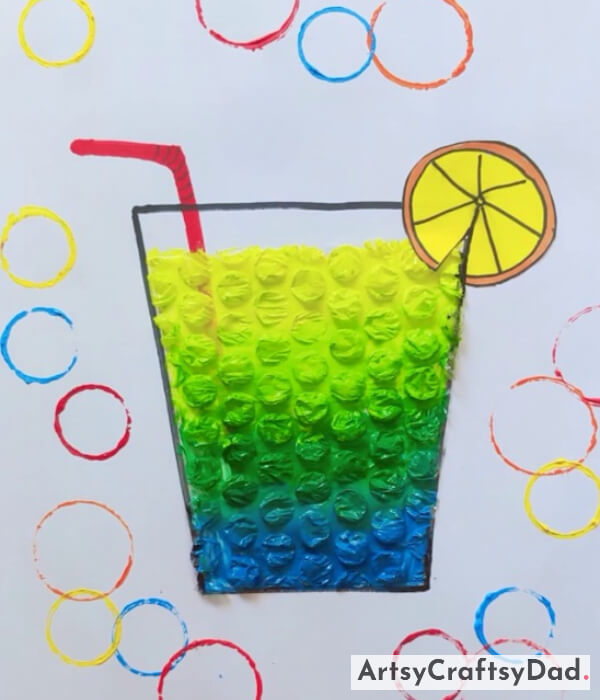
Congratulations that’s how your creative bubble wrap craft should look like at the end.
This bubble wrap drawing craft is a delightful way to nurture your child’s creativity and problem-solving abilities. The easy-to-follow tutorial ensures a rewarding experience, leaving them with a one-of-a-kind masterpiece that celebrates the beauty of unexpected materials and the power of their artistic vision.
You Might Also Like This
- Bubble Wrap Snowman Painting Craft Tutorial For Kids
- Bubble Wrap Pomegranates Craft Tutorial For Beginners
- Recycled Bubble Wrap Fish Artwork Tutorial For Children
- Bubble Wrap Crocodile Artwork Craft Tutorial
- Bubble Wrap Carrot Art Activity Step-By-Step Tutorial


