Learn how to create stunning fish artwork using recycled bubble wrap with this easy-to-follow tutorial for children. Discover how to repurpose materials and unleash your creativity while making beautiful fish designs.
Welcome to our tutorial on creating recycled bubble wrap fish artwork for children! This fun and engaging activity not only allows children to explore their creativity but also teaches them the value of reusing materials. By using bubble wrap, a common household item that is often thrown away, we can create stunning fish artwork that will amaze both children and adults alike. In this tutorial, we will guide you through the step-by-step process of creating your unique fish designs using recycled bubble wrap and other simple materials. So, gather your supplies, and let’s start making bubble wrap fish.
Attractive Bubble Wrap Fish Artwork Tutorial
Must Read: Bubble Wrap Pomegranate Artwork Tutorial
Supplies & Tools
- Bubble Wrap
- Scissors
- Glue
- Googly Eyes
- Acrylic Paint (Red)
- White Construction Paper
- Red Clay
Bubble Wrap Fish Procedure
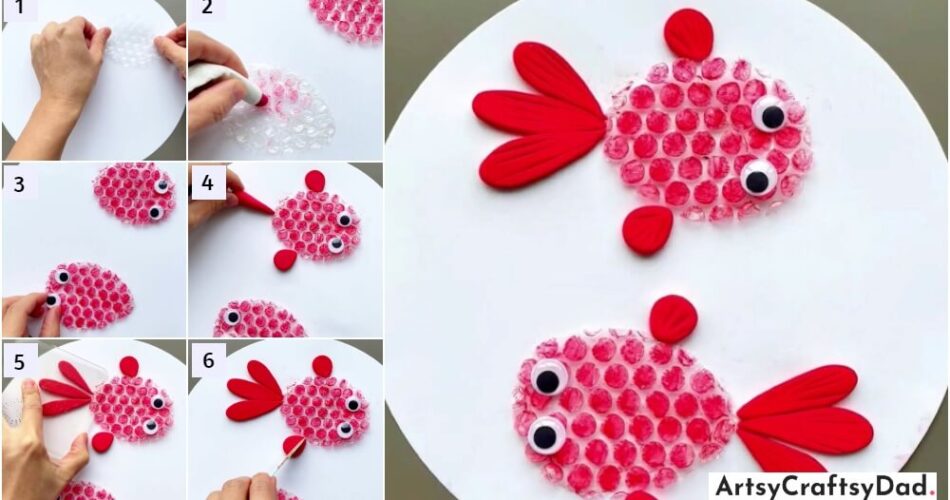
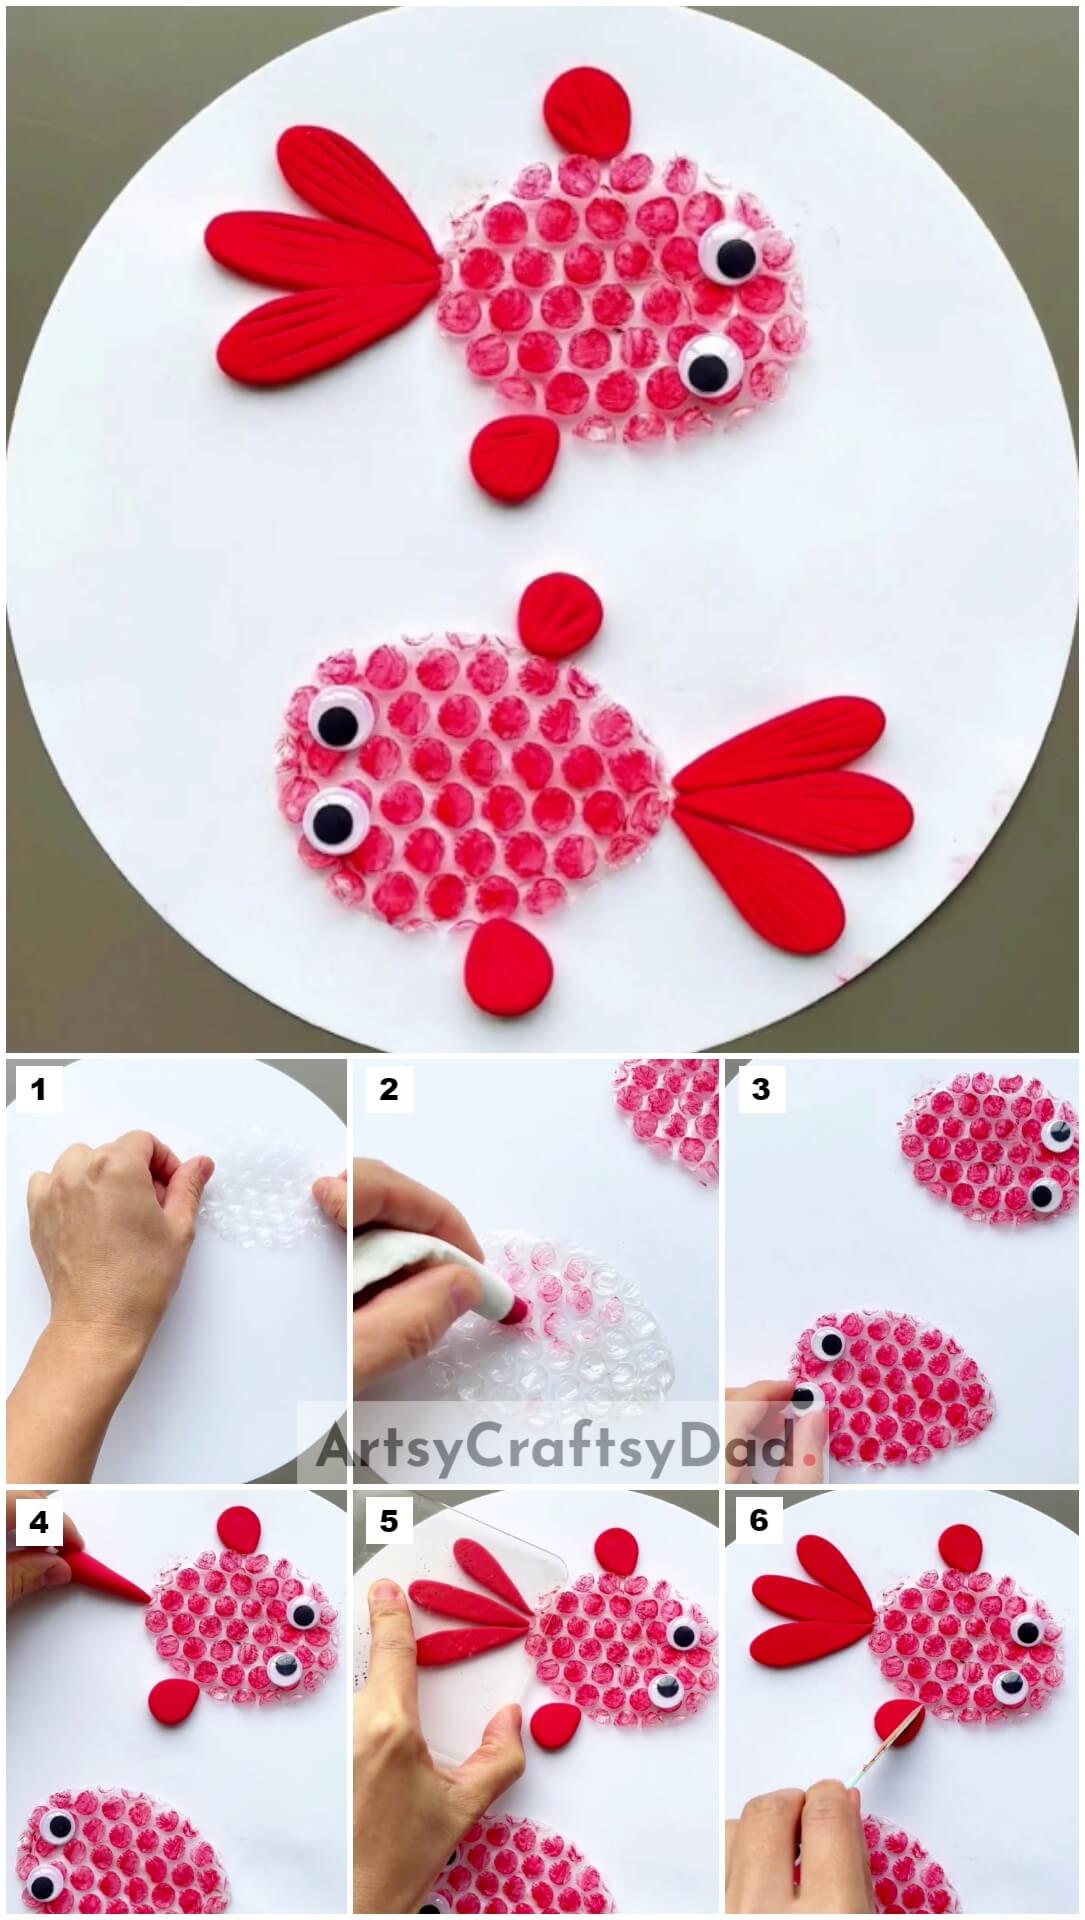
Step #1: Making Fish From Bubble Wrap
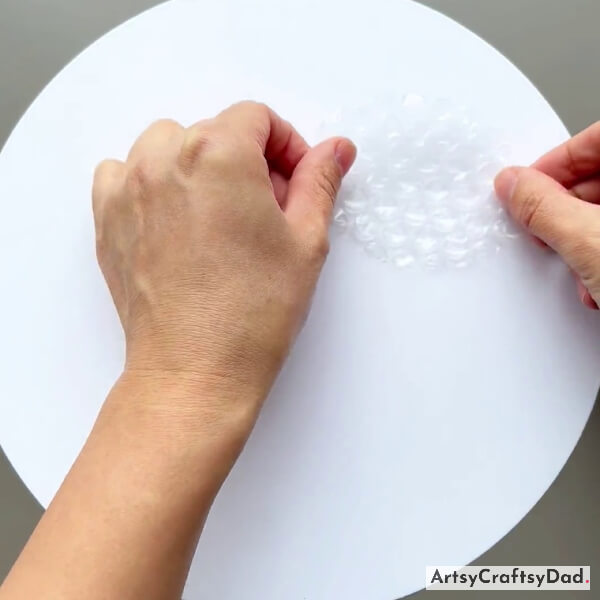
Take a white construction paper & cut it into a big circle shape by using scissors. Take a bubble wrap & cut it into a fish shape & paste it on the top right side on a white base by using glue.
Step #2: Making Another Fish
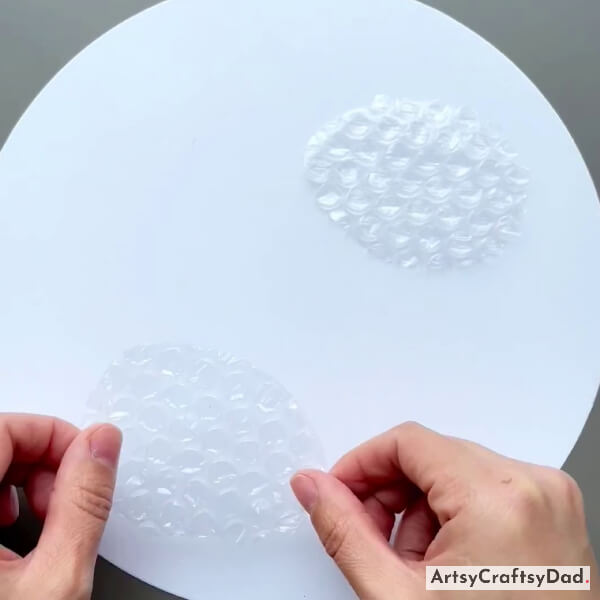
Make one more fish as we made above & paste it at the bottom of the white base.
Step #3: Coloring The Fish
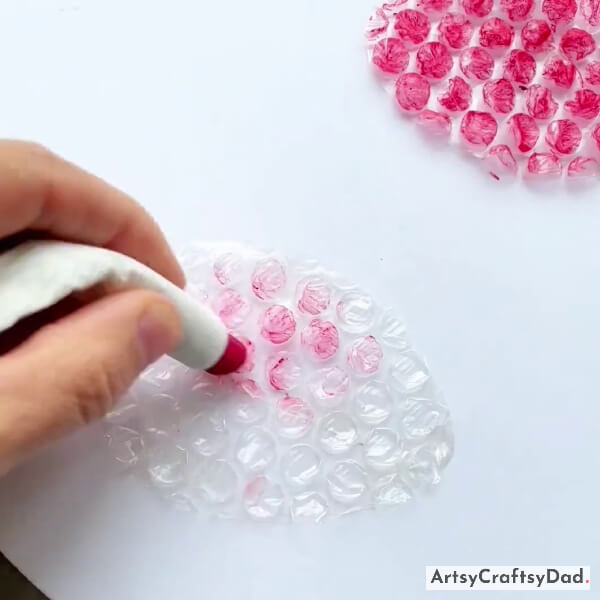
Now, take red acrylic color & color both the fishes one by one.
Step #4: Pasting Googly Eyes
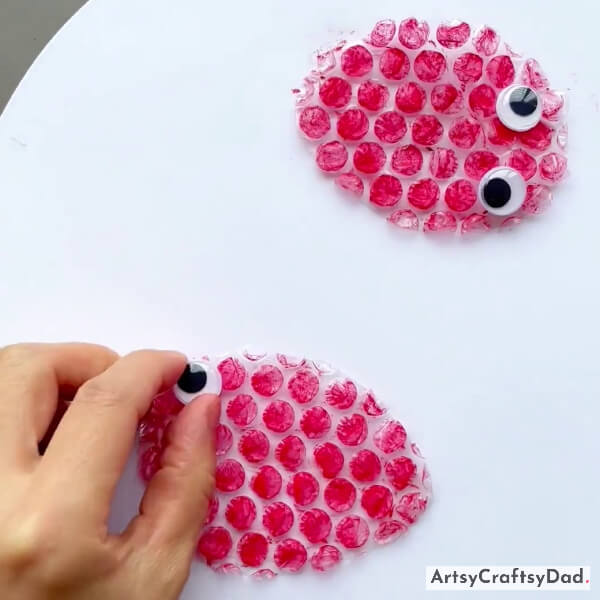
When both the fish get colored, take two pairs of googly eyes and paste them on the fish’s head.
Step #5: Pasting One More Googly Eye
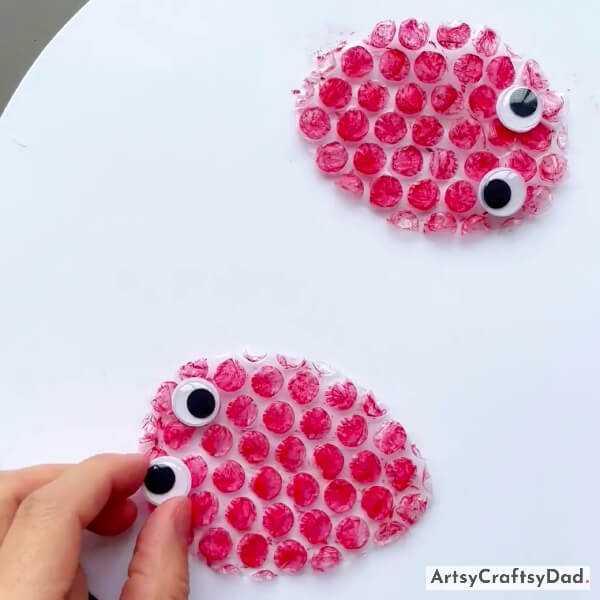
By following the same process, paste one more eye on the fish head.
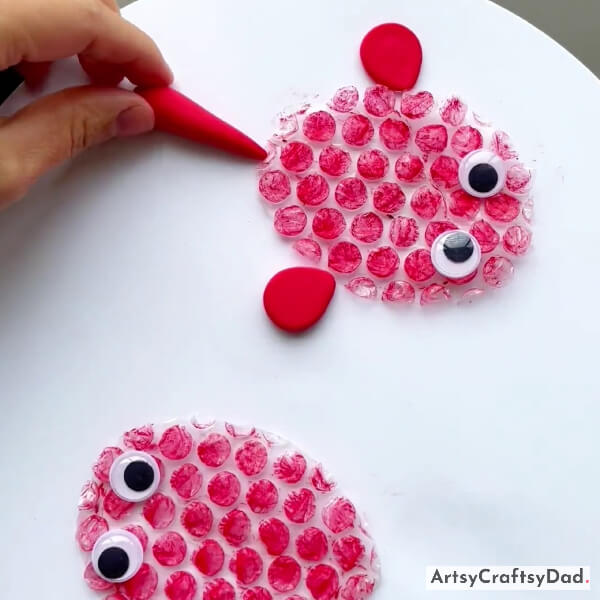
Step #6: Making Wings Of Fish
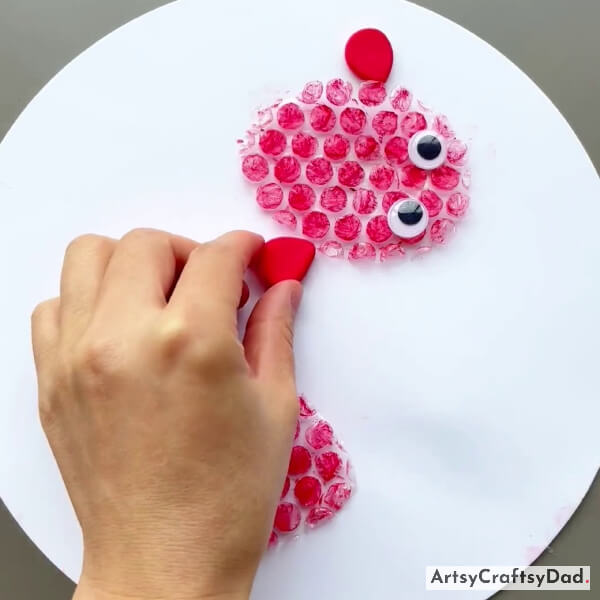
Now, take a small piece of red color clay & make two fish wings with it & paste them one by one on both sides of the fish’s body.
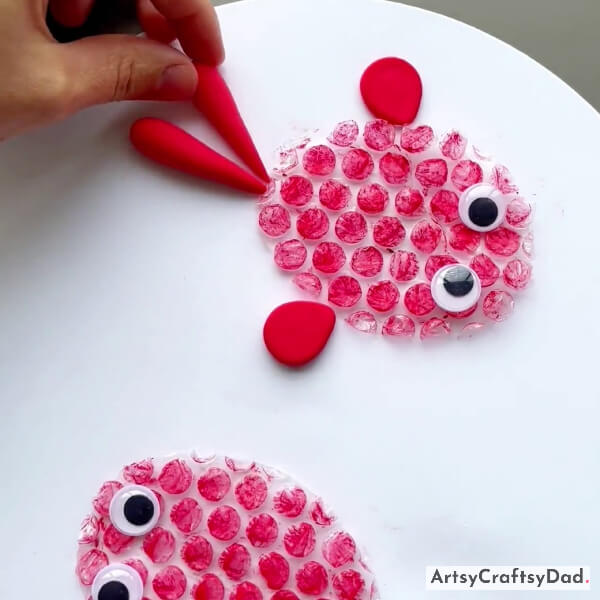
Step #7: Start Making Tail Of Fish
After the wings, take red clay & make a tail shape & paste it on the left side of the fish’s body as shown in the above image.
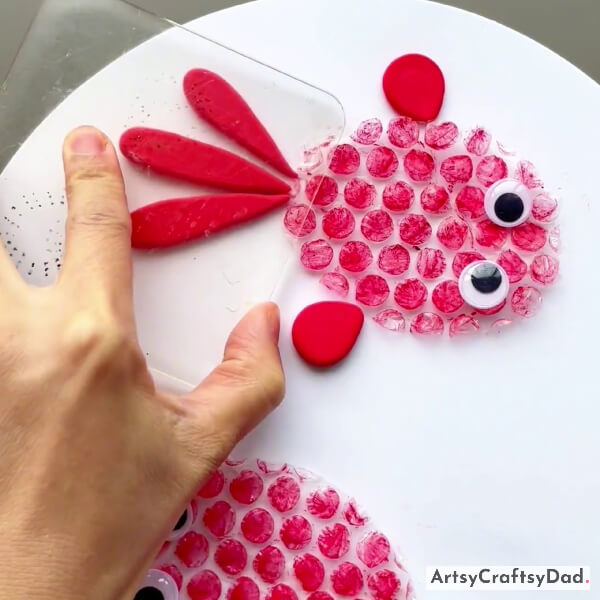
Step #8: Making Further Tail
Continue making the tail in the same way & paste it as we did in the above step.
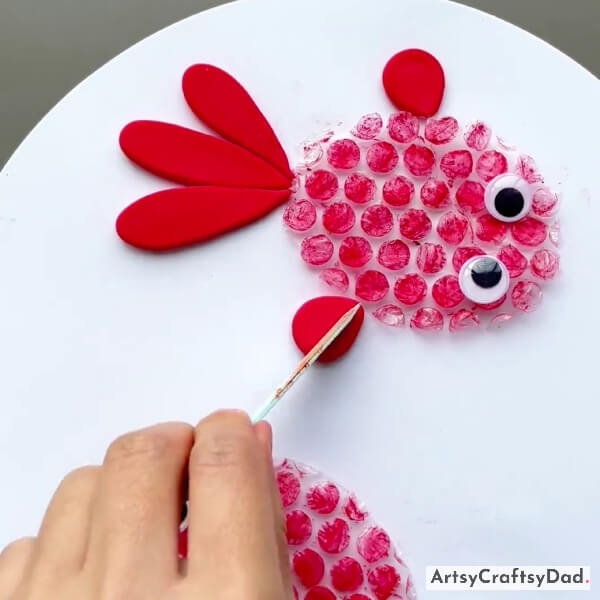
Step #9: Pressing Tail By Transparent Glass
After the tail is ready now, press it with transparent glass or with any hard and flat object.
Step #10: Finishing The Wings
At last add some finishing touch to the tail, wings, and anything you would like to do.
Our Recycled Bubble Wrap Fish Artwork Is Ready Now!
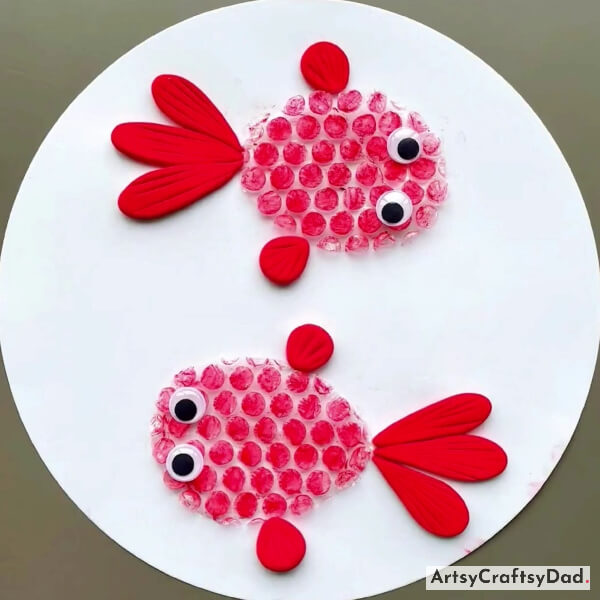
Now, complete the tutorial by adding wings, and tails, for the other fish by following the same process as we mentioned above. After that, our recycled bubble wrap fish masterpiece will be ready.
Hurry, our recycled bubble wrap fish artwork is ready. The recycled bubble wrap fish artwork tutorial for children is a fun and creative activity that not only engages children in a hands-on project but also promotes environmental consciousness by using recycled materials. By incorporating recycled bubble wrap, children are encouraged to think about the importance of reusing materials and reducing waste. You could customize this by making some other animals like a panda, dog, cat, etc & could create some new masterpieces by adding your ideas. Don’t miss to drop your comment in the comment section.
Thanks for choosing us!
You Might Also Like This
- Bubble Wrap Pomegranates Craft Tutorial For Beginners
- Bubble Wrap Snowman Painting Craft Tutorial For Kids
- Bubble Wrap Carrot Art Activity Step-By-Step Tutorial
- Arrow & Bow Toy: Recycled Craft Tutorial
- Fish Get Together: Sketch Pen Drawing Tutorial


