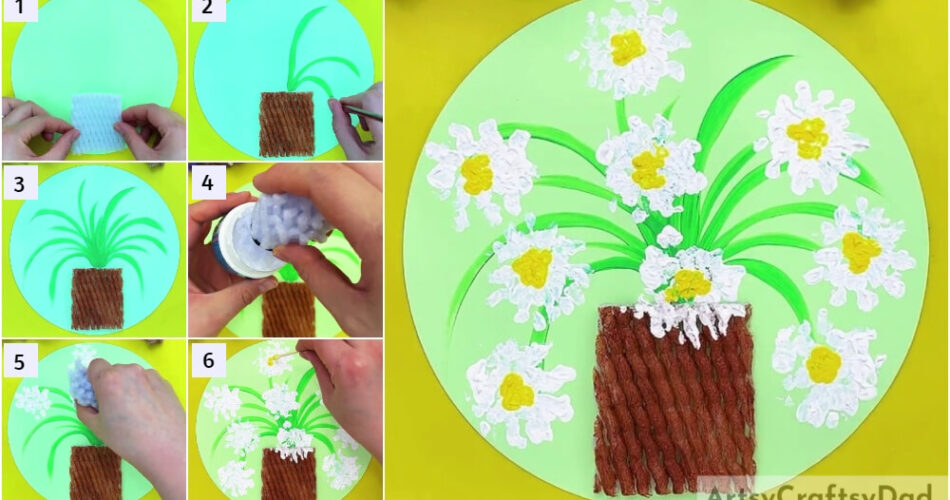
Want to make a painting but doubt using a paintbrush? We got you covered! This tutorial is on making a flower pot painting using fruit foam!
Hello and welcome to this tutorial on making a flower vase with flowers in it painting craft using fruit foam nets! You don’t need to worry about your painting skills while making this on as you won’t be using a paintbrush to paint! You will use a fruit foam net instead! Yes, you heard it right! The fruit foam net will work as a stamp for your artwork and we will show you how! So, go ahead and read the article to know the full procedure and the materials required too! Let’s begin!
Flower Pot Craft Made With Fruit Foam Net
Must Read: How to make flower from foam beads
Supplies & Tools:
- Green Circular Paper Sheet
- Fruit Foam Nets
- Scissors
- Paint Colors (Yellow, White, Green, And Brown)
- Plastic Rubber Band
- Paintbrush
- Cotton Earbud
Fruit Foam Net Instructions
Step #1: Pasting A Fruit Foam Net Rectangle
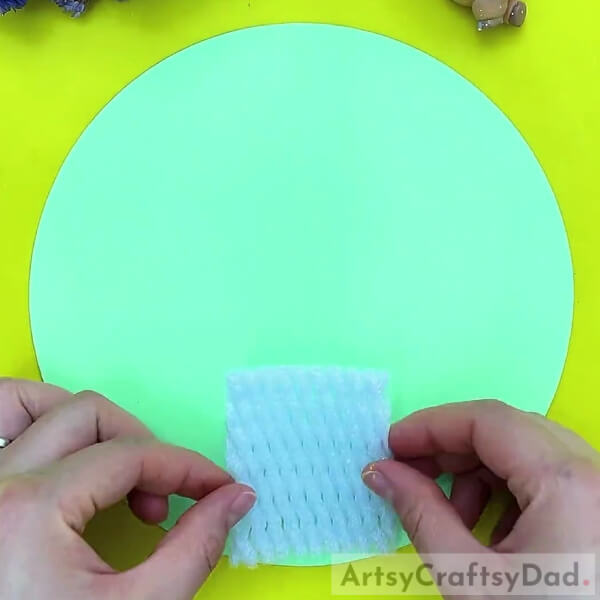
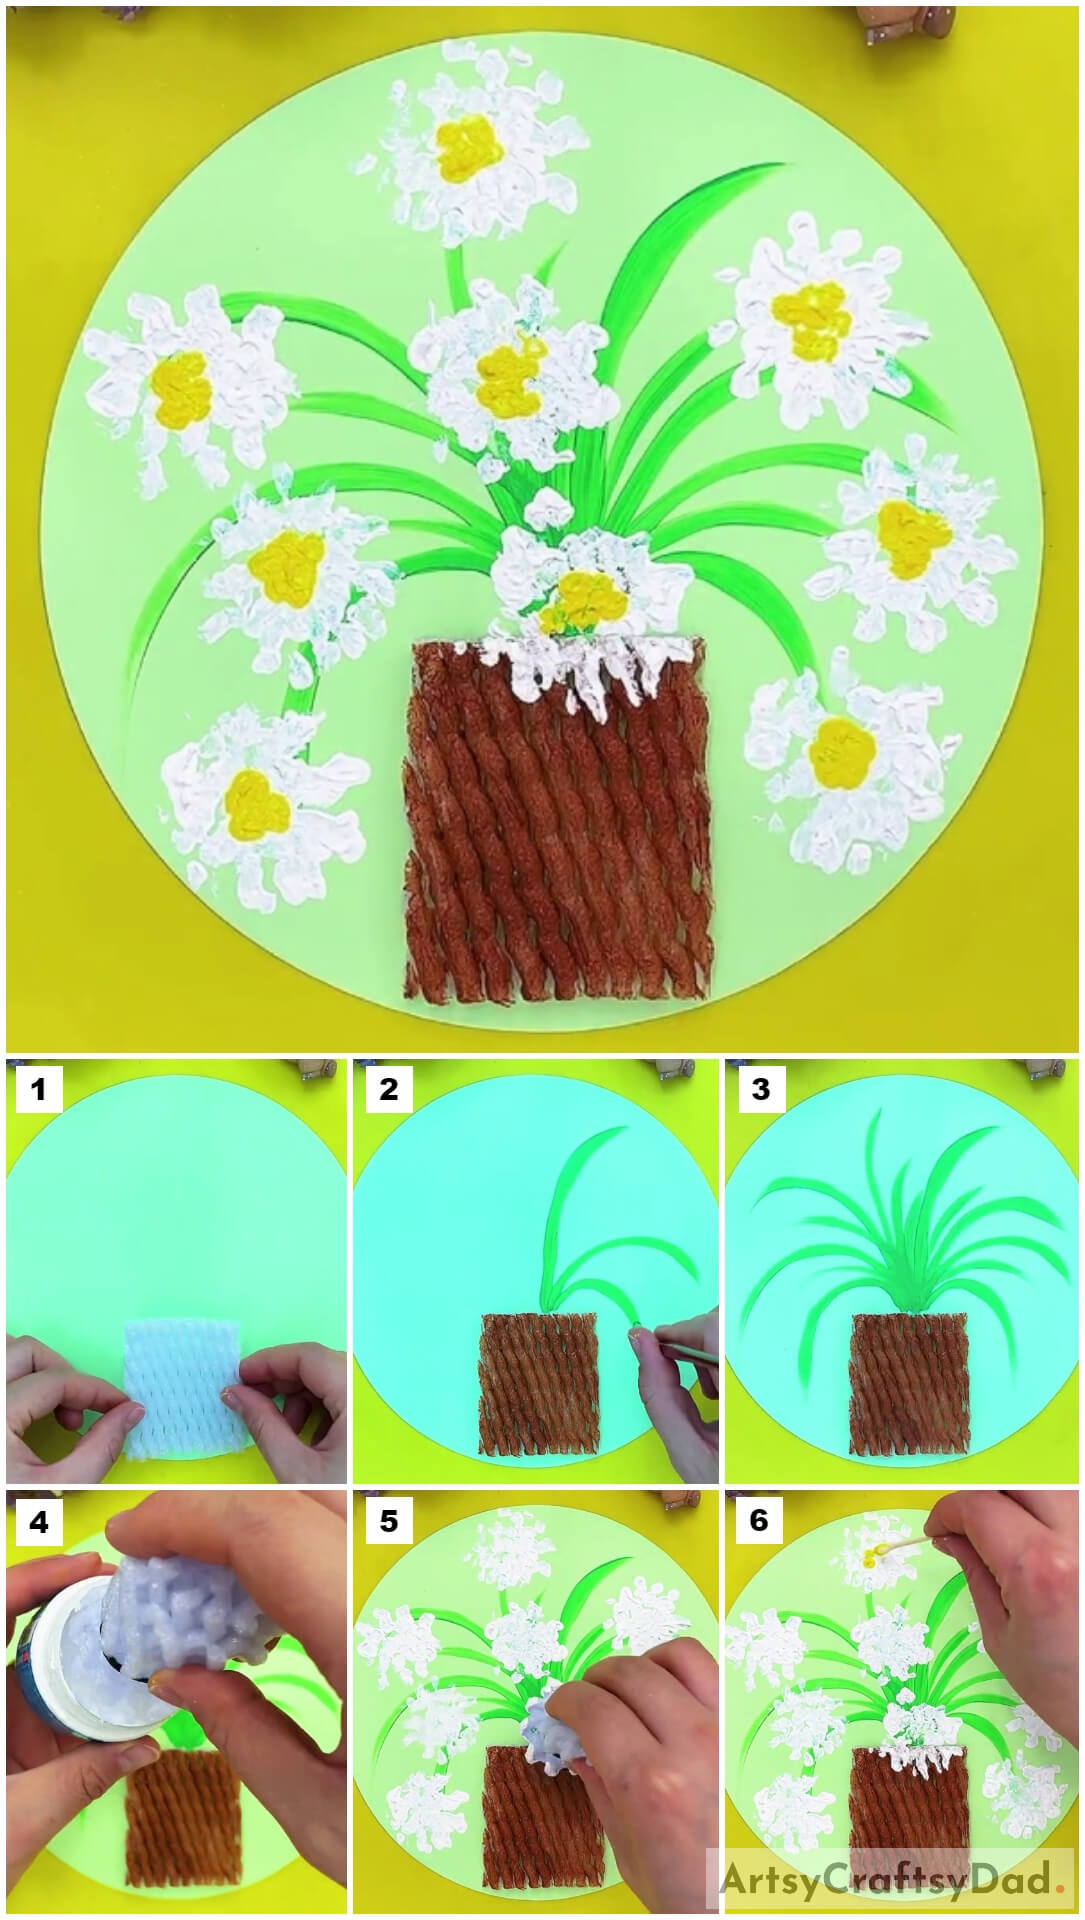
Begin this craft by taking a green circular paper sheet as the base for the craft, a fruit foam net, and a pair of scissors. Now, using scissors, cut out a rectangle from the fruit foam net and stick it over the base mid-bottom using double-sided tape.
Step #2: Coloring The Net Rectangle
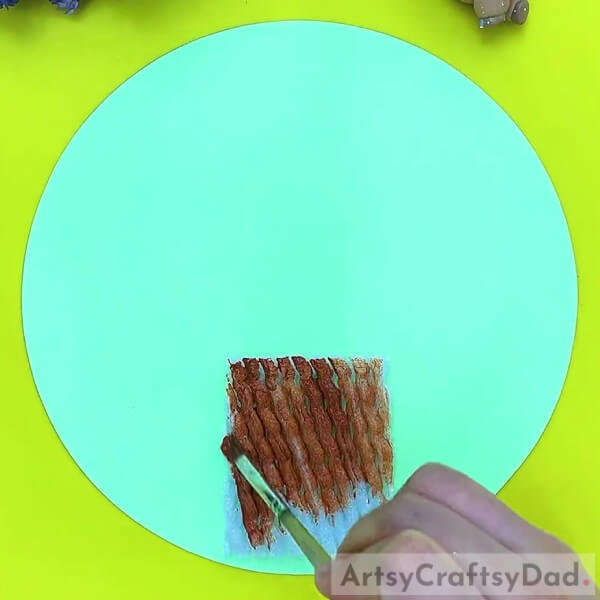
Using a paintbrush, paint the fruit foam net rectangle with brown paint. This will be the flower vase of your craft.
Step #3: Making Flower Stems
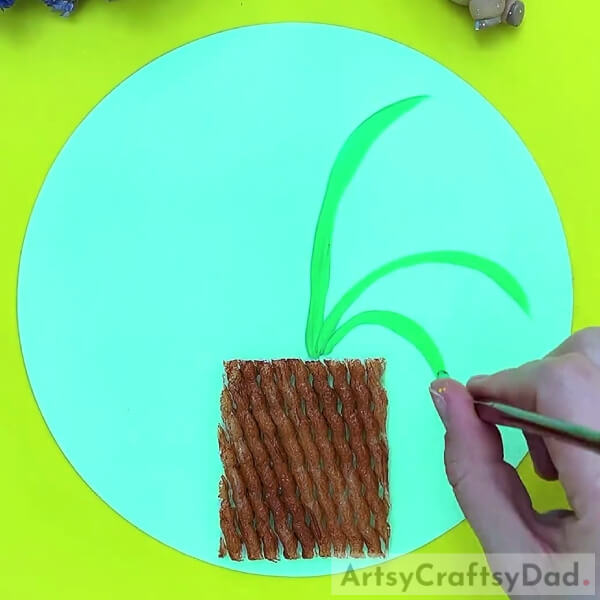
Dip the paintbrush into green paint and draw the curvy stems of the flowers coming from the mid-top of the vase.
Step #4: Completing Making The Stems And Leaves Of The Flowers

Make a bunch of curvy stems and leaves on the base as shown in the image.
Step #5: Rolling A Fruit Foam Net
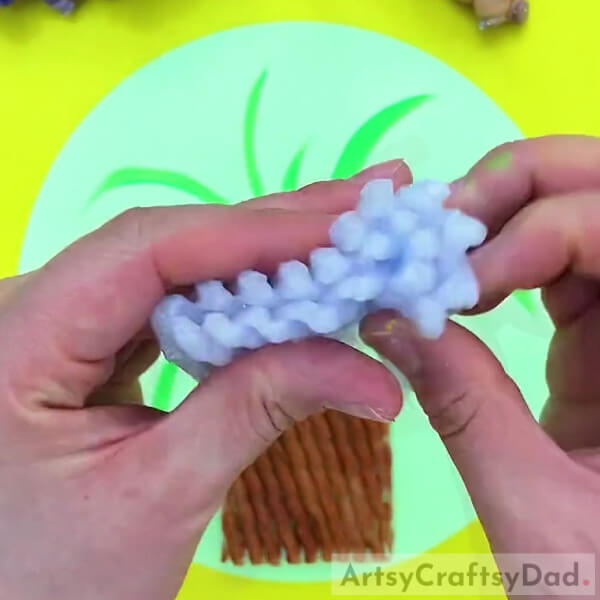
Take another fruit foam net and roll it over from the longer side.
Step #6: Securing Roll With Rubber Band
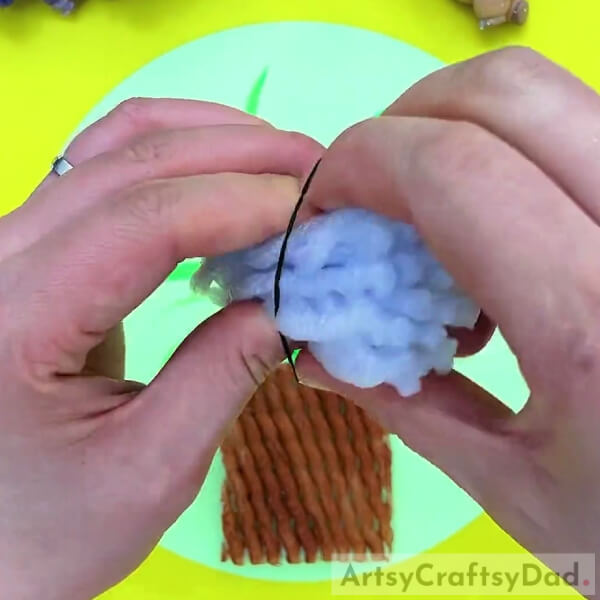
Now, secure the fruit foam net roll using a plastic rubber band. This will serve as a flower stamp.
Step #7: Dipping The Stamp In Paint
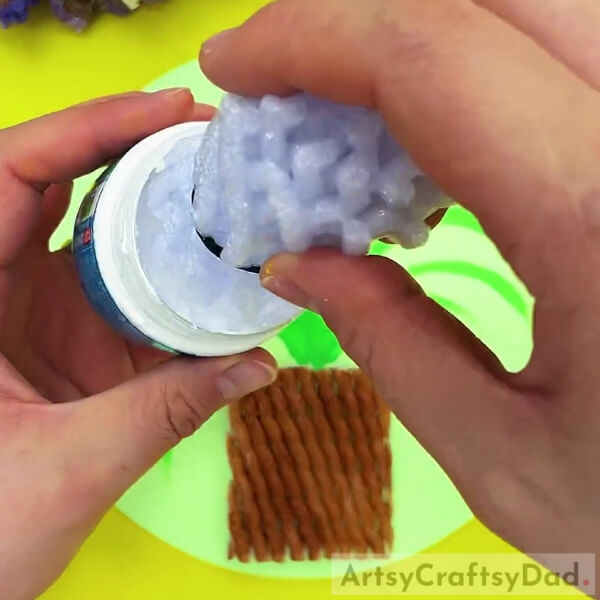
Dip your flower stamp into white paint.
Step #8: Stamping Flowers
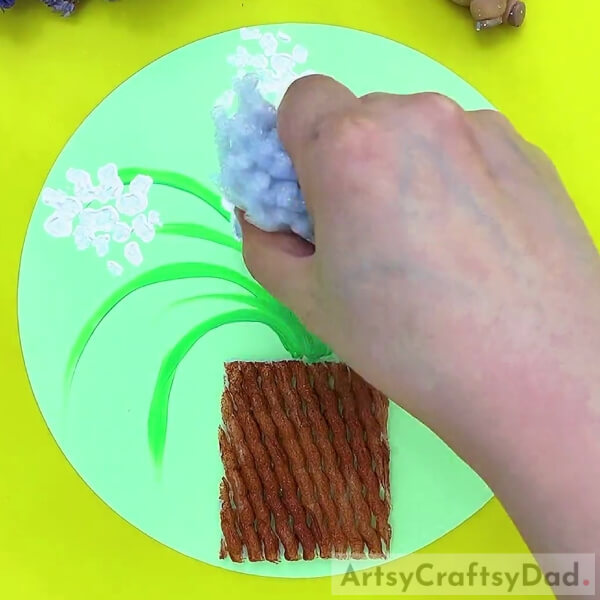
Stamp the flowers over the base at the end of the stems randomly.
Step #9: Stamping More Flowers

Stamp more flowers over the base randomly and also slightly over the vase as shown in the image.
Step #10: Making The Flower Centers
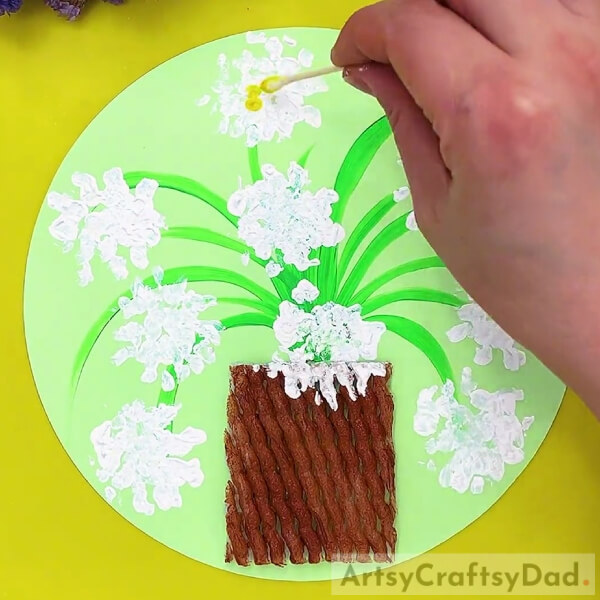
Dip a cotton earbud into yellow paint and dab it over the center of your flower to make its center.
Step #11: Completing Making The Centers Of Your Flowers
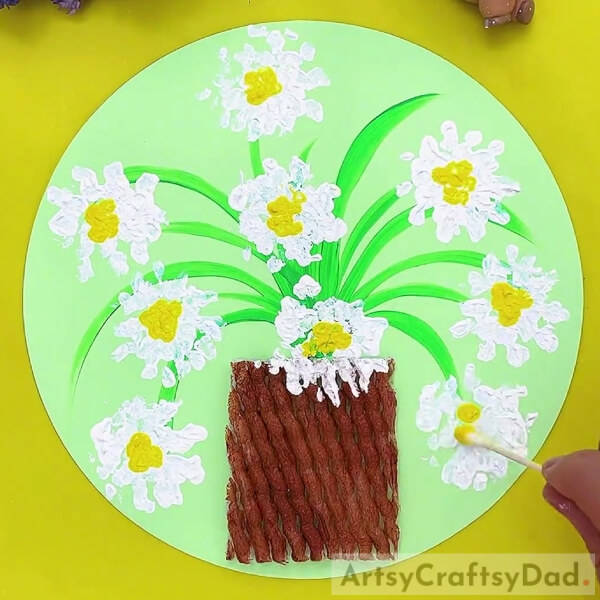
Using the same yellow paint cotton bud, make 5-5 dots closely over each flower and complete making their centers.
Yay! Your Fruit Foam Net Flower Vase With Flowers Is Ready!
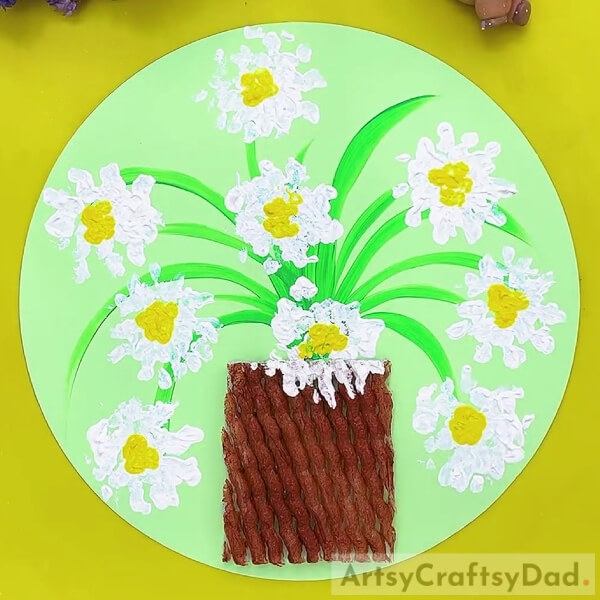
Whoa! It is the final look of your fruit foam net flower vase with these pretty flowers in it!
You can now decorate this craft in your room to have a budget-friendly 2D vase! This craft can also be suited as a gift for your loved one! I’m sure they will love to get a flower vase made by you! You can even customize your craft in any way you like, different colored flowers, a base matching the color of your wall, or textures on the leaves, anything! Make it as unique as you are! Your imagination is the limit!
We are hoping you liked the article! Tell us your feedback in the comments section below! We would love to hear from you! Also, share it with as many people as you can!
You May Also Like:
- How to Make Foam Sheet Flower Bouquet
- How to Make Paper Flower Vase – Tutorial
- How to make a Paper Flower Vase – Paper Craft Tutorial
- How to make a flower vase out of cardboard (Tutorial)
- Clay Heart Leaf Tree Craft Tutorial For Kids


