If you love a hanging plant pot, then make one for your room! This tutorial is to make an artwork craft of a hanging plant pot with a plant!
We love the pretty hanging pots on our balcony! So, today’s craft artwork is inspired by those plant pots! This step-by-step tutorial will guide you on making a hanging plant pot with plants! This artwork craft will be so realistic and you will love to have it in your room! It will look just like a real plant pot hanging in your room! This artwork craft will definitely teach you to get inspired by everything around you! Unleash the creativity in you and let us begin to make it!
DIY Hanging Plant Pot Artwork For Kids
Must Read: How to make an outdoor plant pot
Supplies & Tools:
- Colored Paper Sheets (White And Brown)
- Scissors
- Glue
- Black And Green Marker
- Paint Colors (Green And Light Green)
Plant Pot Artwork Instructions
Step #1: Pasting A Pot Cut Out
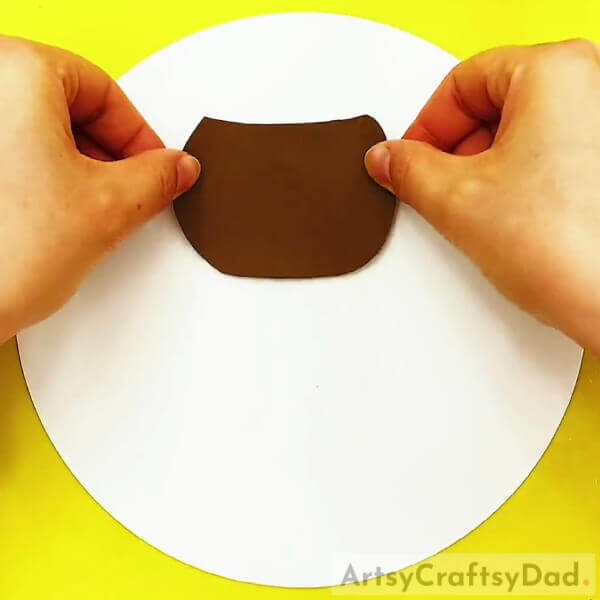
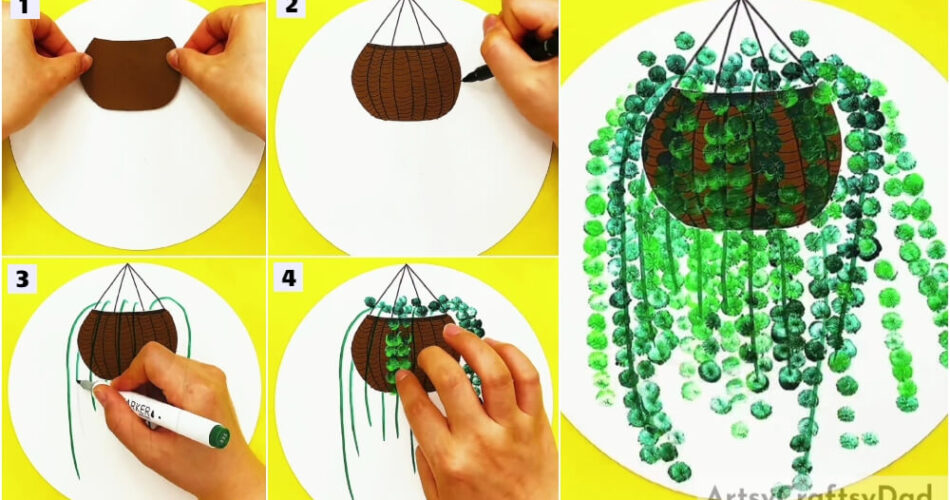
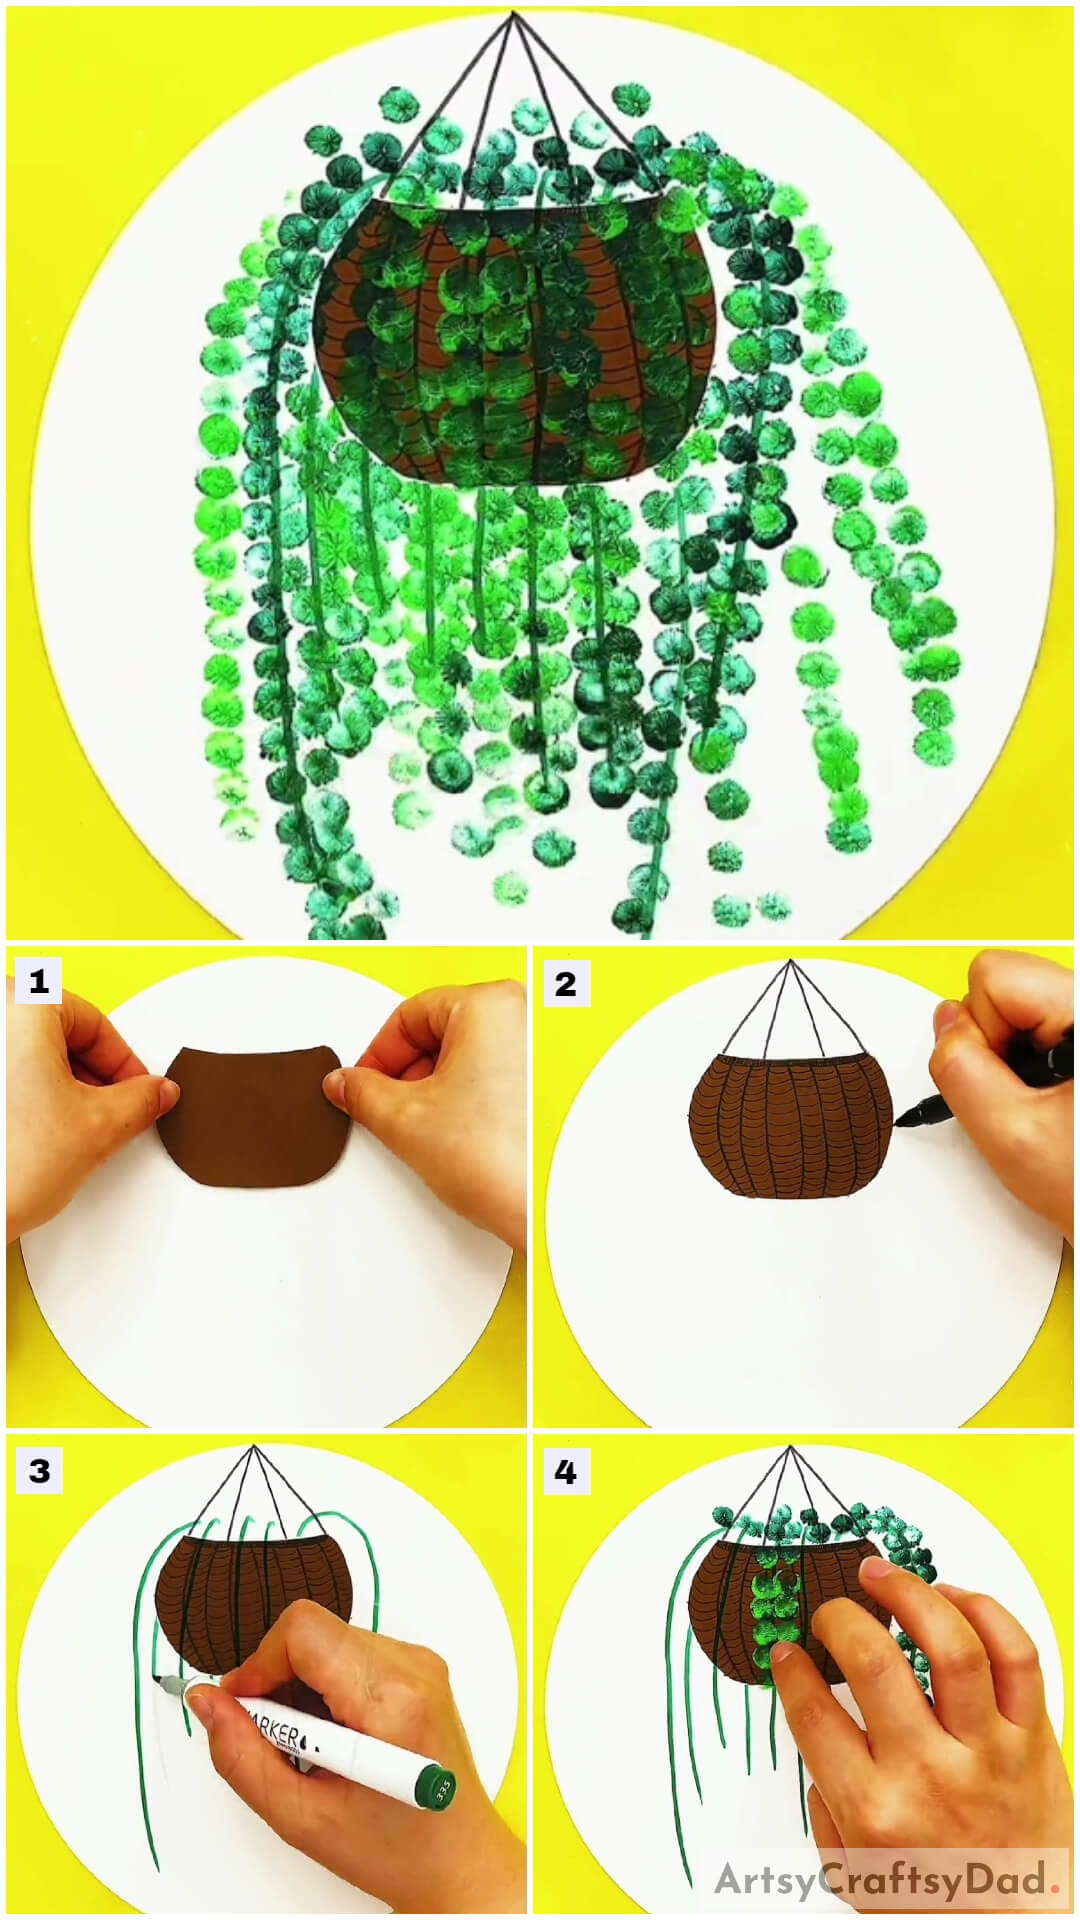
Begin this craft by taking a white and a brown paper sheet. Using scissors, cut down the white sheet into a circle, this will be the base for your craft. Now, using scissors, cut out a pot shape from the brown paper and paste it over the base on the mid-top as shown in the image using glue.
Step #2: Detailing The Pot
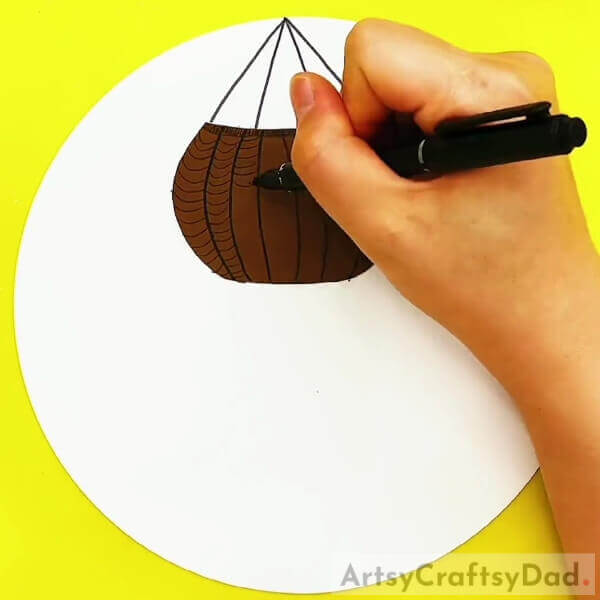
Using a black marker, detail the pot by making vertical curvy lines over it, aligning with the pot cut out. Then make 4 lines on the base connecting the pot the the top of the base at a point. Start to make small horizontal curved lines between the vertical line by line as shown in the image.
Step #3: Completing Detailing The Pot
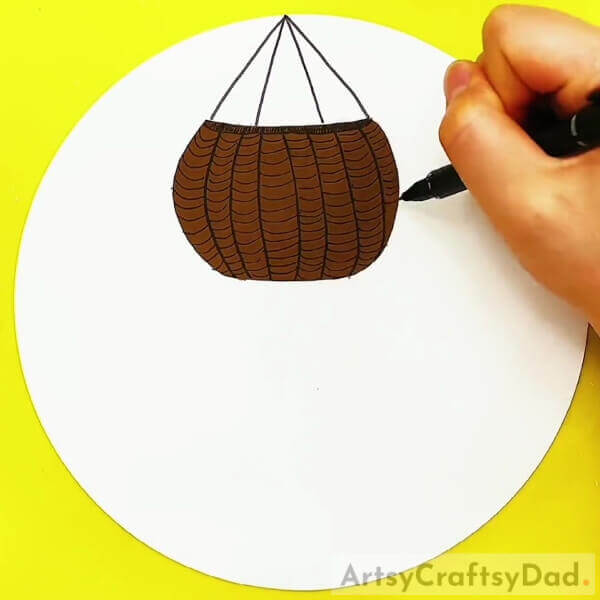
Using the marker, continue making the small horizontal curved lines over the pot to cover it whole and give it a 3D effect.
Step #4: Making Falling Branches Of The Plant
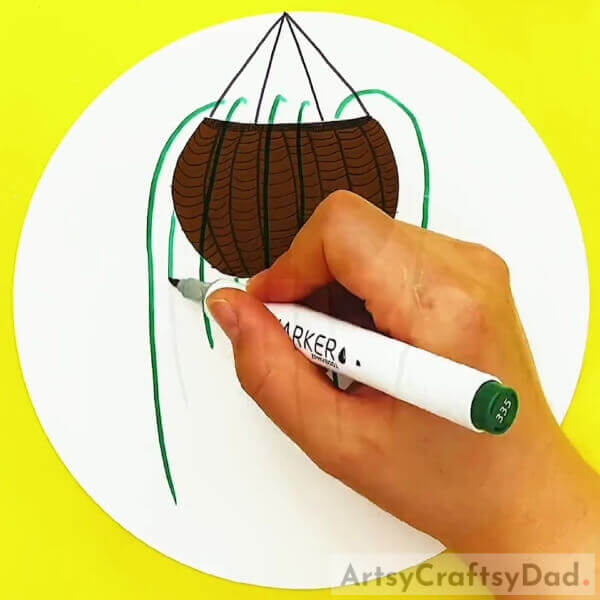
Using a green marker, draw falling branches of the plant coming out of the pot from everywhere as shown in the image.
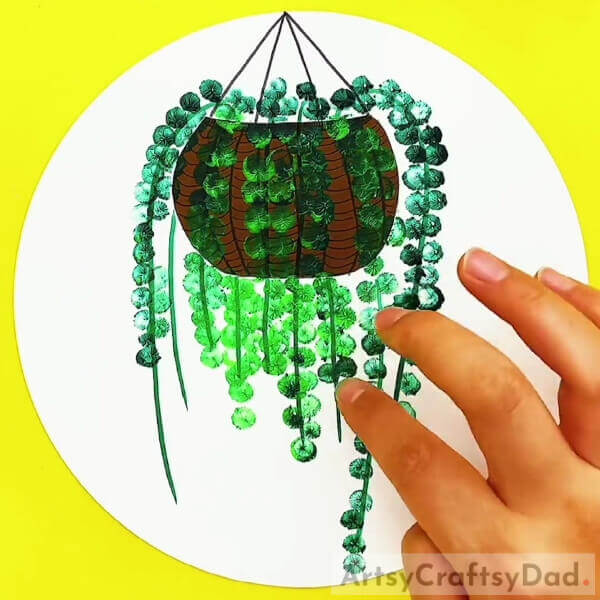
Step #5: Making Leaves Of the Plant
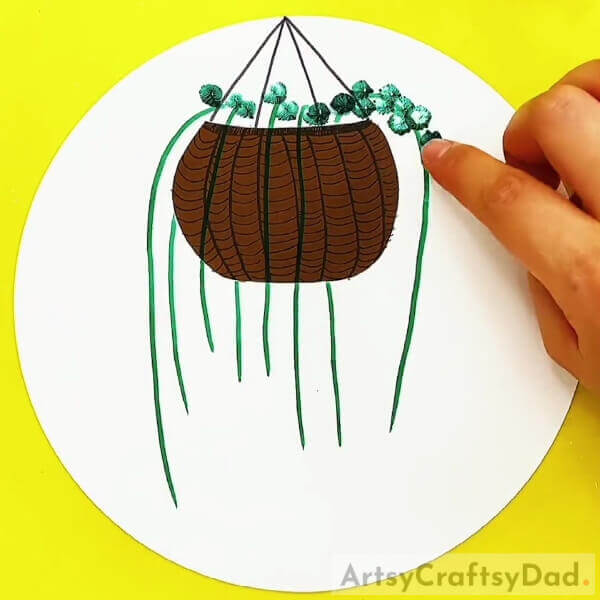
For the leaves, dip your finger into green paint and dab it over the branches, one by one to cover the whole branches from both sides as you can see in the image.
Step #6: Making More Leaves
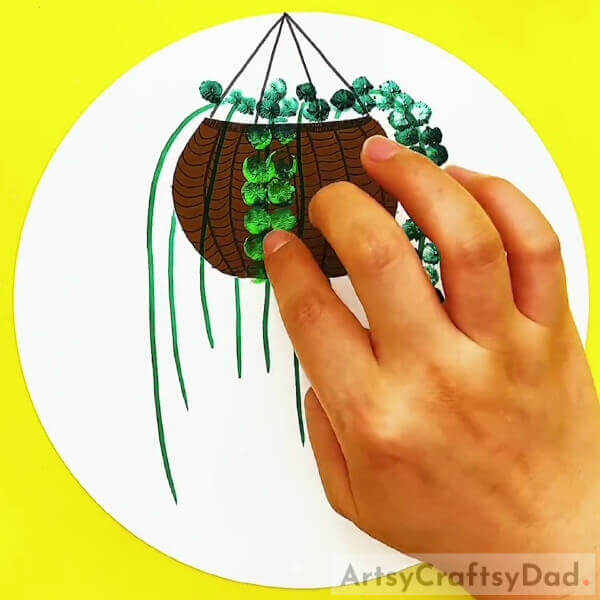
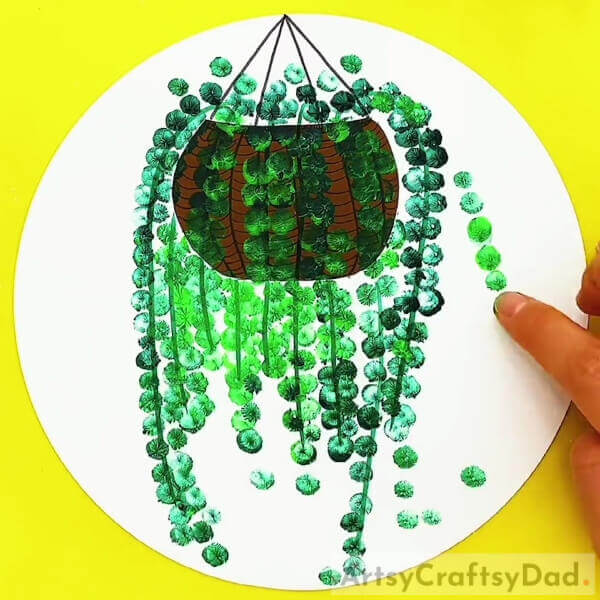
For a good and realistic effect, make light green paint leaves too just like you made the green one previously.
Step #7: Continuing Making Green Leaves
Again make green leaves on the falling branches as shown in the image. Make sure to keep the ratio of the green ones more than the light green ones.
Step #8: Completing Making The Leaves
Mix and match with the green and light green leaves and also make your plant bushy with a lot of leaves. Make leaves in a line other than the branches as shown in the image.
This Is The Final Look Of Your Hanging Pot With A Falling Plant!
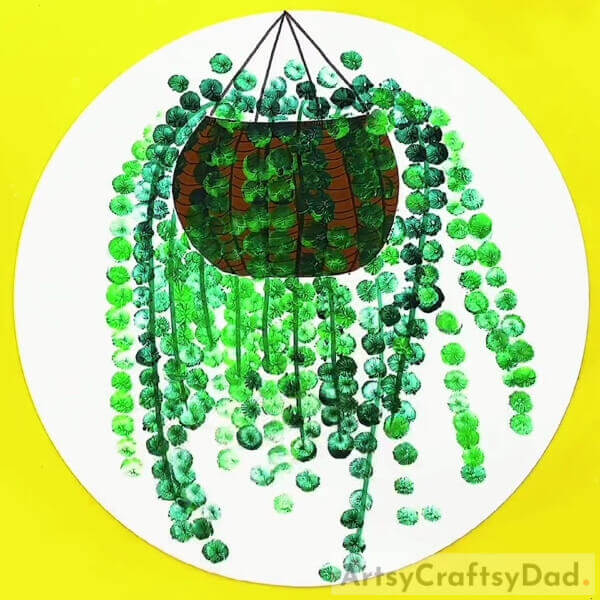
Well done! You have successfully completed making your pretty paper and painting a hanging pot with a falling plant in it, artwork craft!
You can now show off your creations to everyone and let them be proud of your observation and creativity skills! You can also customize this artwork craft to your liking! You can even change the base paper sheet to match it with the color of your room so that it would look more realistic in your room! This craft is definitely a fun and learning one as it will develop the thinking of the kiddos to observe everything around them as everything is beautiful!
Thank you for visiting our website! Hope you liked the article. Drop your feedback in the comments section, we will be waiting to hear from you!
You May Also Like:
- Clay Heart Leaf Tree Craft Tutorial For Kids
- Latest Wall hanging Design – DIY Woolen Craft
- DIY Plastic bottle Wall Hanging | Handmade Craft
- Clay-Paper Sunflower Garden Craft Tutorial
- Simple Swan Craft Ideas for 7-10 Year Old Kids


