Here, we have brought you an easy and creative painting of a cherry plant that will look absolutely lovely in your art collection!
We are glad you came by! We will guide you through each and every step of this cherry plant painting with the help of this step-by-step tutorial! With just some easy steps and the basic art supplies, you will create this painting in just the blink of an eye! This painting is best to make if you’re looking for some unique techniques to make an artwork, this one is a full package! This painting will definitely enhance the skills of your kiddos and even will serve as the best time pass to have in the afternoon time!
Cherry Flowers Pot Painting Art Tutorial For Kids
Must Read: Easy Town Landscape Drawing Tutorial For Kids
Supplies & Tools
- Colored Paper Sheets (White And Brown)
- Paint Colors (Light, Dark Green, And Red)
- Black Pen
- Scissors
- Glue
- Brown Sketch Pen And Highlighter
- Paintbrush
- Cotton Earbuds
Flowers Pot Instructions
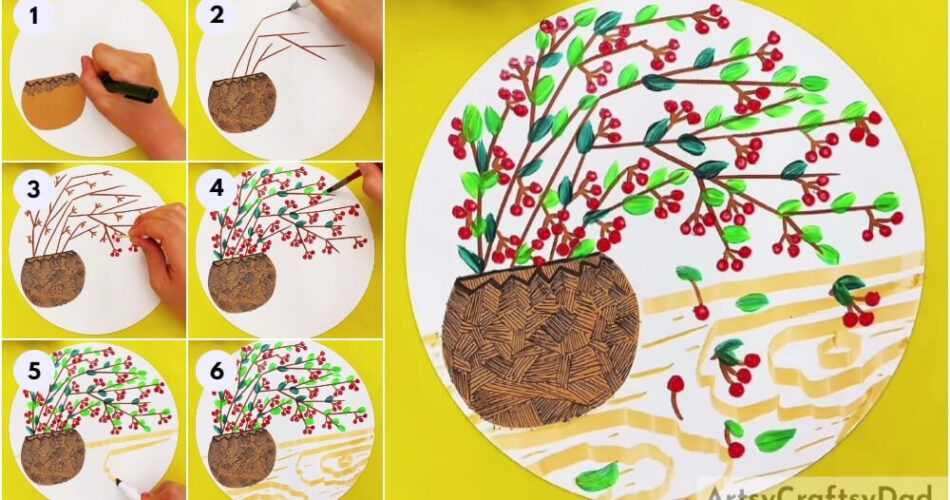
Step #1: Pasting The Plant Pot
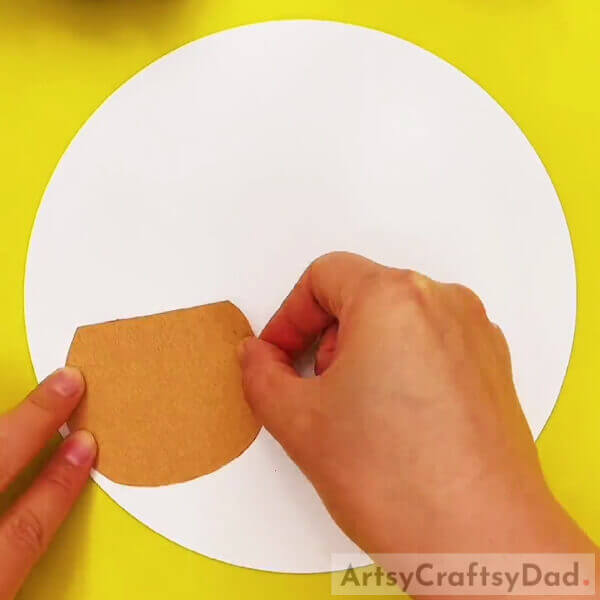
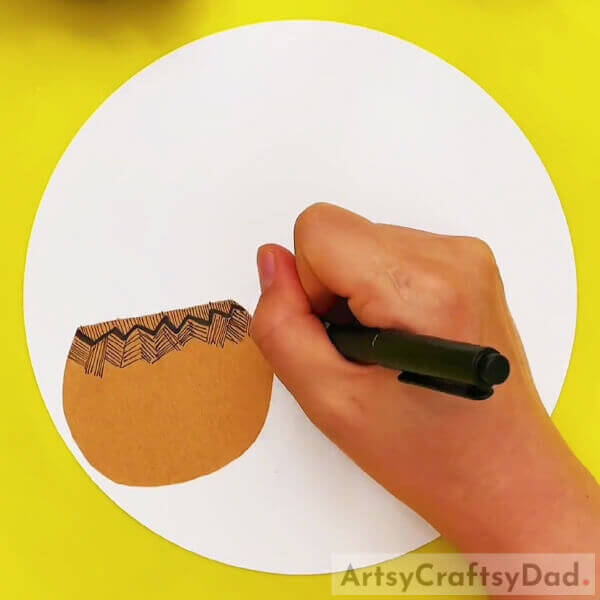
Begin this craft by taking a white paper sheet and a brown paper sheet. Using scissors, cut down the white paper sheet into a circle to make the base for the craft. Also, using the scissors, cut out a round plant pot from the brown sheet and paste it over the base on the left below side using glue as shown in the image.
Step #2: Detailing The Plant Pot
Using a black pen, detail the plant pot by making small straight lines at the very top and then a bold zig-zag line below them. Then, start to make the collective small tilted lines texture all over the plant pot below the zig-zag line.
Step #3: Completing Detailing The Plant Pot
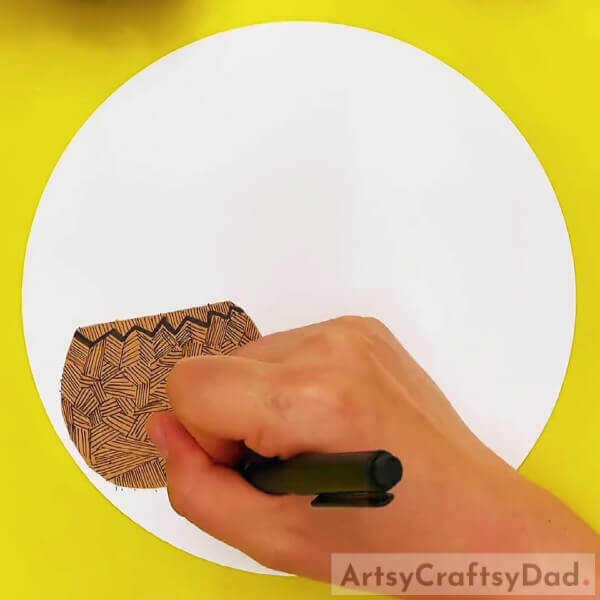
Completely fill the plant pot with the collective small tilted lines texture as shown in the image.
Step #4: Making The Plant Stems And Branches
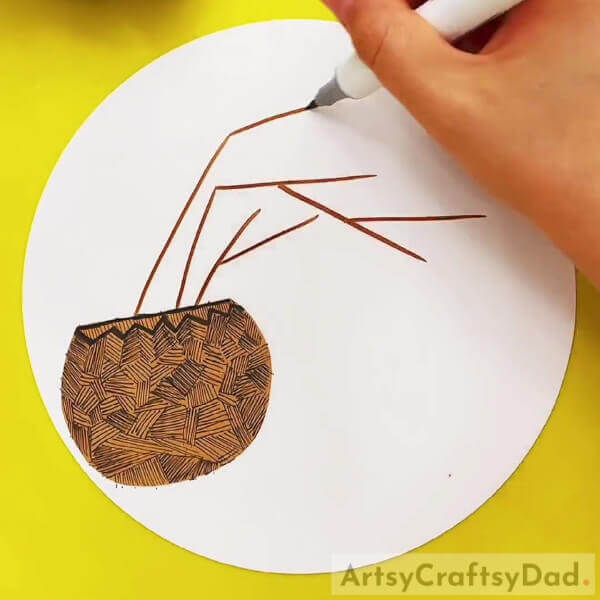
Using the brown sketch pen, draw straight lines from the plant pot going to the right side of the base due to bents. Make these lines cover the upper half of the base. These will be the branches of the plant. Also, make the 3-lined ends of these branches to make the stems for the cherries.
Step #5: Making Cherries To The Stems
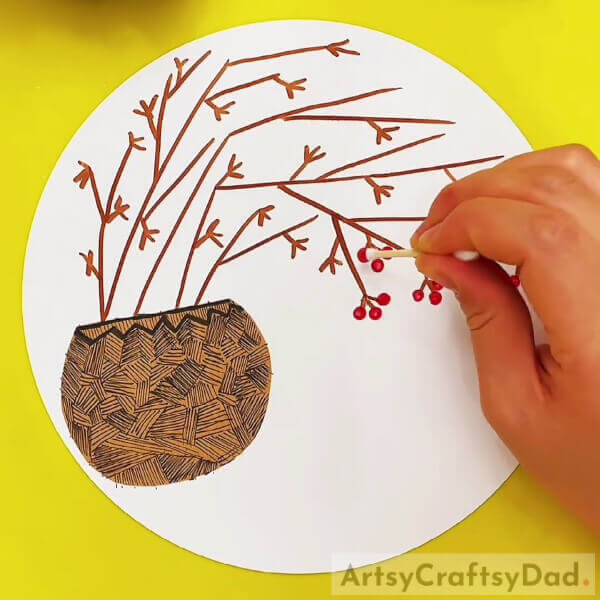
Dip a cotton earbud into red paint dab it over the base to the 3-lined stems and make a cherry on each one.
Step #6: Completing Making The Cherries

Completely cover the upper half of the page with the cherry plant and make a cherry on each and every stem as shown in the image.
Step #7: Making Leaves Of The Plant
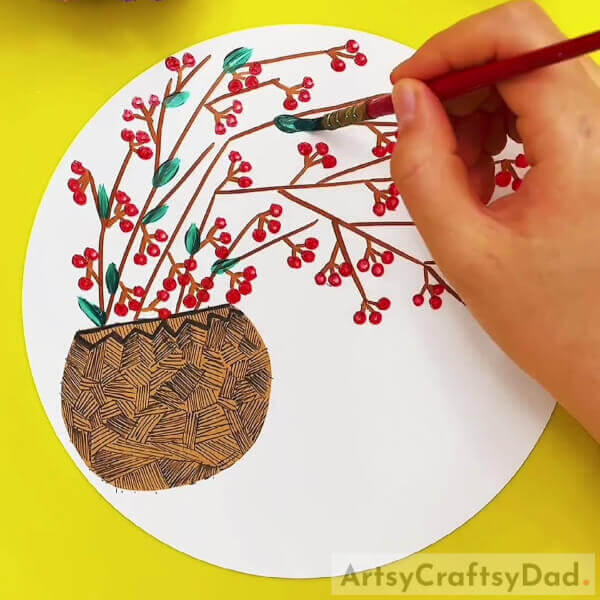
Dip the paintbrush into dark green paint and make small leaves over the base to the branches of the plant randomly as shown in the image.
Step #8: Making More Leaves
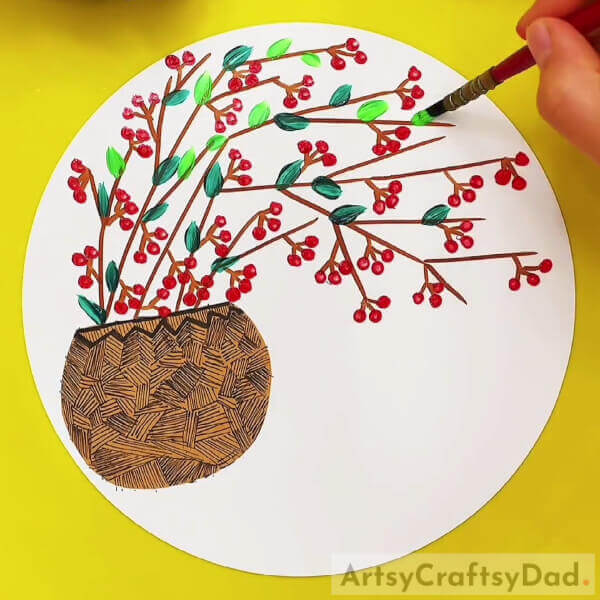
Now, dip the paintbrush into light green paint and make the light green color leaves on the base to the branches mixed with the dark green ones as shown in the image and cover the whole branches.
Step #9: Making The Muddy Ground
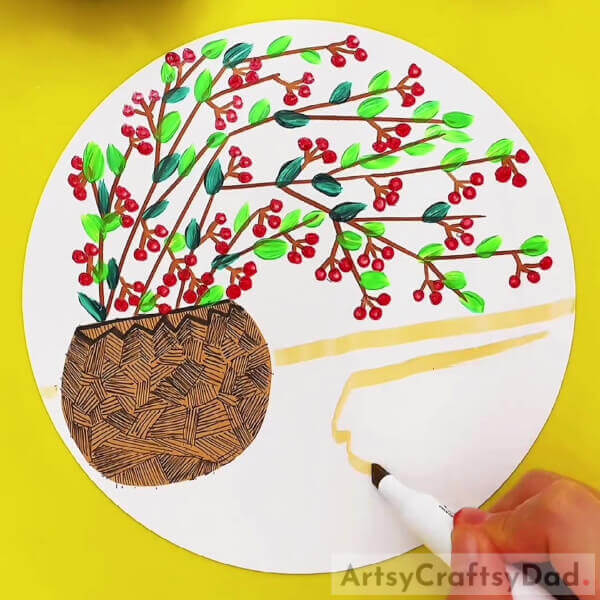
Using a brown highlighter, make the muddy ground on the base below the leaves. Make a straight horizontal line on the base by the middle half of the pot and then make the irregular loops on the base to make it look muddy.
Step #10: Completing Making The Muddy Ground
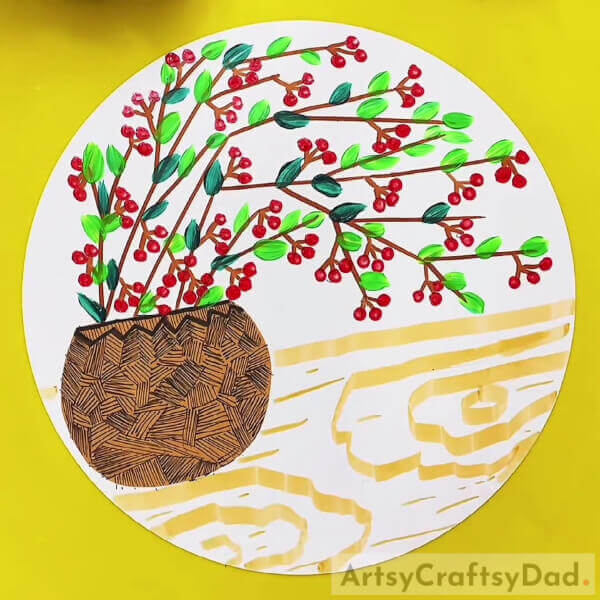
Make the irregular loops on the ground and also some thin line strokes on the base to make them look like the muddy ground as shown in the image.
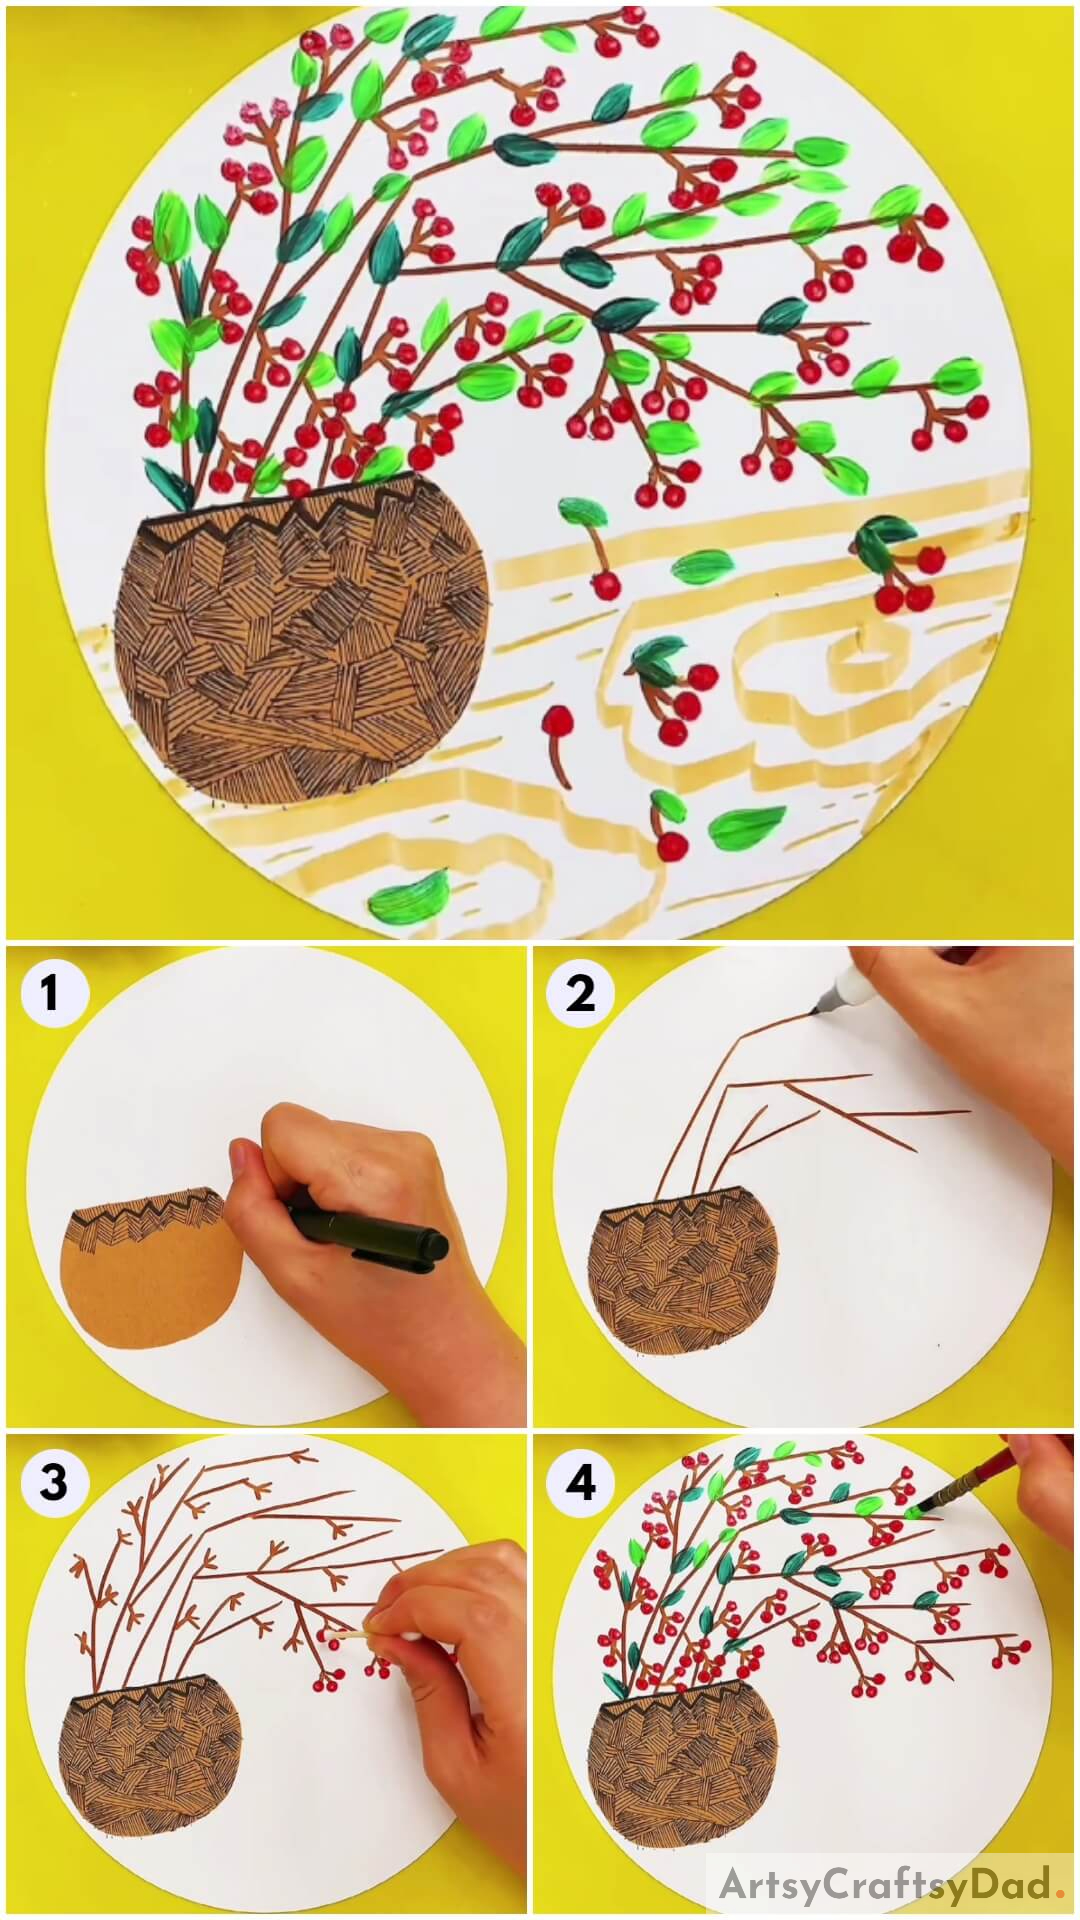
This Is The Final Look Of Your Cherry Plant!
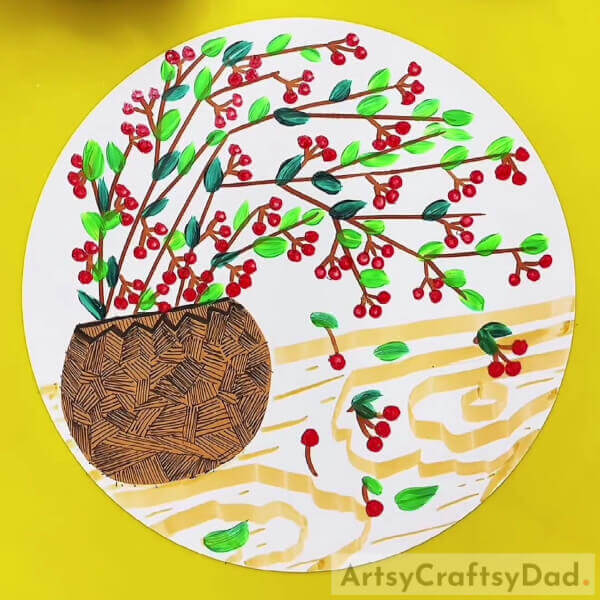
For the last step, make some fallen cherries along with leaves and branches on the ground as shown in the image.
Tada! Look at the amazing results! Your cherry plant looks absolutely eye-catching!
You should now decorate this artwork on your room’s wall to brighten up the room! You can even customize this painting in any way you like, giving different textures to the plant pot, giving a background, or decorating the plant pot with craft beads and pears, anything! Your imagination is the limit, so, make it as unique as you are to show it off to everyone and let them be proud of your skills!
Share the article with your friends and have a competition to see who can make the best one! Don’t forget to leave a comment in the comments section as well!
You May Also Like:
- Peacock Stamp Painting With Hacks Tutorial
- How to Make Paper Flowers Step by Step (with pictures)
- How to make cherry “mobile pouch” from ribbon embroidery
- Beautiful dotted flowers from one stroke painting
- How to Make Cherry Blossom Flower from Satin Ribbon


