Looking for a fun and creative craft project for your kids? Check out our Paper & Clay Ice-cream Cone Craft Tutorial! This step-by-step guide will teach your little ones how to make adorable ice cream cone sculptures using paper and clay. Get ready for a sweet and colorful art project that will bring a smile to everyone’s face!
Welcome to this paper & clay ice-cream cone craft tutorial. This is an easy step-by-step tutorial for kids to make for fun and learn some great skills in crafting. Here we will use paper, and clay to make this craft and make a creative craft for kids. Kids will enjoy the process of the clay ice cream cone craft tutorial. This is the best activity for kids to learn some new techniques and use new ideas for making this craft. Through this craft, children will learn to explore their thoughts and use new and productive ideas that will help them in the future.
Ice-Cream Cone Craft Made With Paper & Clay
Must Read: How to Make Paper Flower Wall Hanging (Tutorial)
Supplies & Tools
- Scissors
- Colored Clay (Yellow, Red, Orange, Pink)
- Colored Paper ( Brown, Red, Yellow, Pink, Sky Blue)
- Glue
- Colored Sketch (White, Brown)
- Pencil
Ice-Cream Cone Instructions
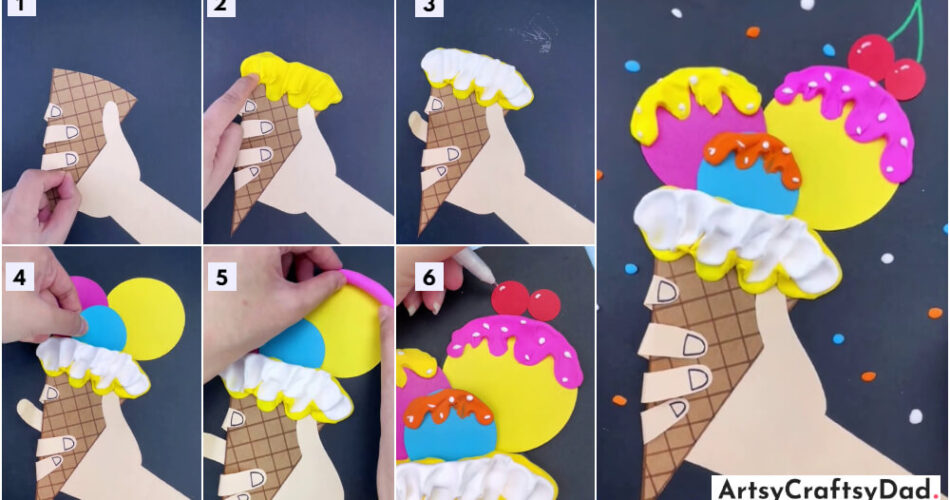
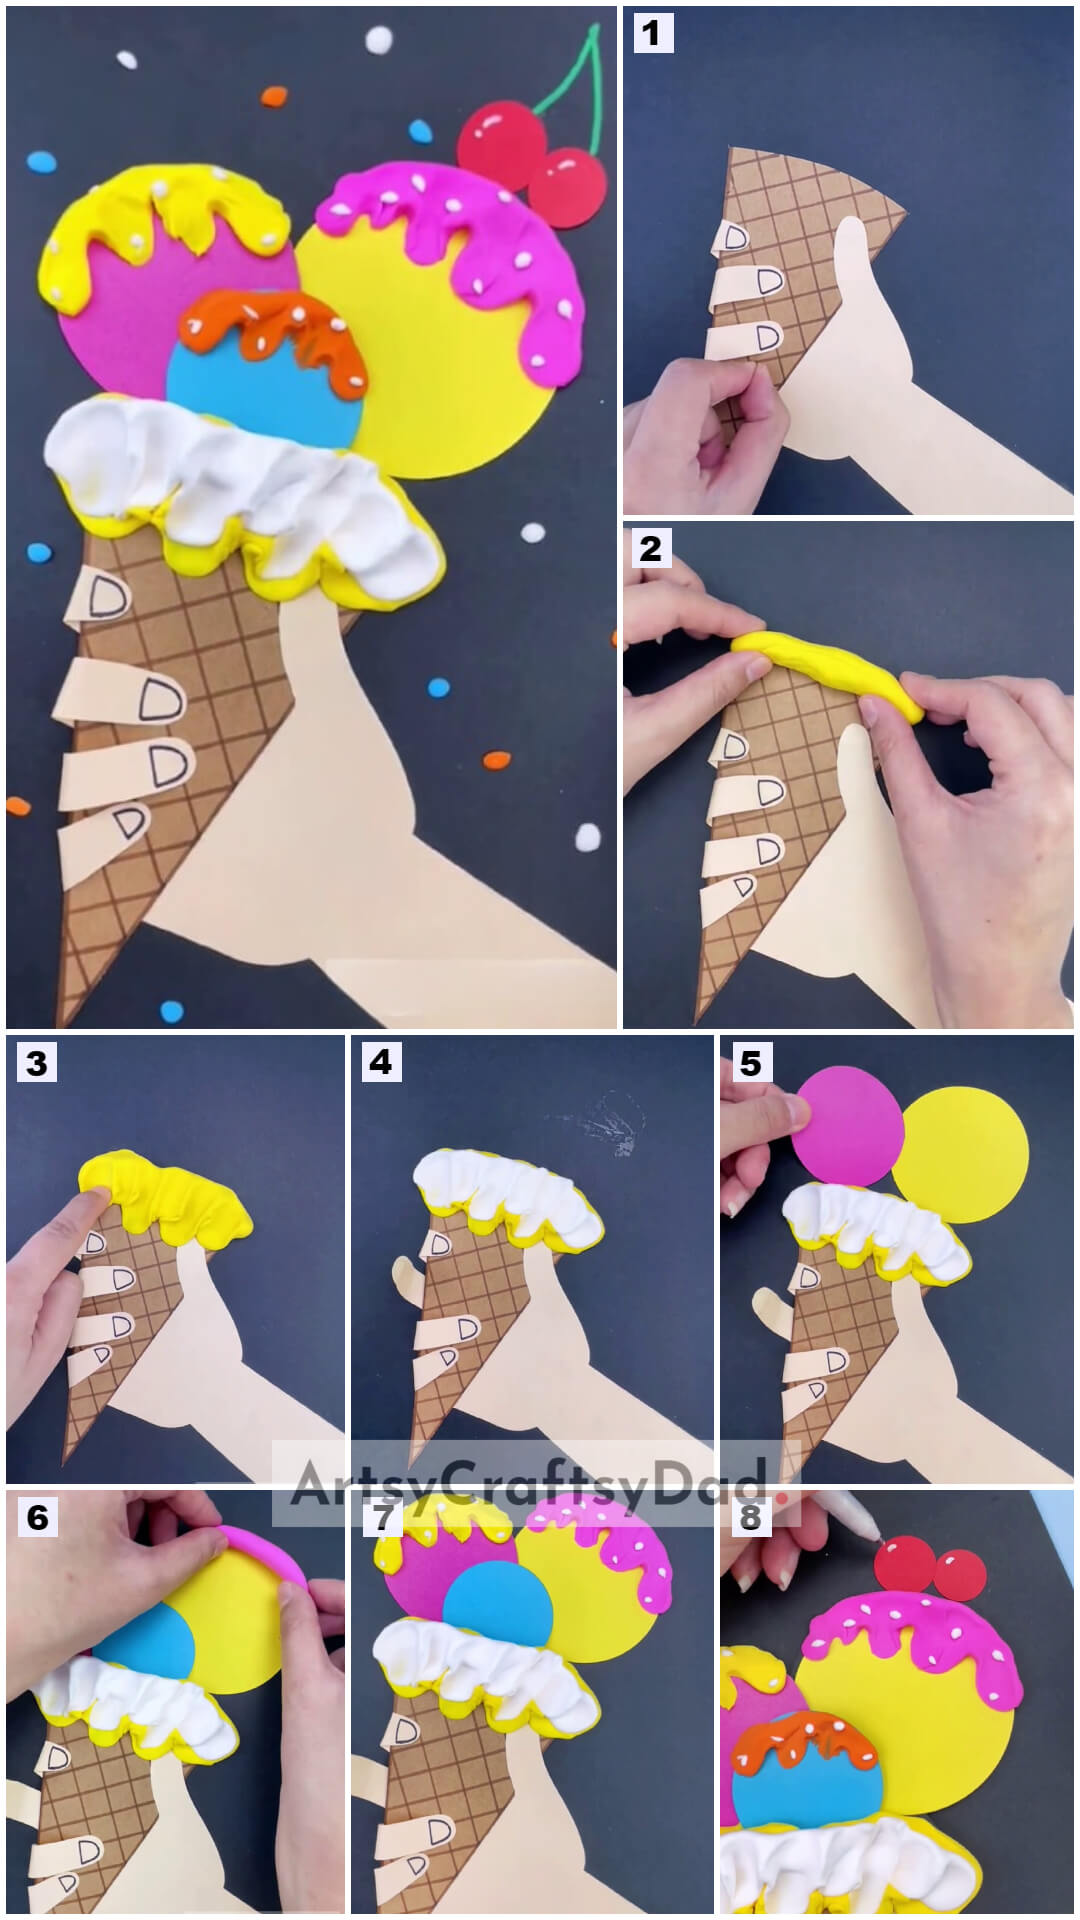
Step #1: Cutting a Paper Into the Shape of the Hand
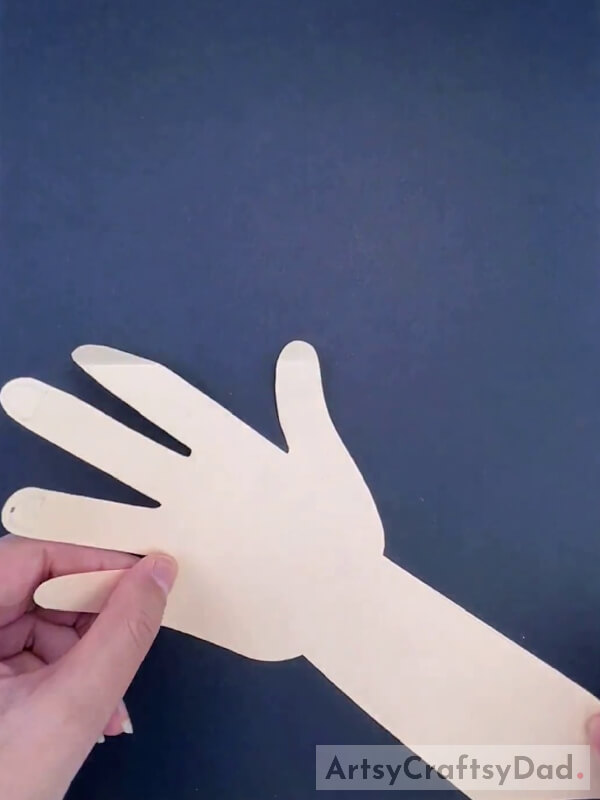
Take a piece of paper and draw a hand on it. Now cut it out with the help of scissors.
Step #2: Cutting a Paper Into a Cone Shape
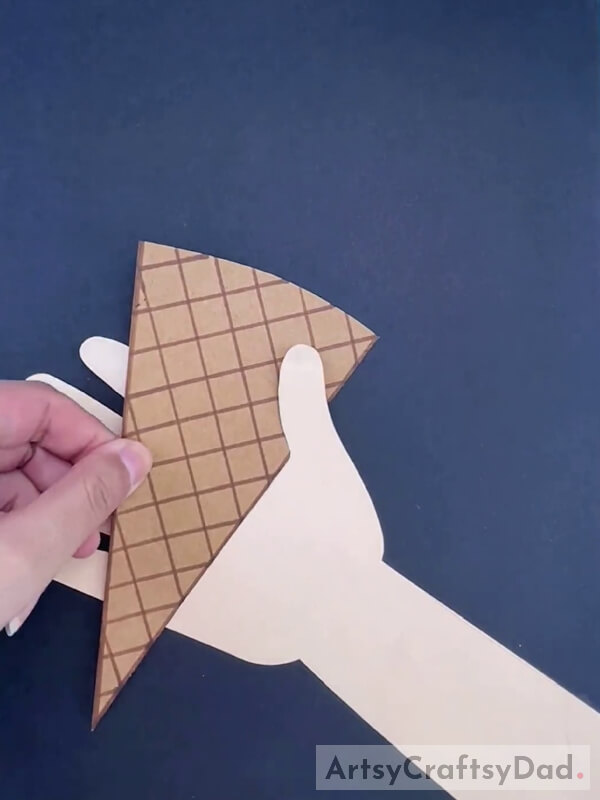
Take a light brown color paper and draw a cone shape on it. Then cut it out by using a scissors. Now use a brown sketch and draw a boundary around the cone. Then draw several lines on the cone using a scale and the brown sketch. Put the paper cone over the paper hand.
Step #3: Holding the Cone in the Hand
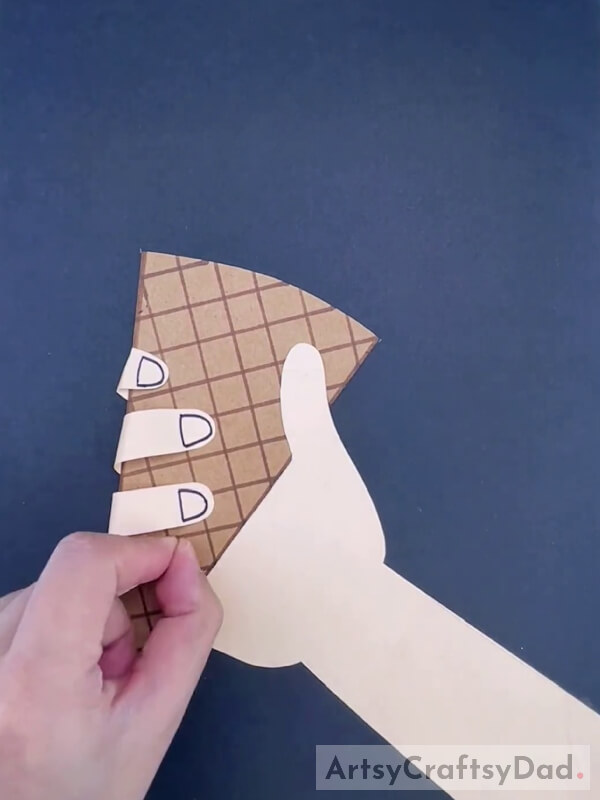
Now fold the fingers of the paper hand around the cone to look like it’s holding the cone.
Step #4: Pasting Clay on Top of the Cone
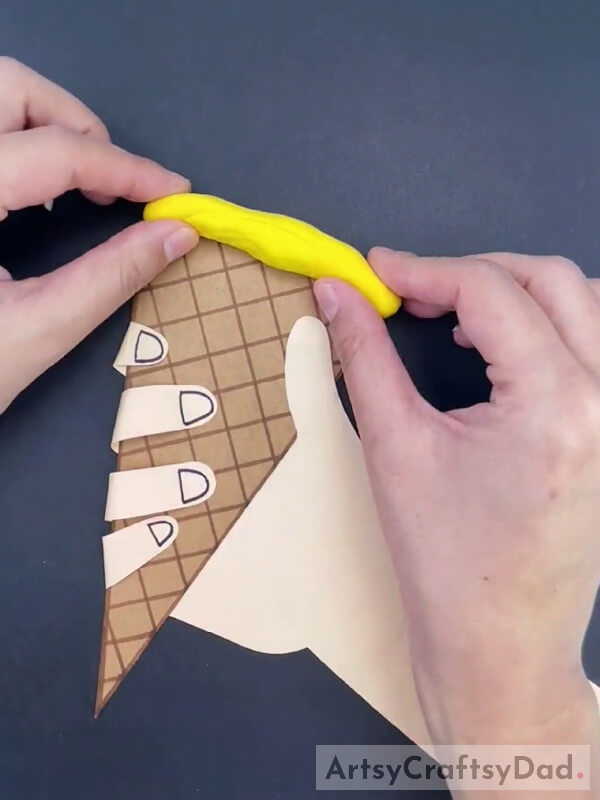
Take yellow color clay and put it over the top of the cone.
Step #5: Pulling the Clay to Look Like It Melting
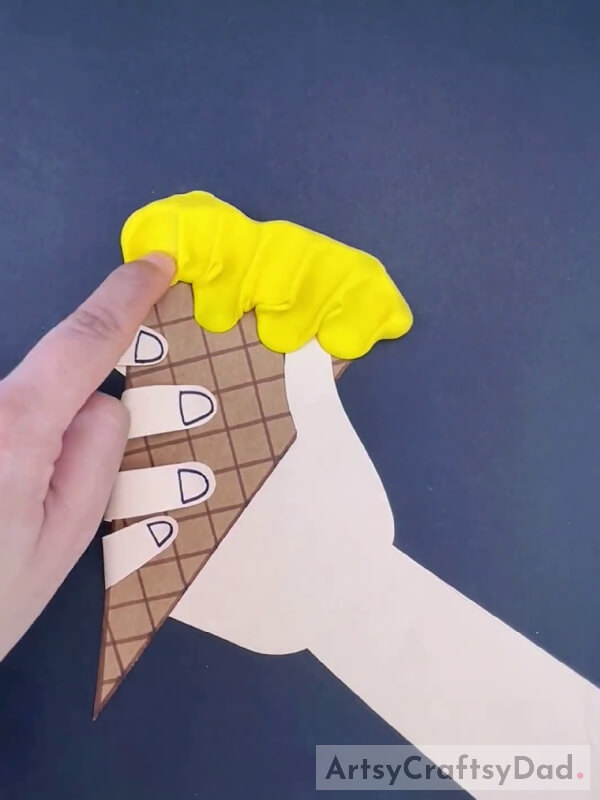
Use your index finger and make an impression over the clay to give it a look like a melting ice cream.
Step #6: Doing the Same Process With White Clay Over Yellow Clay
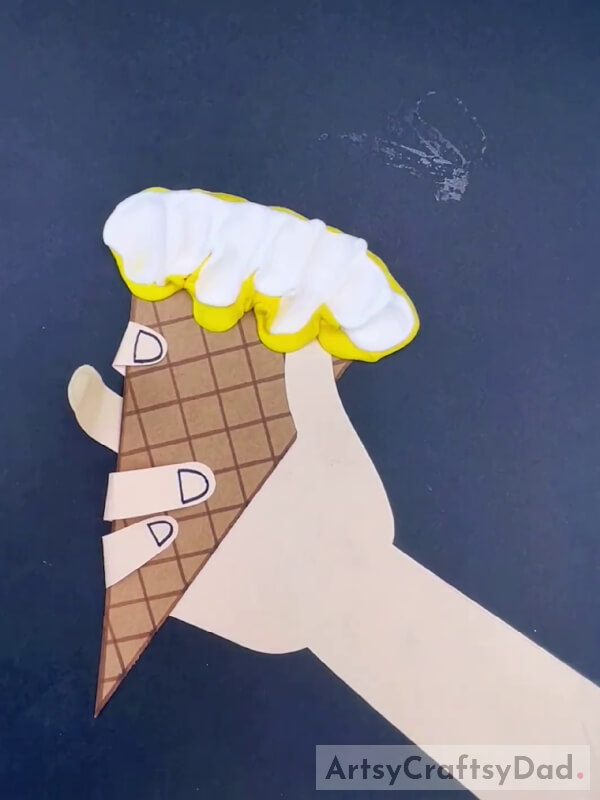
Now put another layer of white color clay over the yellow color clay and make its shape like melting ice cream by using your finger.
Step #7: Taking Pink & Yellow Papers of Circle Shape
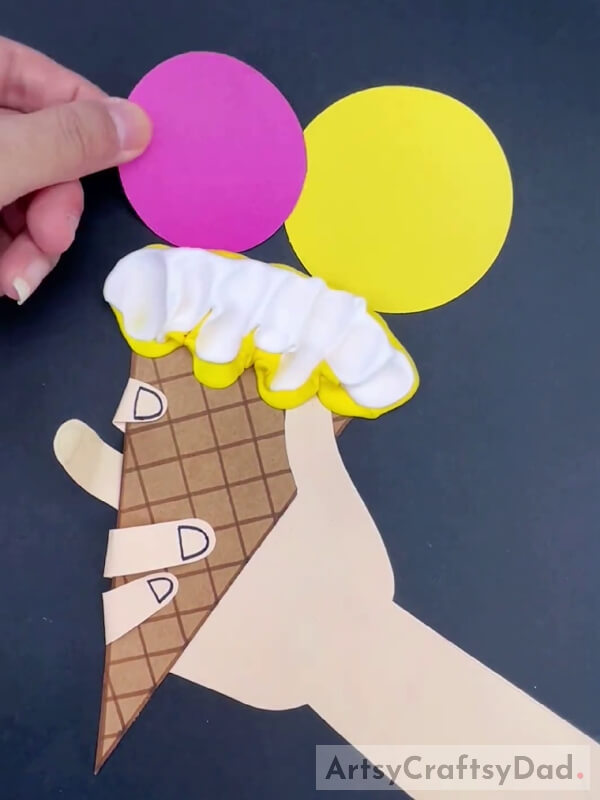
Take two colored papers yellow & pink. Now draw a circle on those papers with the help of a pencil. Now cut these circles using scissors. Put these pink and yellow circle papers over the top of the cone.
Step #8: Adding Circle Shape Papers on the Top of the Cone
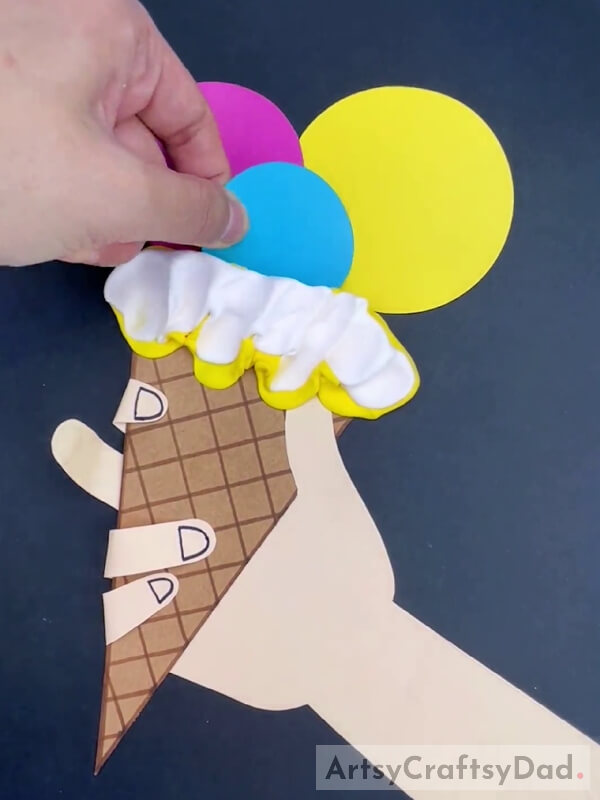
Took sky-blue paper and cut it out in the shape of a circle. Put a sky-blue circle in between the other two circles on the cone.
Step #9: Adding Pink Clay Layer Over the Yellow Circle
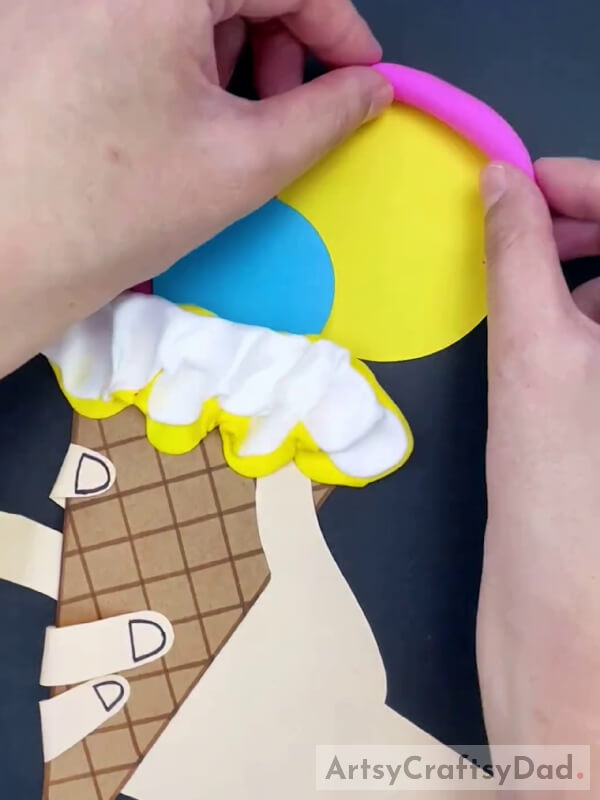
Now use pink color clay & put it over the top of a yellow color circle.
Step #10: Pulling the Clay to Make it Melting ice cream of Both Circles
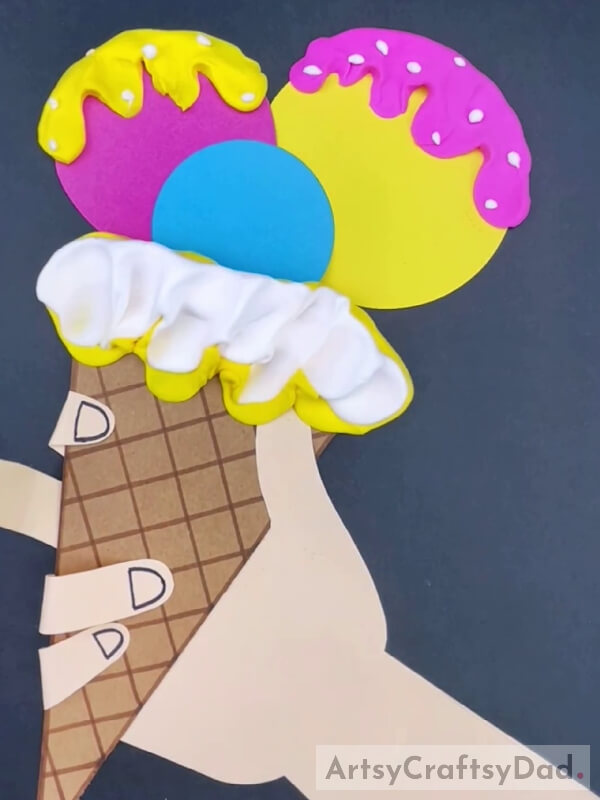
Now use yellow color clay over the pink paper circle. Use your finger to make an impression on yellow & pink clay to look like its melting.
Step #11: Cutting Red Colored Paper Into Small Circle
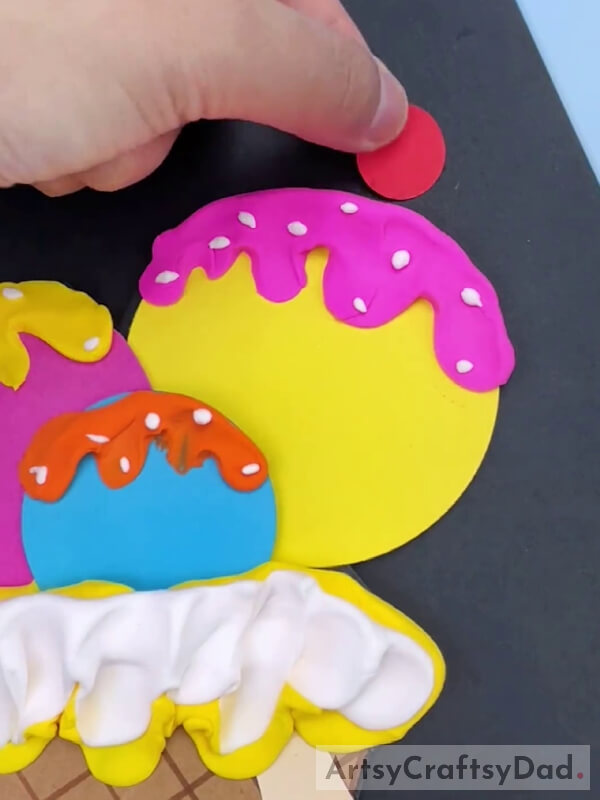
Take an orange color clay & put it over the sky-blue paper circle & make a melting impression by using an index finger. Now take a red colored paper and cut it into the shape of a circle. Paste that red colored circle over the top of the pink clay by using glue. Put white color clay dots over orange, pink & yellow color clay for the topping of ice cream.
Step #12: Pasting Two Red Colored Circles And Using White Sketch
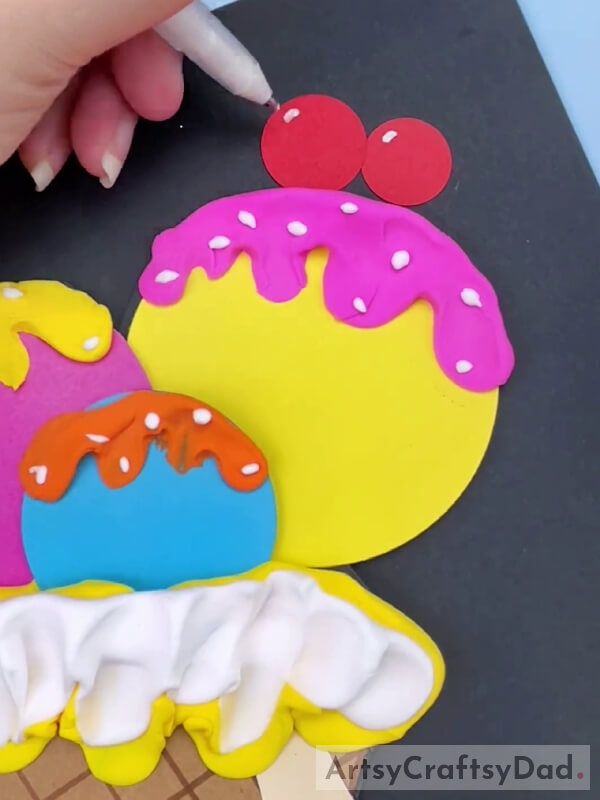
Now cut one more red-colored paper circle with the use of scissors & paste it beside the first red-colored circle. Now use a white color sketch & make small marks over red colored circles.
Hurry! Our Paper & Clay Ice-Cream Craft is Ready!
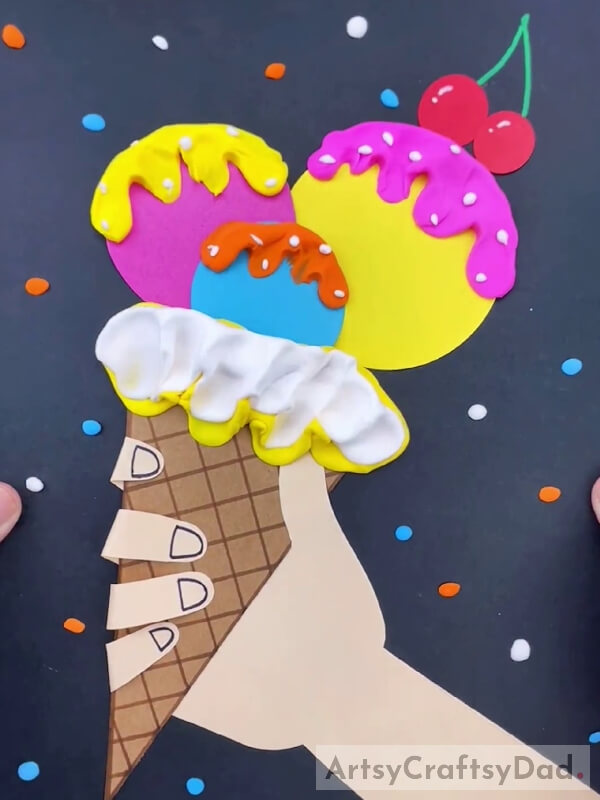
Use green paper & cut it into two small strips. Paste them over red paper circles to look like cherries stem. Your ice cream clay paper craft is ready.
Hey, you have made a clay ice cream cone craft. You have created a masterpiece. You could apply your ideas and create some more beautiful art as you want. If you want to try some new craft and art ideas for that we have a solution for you. You could visit our other websites where you could find new articles, ideas, and many new art and craft ideas and options that you want. Please share your thoughts and ideas in the comment section. we would love to hear your words. Keep visiting our website in the future.
Thanks for your love & support.
You Might Also Like
- Paper Cup And Clay Crowns Craft Tutorial For Beginners
- Dumpling Dragon Boat Paper Craft Step-By-Step Tutorial
- Clay-Paper Sunflower Garden Craft Tutorial
- Clay Circles Landscape Craft Tutorial For Kids
- Clay Circles Tree Artwork Craft Tutorial For Kids


