Looking for a fun and creative craft project for your kids? Check out our tutorial on how to make a colorful paper rainbow wall hanging! This step-by-step guide will show you how to create a vibrant and eye-catching decoration using simple materials. Join us now and let the crafting adventure begin!
Hey, do you want to make some wall-hanging craft? Here we will make a colorful paper rainbow craft. You could make this craft with your kids they will enjoy making this colorful craft. In this craft be ready with your paper, scissors, and glue and make a beautiful hanging craft for your home décor. By making these crafts your kids will enjoy some new activities that will make them creative & divert their minds to some unique and new things to explore. So let’s ready to make some new crafts and have fun in the process of making crafts.
Colorful Rainbow Wall Hanging Craft Made With Paper
Must Read: How to Make Paper Flower Wall Hanging (Tutorial)
Supplies & Tools
- Colored Papers ( Red, Yellow, Pink, Sky Blue, Orange, Light Green)
- Scissors
- Thread
- Googly Eyes
- Colored Marker (Pink, Black)
- Pencil
Hanging Rainbow Craft Procedure
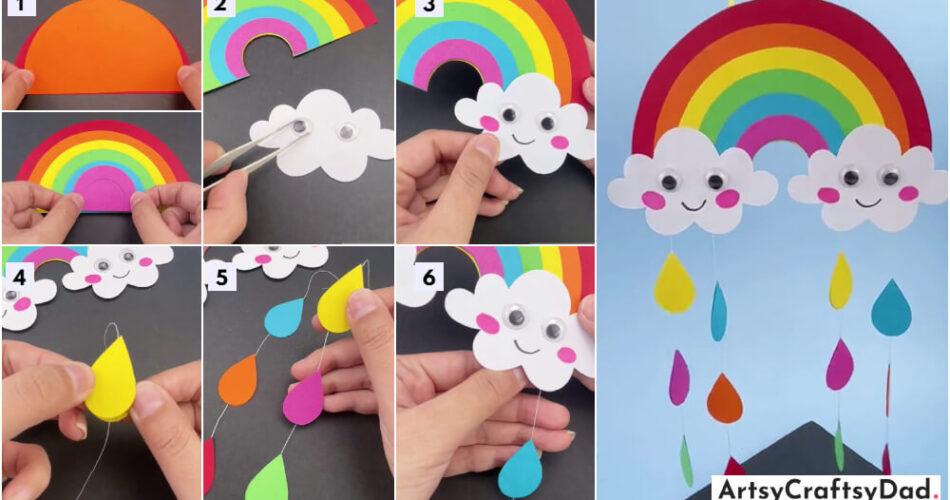
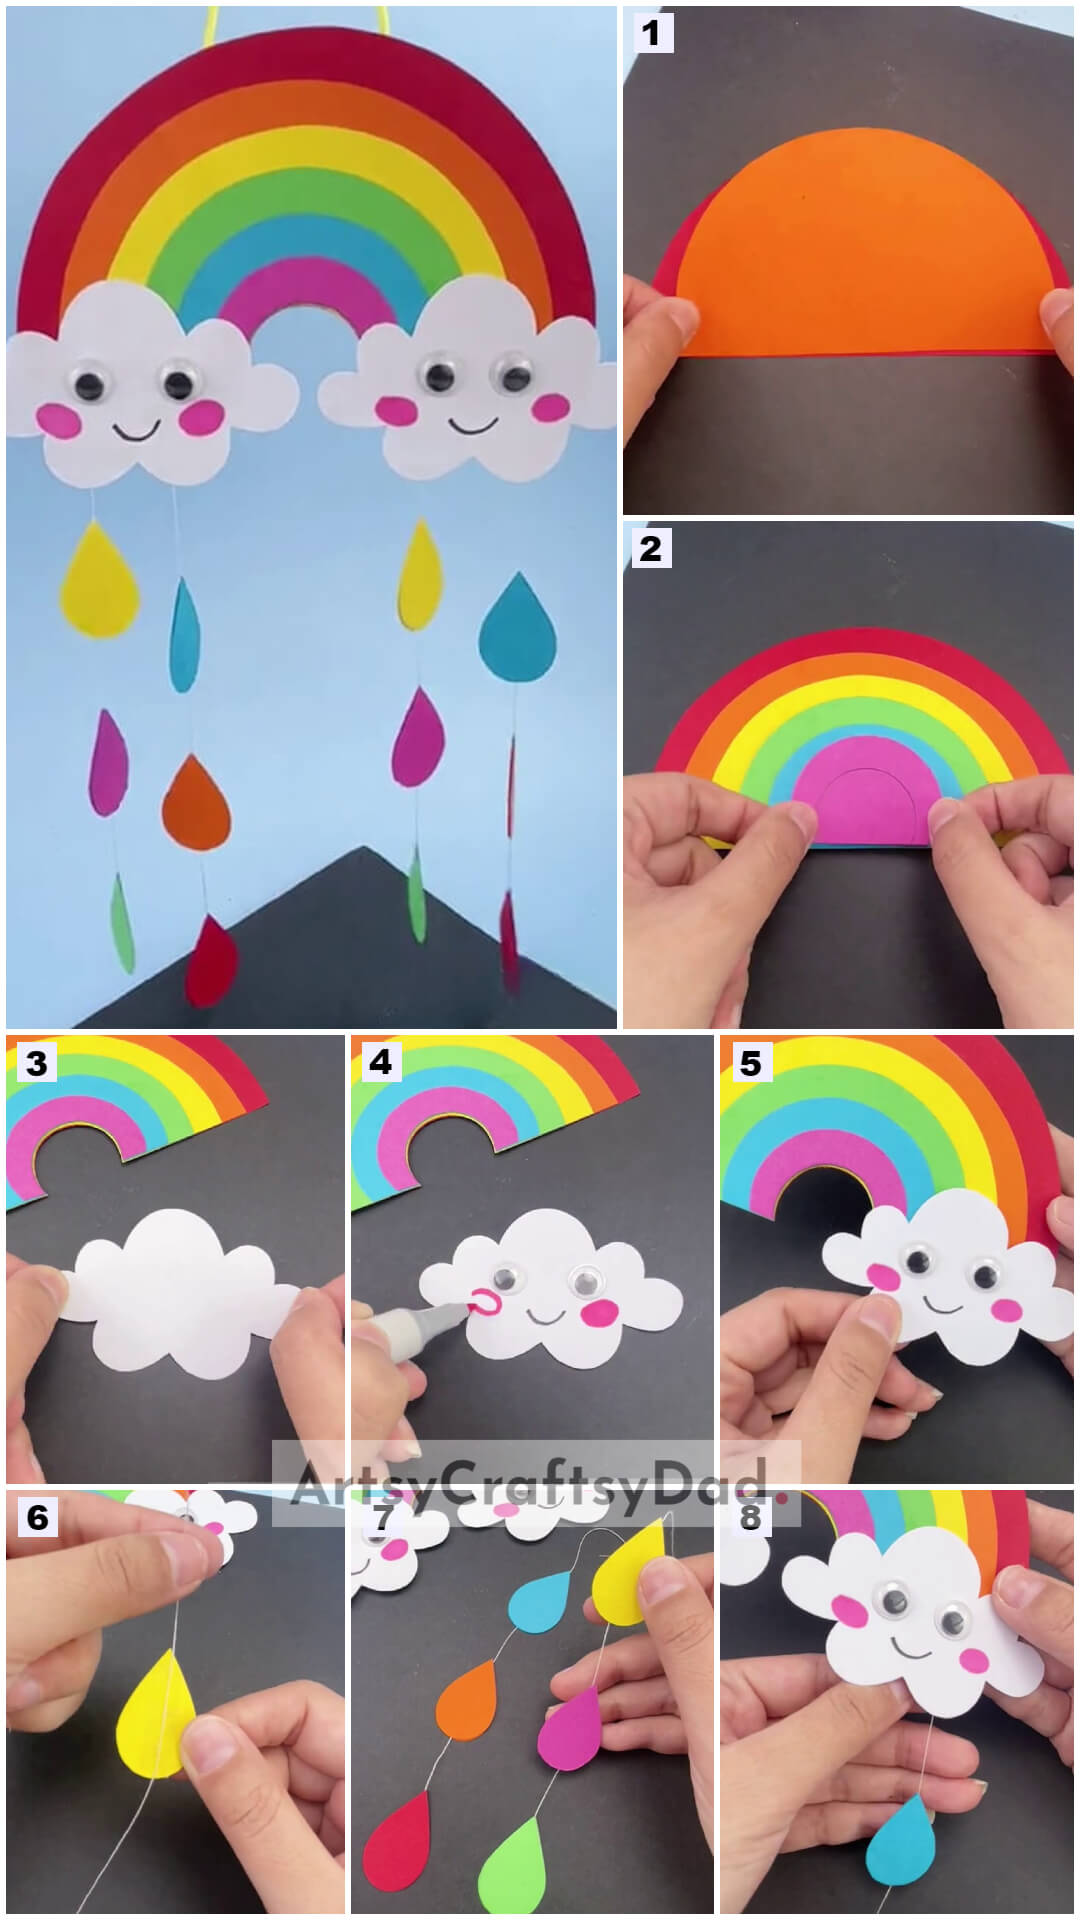
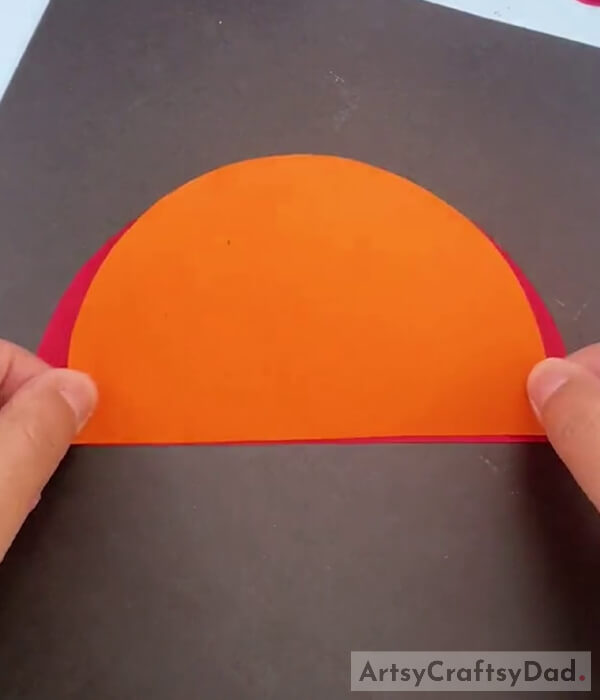
Step #1: Taking a Semi-Circle Shape Red Paper

Take a piece of red color paper sheet. Now draw a semi-circle on it with the help of a pencil. Cut the semi-circle drawing on red paper with the help of scissors.
Step #2: Doing the Same Process With an Orange Paper
Now take an orange colored paper. Draw a small semi-circle with the help of a pencil on orange color paper & cut it by using a scissor. Now paste that orange paper semi-circle on the red semi-circle by using glue.
Step #3: Pasting Rainbow Colored Semi-Circles One by One
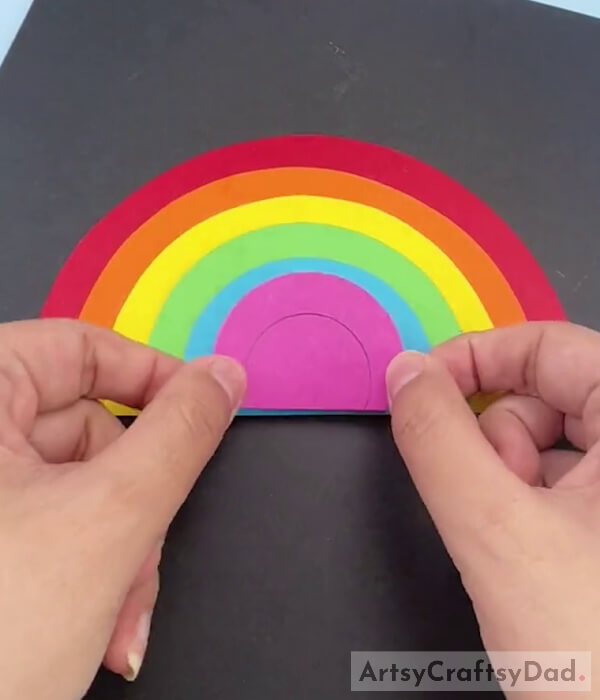
Now take different colored paper sheets like yellow, pink, sky blue, and light green with different sizes & cut them all into a semi-circle shape by using scissors. Now paste these all semi-circles one over the other as shown in the above image by using glue.
Step #4: Drawing and Cutting a Semi-Circle on Pink Paper
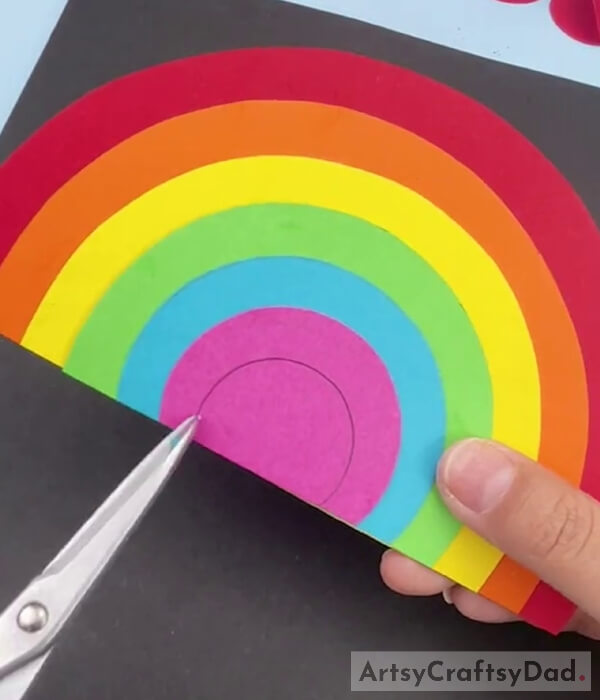
Now draw a small semi-circle over the pink paper circle with the help of a pencil & cut out that drawn part from the pink circle of the rainbow by using scissors.
Step #5: Making a Cloud by Using White Paper
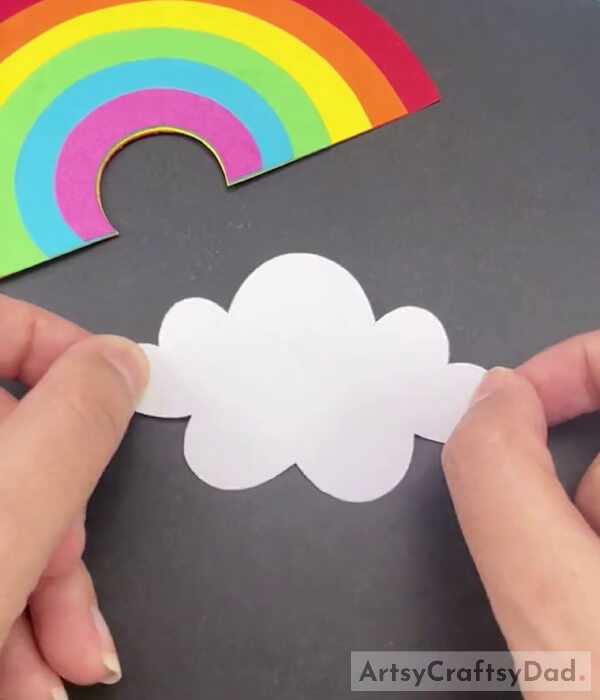
Now take a white paper sheet and draw a cloud shape with the help of a pencil. Cut that cloud shape by using scissors.
Step #6: Pasting Googly Eyes on Cloud
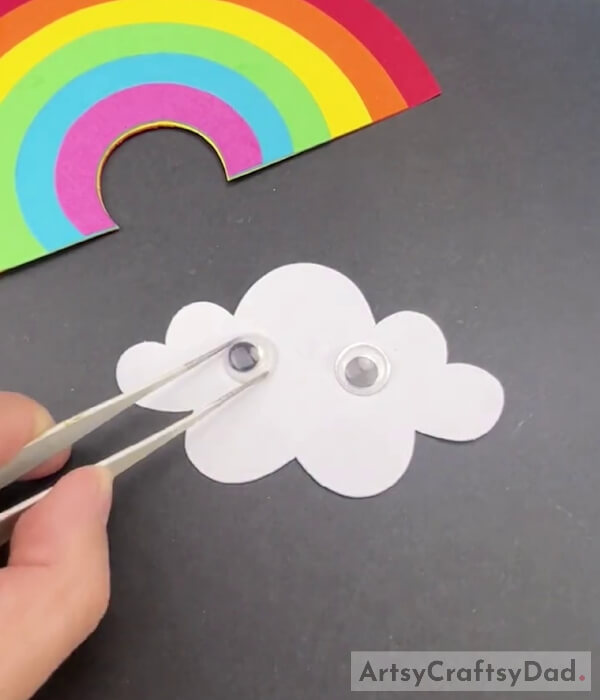
Take two googly eyes and use glue to paste them on the cloud as shown in the image above.
Step #7: Detailing the Cloud Using a Pink Marker
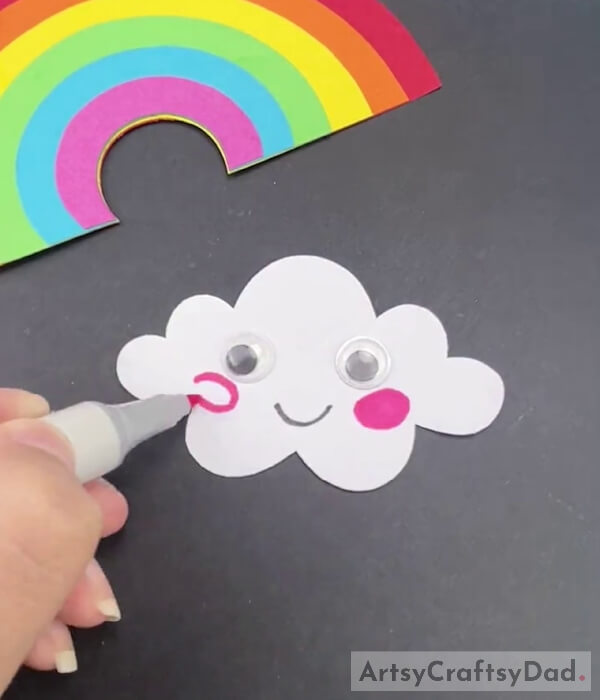
Now use a pink color sketch pen or marker to make blushes on both sides of the cloud under the cloud’s eyes. Now draw a curvy line by using a black marker or pen to make a cloud’s mouth.
Step #8: Pasting Cloud on Rainbow
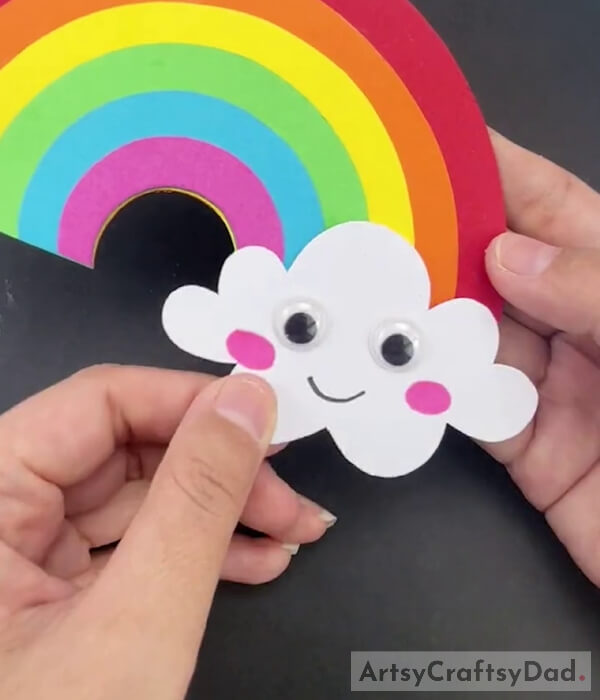
Now paste the cloud on the right side of the rainbow.
Step #9: Pasting Another Cloud
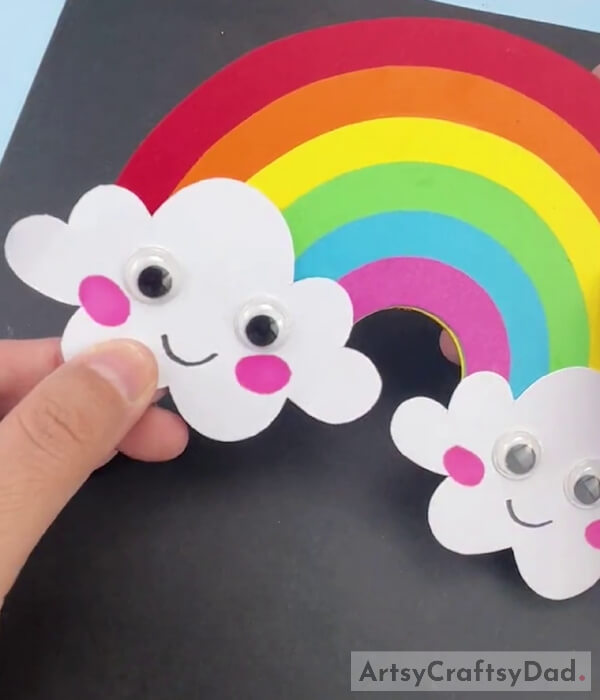
Now, make one more cloud by following the same procedures that we used in the above steps and paste the cloud on the left side of the rainbow.
Step #10: Making Paper Raindrops
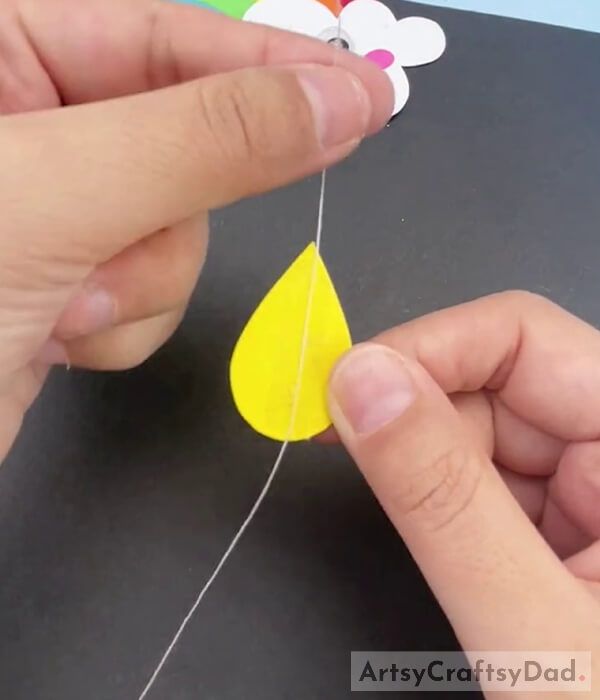
Use yellow color paper and draw a droplet with the help of a pencil and cut it out with scissors.
Step #11 Attaching a Thread Between the Two Raindrops
Now make another same colored raindrop by using the same process. Take a white thread and paste it in between both raindrops.
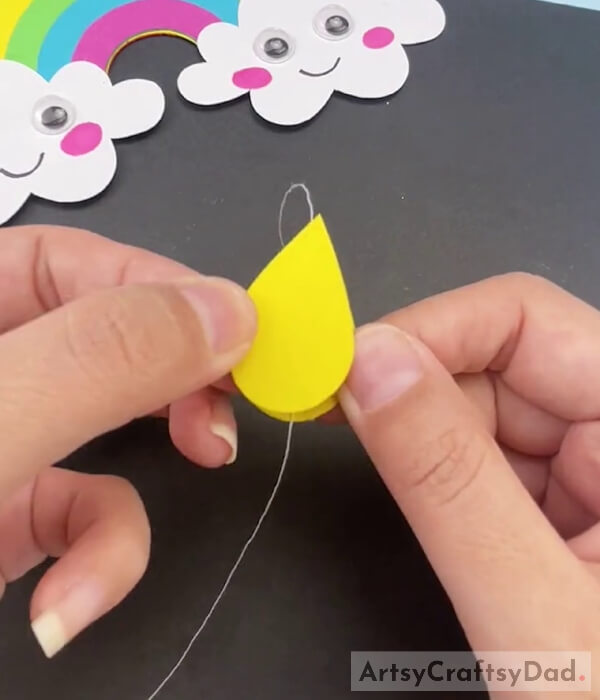
Step #12: Pasting Other Paper Color Raindrops on Thread
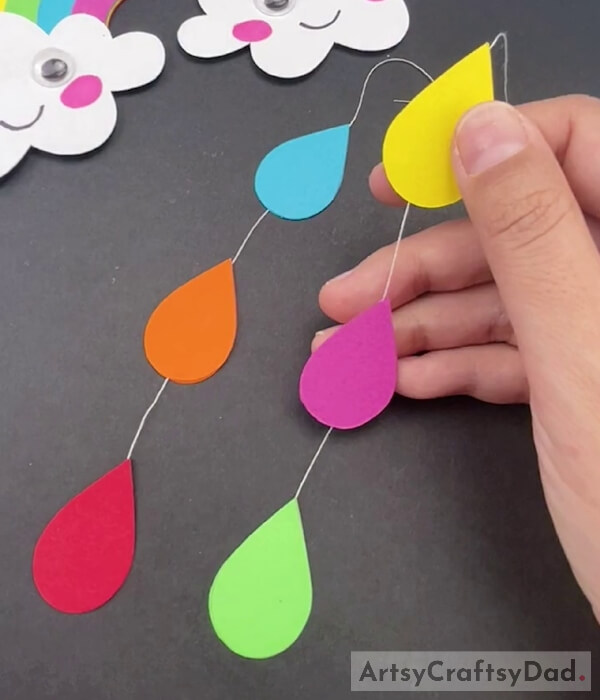
Now we will make more raindrops of different colored papers. Use orange, red, light green, pink, yellow, and sky blue color paper & draw drops, and follow the same procedure as we have done in the above steps.
Step #13: Pasting Raindrops to the Backside of the Cloud
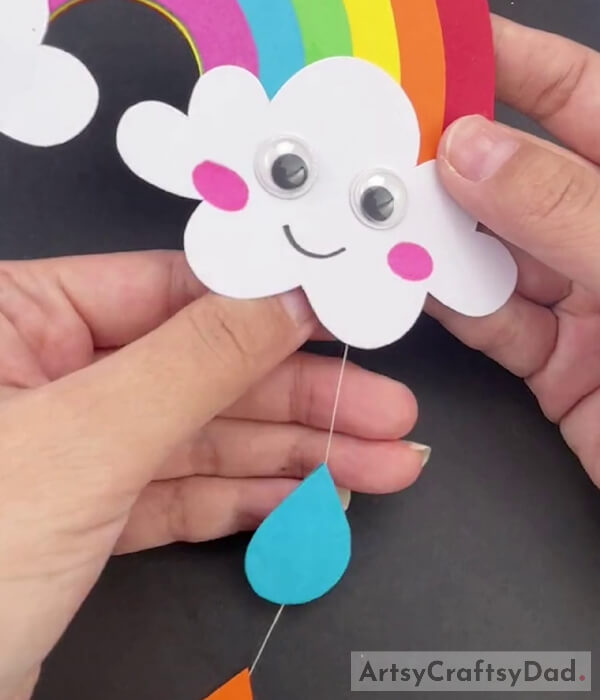
Now paste all the threads on the backside of the cloud by using glue.
Tada! Our Colorful Rainbow Craft is Ready!
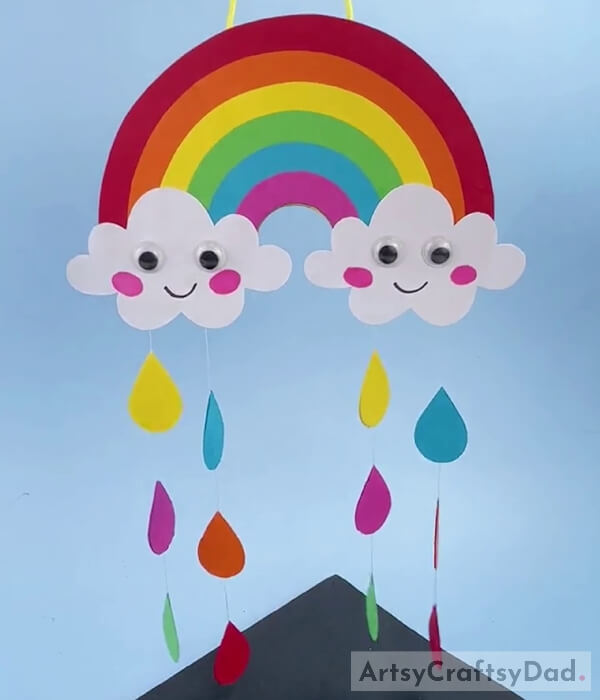
Make some more raindrops & paste the thread to the backside of both clouds by using glue. Our colorful rainbow craft is ready.
Tada, my friend you have created an amazing and beautiful hanging craft. I know you are creative and want to learn some interesting crafts to show your friends and family and feel happy in the process of making new and thinking out of the box. Never stop yourself from learning something new in your life. Remember to make a craft you don’t need to be perfect, just take a little step and go with the flow of new ideas for crafts. Keep sharing our website with your friends. Also, drop your feedback in the comment box because we love to hear your thoughts on our crafts and you could share your ideas for new future crafts. We are grateful to have you.
Happy Learning!
You May Also Like
- DIY Newspaper Wall Hanging Craft Tutorial
- How to make wall hanging paper flower
- DIY Plastic bottle Wall Hanging | Handmade Craft
- Latest Wall hanging Design – DIY Woolen Craft
- How to make newspaper wall hanging – Wall Decoration


