How to Make Decorative Easter Eggs (Beyond the Dip & Dye)
Let’s move past the basic dye kits! Creating stunning Easter eggs is about texture and technique. My family’s favorite method doesn’t even involve liquid dye.
The Swedish Method: Silk Tie Eggs
This sounds wild, but it works brilliantly. Grab an old silk tie or scarf with a tight, colorful pattern (100% silk is a must). Cut a piece large enough to wrap around a raw egg, with the pattern facing the eggshell. Wrap the silk tightly around the egg, then wrap again with a piece of plain white cotton cloth (like from a pillowcase or t-shirt) to hold it in place. Secure the bundle with a twist-tie or string. Now, boil the wrapped eggs in water with a few tablespoons of white vinegar for 20 minutes. Let them cool completely before unwrapping. The silk’s pattern transfers onto the eggshell in stunning detail! It’s pure magic.
For a Modern Twist: Acrylic Paint & Texture
Blow out your eggs (poke a small hole in each end and blow out the contents) for a keepsake that won’t spoil. Then, use acrylic craft paint. Instead of a brush, try:
A small piece of sponge for a dappled, speckled effect.
The end of a drinking straw to make perfect polka dots.
A gold leafing pen to add elegant, luxurious accents.
These methods create gallery-worthy eggs that are true works of art.
How to make decorative easter eggs
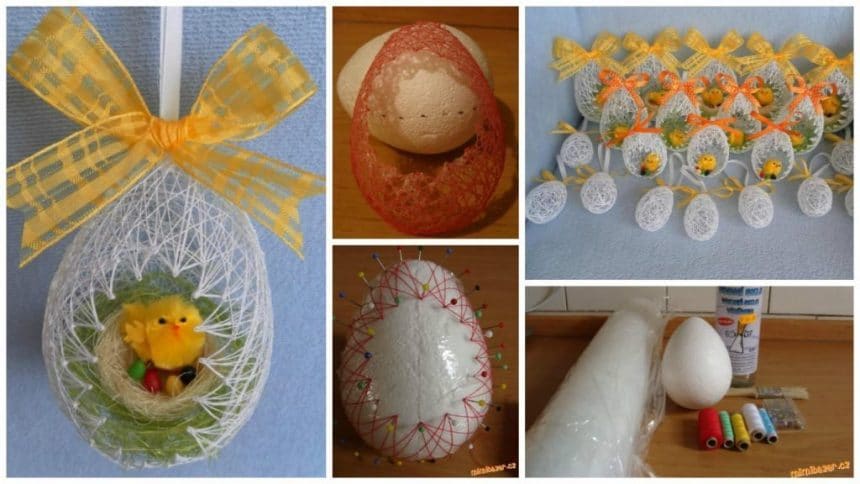
I do not know about you, but to me such decorative Easter eggs like most everyone else. They are gentle, airy … the beauty) and to make such an egg is a snap, the main thing that you need to work – this foam preform in the shape of eggs, thread and glue
To work you will need:
egg foam, plastic film, needles, thread (cotton or silk), glue or water glass and a brush
Courtesy: www.liveinternet.ru


