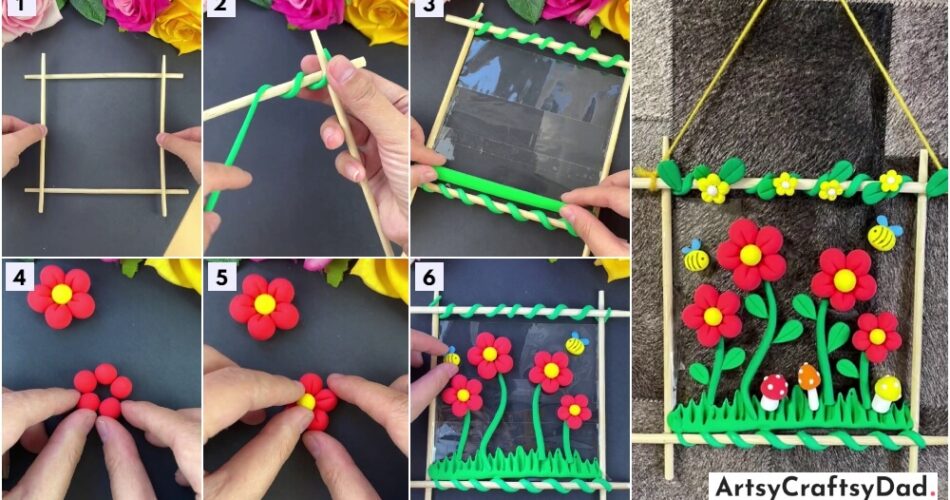
Learn how to make a beautiful clay spring flower hanging craft using chopsticks with our easy-to-follow tutorial. Discover step-by-step instructions and expert tips for creating stunning floral designs that will brighten up any space. Get creative and explore different colors and shapes to personalize your unique hanging craft.
In this tutorial, we will give you all instructions on how to create beautiful clay spring flowers that can be hung from chopsticks to create a unique and eye-catching decoration. This tutorial is perfect for anyone looking to add a touch of nature and color to their space. You could use this craft to decorate your home. I am sure that everyone will like this craft & ask you to process of making this. You only need some simple things to make this beautiful craft. You need to take different colored clays, & chopsticks & glue for our craft. So gather your supplies and get ready to create our lovely clay flower hanging craft.
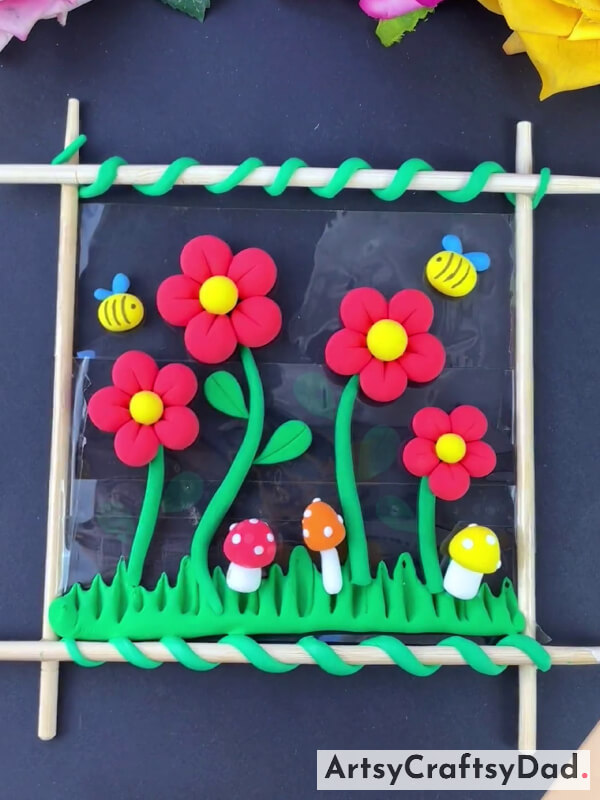
Lovely Spring Flower Hanging Clay Craft
Must Read: Clay Flower Pot Model Craft Tutorial For Kids
Supplies & Tools
- Wooden frame
- Colored Clay(Green, Red, Yellow, Blue, Orange, White, Sky-Blue)
- Thick Thread
- Fork Spoon
- Transparent Tape
- Transparent Polythene Sheet
- Glue
Clay Flower Hanging Instructions
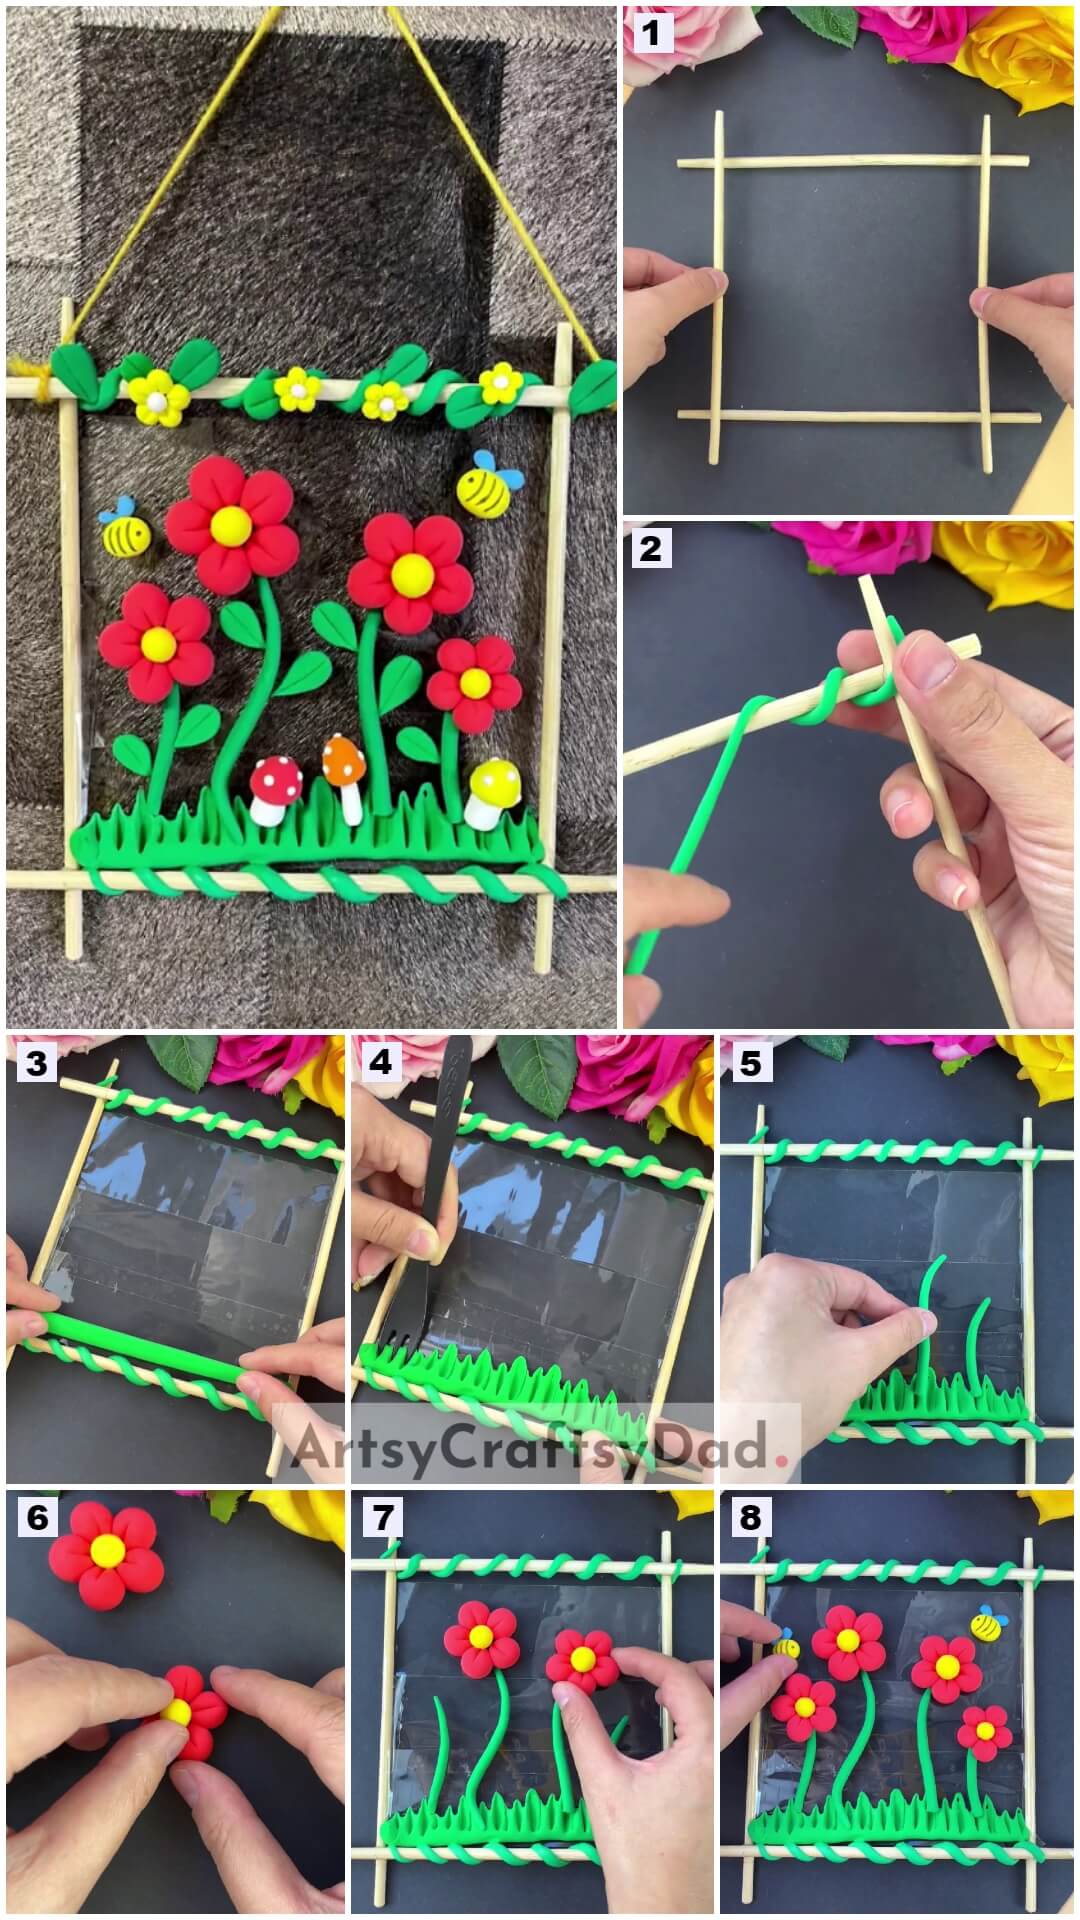
Step #1: Making A Frame
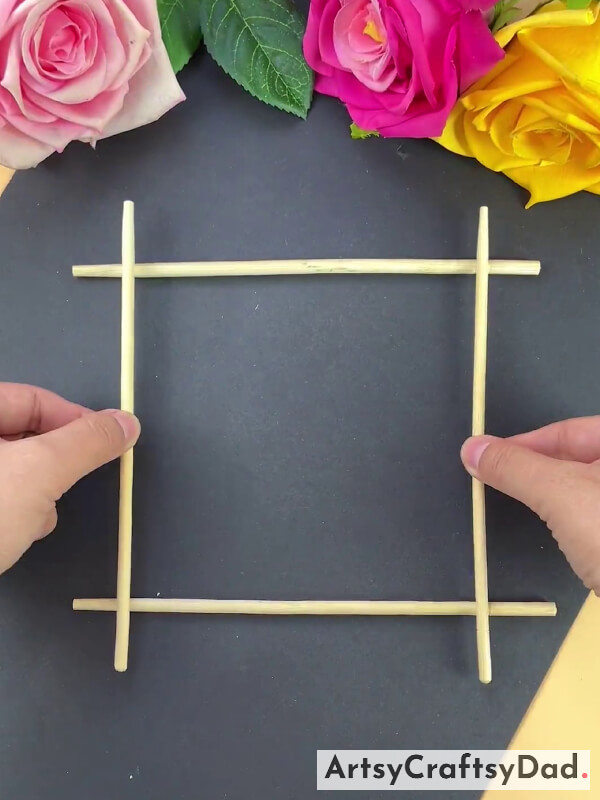
Take four chopsticks to make a frame & paste all of them in the same manner as shown in the above image using glue.
Step #2: Wrapping Up Clay Around Frame
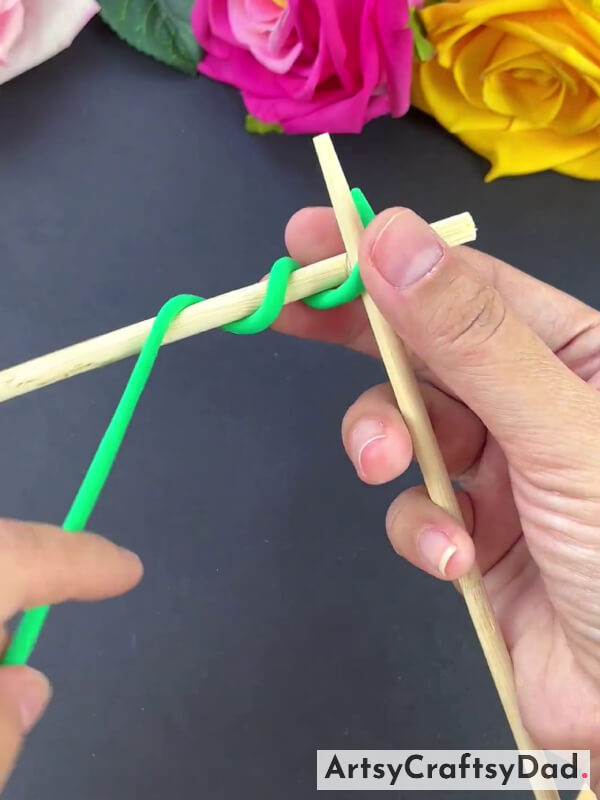
Take green color clay and roll it to make a thin long layer then, start wrapping it all around the top frame’s stick.
Step #3: Pasting Tape
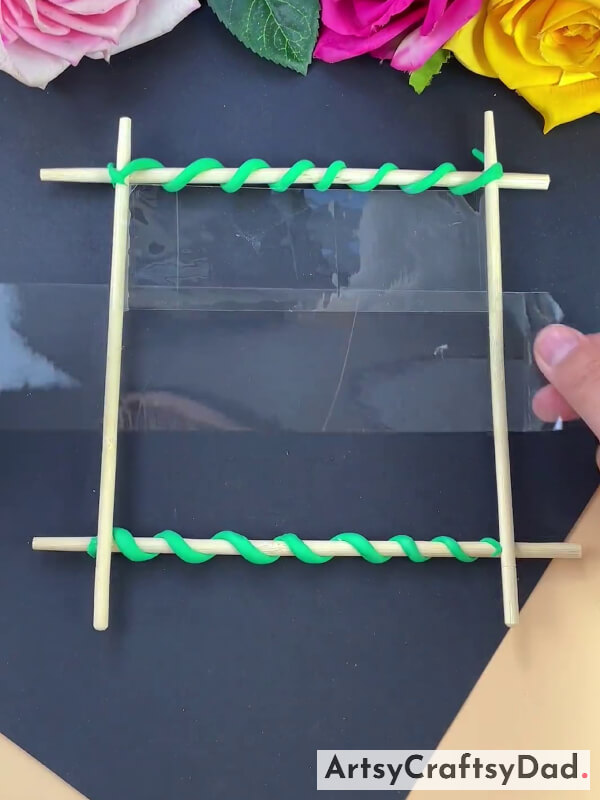
Follow the same process for the bottom stick. Now, paste tape horizontally on the left & right sticks of the frame & cover all the middle areas of the frame.
Step #4: Pasting Clay

Take green clay & roll it to make a thick strap & then paste the thick and long clay strap in the middle area of the frame as shown in the image.
Step #5: Spreading Clay

Now, with the help of a fork spread the clay in the upside direction to give it the grass look as shown above.
Step #6: Making Grass
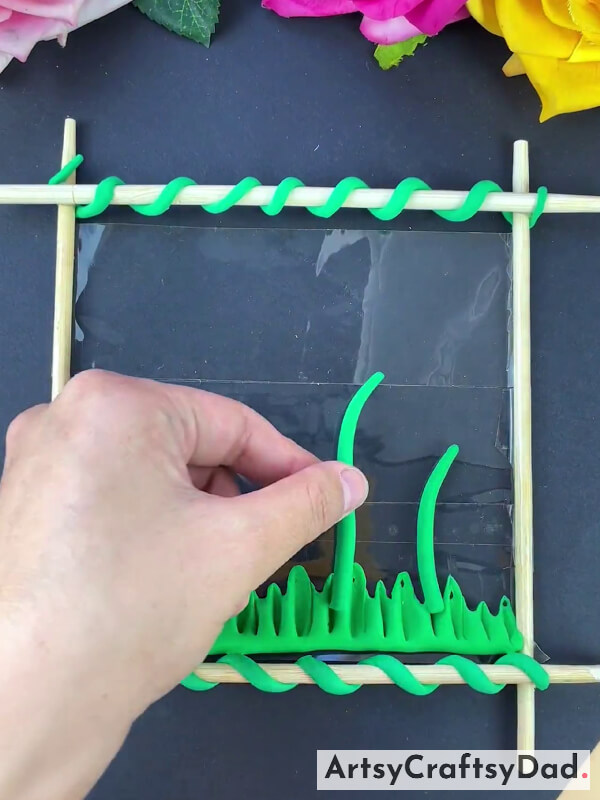
Take green clay & roll it to make a green strap for the flower stem & paste flower stems between the grasses.
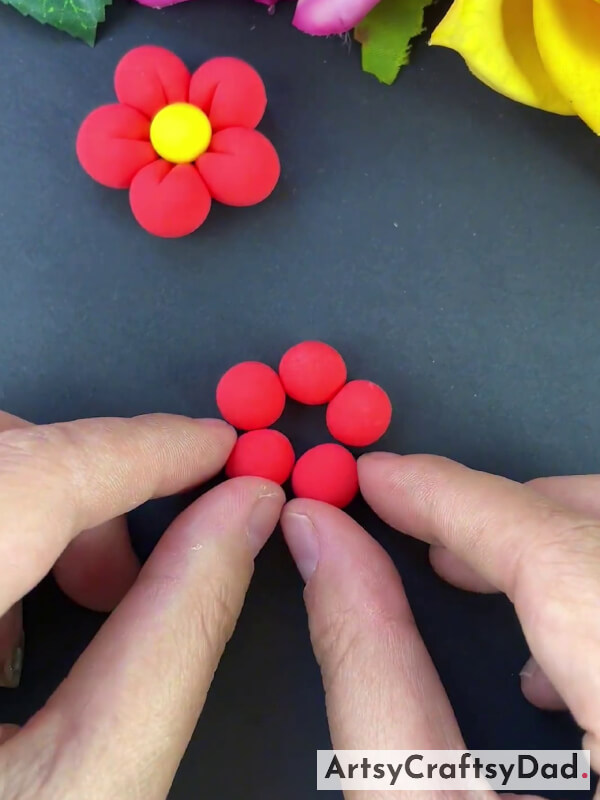
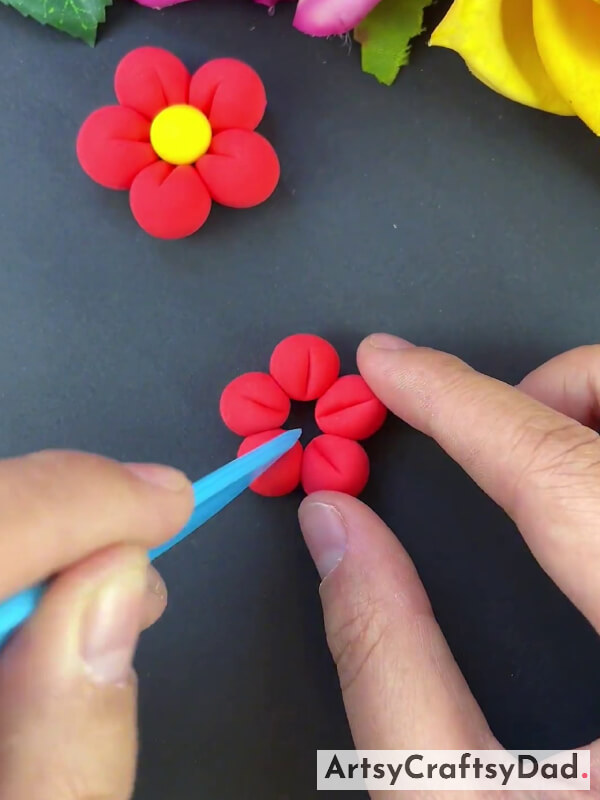
Step #7: Making Flowers
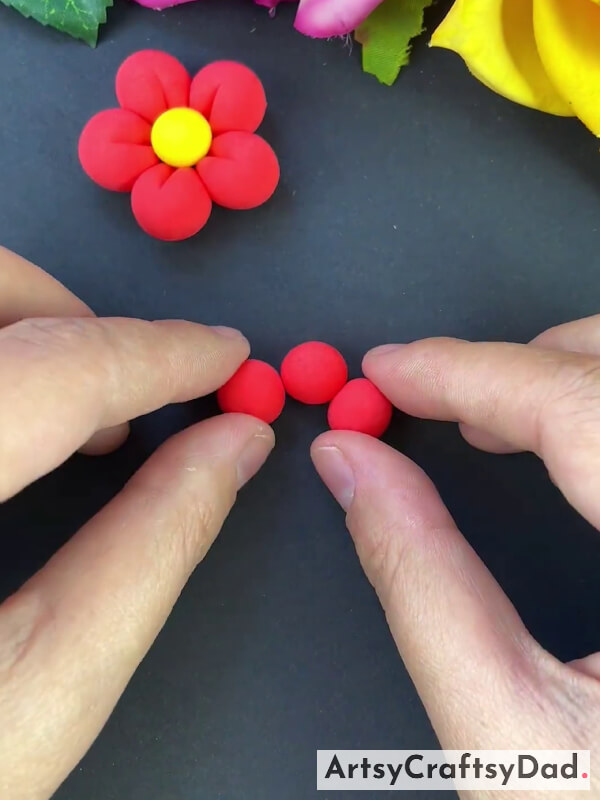
Now, take red clay & make red balls as flower petals then put them on the top of the craft base in a circular arrangement to make the flower shape. After that take yellow clay & make a ball & put it in between the flower called the pistil (the pistil is the center part of any flower). Start making another flower using the same process.
Step #8: Continue Making Flower
Continue the process of making clay flowers.
Step #9: Making Designs On The Flower
Take a sharp clay tool & make some designs on the red flower petals.
Step #10: Pasting Pistil
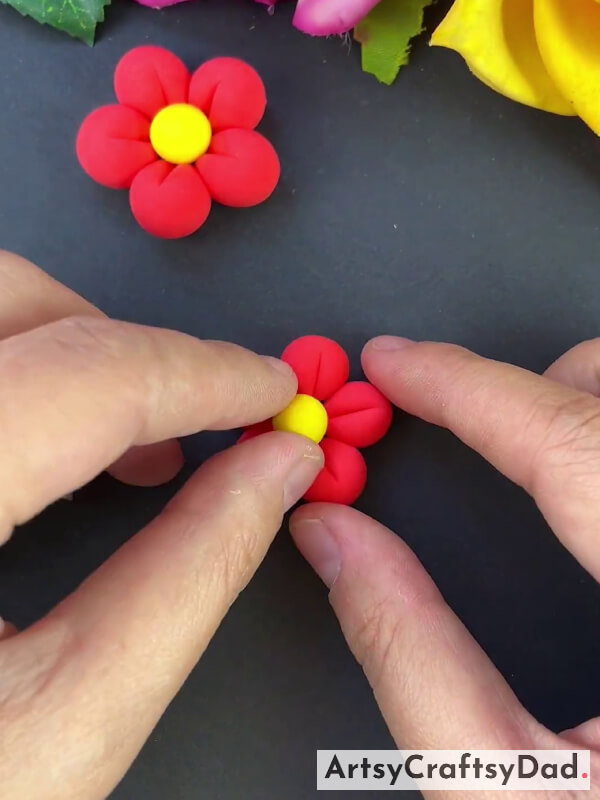
Take a yellow clay ball and paste it in the center of the flower.
Step #11: Pasting Flowers On Flower Stem
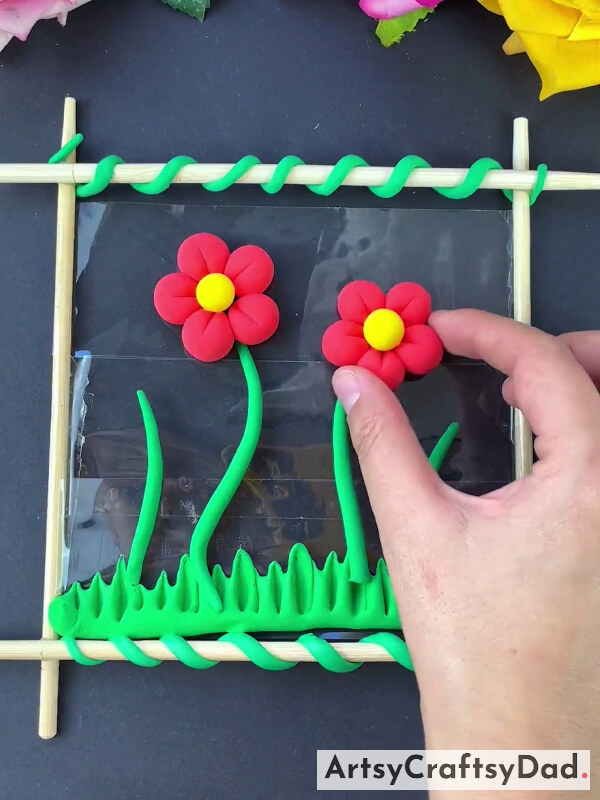
Paste flowers on top of both stems one by one.
Step #12: Making Bees

For the rest of the flower stems repeat the same process. Take yellow clay & make a ball of a honeybee’s body then paste it on the top left side between two flowers. Take blue clay make honeybee wings & paste them over the bee’s body. After making one honeybee repeat the same process for the other one & paste it on the top right side between the frame.
Step #13: Making Mushrooms
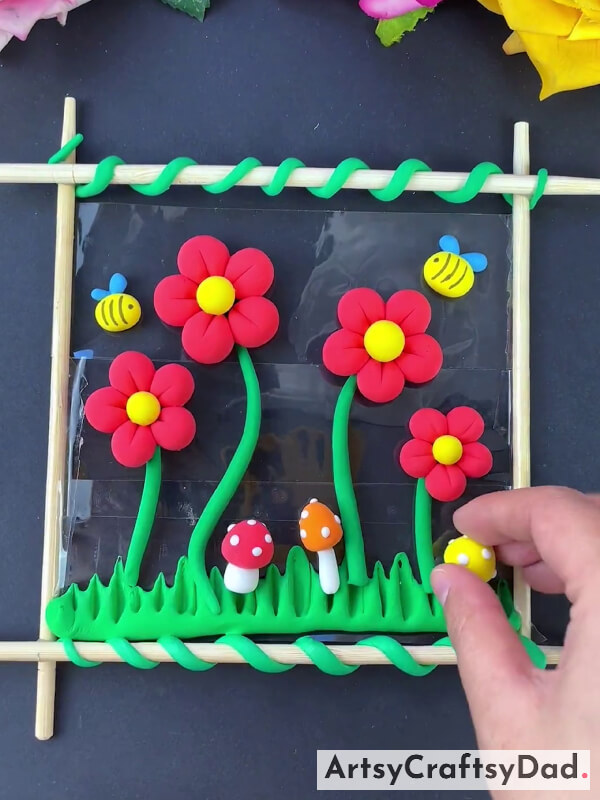
Now, take white clay & make a mushroom’s stem & paste it on the grass & then take red clay & make mushroom’s cap & paste it on the top of the stem. After that make tinny clay balls & paste them on the cap. Make two more mushrooms using orange & yellow clays by the same process & paste them on the grass.
Step #14: Making Flower Leaves
Make leaves using green clay & paste them on the mushroom’s stem.
Step #15: Creating Small Flowers
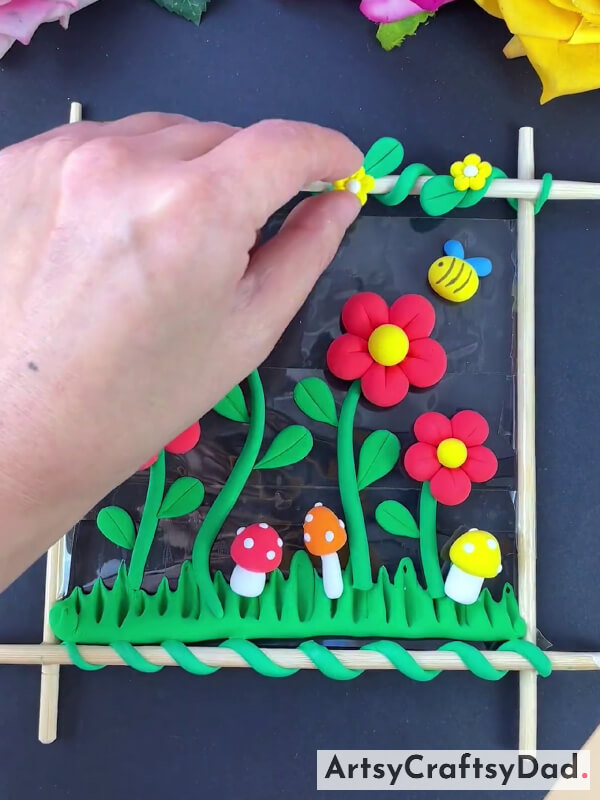
Make leaves with the same process & paste them on the top frame stick. Furthermore, make flower petals with yellow clay balls, & paste them on the top frame stick. Now, take white clay & make a little ball as a flower pistil & paste it between the flowers. Repeat the same process & make more flowers like that.
Step #16: Pasting More Flowers
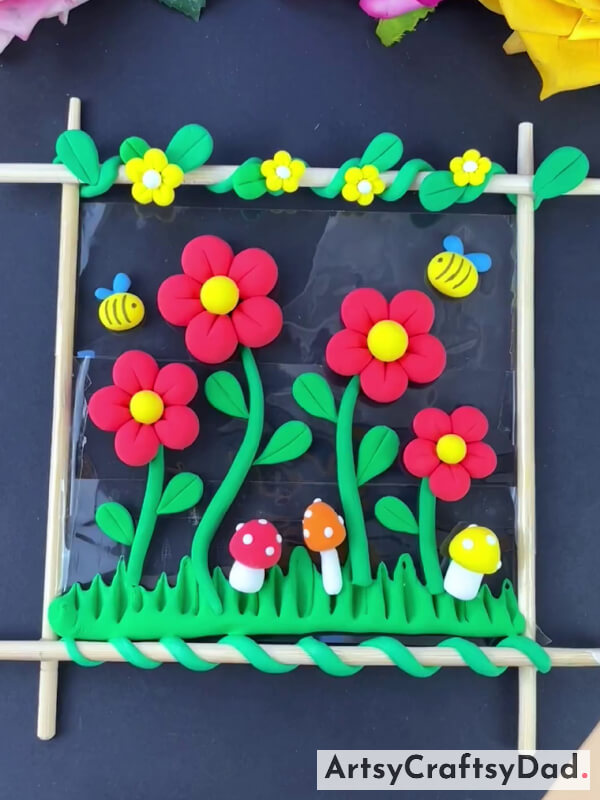
Paste the flower on a complete stick.
Final Look Of Clay Spring Flower With Chopstick Hanging Craft!
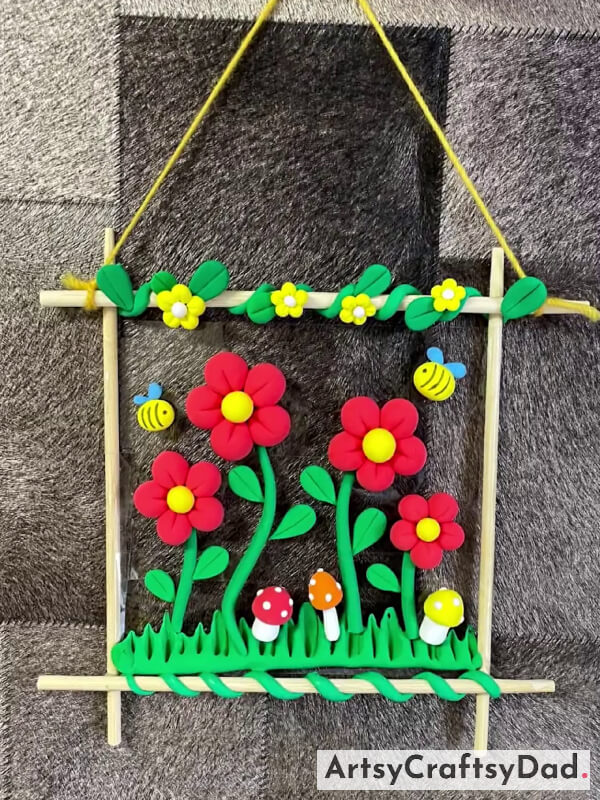
Now, take a strong thread & tie the top frame stick ends as shown above, and hang it in your preferred place. Our Spring Flower Hanging Craft is Ready.
Your crafting journey of making spring flower hanging crafts has ended here. Decorate your home with this hanging craft. Creating a clay spring flower hanging craft with chopsticks is not only a fun and creative activity, but it also allows for a beautiful and unique decoration to brighten up any space. Please share your thoughts in the comment section because we love to hear from you.
Thanks for visiting our website!
You Might Also Like This
- Beautiful Clay Flower Vase Craft Tutorial For Beginners
- Orange-Yellow Flower Climber Clay Craft Tutorial
- Clay Flower Vase Model Craft Tutorial For Kids
- Flower Bouquet: Clay & Tissue Craft Tutorial
- Beautiful Clay Flower Garden Craft Tutorial For Beginners

