Take a flight to the crafty world with your creation! This is a step-by-step tutorial on making a retro plane craft using leaves!
Do you find retro planes cool? If yes, then you are at the right place! This step-by-step tutorial will guide you on making a retro plane using leaves! A fun, creative, and budget-friendly craft, just for you! This craft is perfect to make on a boring afternoon to have a blast with driving your motor skills and creativity! Plus, what’s more amazing than creating something with mere waste? As the fallen leaves are used for nothing, hurry to your garden and collect them to make it!
Retro Plane Craft Using Leaf For Kids
Must Read: Caterpillar Over Leaf Scenery: Leaf Craft Tutorial
Tools & Supplies
- White Circular Paper Sheet
- Scissors
- Glue
- Fall Leaves (Green And Red)
- Leaves (Green And Yellow)
- Black And White Pen
Leaf Retro Plane Instructions
Step #1: Pasting A Drop-Shape Leaf
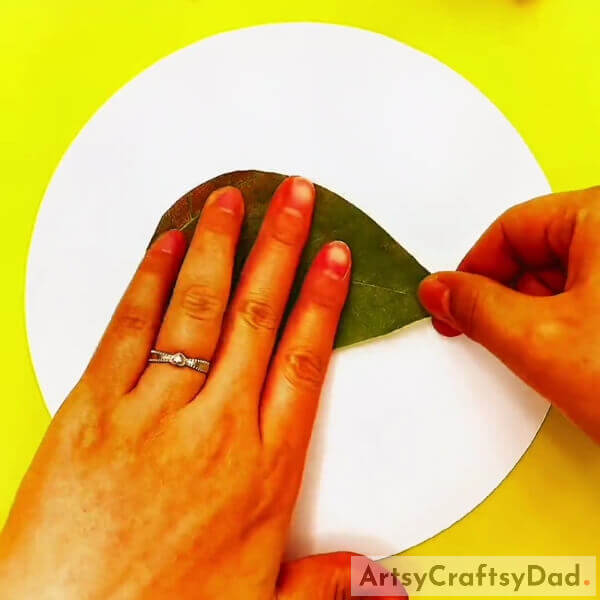
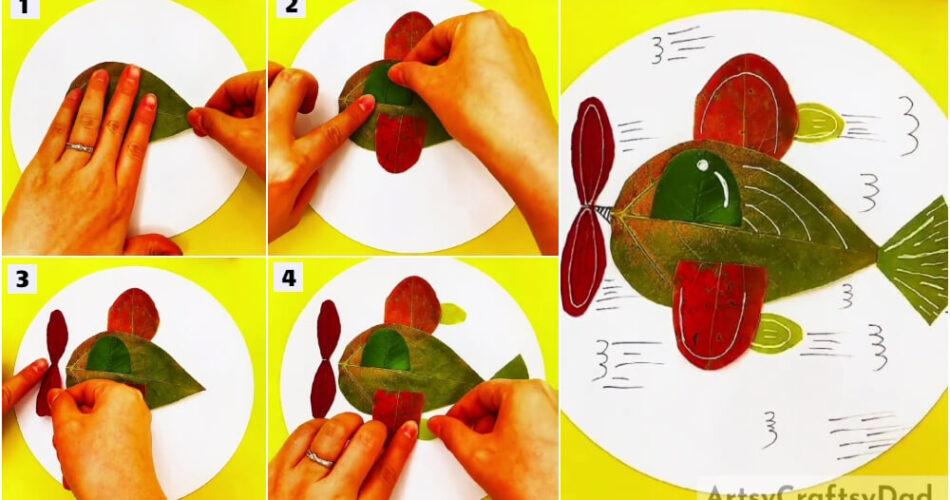
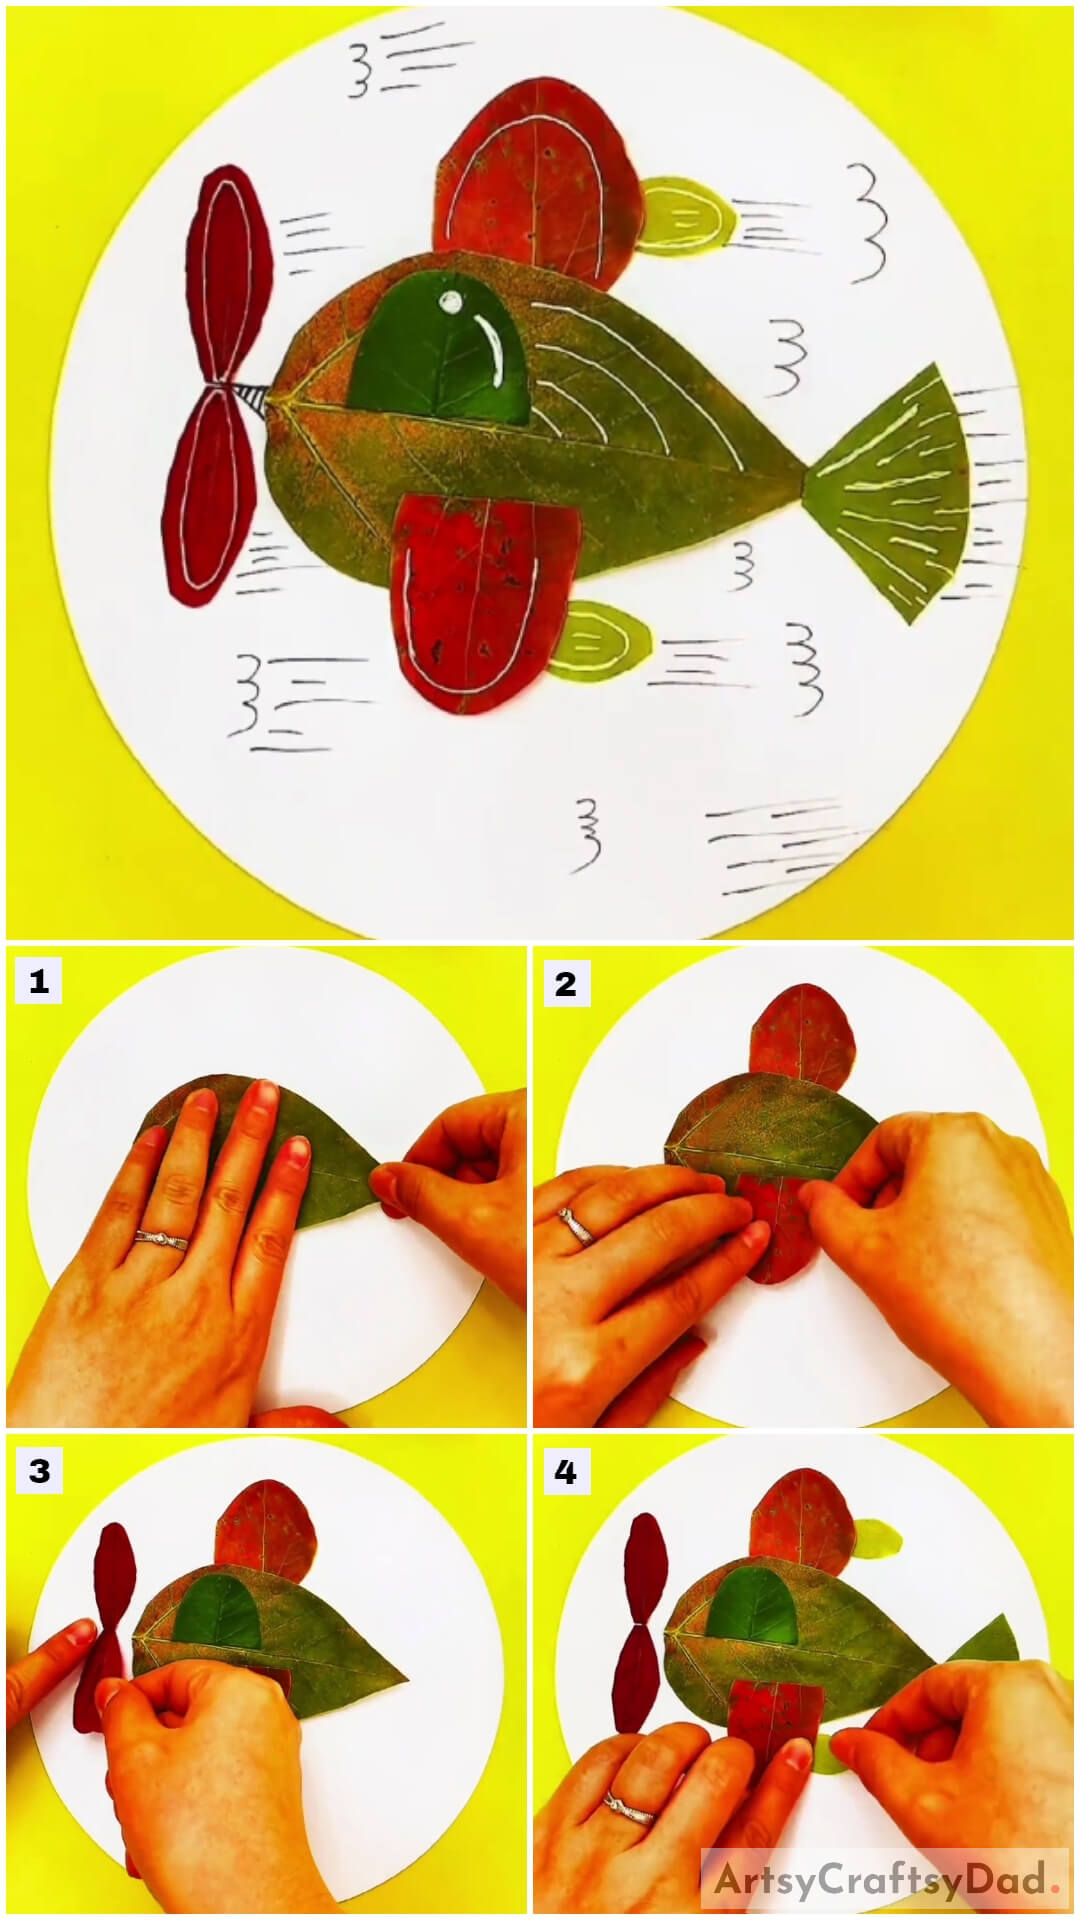
Begin this craft by taking a white circular paper sheet as the base for the craft, a pair of scissors, and a green-colored fall leaf. Using scissors, cut the leaf into a drop shape and paste it over the base horizontally tilted using glue. See the image for reference. This will be the body of your retro-plane.
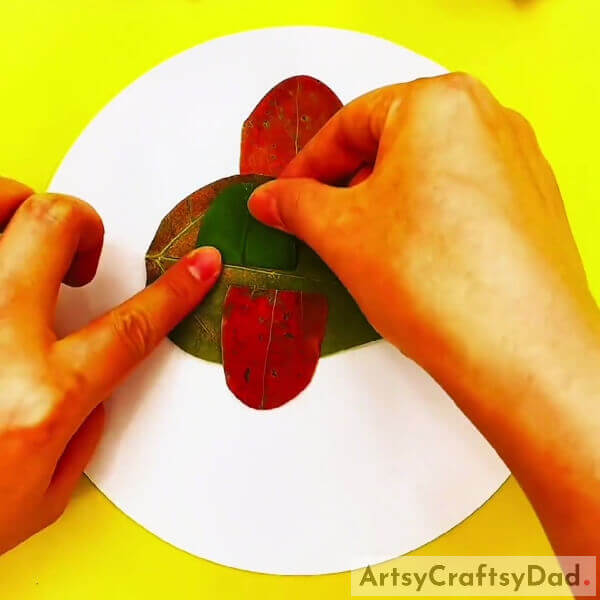
Step #2: Making Wings Of The Plane
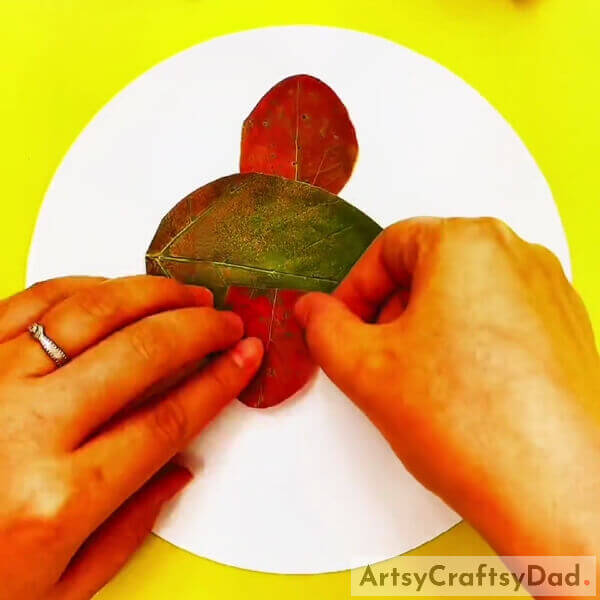
Take a red fall leaf and cut out 2 semi-ovals from it using scissors. Paste these semi-ovals on the upper and bottom parts of the plane. Paste the upper one from the back of the plane on the base and the bottom one half over the plane and half over the base using glue as shown in the image. These will be the wings of the plane.
Step #3: Making A Window
Using scissors, cut out a semi-circle from a green leaf and paste it on the upper half of the plane on the left side using glue. See the image for reference.
Step #4: Making eh Rotating Blade Of The Plane

Using scissors, cut out an infinity loop shape from a red fall leaf and paste it vertically ahead of the plane i.e. on the left side using glue. See the image for reference.
Step #5: Making The Tail Of The Plane
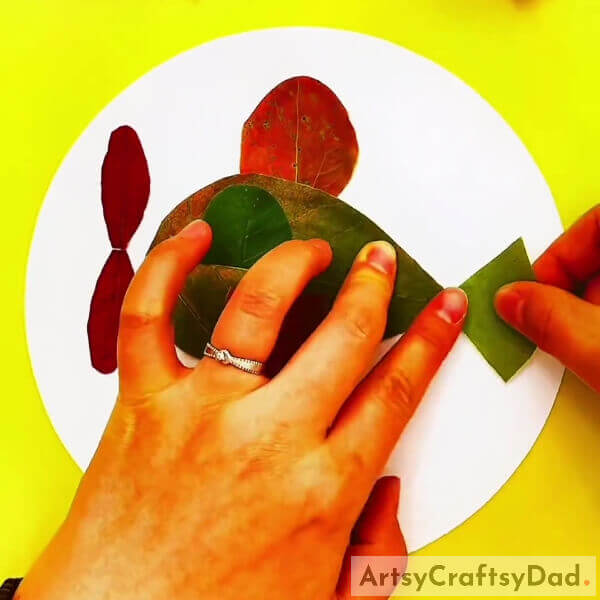
Cut out a triangle shape from the green leaf using scissors and carve its one side curvy i.e. bulging out. Paste this figure at the back of the plane i.e. on the right side using glue as shown in the image.
Step #6: Making The Plane’s Engine
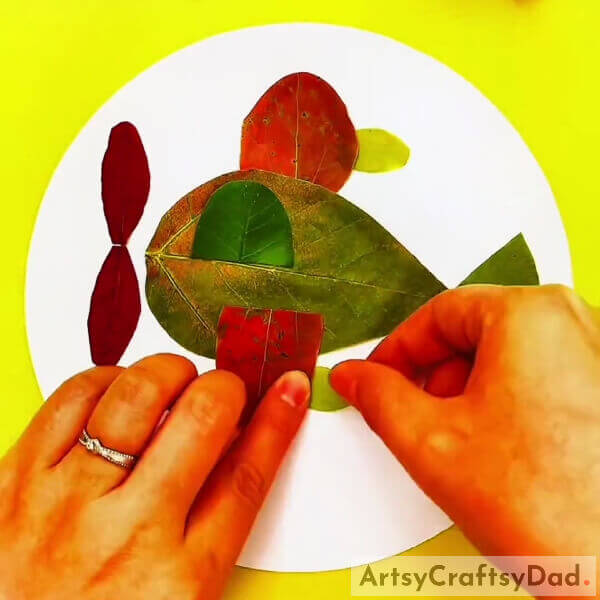
Using scissors, cut out oval shapes from the yellow leaf and paste them one-on-one to the right side of the wings on the base and half of the below the wings using glue. These will represent the engine of the plane.
Step #7: Making The Plane Look Like Flying In the Sky
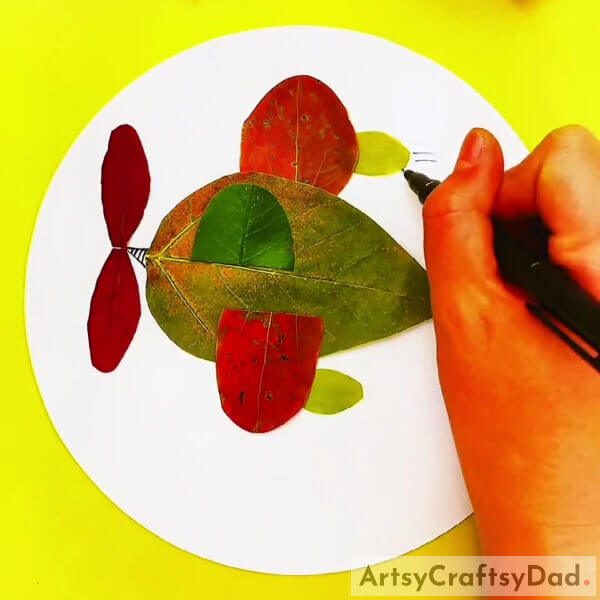
Using the black pen make the triangle shape behind the rotating blades to the plane to attach them to the plane and also make small vertical lines in it. Also, make the horizontal strokes behind the engine to make them look like giving air and make these horizontal strokes collectively on the base randomly to make the plane look like flying in the sky. To add more details, make bumpy vertical lines in front of the horizontal strokes and randomly over the base.
Step #8: Detailing The Plane

Using a white ink pen, make a dot on the upper right side of the window and make a curvy line below the dot along the window outline to make it look shiny. Also, make curvy lines over the wings by leaving some gaps from the boundary and along the boundary.
This Is The Final Look Of Your Leaf Retro Plane!
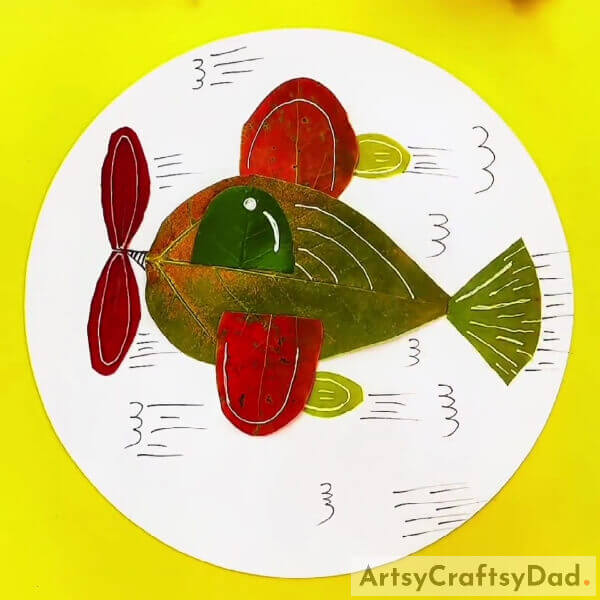
For the last step, detail your plane wholely using the white ink pen, and make the rotating blade boundaries by leaving some gaps from the leaf boundary and along it. In the same way, make boundaries on the engines. Also, make the slanting lines on the tail randomly along the leaf boundary. At last, make curvy lines on the upper half of the plane beside the window along the leaf boundary. See the image for reference.
Tada! Your retro plane is ready to take the flight!
You can now decorate this piece of craft in your room to show it off to everyone who comes by! I’m sure everybody will admire your creation and innovative skills! This craft can also be the first step into your artistic or pilot career! As dreams and goals are set from childhood. You can also use this craft as your school craft project and stun everyone! See everyone envies you being the teacher’s favorite, hehe!
We are hoping you liked the article! Share it as much as you can to motivate us to bring more such crafts for you! Also, give your feedback in the comment section below!
You May Also Like
- Beautiful Girl In Leaf Dress Craft Tutorial For Kids
- Leaf Ballerina Pose – Drawing Craft Tutorial For Kids
- Leaf Fox Craft Step-by-Step Tutorial For Kids
- Popsicle Stick Airplane Craft Model Tutorial For Kids
- Leaf Fish Swimming Underwater Craft Tutorial


