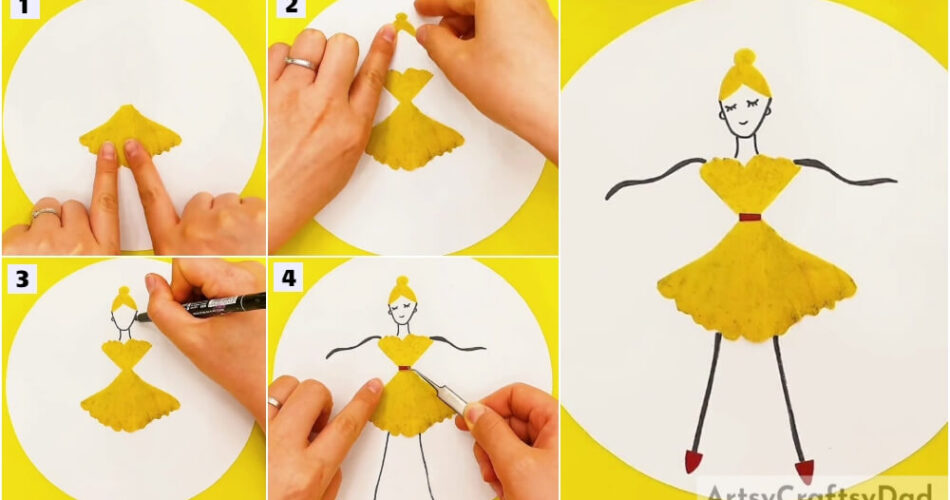
If you love how a ballerina poses then this step-by-step tutorial will guide you to make a ballerina in a graceful pose using leaves!
Have you ever seen a ballerina dancing? If yes, then you definitely know how graceful she looks in her usual poses! If not, then we will show you! This step-by-step tutorial will guide you on making a ballerina in a graceful pose using the fall leaves you can find in your garden easily! This ballerina has some elegant graceful movement just like the flow of water! The results of this craftwork will definitely be smooth and elegant and you will love it! Grab the listed materials and begin to make it!
Ballerina Pose Craft Using Leaf For Kids
Must Read: Oil Pastel Rose Bouquet Drawing Hack Craft Tutorial
Supplies & Tools
- White Circular Paper Sheet
- Leaves (Yellow Ginkgo And Red)
- Scissors
- Craft Tweezers
- Glue
- Black Marker
Ballerina Pose Craft Instructions
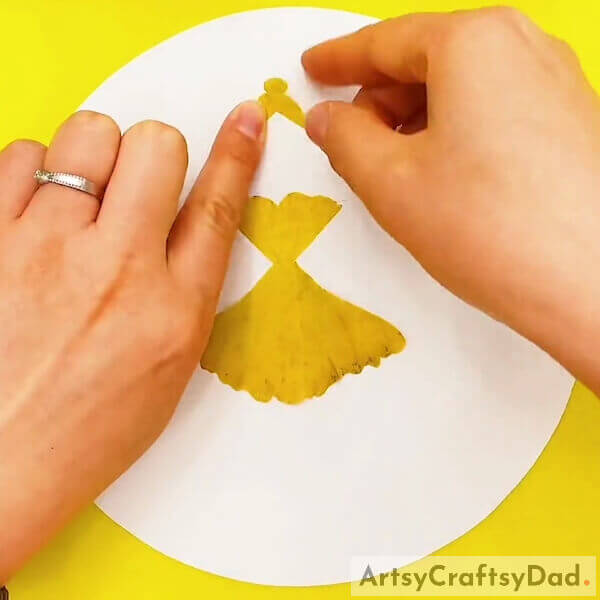
Step #1: Pasting A Yellow Ginkgo Leaf
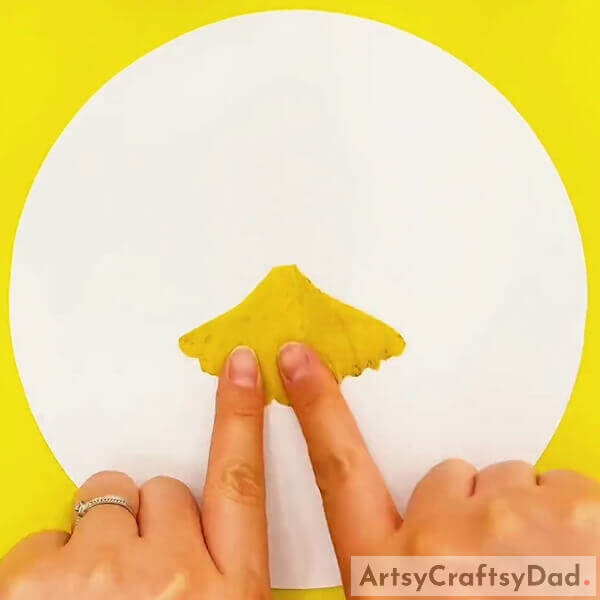
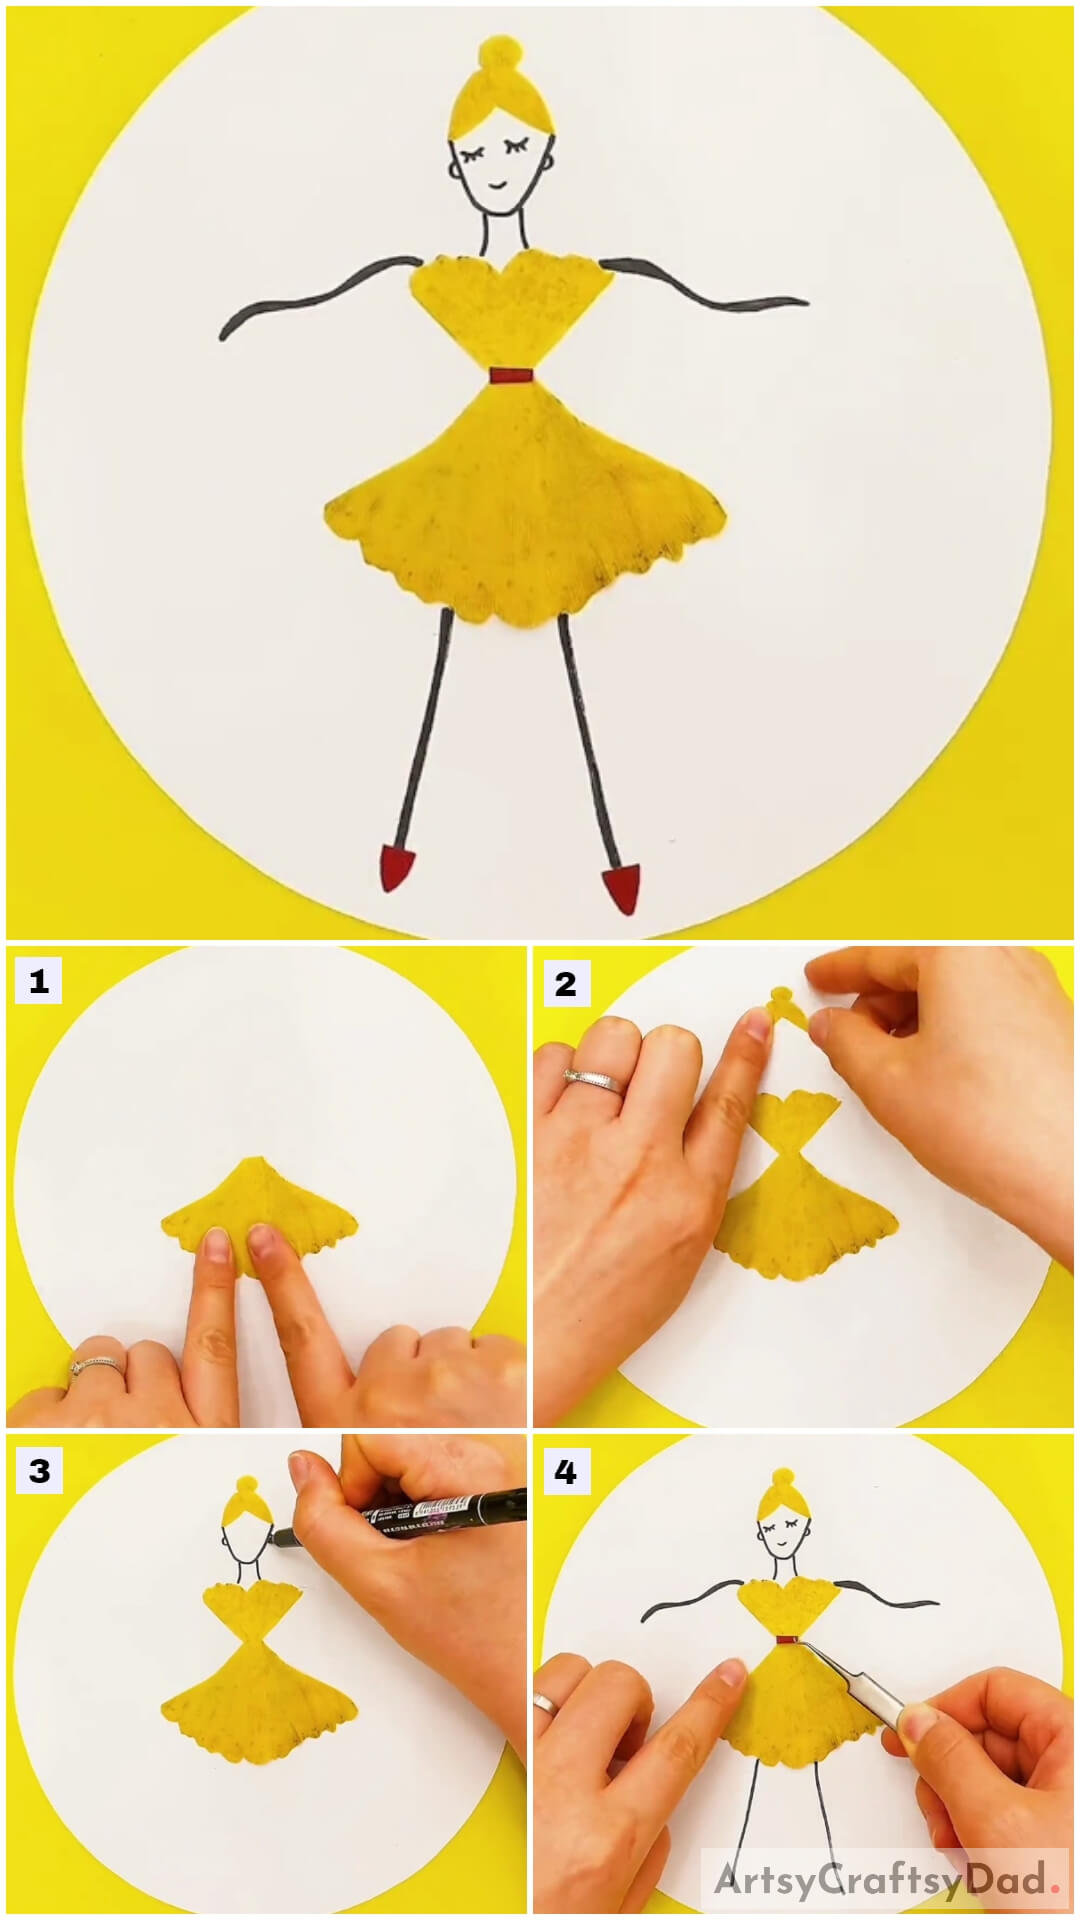
To begin, take a white circular paper sheet as the base for the craft and a yellow ginkgo leaf. Using scissors, cut the stem part of the ginkgo leaf and paste it in the center of the base using glue upside down. See the image for reference. This will be the skirt of the ballerina’s dress.
Step #2: Making The Top Of The Ballerina’s Dress
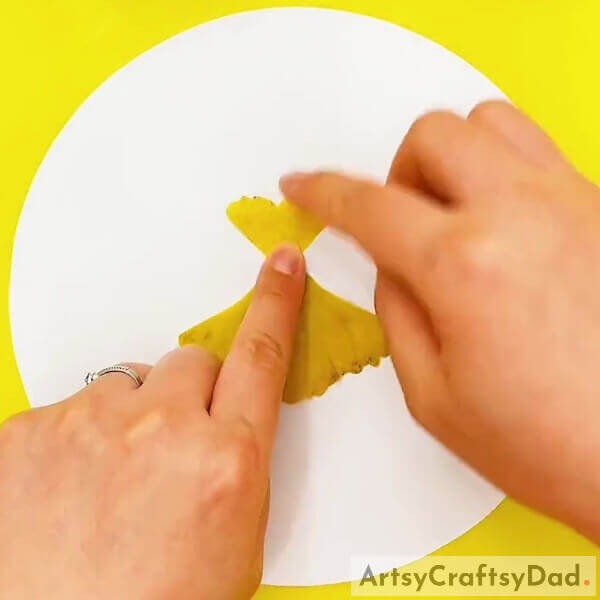
Take another yellow ginkgo leaf, this time relatively smaller than the previous one, and cut the stem part of it too using scissors. Paste this leaf above the skirt to make the top of the ballerina’s dress using glue.
Step #3: Making Hair Of Ballerina
Using scissors, cut out the hair with the bun of the ballerina from the yellow ginkgo leaf and paste it using glue on the base above the dress after leaving a gap for the face.
Step #4: Making The Face And Neck Of Ballerina
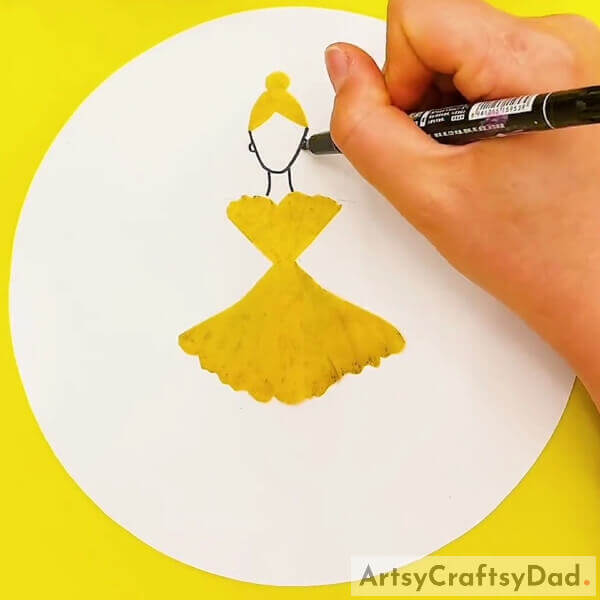
Using a black marker, make the face below the hair of the ballerina and a thin neck below the face. Also, draw the tiny loops on the sides of the face to make the ears of the ballerina. See the image for reference.
Step #5: Making Facial Features, Hands, And Legs Of Ballerina
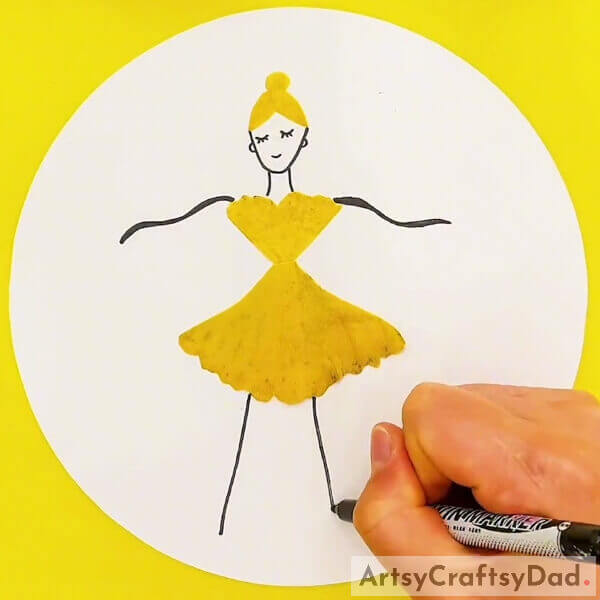
Using the black marker, make the curvy closed eyes on both sides of the face with small lashes, and a smile below and in between the eyes of the ballerina’s face. Also, make the horizontally wavy hands of the ballerina on both sides of the top. Also, make the stick-like legs of the ballerina beneath her skirt. See the image for reference.
Step #6: Making The Ribbon On Her Dress
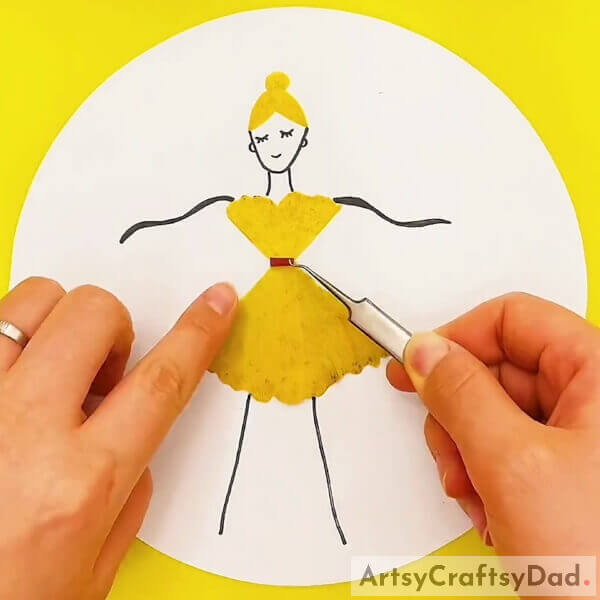
Using scissors, cut out a tiny rectangle from the red leaf, and using craft tweezers, hold it. Paste it over the middle of the skirt and top of the dress horizontally using glue to make the ribbon on her dress.
Step #7: Making Ballerina’s Shoes
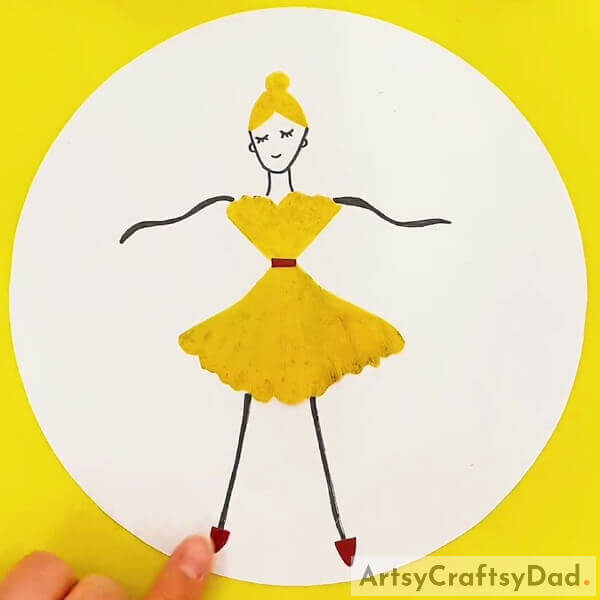
Cut out rounded triangles tiny shapes from the red leaf and paste them over the end of the legs using glue to make the ballerina’s shoes. See the image for reference.
This Is The Final Look Of Your Leaf Ballerina Craft!
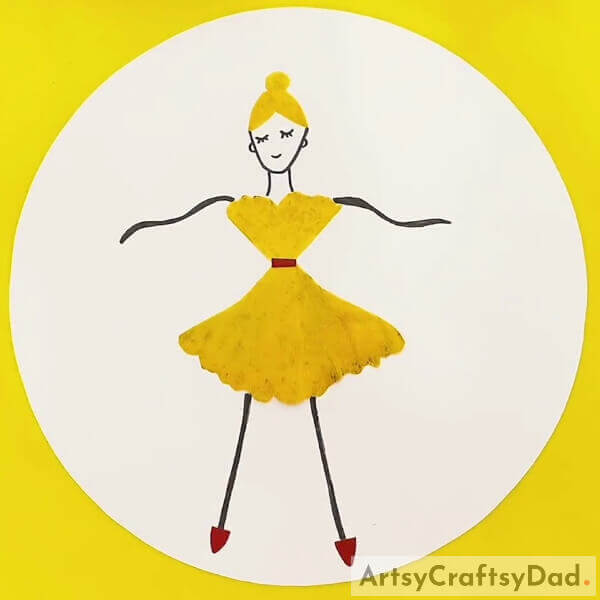
Voila! You have finally completed making your ballerina using leaves!
You can take a minute to gaze at her, can’t blame you! She is so elegant and beautiful even I can’t take my eyes off her! Well, you too have to dress well and be groomed to look graceful and eye-catching! You can now decorate this craft on your wall where you can watch her daily and she will serve as a daily reminder for you to be presentable! You can also customize her dress in any way you like, color it with paint, make textures over it, or add some craft stones to her dress! Make her as beautiful as you are!
Hope you liked the article and the description! Share it with your buddies and see who can make the prettiest one! Also, tell us your feedback in the comments section below!
You May Also Like
- Leaf Frogs In Pond Scenery Craft Tutorial For Kids
- Leaf Fish Swimming Underwater Craft Tutorial
- Clay Heart Leaf Tree Craft Tutorial For Kids
- Clay Snails On Leaves Craft Tutorial For Kids
- Hand Gesture Outline Giraffe Drawing Tutorial For Kids

