This is a Hen Face: Shading Painting step-by-step Tutorial for Kids. This activity focuses on basic shading techniques. It is apt for a beginner.
This is a Hen Face: Shading Painting step-by-step Tutorial for Kids. This is a suitable activity for kids of ages around three and above. This activity requires very little time to do and is very minimal with the requirements of effort as well. This will give you an idea regarding an easy and simple way to shade in painting. You can utilize and make use of this technique in the future. Grab the following materials and let us get started.
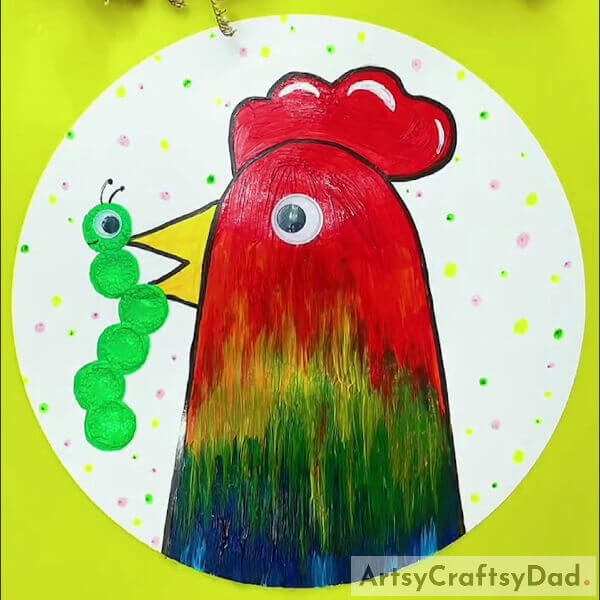
Easy Hen Face Shading Painting For Kids
Must Read: Golden Mimosa Flower Painting Tutorial
Tools & Supplies
- A White Sheet of Paper
- A Pair of Scissors
- A Black Colored Sketch Pen or Marker
- A Small Stamp (or Anything Small and Circular with a Smooth Surface to make Imprints)
- A Pair of Googly Eyes
- Paint Colors (Red, Yellow, Dark Green, Dark blue, Light green, White, Paintbrush)
Hen Face Painting Instructions
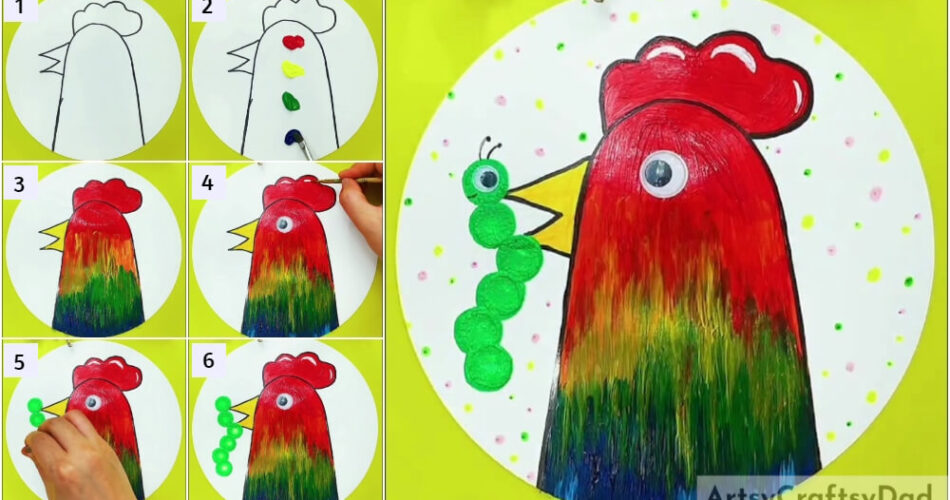
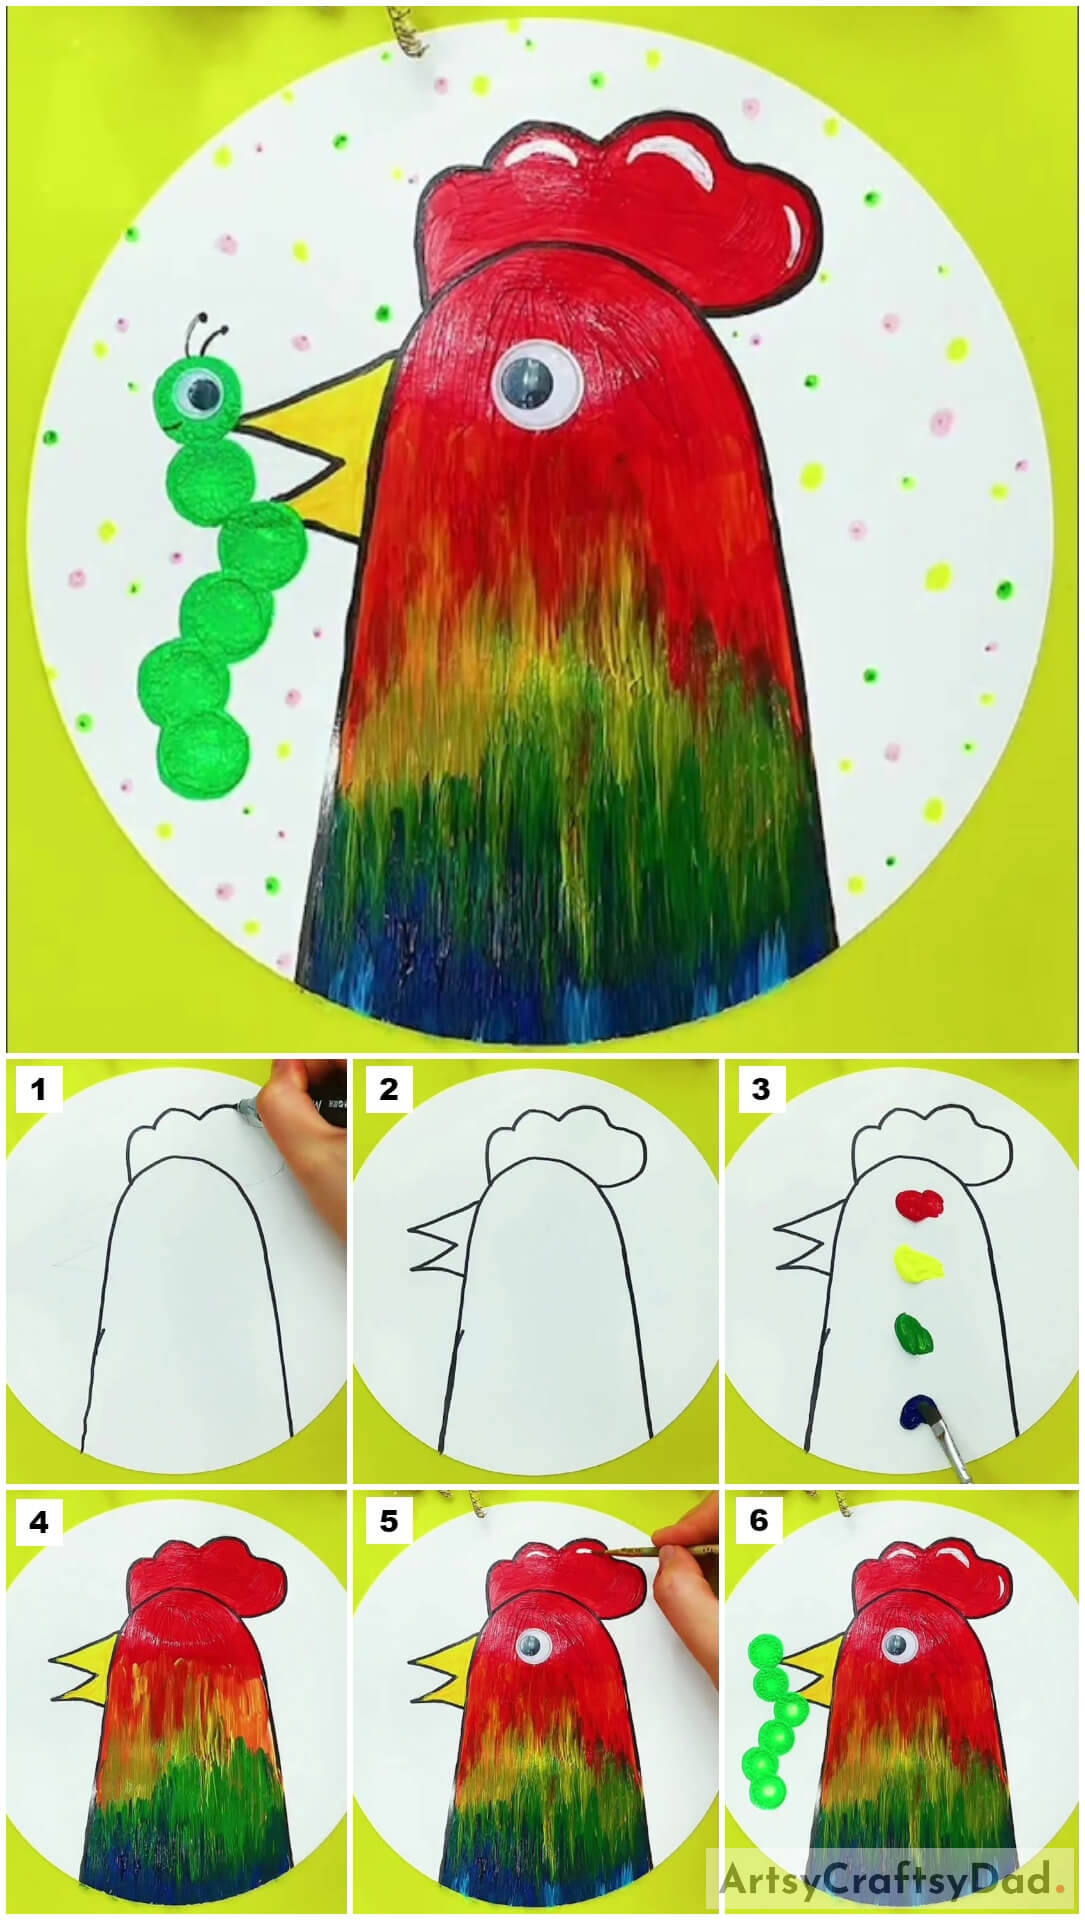
Step #1: Making The Outline Of A Hen’s Face
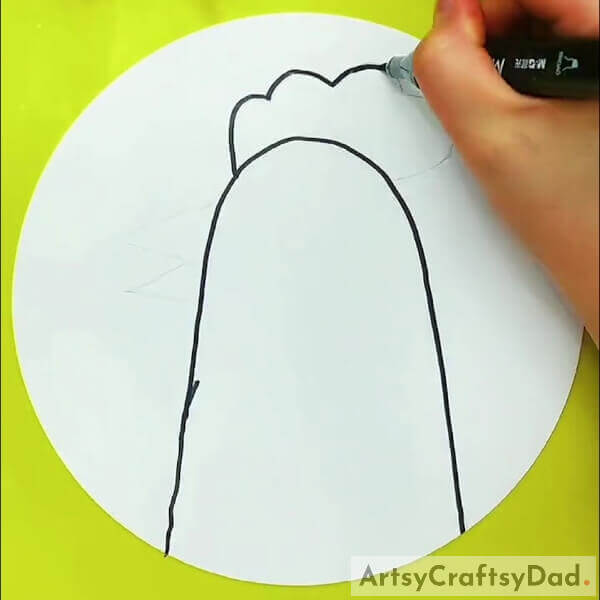
Take a plain, white sheet of paper and draw a circle on it. Cut out the circle using a pair of scissors. Take a black colored sketch pen or a marker. Using that, make an outline of the hen’s face. For some more clarity, check the reference image presented right above. That will help. Make just as that.
Step #2: Now Make The Beak Of The Hen
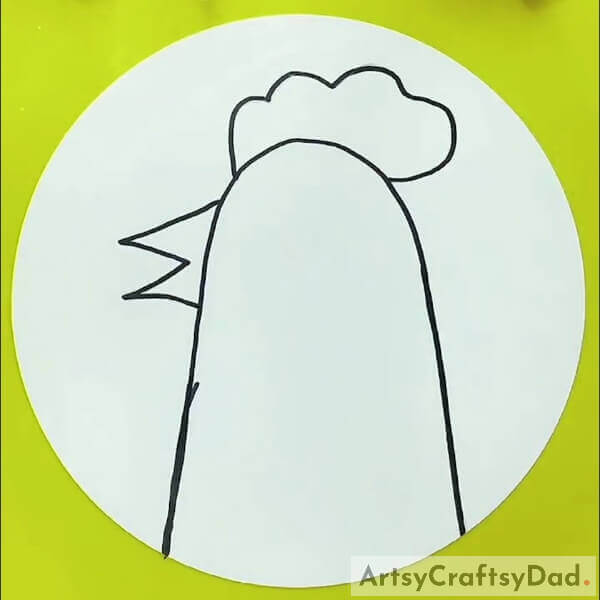
Using the same black colored marker or sketch pen, make the beak of the hen. Next, make that cloud-like thing on the head of the hen. Again, take the assistance of the reference image presented above.
Step #3: Applying Paint On The Hen In The Below-Mentioned Order

After the outline drawing is done, get yourself a paintbrush and red, yellow, dark green, and dark blue colored paints. Put some paint as shown in the reference image on the sheet, following the order, starting from red, then, yellow, dark green, and at last dark blue. Keep sort – of equal distance between them and apply equal amounts of paint.
Step #4: Now Comes The Main Part, To Shade And To Paint
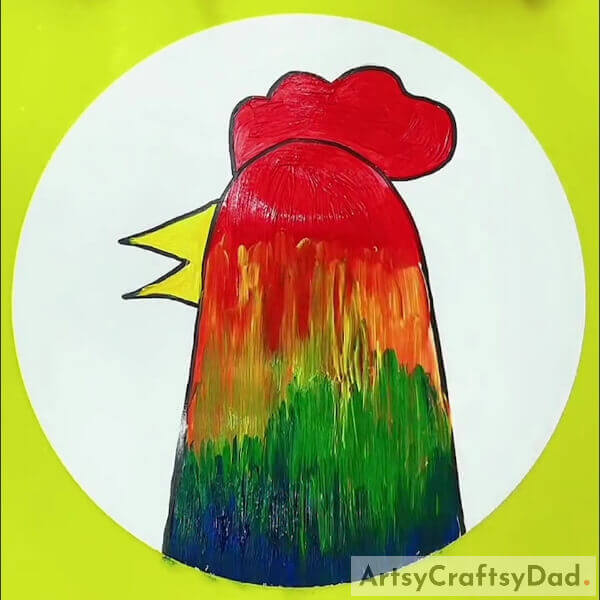
Now, well, do not let the paint get dry being the utmost priority, start by painting slowly. Start from blue and got upwards. Let the paint blend on its own, do not mess with the process or rub the paintbrush too much. Do not try to get it with perfection, that is the point. Let it blend as it does. Just make sure it looks, not exactly the same, but close to the reference image presented above. After that, color the beak using yellow paint and that cloud-like thing with the red.
Step #5: Pasting A Googly Eye On The Face Of The Hen
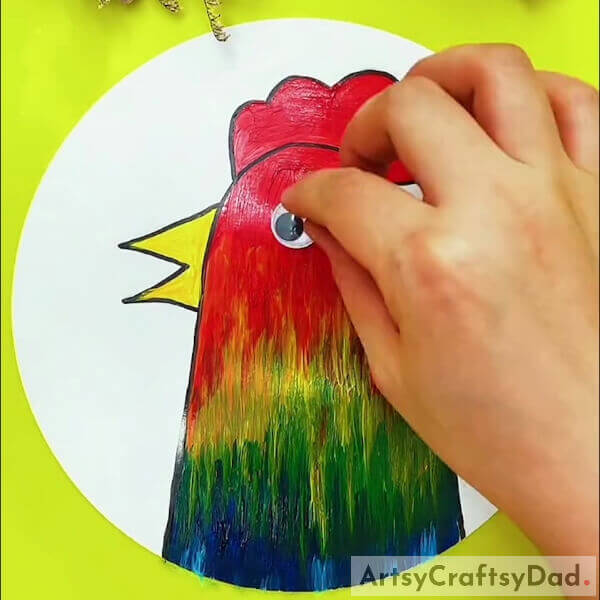
As soon as you realize that the paint is dried off, get a googly eye. Paste it on the face of the hen, just as in the image presented above.
Step #6: It Is Time For Some Details

Now, get some white paint and a thin brush. Give the details and paint just as shown in the reference image projected right above.
Step #7: Making Impressions Using Light Green Color Paint
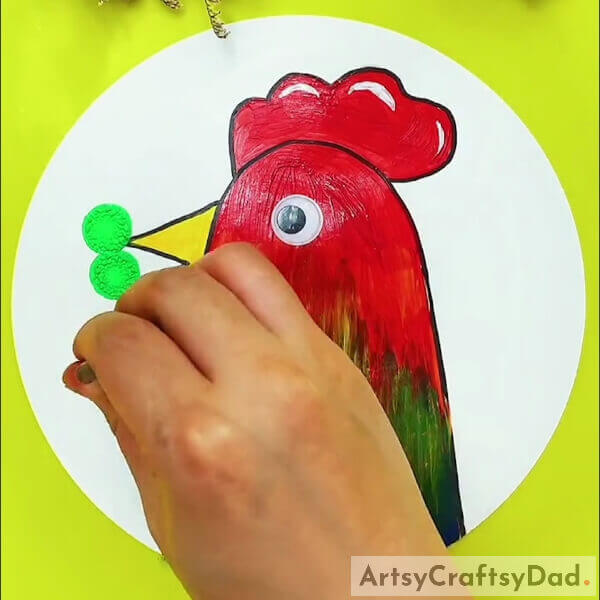
Get a stamp, a small one or something circular and small will also work. You need it to make its impression. The surface must be smooth and fine. Get light green color paint and apply it on the surface of the stamp or the circular thing. Them before it dries off, press it on the sheet, starting from just a bit above the beak of the hen.
Step #8: Continuing With The Stamping And Making Imprints
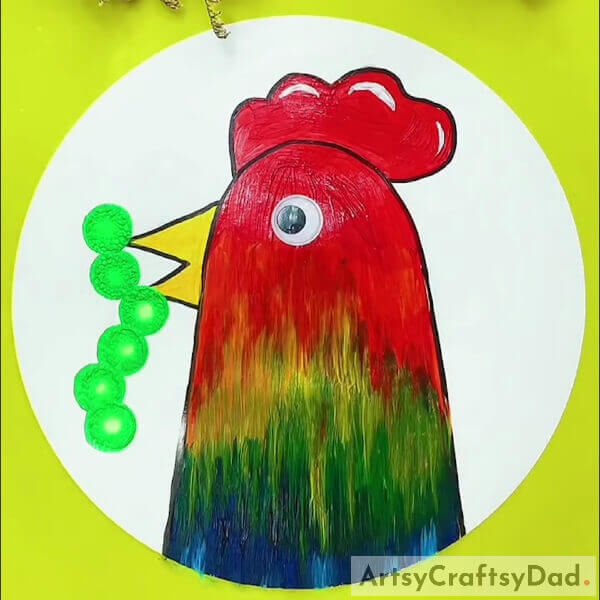
As you can see in the reference image presented above, you need or make six imprints to get the expected outcome and, in the arrangement, and position as shown in the image. This was the last step so, well, that was it. And yes, do not forget to paste the googly eyes and do the other details on the worm using a black sketch pen or a marker, just as shown in the final image, right below. That will help you.
Here It Is! Hen Face: Shading Painting
Well, here we are. Now, you can do some shading on your own. You can make different drawings or designs and practice shading. This will give you room to improve and practice.
And in case you need more ideas, tutorials, articles, or anything related to arts and crafts, go to the main website. There are so many resources present there, something will definitely catch your eye and clasp your interest. Also, do mention any suggestion or review or anything that you would like to share.
Thank you.
You May Also Like
- Giraffe Face Painting Step-by-Step Tutorial For Kids
- All Four Season Trees Painting Tutorial
- Colorful Parrot Painting Tutorial For Beginners
- Shrimps And Chilli Painting Tutorial For Kids
- Cute Dinosaur: Stamp Painting Tutorial For Kids


