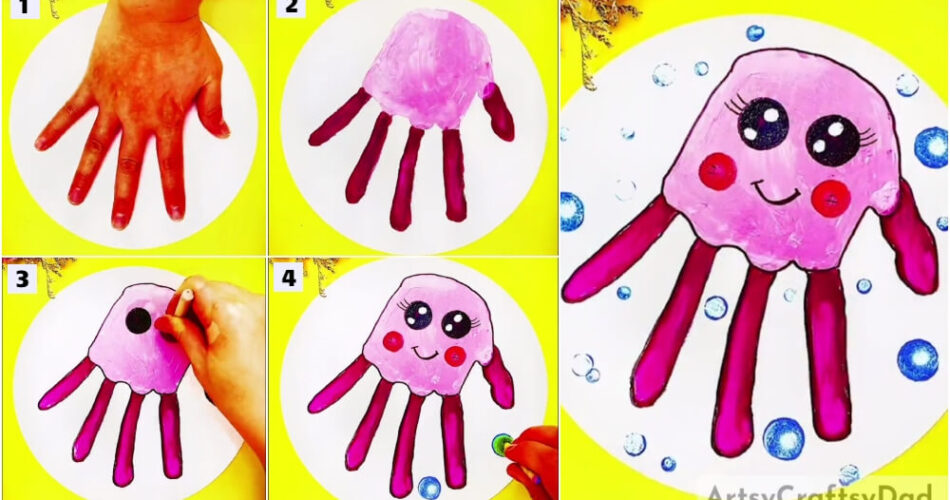
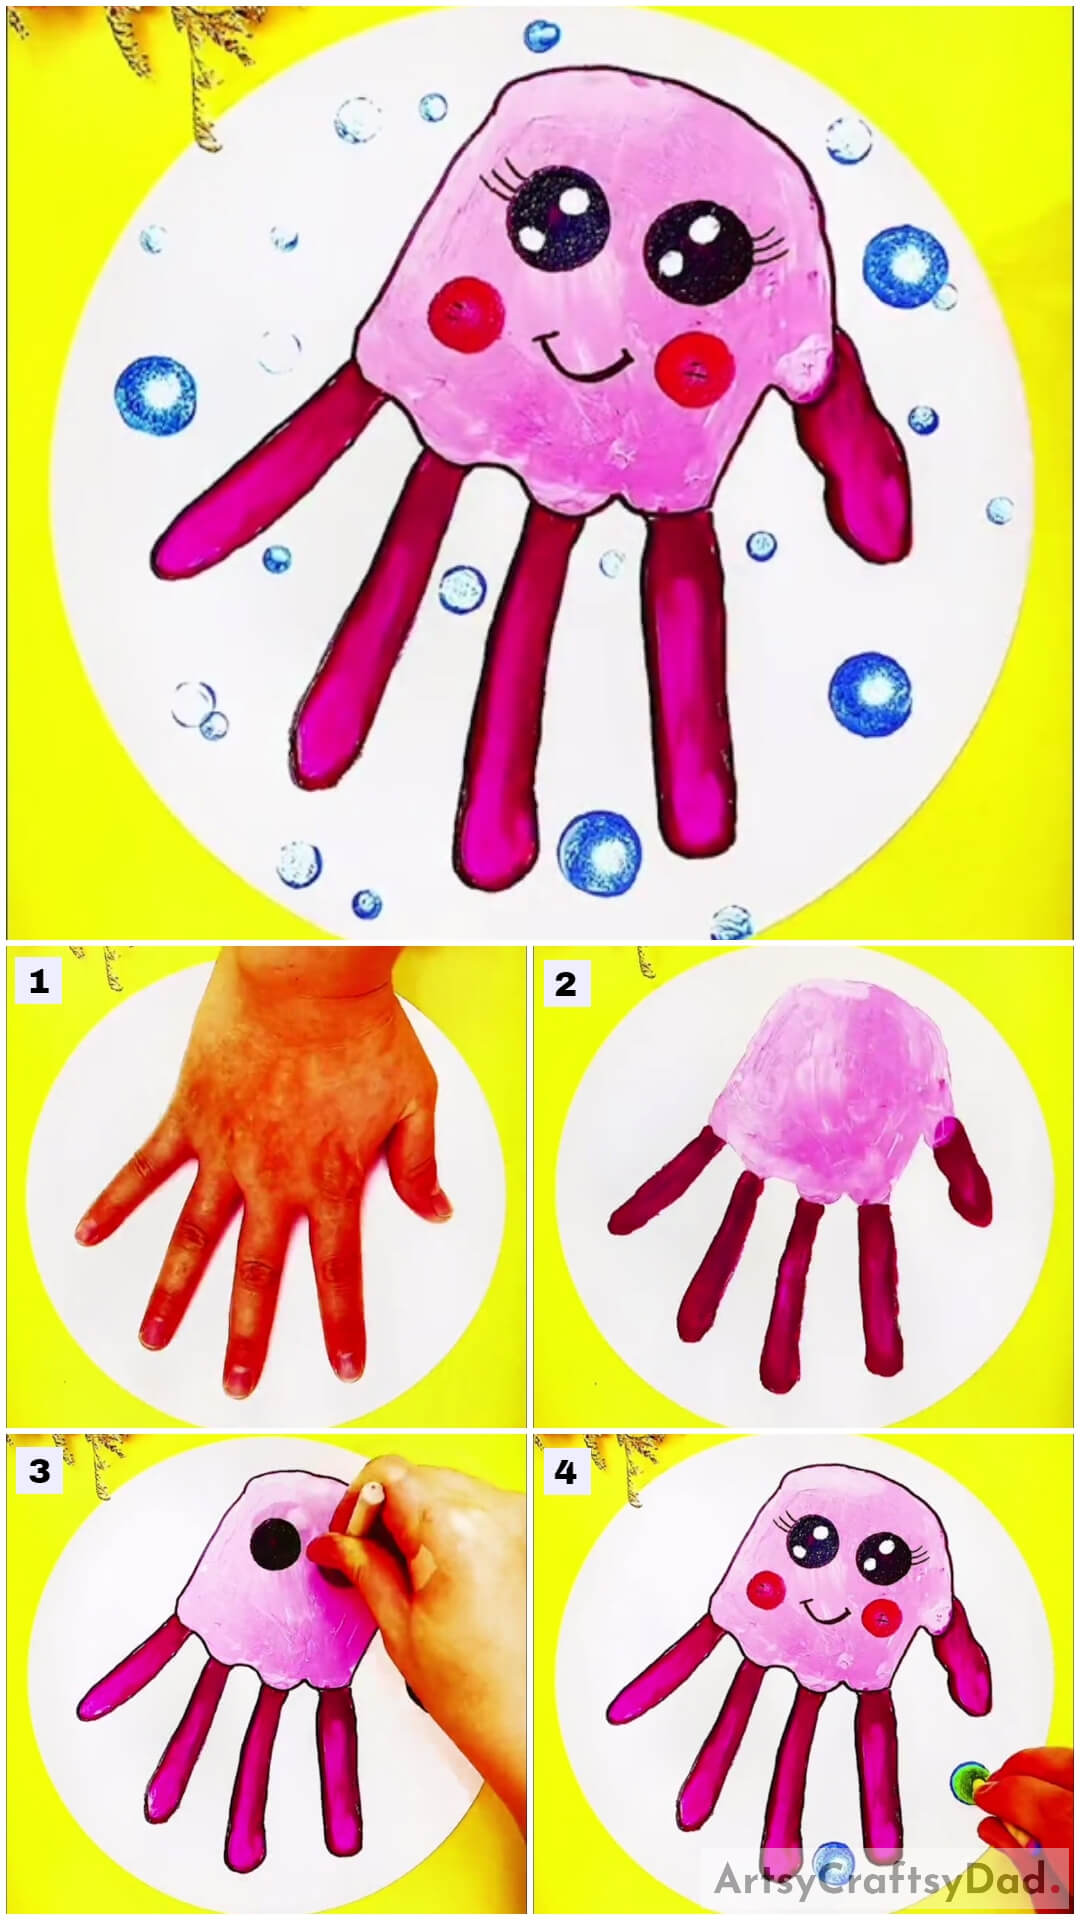
This is a Hand Impression Jellyfish Painting step-by-step Tutorial for kids. This art activity is really creative, and kids will have a lot of fun doing this. They will also get to learn something.
This is a Hand Impression Jellyfish Painting step-by-step Tutorial for kids. It is a really good fit for toddlers. It is also a very suitable painting for beginners. It is a very simple and easy painting activity. From this activity, kids will get an idea about impressions and how they can use the trick of impression in so many ways; this painting activity just being one of those many. This will be something new for the kids. The idea of painting on their hand will get them really thrilled and enthusiastic. It will turn out as quite a fun and engaging activity for the kids. They will love it. It will also make me think about it. Activities like this one enhance the creativity and imagination in kids. Well, let us get started already!
Easy Hand Impression Jellyfish Painting
Must Read: Hand Impression Cactus Painting Tutorial For Beginners
Supplies & Tools
- White Sheet of Paper
- A Pair of Scissors
- A Stamp or a Sponge or Anything Small and Circular
- An Earbud
- Paint Colors (Red Color, Blue Color, Pink Color, Crimson Color, Black Color, White Color)
- Paintbrush
- A Black Sketch Pen or Marker
Jellyfish Painting Instructions
Step #1: Painting Your Palm Hand With Light Pink Color
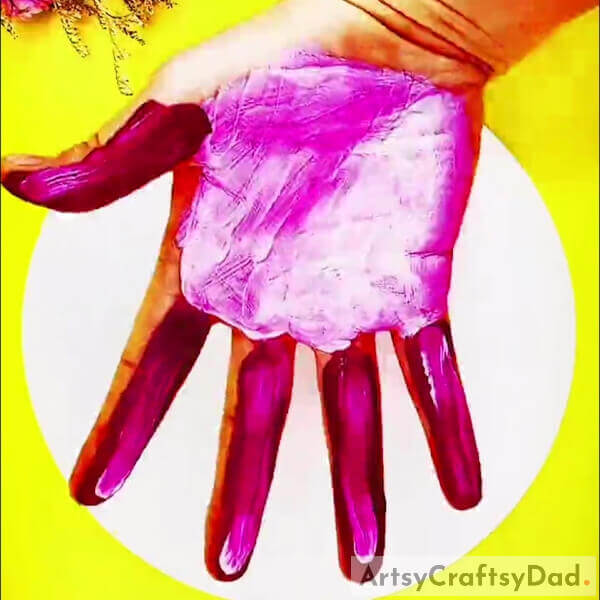
Take a white sheet of paper. Cut a circle out of it using a pair of scissors. Paint your palm using a paintbrush. Use a light pink color paint. Now, for the fingers, use the crimson color paint. Keep both the color shades separated.
Step #2: Making Hand Impression On The White Sheet Paper
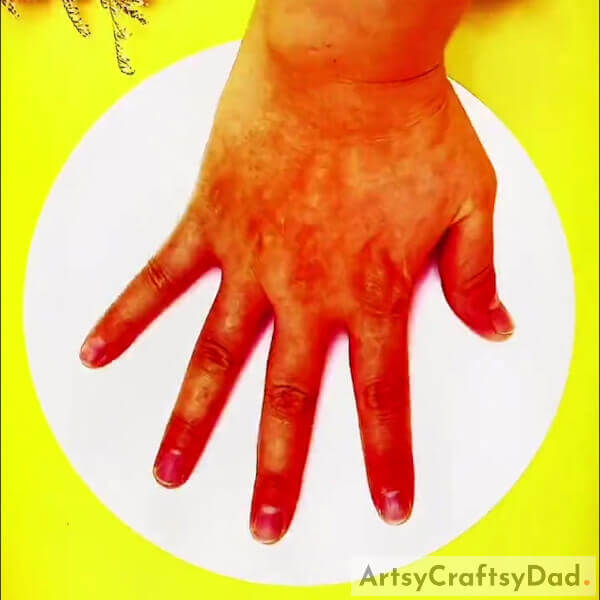
Now, quickly and without wasting any time, press your hand against the surface of the white sheet to get an impression of your hand.
Step #3: Making Hand Impression Of Palm On White Sheet Paper
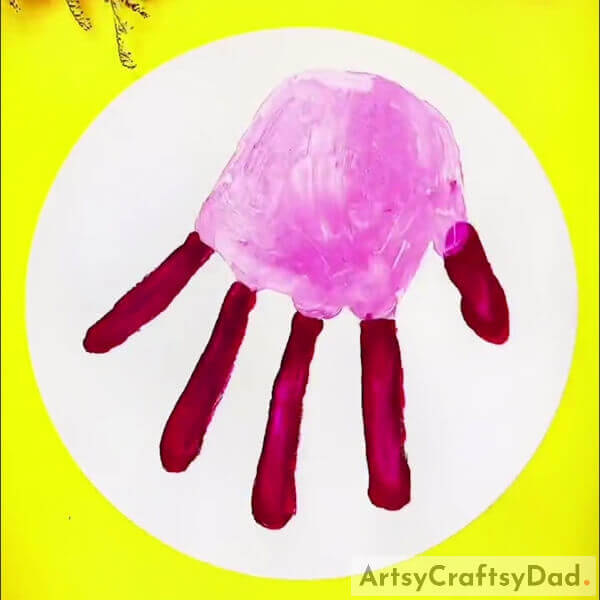
Compare the hand impression you got with the one in the reference image presented above. Make sure they look similar. As long as they look similar, you will know that you are going the right way.
Step #4: Now, Making an outline of the palm and fingers With a Marker
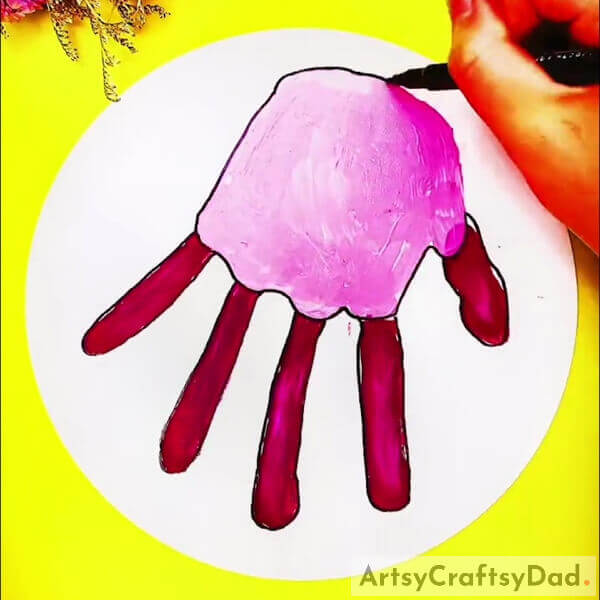
After making the impression, take a black sketch pen or marker. Using it, draw an outline of the palm and fingers the hand on the sheet, separately.
Step #5: Making An Eye With Stamping Black Paint
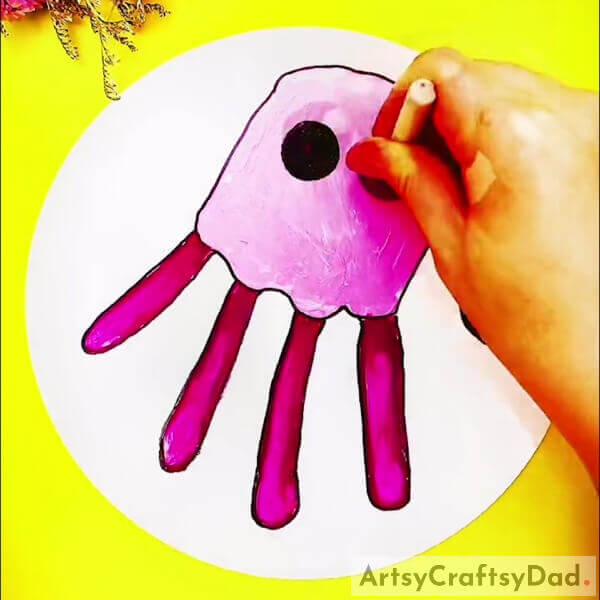
While outlining, take the reference of this image and do accordingly. Take a small stamp. If in case you cannot arrange a stamp, you can also get something small and circular; it must have a smooth and fine surface. Now, apply black paint on the surface and press it against the paper, in the opposite direction of the fingers. Make two impressions; these two circles will act as the eyes of the jellyfish.
Step #6: Taking Earbud to Make Eyes With a White Paint
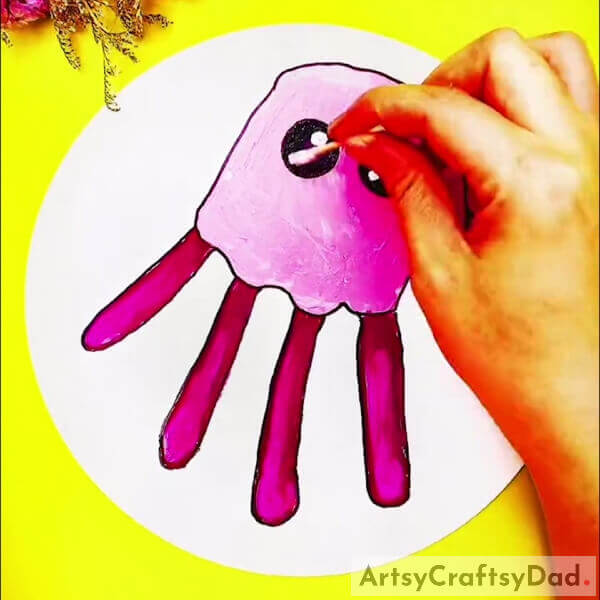
Now, grab an earbud and white paint. Dip the earbud in some white paint. Make impression of the ear bud on the eyes of the jellyfish to make the reflection. There must be two circles in each eye, hence, four in total. Using the thinnest brush, you have to make very little dots in the eyes, just sparing a small middle portion. Make sure the dots are really small and minute.
Step #7: Drawing More Features Of Jellyfish With Sketch Pen
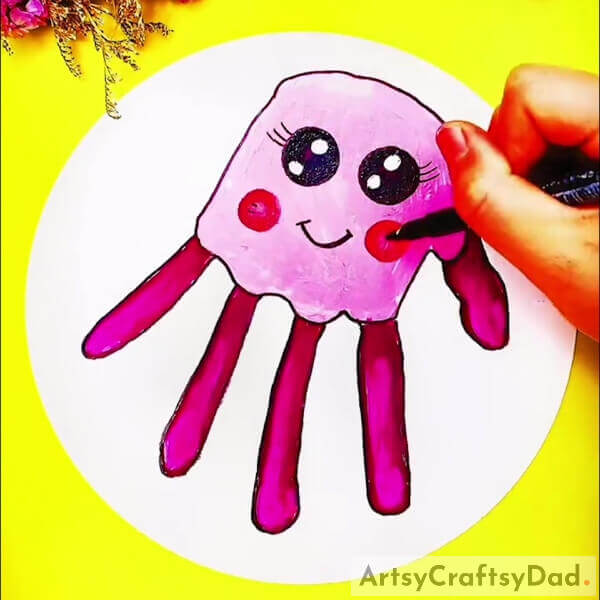
Take a black-colored sketch pen or marker and make the eyelashes and the smile of the jellyfish. Make the eyelashes only after the paint on the eyes has dried. After that, take a red colored sketch pen or marker. Using that make two little circles, each on one side of the face, below the eyes and above the smile and a little towards the outer side as compared to the position of the eyes and the smile. They are the cheeks of the jellyfish.
Step #8: Making Bubbles Around The Jellyfish
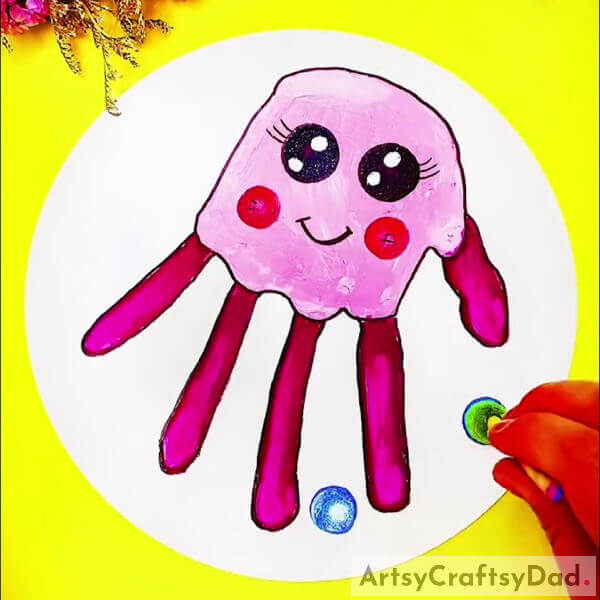
Get the stamp, sponge, or any small circular thing and paint its surface with a blue color. Now make impressions of it all over the negative space to make the water bubbles. Do it with different sizes of stamps or sponges. And well, that is it. This was the last and final step of the tutorial.
Your Hand Impression Jellyfish Is Ready!
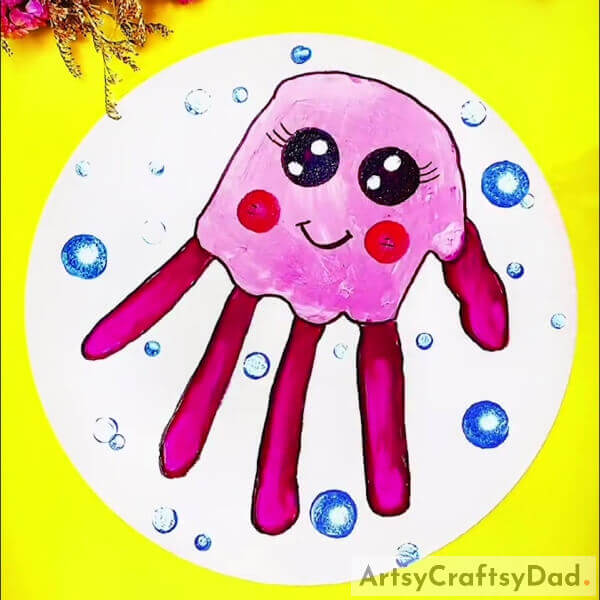
Well, here we are. Finally done with Set17_10* Hand Impression Jellyfish Painting step-by-step Tutorial for kids. We hope you learned something and had fun at the same time. Now you have an idea or more like an example, how you can use sketch pens in a more creative and different way. You can make more designs straight out of your imagination without any reference. All you need to get started with is an idea. It will be really creative and fun, really.
But in case you wish to do something else, we have a solution for that too. You can check out the main website. You will find so many articles, tutorials and ideas based on art and crafts with a lot if varieties and options to choose from. You will find at least one thing or the other that you will like. Well, keep up the art and craft.
Mention down your experience of making this, or reviews, suggestions, ideas, or literally anything that you would like to say or share, in the comment section. It will be nice to hear from you. Thank you for your time and support. Have a good day.
You May Also Like
- Hand Gesture Outline Elephant Drawing Tutorial For Kids
- Hand Outline Peacock Drawing Tutorial For Beginners
- Hand Gesture Outline Giraffe Drawing Tutorial For Kids
- Angelfish Underwater: Paper Stencil & Stamp Painting Tutorial
- Wistera Finger Painting Artwork Tutorial For Kids=


