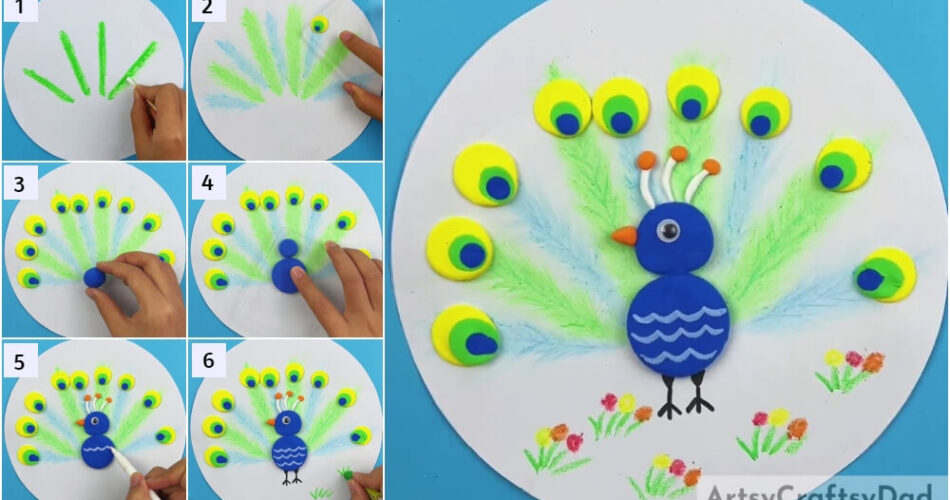
Add the most beautiful bird to your drawing and craft collection! This tutorial will guide you to make a peacock using clay & colors!
Hello and welcome to the wonderful world of crafting where we can create anything we want! So today, we brought an artwork craft on making the king of birds, peacock! This peacock artwork will basically be made using clay and colors and some other basic drawing supplies that you already have! This artwork will be a fun learning activity for your kid to do in a boring afternoon time! The results will definitely stun you and everyone! So, let’s begin to make it!
Adorable Peacock Craft Using Clay And Paper
Must Read: Clay Circles Tree Artwork Craft Tutorial For Kids
Supplies & Tools
- White Circular Paper Sheet
- Crayons (Green, Blue, Red, Yellow, And Orange)
- White And Black Marker
- Cotton Earbud
- Colored Clay (Blue, Orange, Yellow, Green, And White)
- Googly Eye
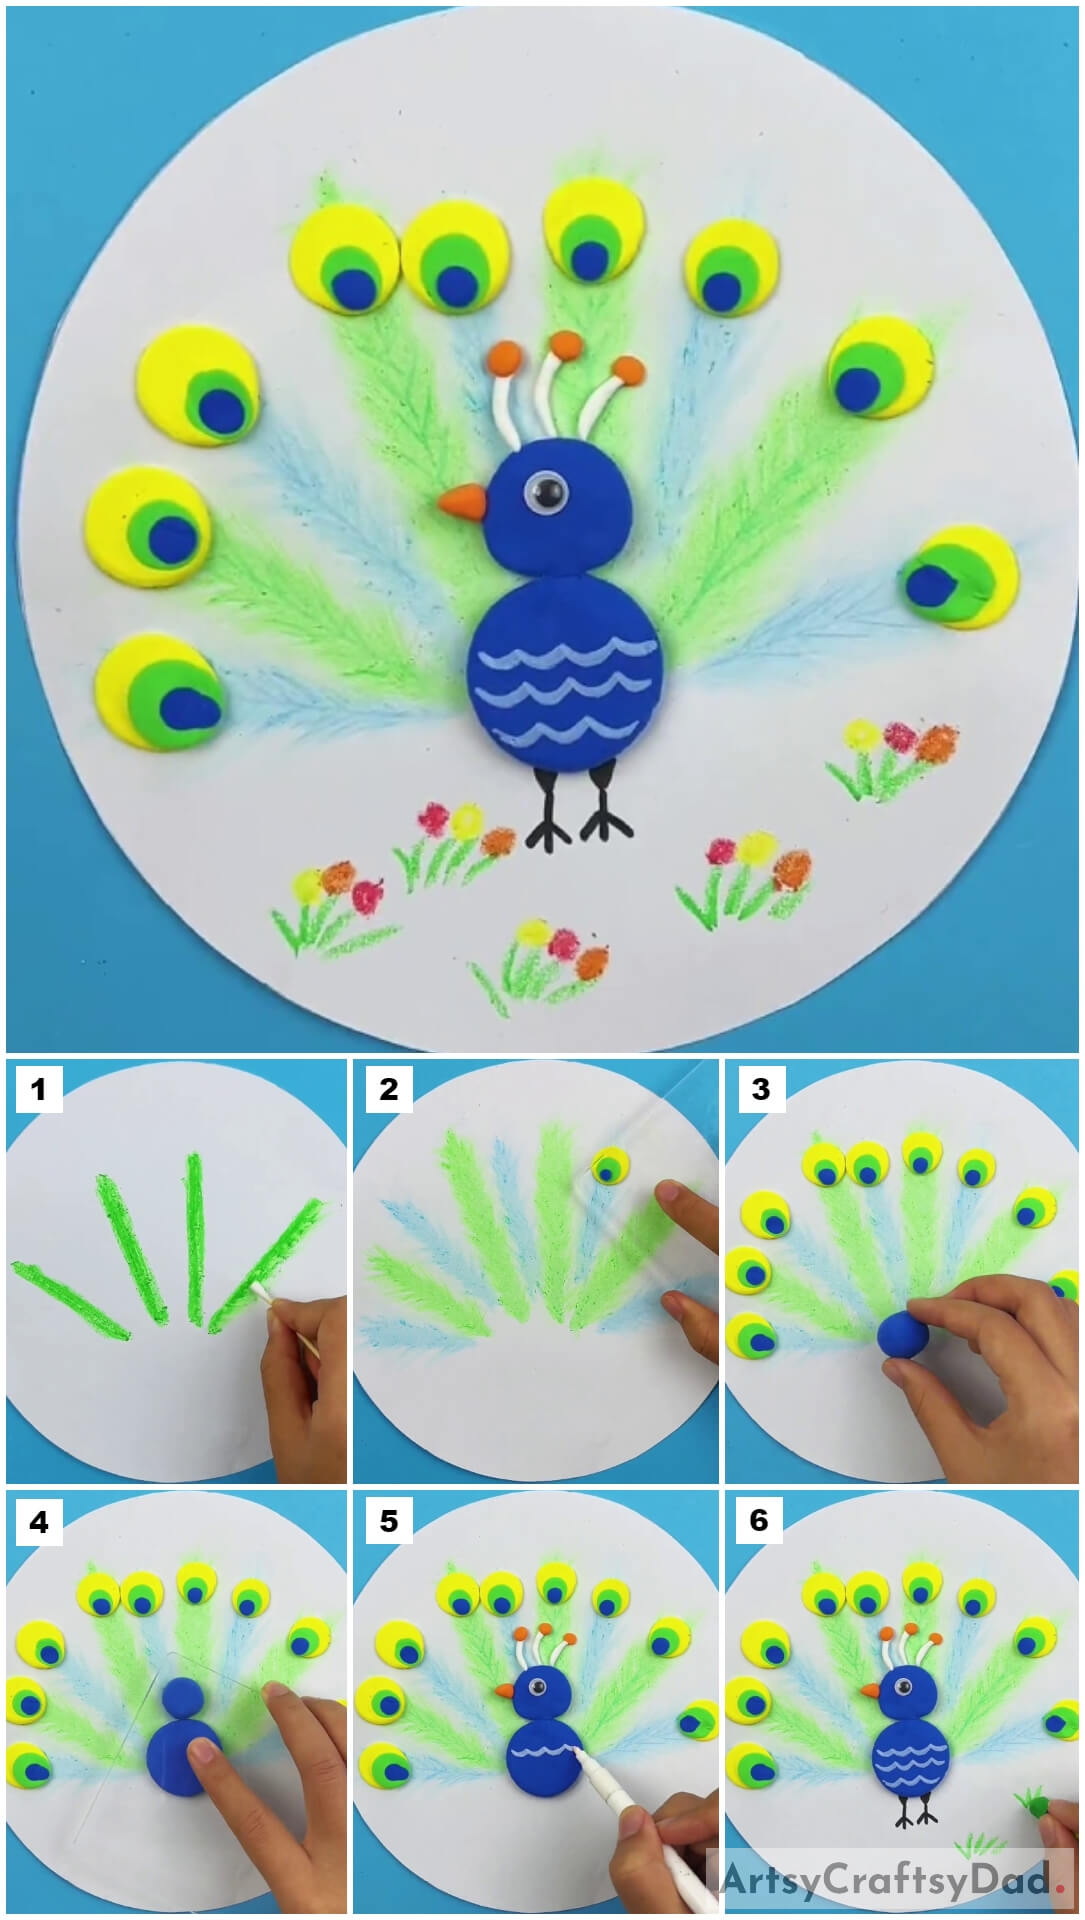
Clay Peacock Artwork Instructions
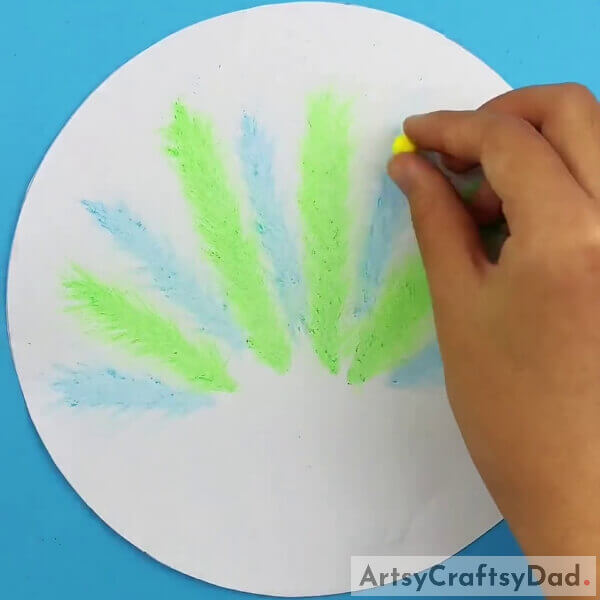
Step #1: Drawing A Slanting Line
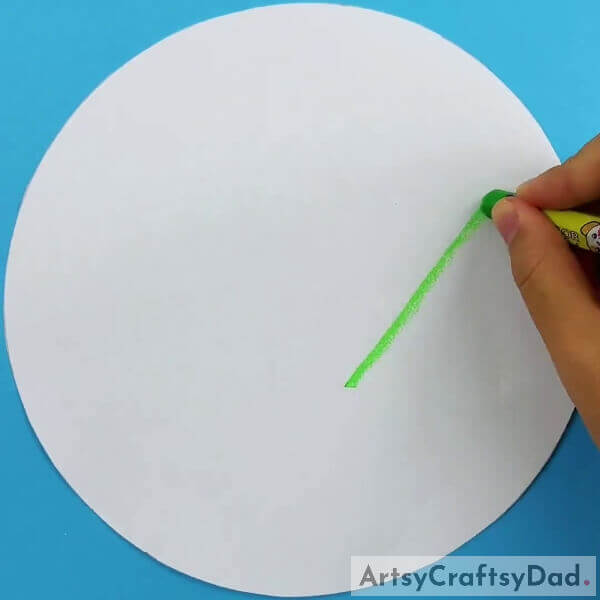
Begin this artwork by taking a white circular paper sheet as the base for it and a green crayon. Using the crayon, make a slanting line on the base tilted from right to left from top to bottom respectively on the right side of the base. See the image for reference. The will be the feather of the peacock.
Step #2: Making More Feathers And Shaping Them
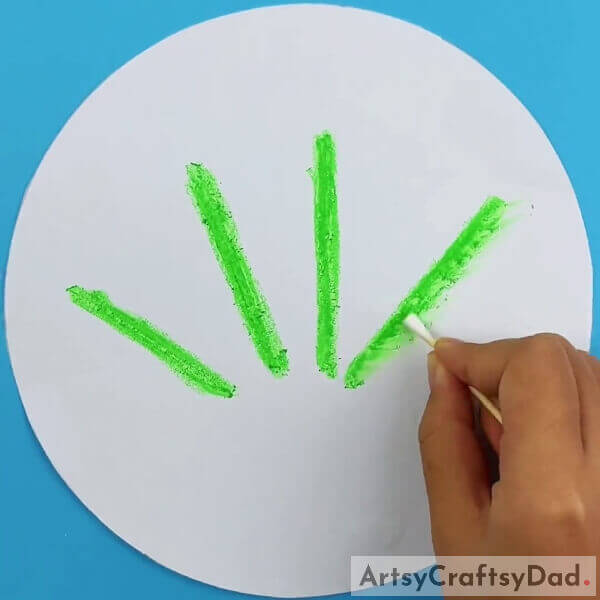
Similarly, make 3 more slanting lines i.e. feathers of the peacock beside the already-made one as shown in the image. Now, using a cotton earbud, make upward slanting strokes over the feathers wholely to shape each feather from both sides of it.
Step #3: Making The Train Of Feathers
As you make the shaped green feathers, make the crayon lines in between them and at the ends of the green ones and shape them as the feathers too to make a whole train of peacock feathers.
Step #4: Making A Clay Circle On The Top Of Feather
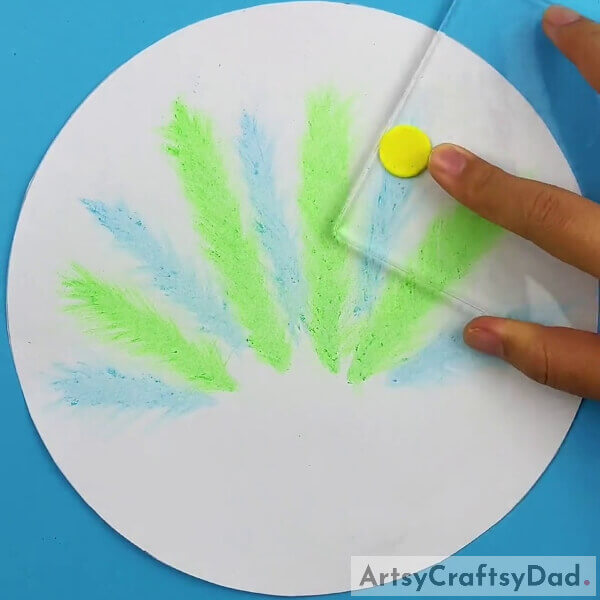
Take yellow clay and dough a small ball from it and place the ball on the top of a feather. Now, using the polymer clay pressing tool, press to flatten the ball into a circle.
Step #5: Making The Eye On The Feather
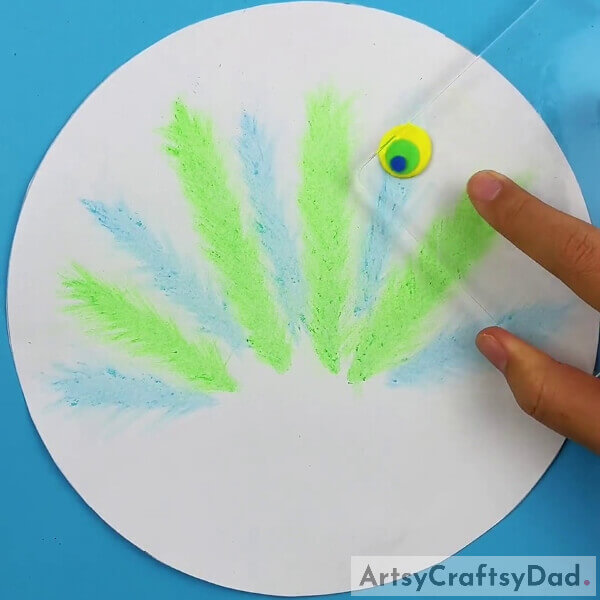
Make a relatively small clay ball of green clay nd place it over the yellow clay circle and press to flatten it using the polymer clay pressing tool. Again, make the smallest clay ball from blue clay place it over the green circle, and flatten it into a circle. You will make the eye of the feather. See the image for reference.
Step #6: Competing Making The Eyes And A Blue Clay Ball
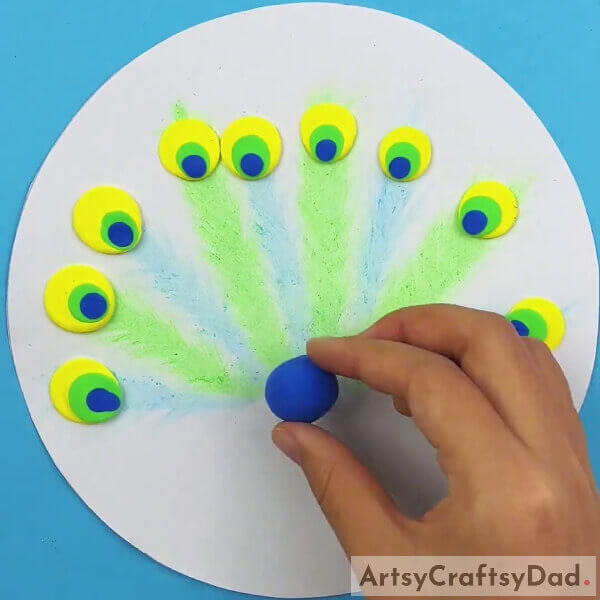
In the same way, make the eyes of the feathers on the top of each drawn feather. Now, take blue clay and dough it into a big clay ball and place it at the bottom mid of the feather train.
Step #7: Making The Body And Face Of The Peacock
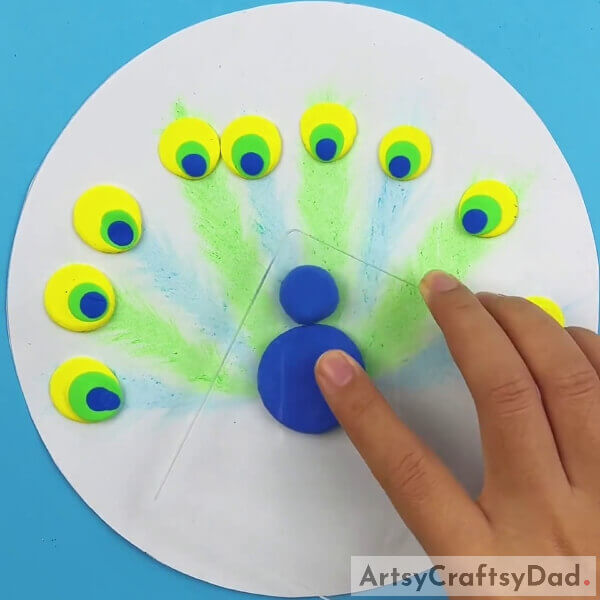
Make another relatively smaller clay ball of blue clay and place it right above the bigger one and using the polymer clay pressing tool, press and flatten the clay ball into circles and form the blue body and face of the peacock.
Step #8: Adding An Eye And Beak To The Face
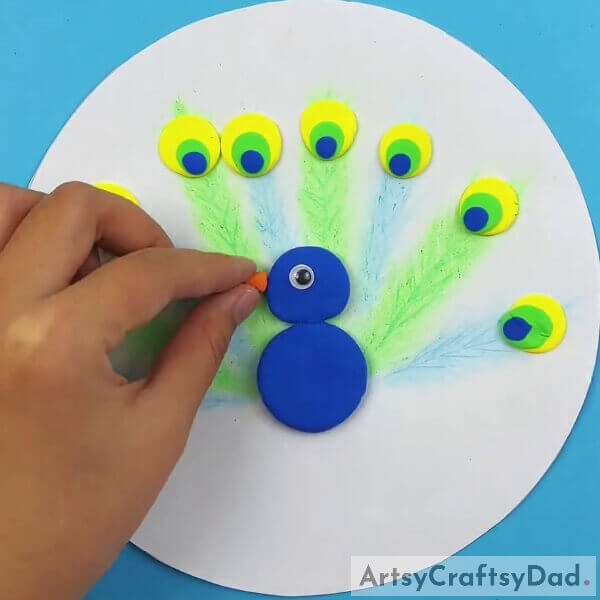
Stick a googly eye over the face of the peacock, i.e. upper blue clay circle by pressing it over. Take orange clay and make a triangular beak of the peacock over and place it on the left side to the face of it.
Step #9: Making The Peacock Crest And Detailing The Body
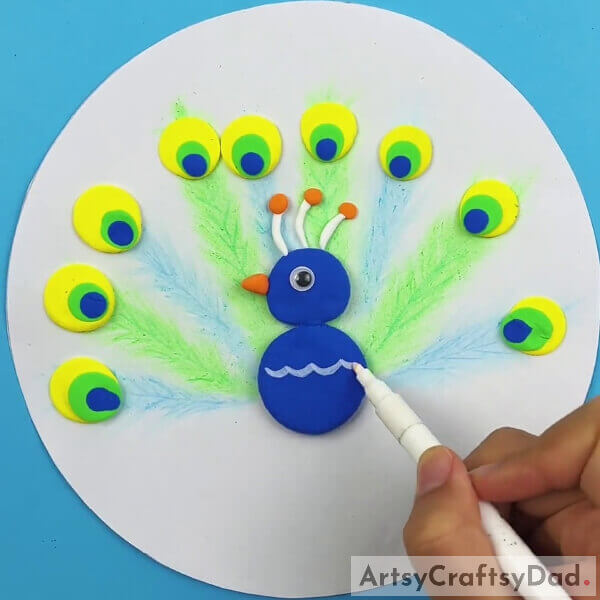
Now, dough white clay into 3 small and thin rolls and place them above the head of the peacock in a curved manner. Dough 3 tiny orange clay balls and place them above the tip of the curved white clay rolls and press to flatten them and create the crest of the peacock above its head. Also, using the white marker, make the horizontal bumpy lines from the mid-half of the peacock’s body to the bottom to detail it.
Step #10: Making Peacock’s Legs
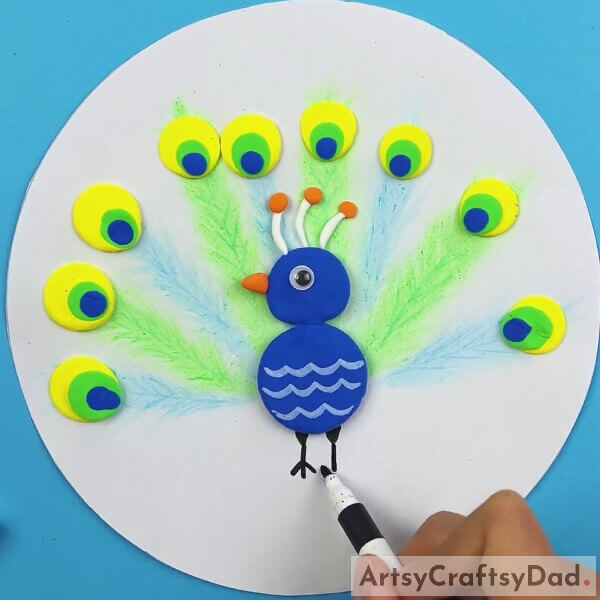
Using a black marker, make the classic stick-like legs of the peacock beneath its body. Make the 3-lined toes at the end of the legs. See the image for reference.
Step #11: Making Grass
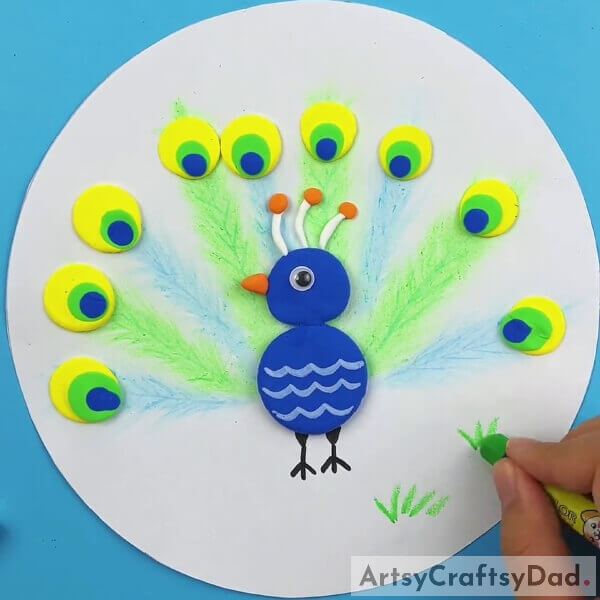
Using the green crayon, make the curvy stroked grass at the bottom of the base below the peacock.
This Is The Final Look Of Your Peacock Artwork!
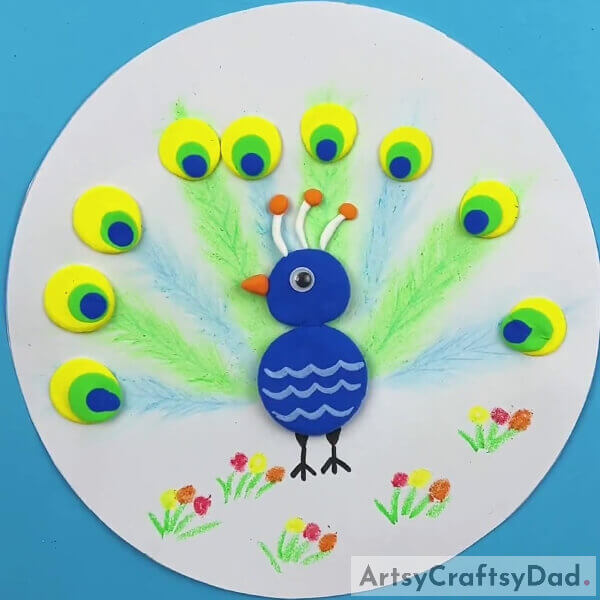
For the last step, make the grass randomly below the peacock to cover the white base, and using red, yellow, and orange crayons make the circular flowers over the top ends of the grass to make flowers over them. See the image for reference.
Woah! Look at the final result of your prettiest peacock artwork!
You can take a minute to admire your creation and then show it to everyone else to let them be proud of your creation and skills! You can also use this artwork as your school arts & crafts project and see everyone being jealous of you being the teacher’s favorite! Decorate this artwork in your room to look at and admire it every time you want! This is just so amazing! This artwork can thrive everywhere! If not made yet, make it now!
Hope you liked the article and the artwork idea! If so, give it a like and share it as much as you can to keep us motivated to keep bringing such crafts for you!
You May Also Like
- Paper And Clay Snow Town Landscape Craft Tutorial
- Paper And Clay Tree Craft Tutorial For Beginners
- Clay Snails On Leaves Craft Tutorial For Kids
- Peacock Stamp Painting With Hacks Tutorial
- Clay Circles Landscape Craft Tutorial For Kids


