This tutorial will help you to create a cute chick hatch from egg craft using colored craft papers, This fun craft is best to try at your boring times.
Welcome to this chick hatch paper craft tutorial! Here, we will teach you how to create a cute chick hatch from egg craft using craft papers. Using easily available craft materials create this fun craft without much effort. This fun chick hatch craft would be liked by all-age kids. To create this craft, you will need a few materials like craft papers, crayons, popsicles, and pencils. Okay, let’s start!
DIY Chick Paper Craft Tutorial For Kids
Read More: DIY Paper Quilling Elephant Craft for Kids
Supplies & Tools
- Craft papers (white, yellow, and orange)
- Piece of cardboard
- Scissors
- Glue
- Color crayons
- Pencil and ruler
- Markers (black and red)
- Popsicle
Chick Hatch Craft Instructions
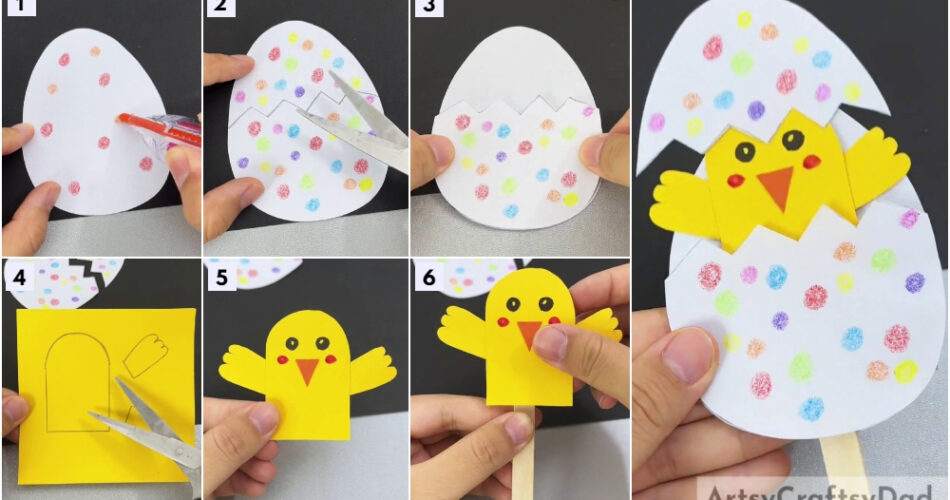
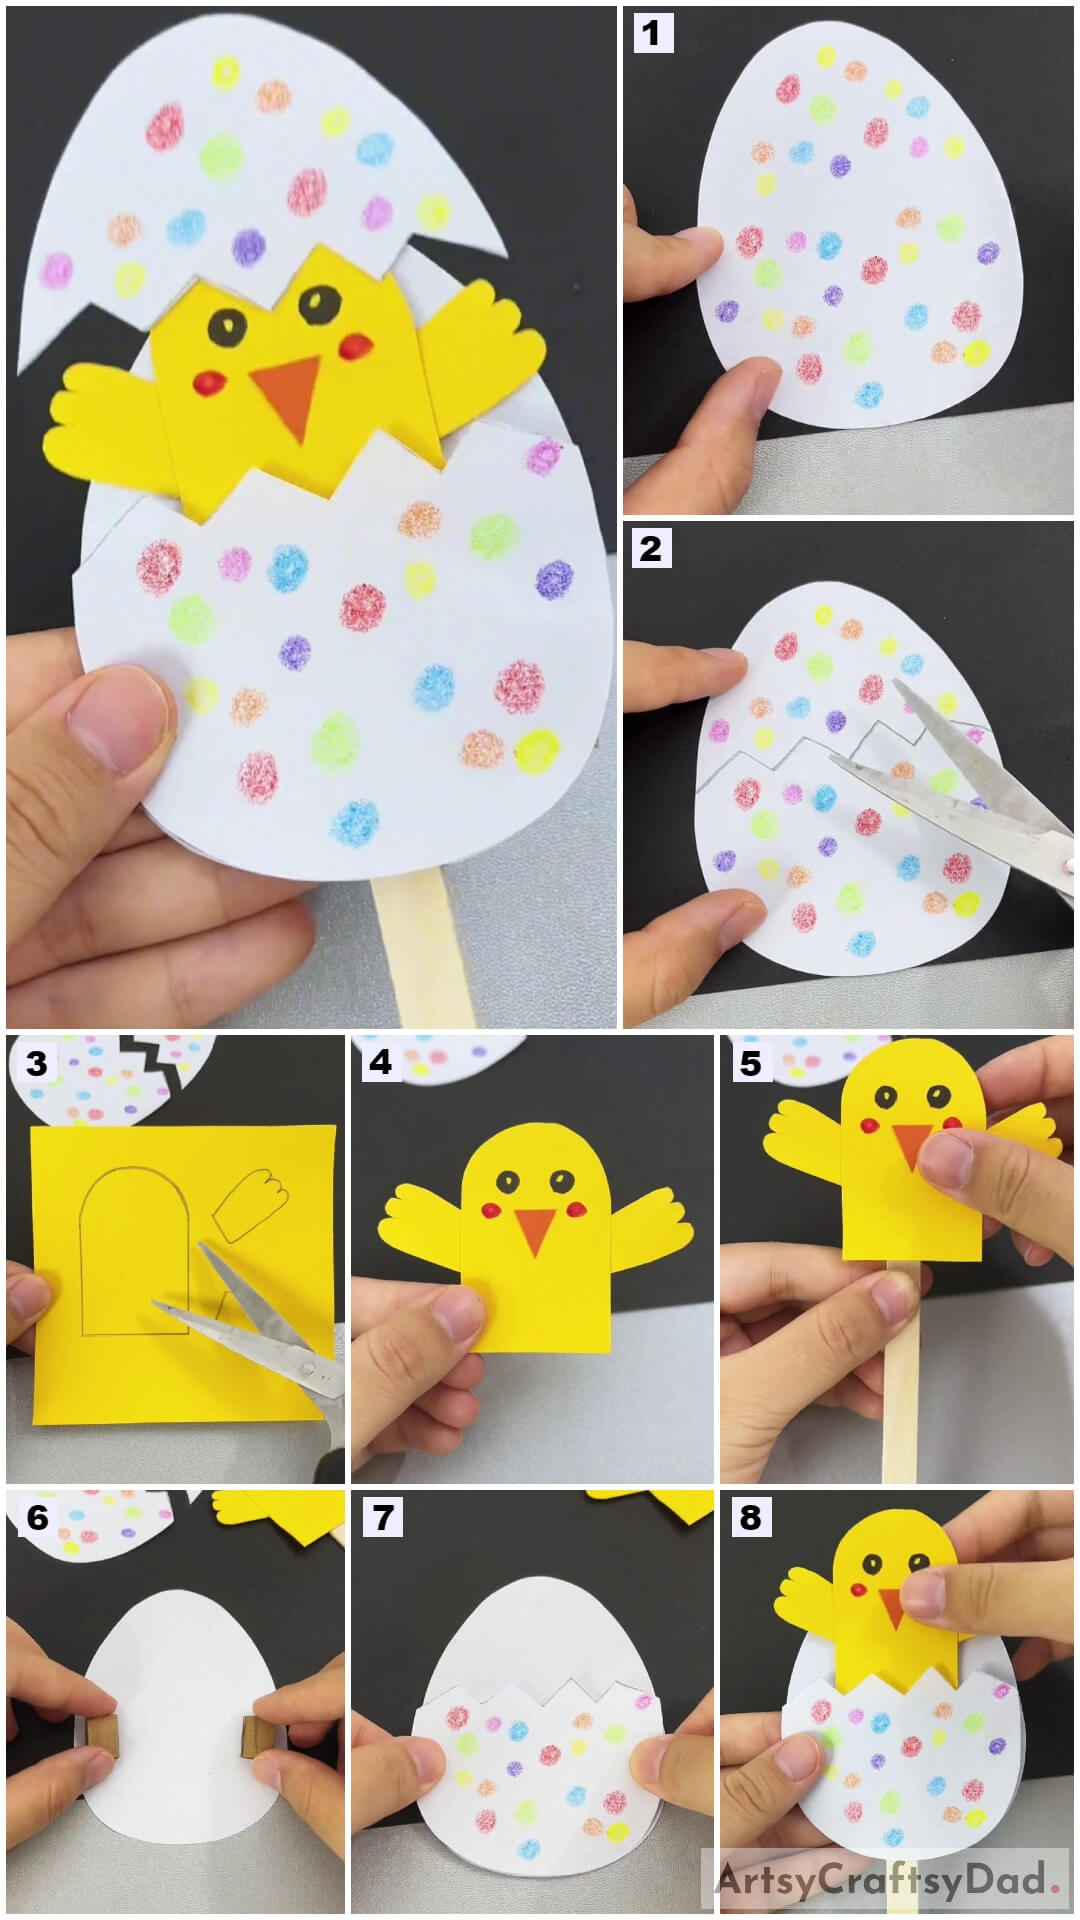
Step #1: Drawing Egg On White Craft Paper
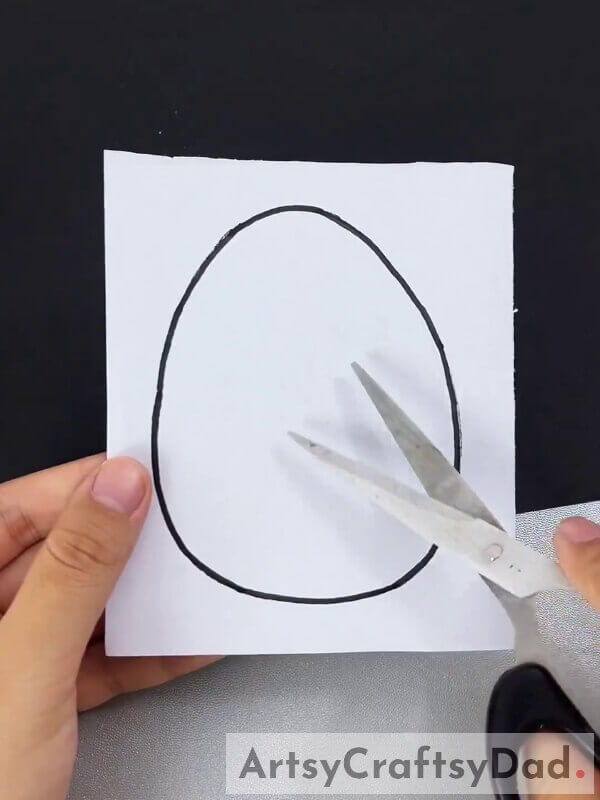
Draw two big ovals on white color craft paper using a black color marker to create eggs.
Step #2: Cutting Eggs From White Color Craft Paper
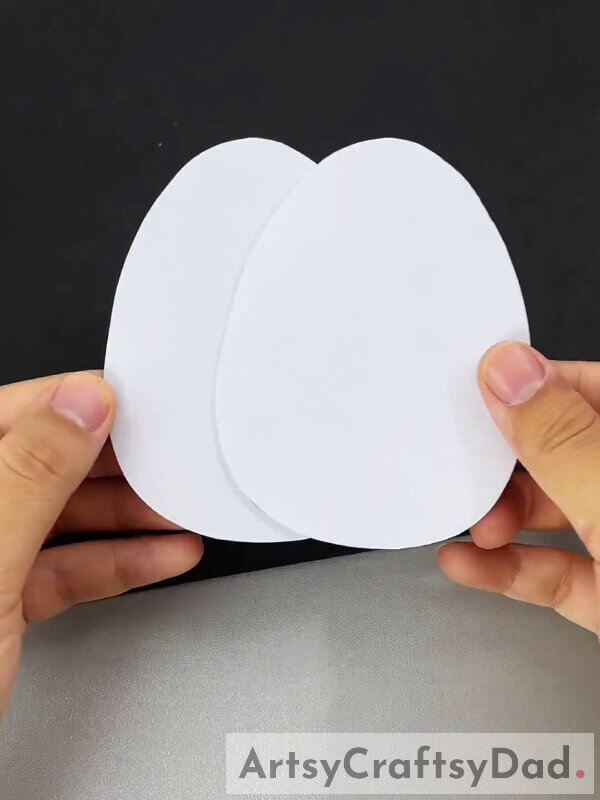
Now, cut those ovals out from your white color craft paper using scissors.
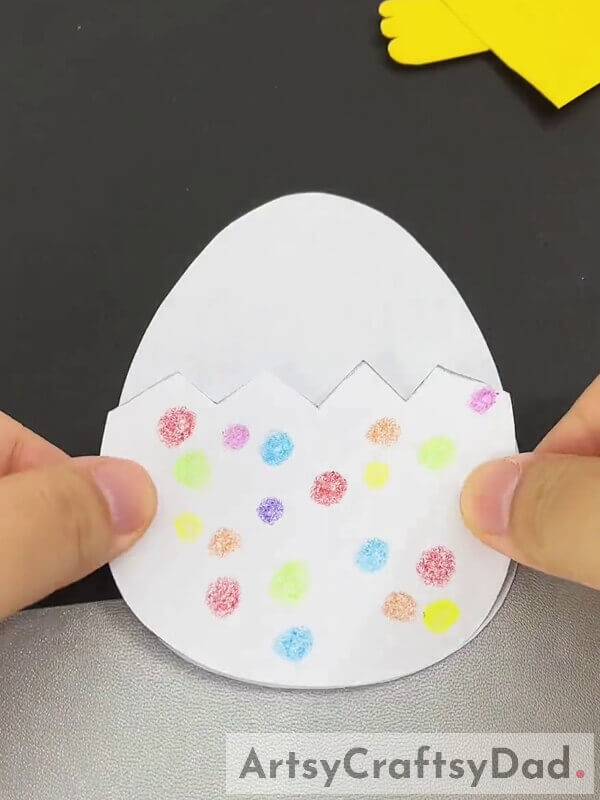
Step #3: Putting Color Dots On Our Paper Eggs
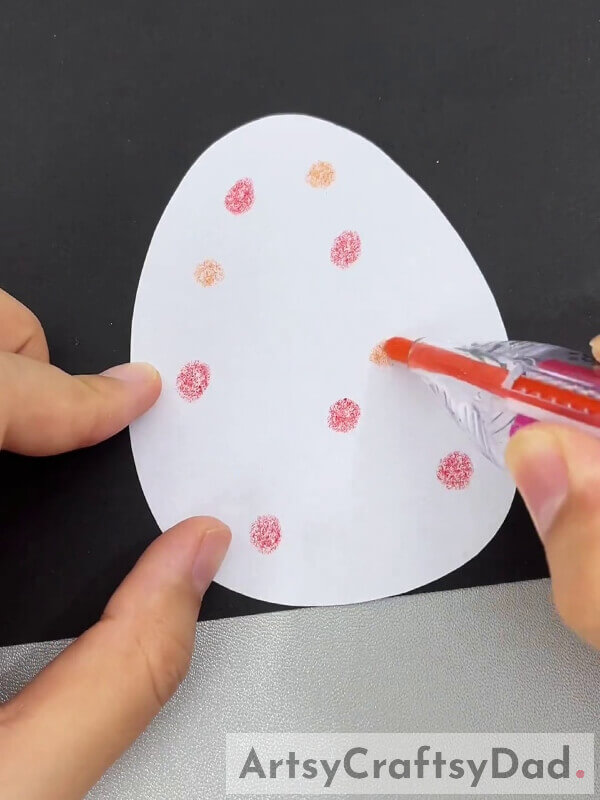
Using red and orange color crayons, put some big dots on one piece of your paper egg that we create before as shown.
Step #4: Putting More Color Dots On Our Paper Egg
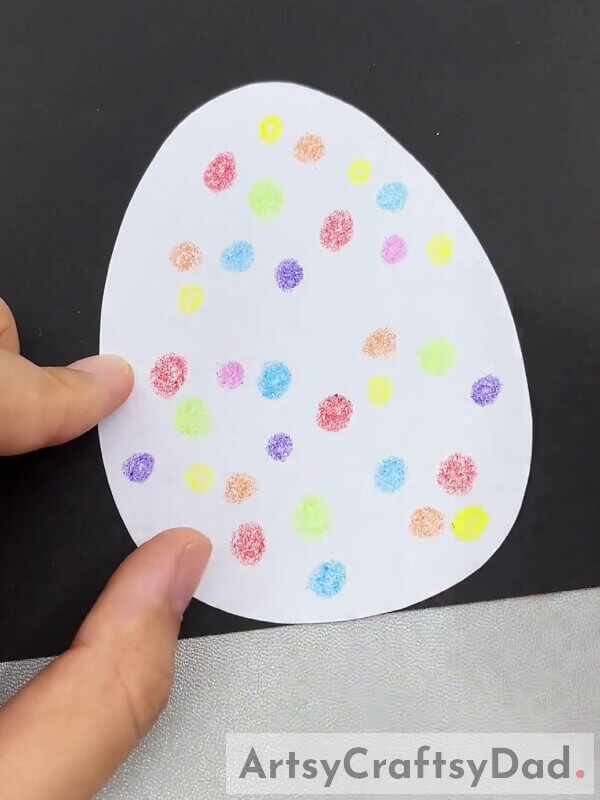
Also put more dots on that piece of paper egg using more color crayons to decorate your egg.
Step #5: Drawing Zig Zag Line To Create Crack
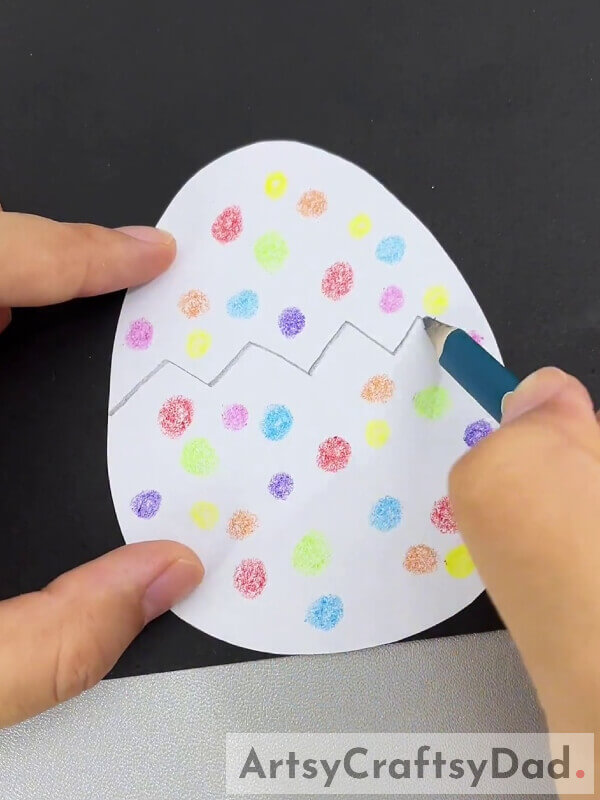
To create crack, draw a zig zag line in the middle of one egg using pencil to create crack.
Step #6: Cutting Egg On Zig Zag Line
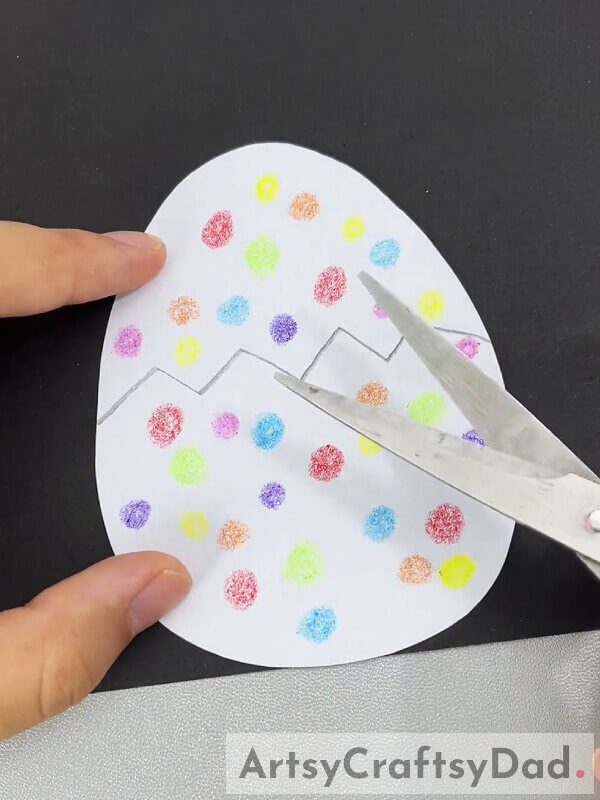
After drawing zig zag line, grab your scissors and cut on that zig zag line.
Step #7: Drawing Chick On Yellow Color Craft Paper
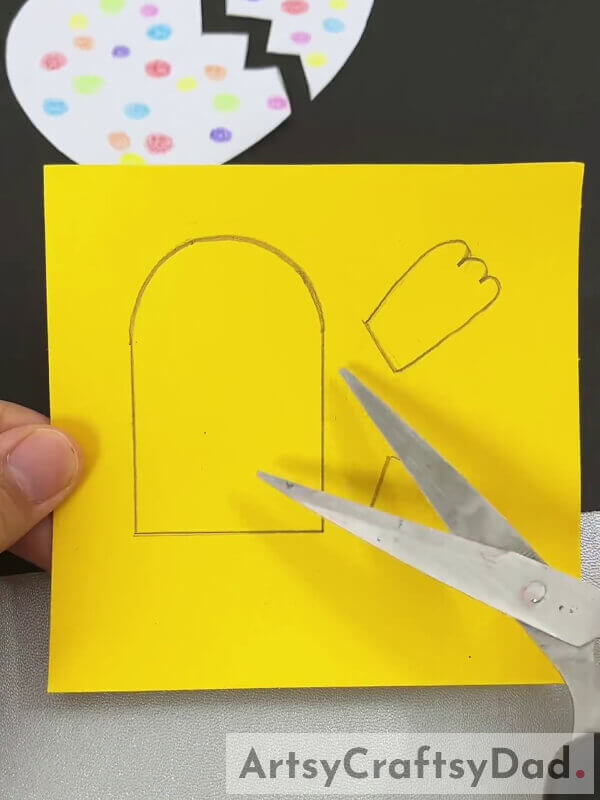
Then, draw a rectangle using ruler and pencil on yellow color craft paper. Rub the top line and draw a curvy line to create chick body. Also, draw two chick wings on yellow color craft paper and cut them from yellow paper.
Step #8: Pasting Chick Wing With Chick Body
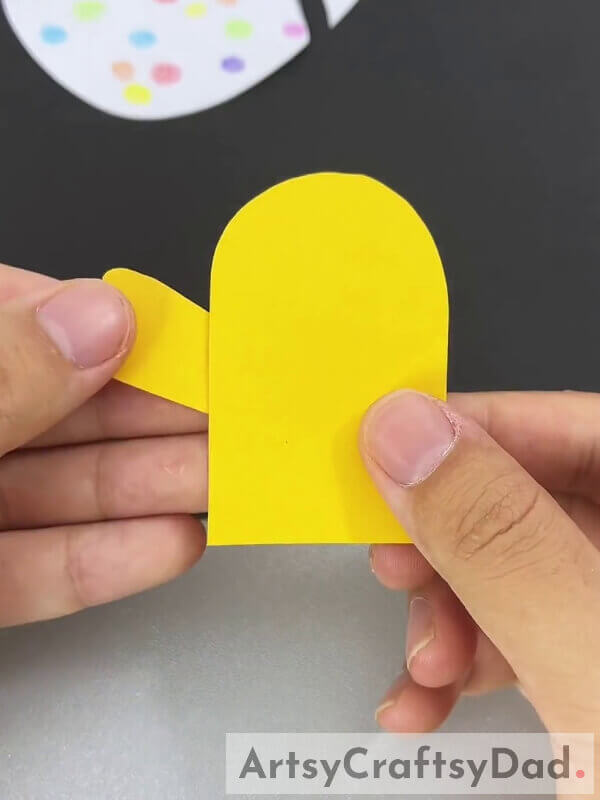
Using some glue, paste one chick wing at the left of chick’s body as shown in the image.
Step #9: Pasting Another Wing At The Right Side
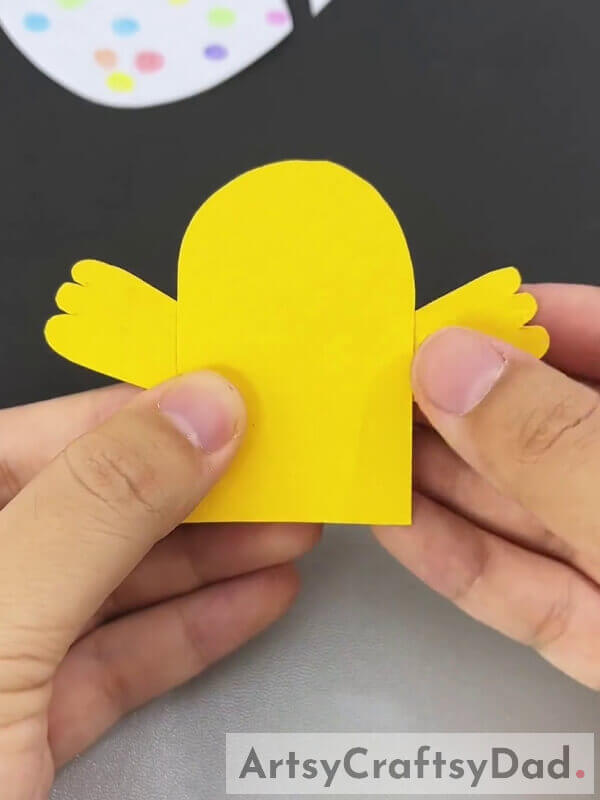
Now, paste another one wing of chick at the right side of your chick’s body using glue.
Step #10: Drawing Eyes, Blush And Pasting Peak

With the help of color markers, draw two black circle for eyes at the top of chick’s body using black marker. Also draw two red circles under chick eyes for blushes and cut small triangle from orange color craft paper. Then paste that rectangle upside down in between blushes.
Step #11: Pasting Popsicle With Our Chick
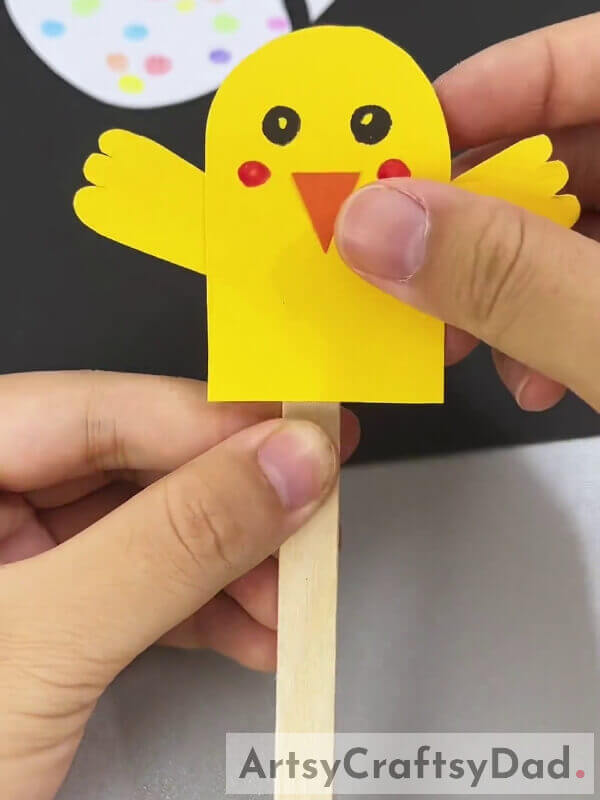
Take one piece of popsicle and paste it underneath of your yellow chick using glue.
Step #12: Pasting Cardboard Pieces With Egg
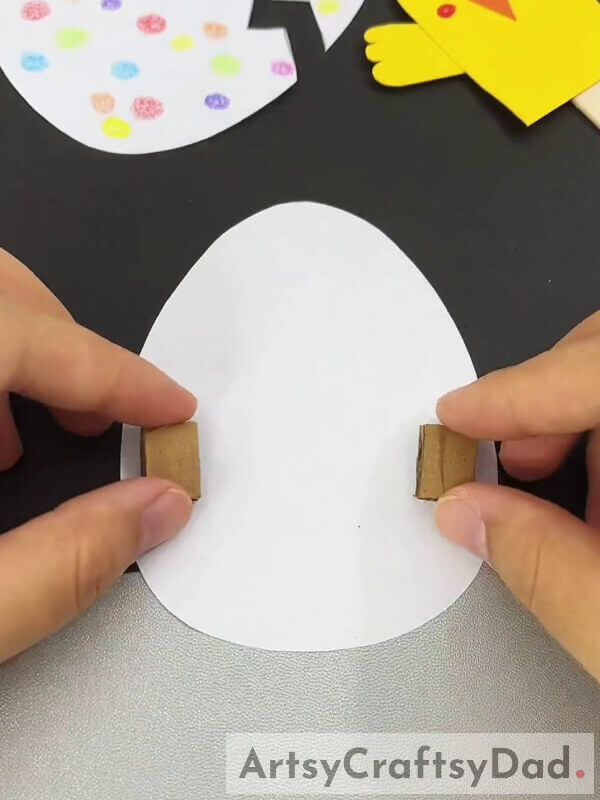
Cut two square shaped pieces from cardboard sheet. Paste those pieces at left and right side of your plain piece of paper egg.
Step #13: Pasting Both Paper Eggs Together
Grab the cracked paper egg which we create and paste it with those pieces of cardboard sheet that we paste on plain paper egg.
Step #14: Placing Chick Into Our Paper Eggs
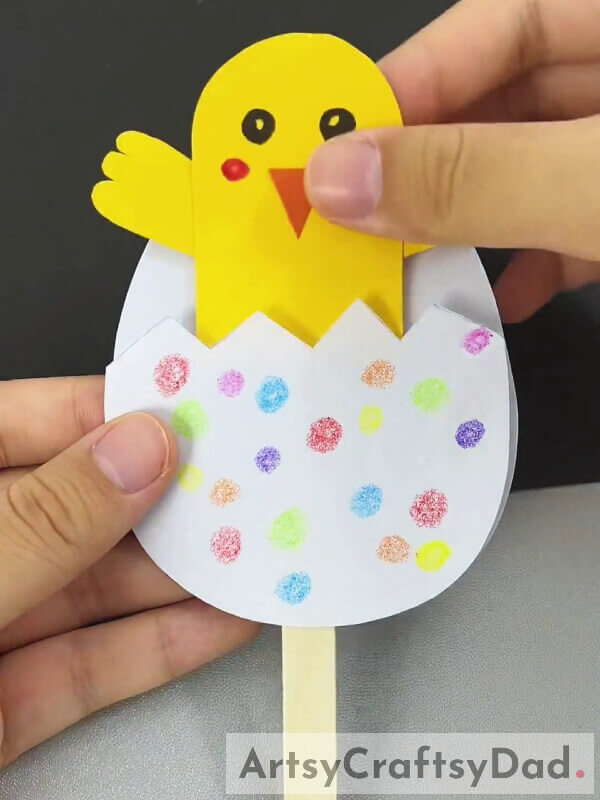
Then insert your yellow chick popsicle in between your paper eggs as shown in the image.
Step #15: Pasting Top Piece Of Cracked Paper Egg With Chick

Now, paste the top piece of your cracked paper egg on the chick’s head using glue.
Our Adorable Yellow Chick Is Ready To Hatch!
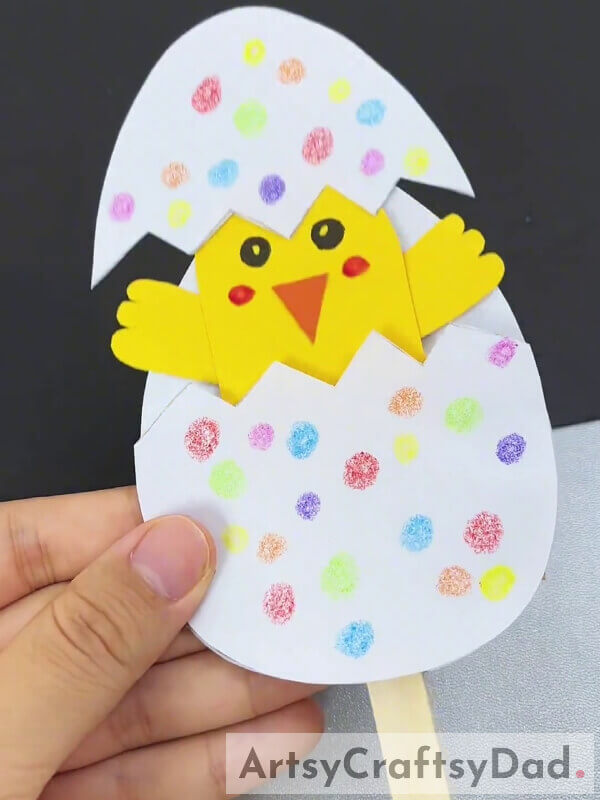
That’s all our cute chick paper craft is ready! This fun craft is really easy to create and is suitable for kids of all ages. Creating this interesting craft is a fun process to do with your kids, with very little effort create this craft easily.
We hope this chick hatch craft tutorial is useful for you, lets us know your thoughts about this tutorial in the comment section. For more art and craft tutorials like this, visit our website.
Thank you for visiting our website.
You May Also Like
- Clay Snails On Leaves Craft Tutorial For Kids
- Simple Paper Tearing Flowers Craft Tutorial
- Clay-Paper Sunflower Garden Craft Tutorial
- How to Make a Paper Flower Vase – Paper Craft Tutorial
- Clay Heart Leaf Tree Craft Tutorial For Kids


