Capsicums are healthy and beneficial so we brought you a painting inspired by them! This tutorial will guide you through it using stamps!
This step-by-step tutorial will lead you to healthy artwork! This stamp painting includes capsicums which will lead your kid to finish them up if served on a plate! This makes this artwork a healthy and beneficial one! You will only need some basic art supplies that you already have with you and some circle stamps, that’s all! Kids show tantrums eating healthy veggies and making an art of them can make the kiddos eat them! So, what are you waiting for? Make it with us!
Easy Capsicum Stamp Painting For Beginners
Must Read : Colorful Lavender Garden Night Painting
Supplies & Tools
- White Circular Paper Sheet
- Circle Stamps (Big And Small)
- Paint Colors (Red, Yellow, And Green)
- Cotton Earbud
Capsicum Stamp Instructions
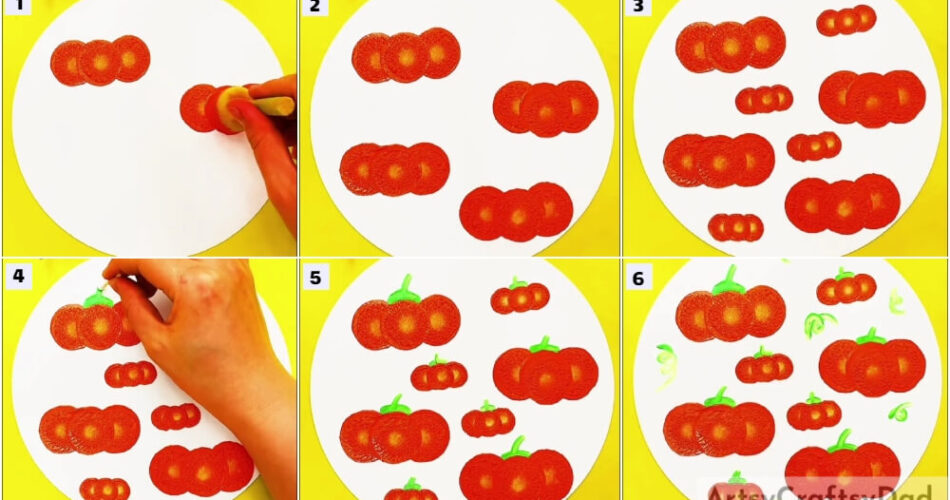
Step #1: Stamping Shaded Circle
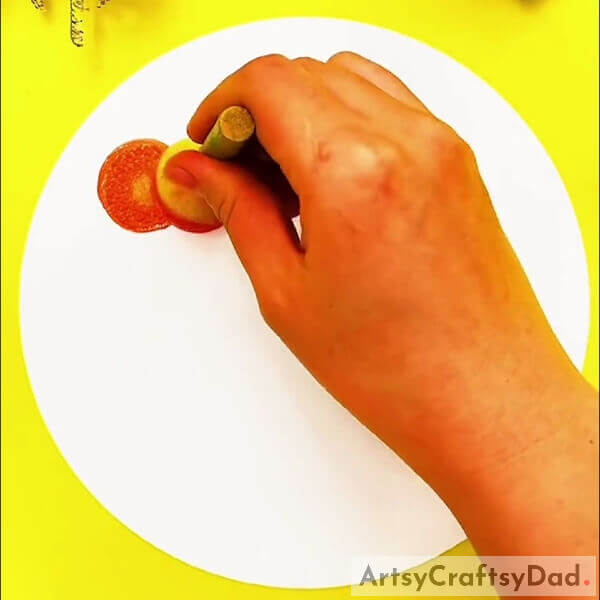
Begin this artwork by taking a white circular paper sheet as the base for this painting and a circle stamp. Dip the circle stamp into red paint and add a drop of yellow paint in the center of the stamp. Dab the stamp over the case on the left top to get a shaded circle.
Step #2: Forming Capsicums
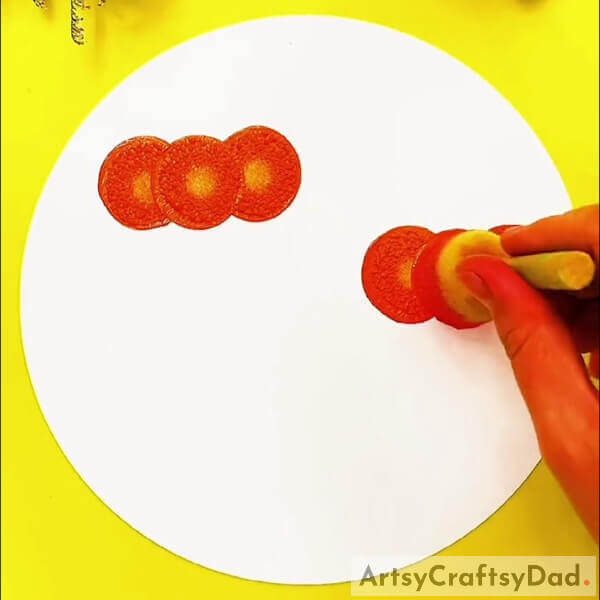
Using the same yellow-red painted stamp, dab another circle beside the already-made one by leaving a little gap to the right, then dab a circle in the middle of these two circles and slightly lower to form a capsicum.
In the same way, make another capsicum on the middle right pf the base.
Step #3: Forming More Capsicums
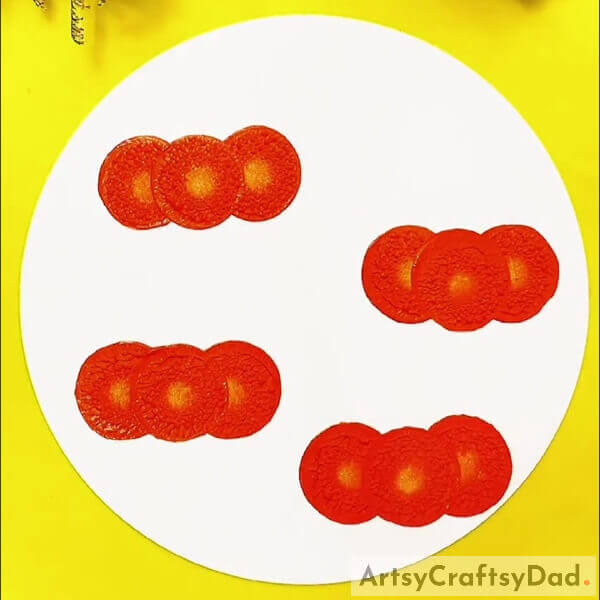
Make 2 more capsicums on the base on the left and right alternatively, all 4 collectively form a zig-zag pattern on the base. See the image for reference.
Step #4: Forming Small Capsicums

Make small capsicums as you made the big one but this time, use a small circle stamp and make these small capsicums on the base between the left space of the big capsicums. See the image for reference.
Step #5: Making the Stem Of Capsicum
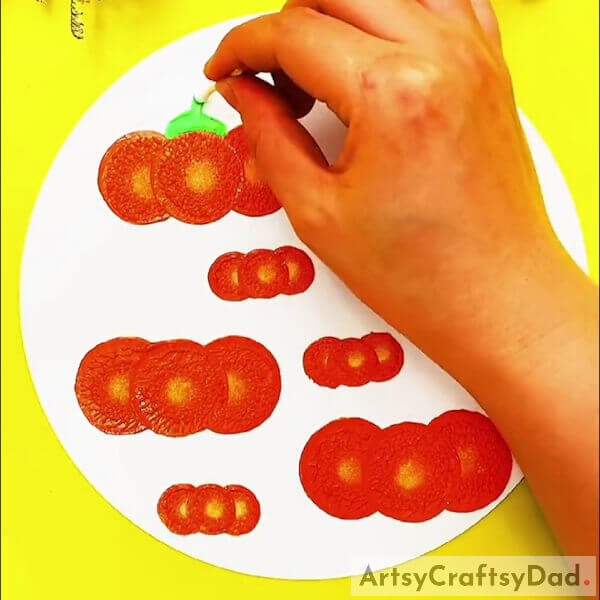
Dip a cotton earbud into green paint and use it as a paintbrush to make a stem above the capsicum. Make a curvy line right above the middle circle of the capsicum along its boundary and make a small vertically tilted line over it to make the stem.
Step #6: Making Stems Of All Big Capsicums

Following the previous step, make the stems above all the big capsicums.
Step #7: Making Stems Of Small Capsicums
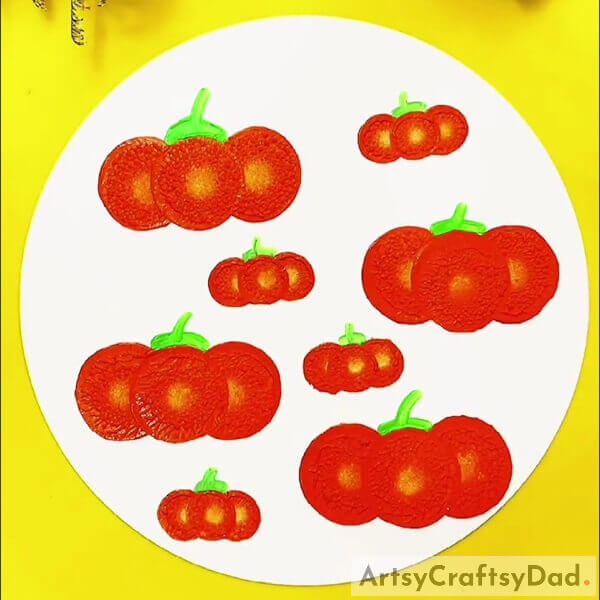
As you made the stems of the big capsicums, make the stems of small ones too. See the image for reference.
Step #8: Making Spring Loops

Using the green-painted cotton earbud, make the spring loops over the base randomly between the capsicums. See the image for reference.
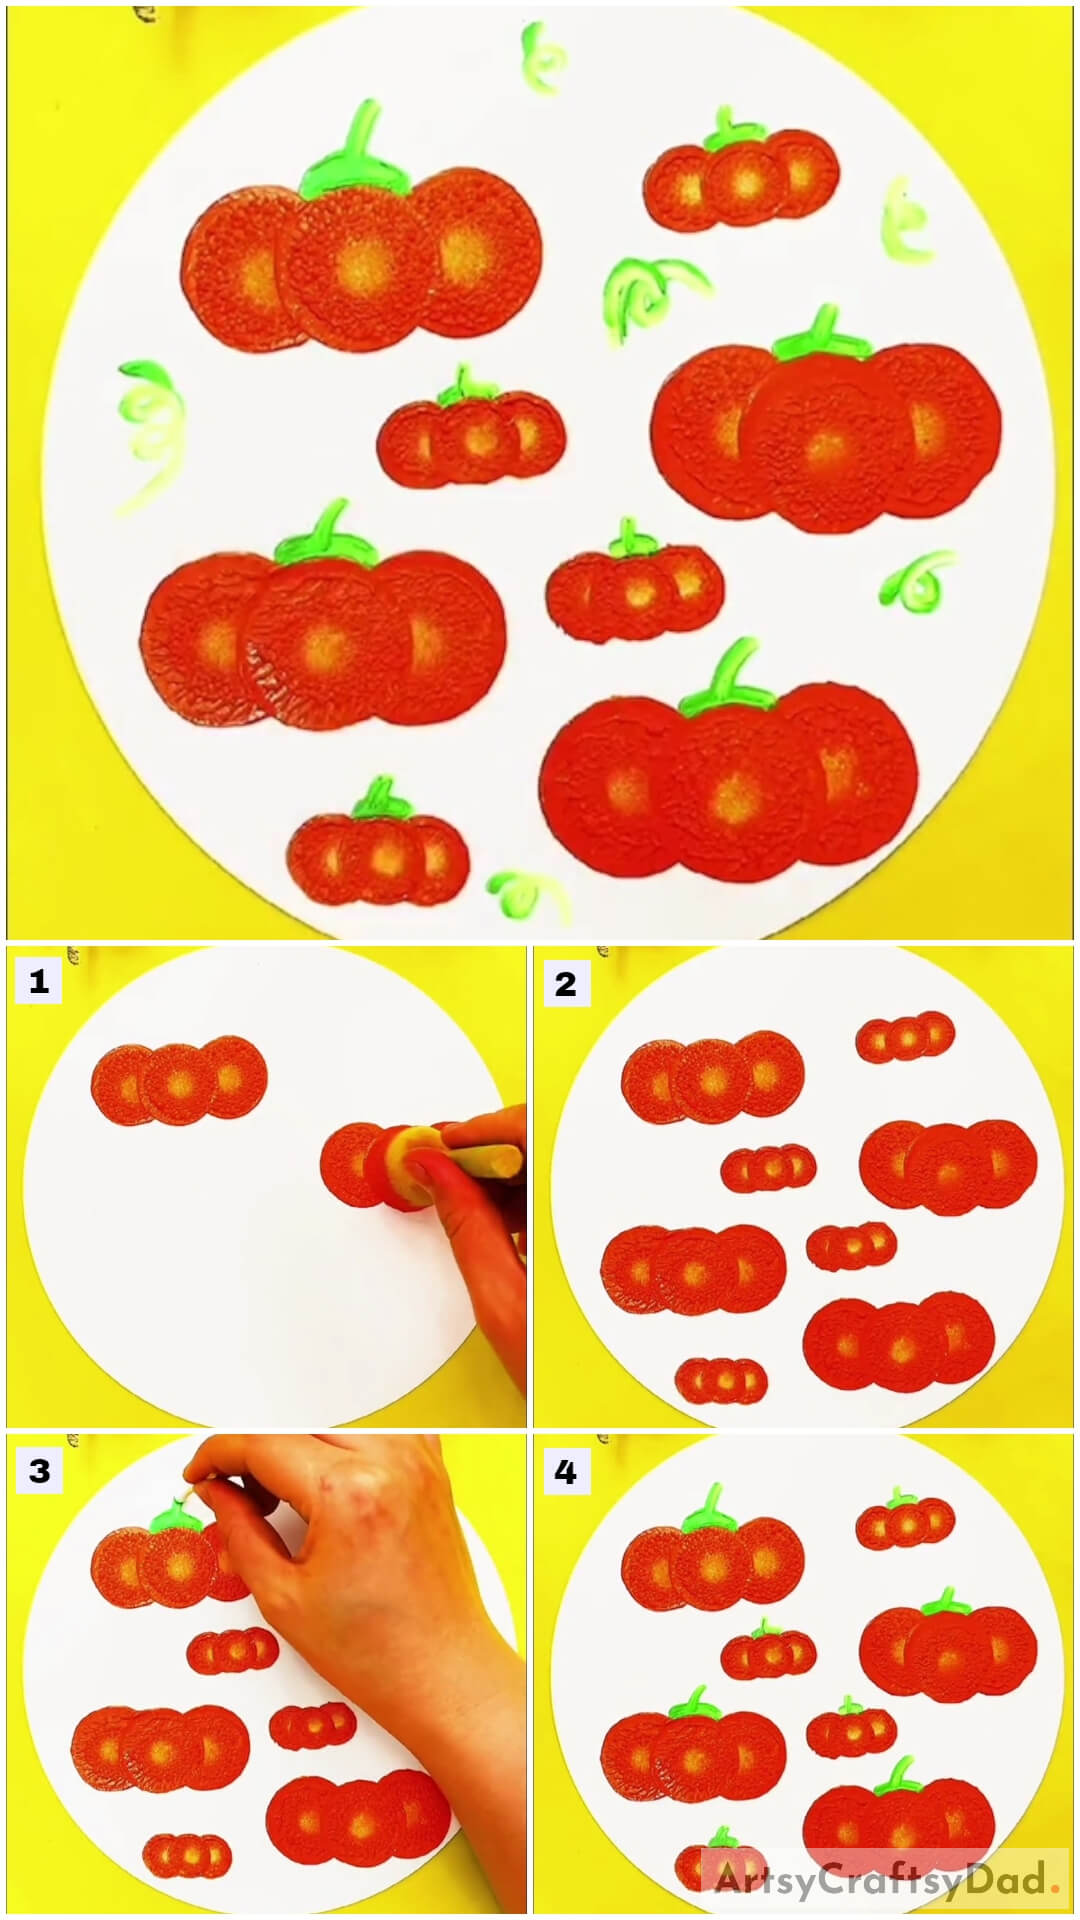
This Is The Final Look Of Your Red Capsicum Stamp Painting!
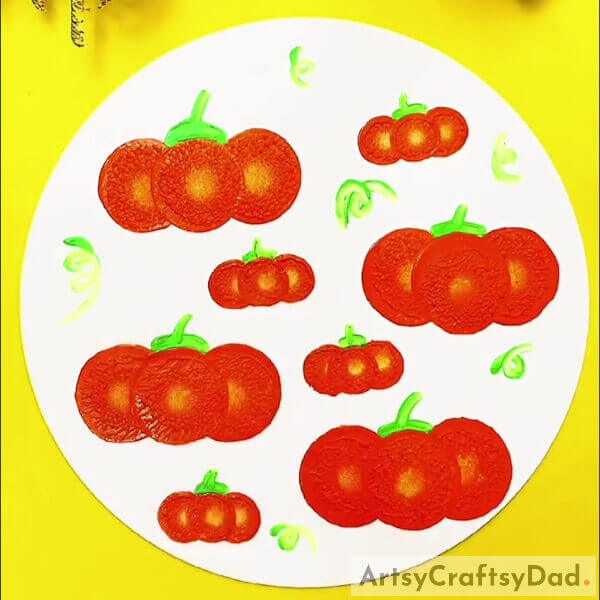
Whoa! Look at the final outcome! These capsicums look real!
You can teach your kid the benefits of eating capsicum while making and finishing this painting! You can also make other colors of capsicums like yellow and green too! You can use this art to decorate your kitchen or use it as a school art project on ‘Your Favorite Vegetable’! I’m sure it will be loved by your teacher and she will admire your creation and th smart hack to use stamps!
We are hoping you liked the article! Share it with your buddies! Also, drop your feedback in the comments section below! We would love to hear from you!
You May Also Like
- Red Vector Flowers Stamp Painting Art Tutorial For Kids
- Peacock Stamp Painting With Hacks Tutorial
- Cabbage Stamp Roses Painting Tutorial
- Yellow And Purple Flowers Bunch Painting For Beginners
- Wistera Finger Painting Artwork Tutorial For Kids


