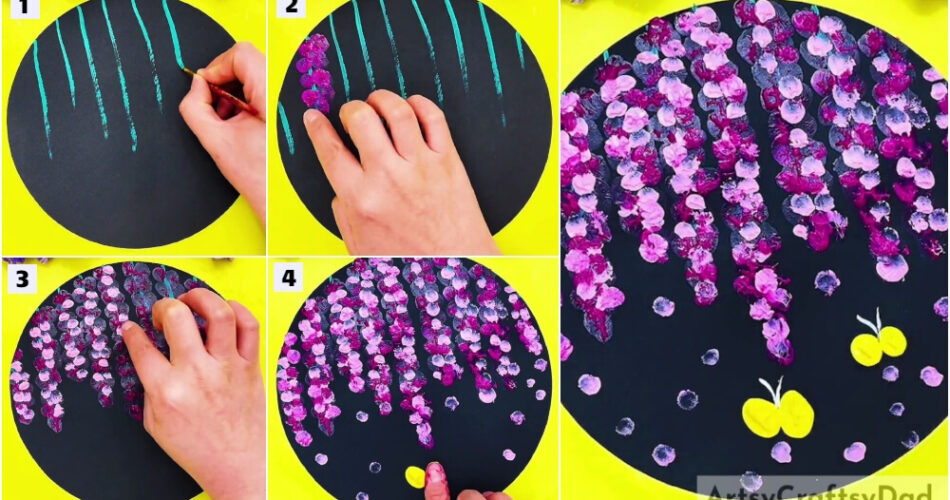
This easy art tutorial will help you to paint wisteria painting with zero effort. Paint this beautiful art by yourself for room decorations.
Welcome everyone! In this tutorial, we will show you how to paint wisteria finger painting artwork in less than 5 minutes. This wisteria finger painting is a super easy artwork that is appropriate for all ages of kids. Using very few craft supplies like acrylic paint, painting brush, and craft paper, make this artwork quickly. Are you ready?
Adorable Wisteria Finger Painting Artwork For Kids

Must Read: Easy Town Landscape Drawing Tutorial For Kids
Supplies & Tools
- Black color craft paper
- Acrylic paint (green, pink, pale pink, white and yellow)
- Painting brush
Wisteria Finger Instructions
Step #1: Drawing Green Stems On Black Color Craft Paper
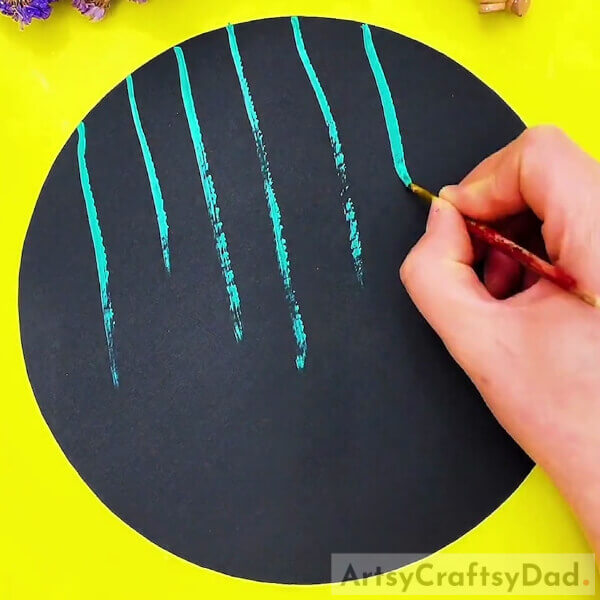
Cut your black craft paper into a circle shape, grab your painting brush, and dip it into green acrylic paint. Then draw 8 to 10 lines from the top of the craft paper to the center of the paper.
Step #2: Painting Wisteria Flower Using Pink Acrylic Paint
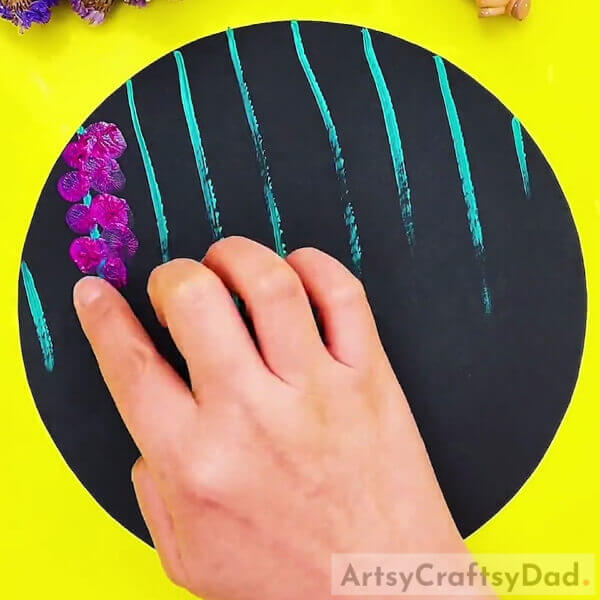
To paint a wisteria flower, dip your right index finger into pink color paint and start to put dots on the green lines till the end.
Step #3: Painting A Few More Wisterias
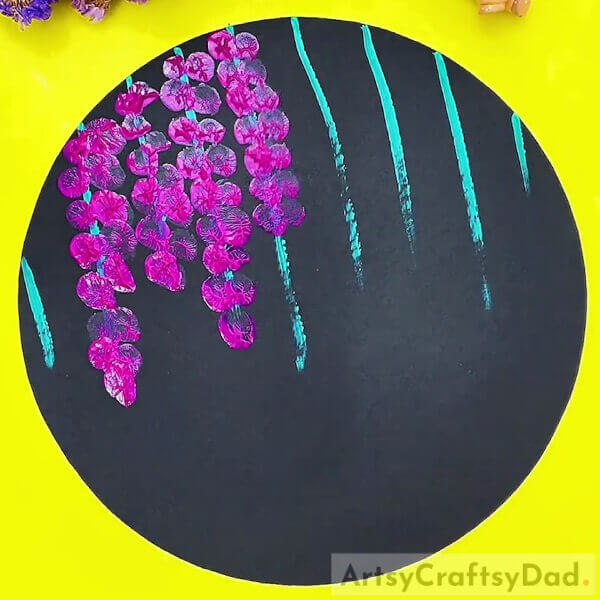
Using the same method, put pink dots on both sides of the remaining green stems to draw a few more flowers.
Step #4: Completing Wisteria Painting

After putting pink dots, your wisteria painting should look like this, and then, let your painting dry.
Step #5: Putting Pale Pink Color Dots

Now, dip your finger into pale pink color paint and randomly put some dots on your wisteria painting.
Step #6: Painting Floating Petals
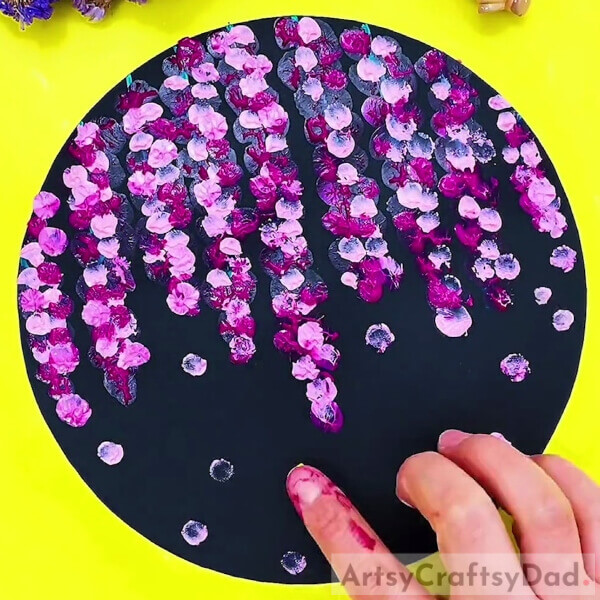
Then, put a few pale pink color dots on the plain area of your black craft paper to create floating petals.
Step #7: Putting Yellow Dots To Paint The Butterfly
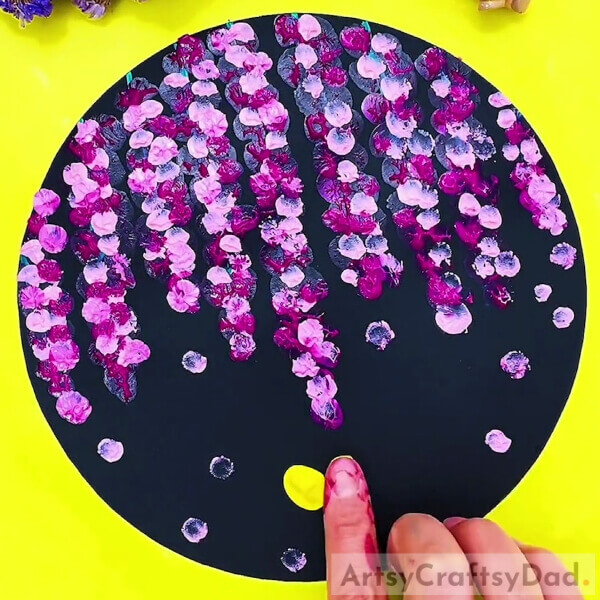
Now, dip your index finger into yellow-colored acrylic paint and closely put two oval-shaped dots under wisteria flowers to paint the butterfly. Put another two dots near the first butterfly to create the second one.
Step #8: Painting Antenna For Both Butterflies

Grab your painting brush and dip it into white color paint. Then, paint two curvy lines from the middle of two yellow dots that we put to create a butterfly.
Yeah! Our Wisteria Finger Painting Is Ready!

After your painting dries, paste it on your living room wall for home decoration. This simple and easy painting idea is appropriate for beginners and kids above 4 years. Spend your time on interesting and easy arts like this, this kind of activity is not only for time-pass but also helps you to get relaxation.
Hope you like this wisteria painting art tutorial, We would like to know your thoughts about this tutorial, share your thoughts in the comment section and visit other projects from our website.
Thank you for visiting our website.
You May Also Like
- Peacock Stamp Painting With Hacks Tutorial
- Clay Snails On Leaves Craft Tutorial For Kids
- Simple Bottle Painting Ideas
- 2 Basic finger tip mehndi design tutorial
- Balloon Stamping Painting Ideas


