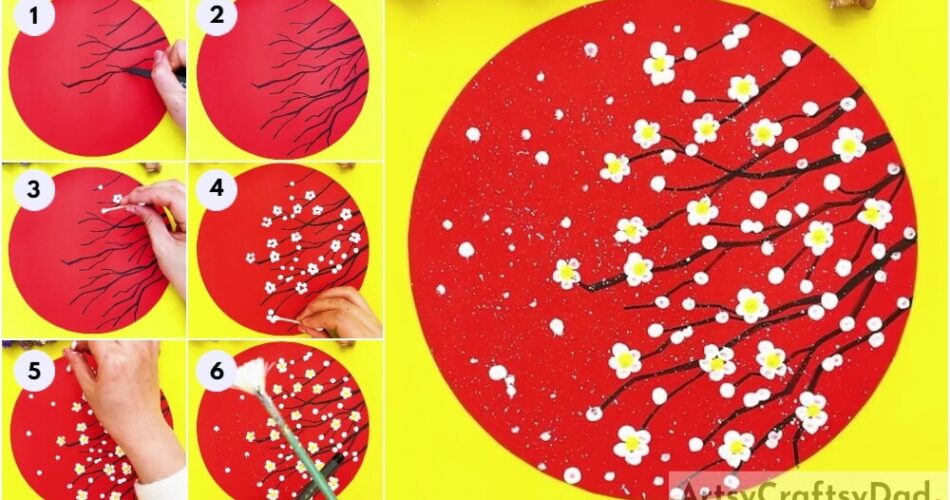
This step by step tutorial will show you how to paint easy white cherry blossom art using very easy steps, this art tutorial is perfect for kids and beginners.
Welcome to this cherry blossom art tutorial! Here, we are going to teach you how to paint beautiful white cherry blossom art without any effort. This art tutorial is helpful for kids and beginners, using simple instructions from tutorial kids can paint this art by themselves very easily. To paint this you will need very few supplies, such as craft paper, black marker and acrylic paint. Are you ready?
Awesome White Cherry Blossom Tree Painting Idea For Kids
Must Read: Balloon Stamping Painting Ideas
Supplies & Tools
- Red color cardstock paper
- Scissors
- Black marker
- Earbuds
- Acrylic paint (white and yellow)
- Painting brush
Cherry Painting Instructions
Step 1: Cutting Red Cardstock Paper Into Circle Shape
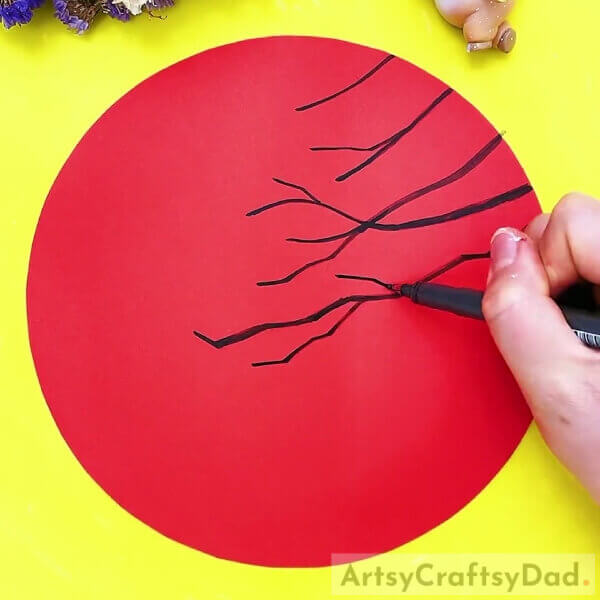
Grab your scissors, cut red color cardstock paper into circle shape and start to draw branches at the right side.
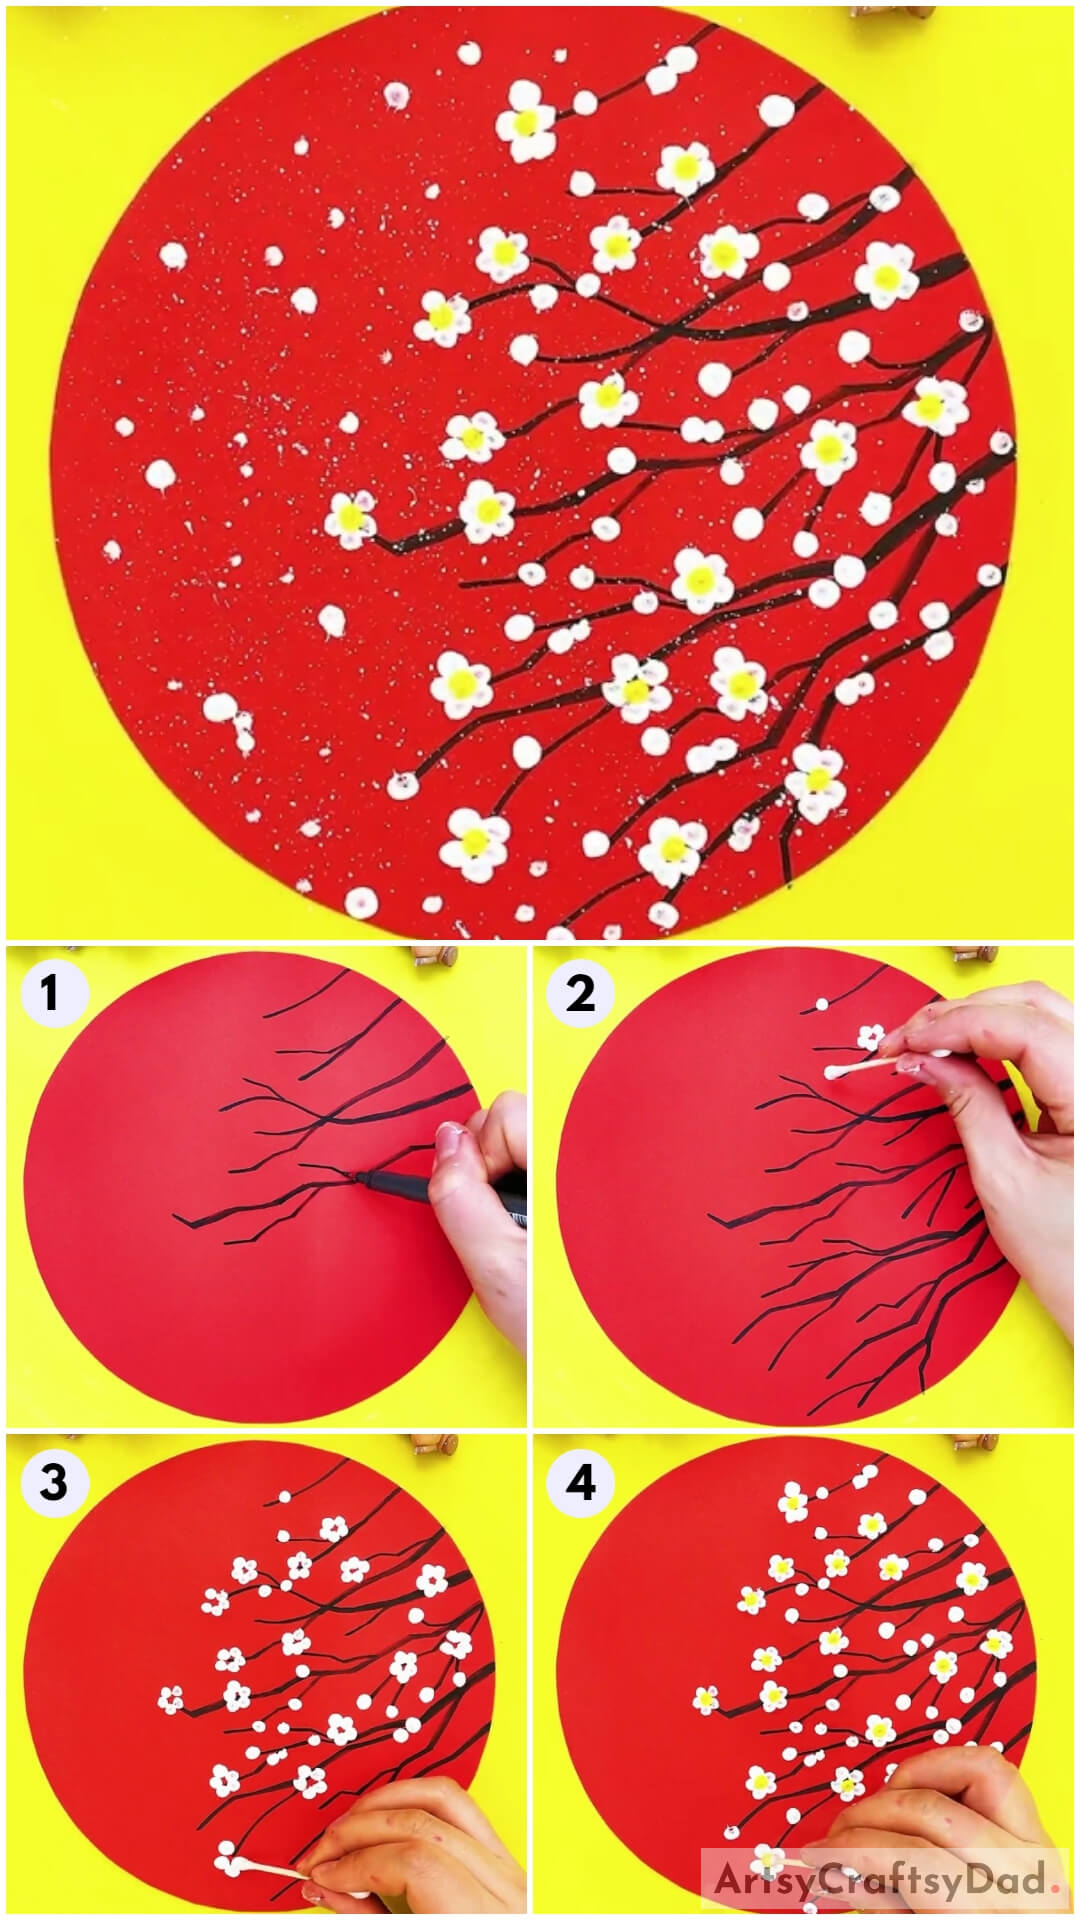
Step 2: Drawing Tree Branches On Our Cardstock Paper
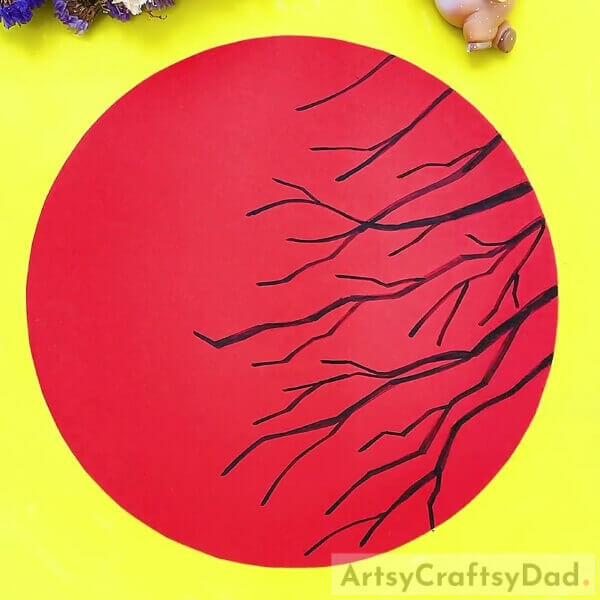
With the help of black marker, draw tree branches at the left side of your circle shaped red paper. Draw some zigzag lines and add some more details with it to draw branches.
Step 3: Painting Cherry Blossom Using Earbuds
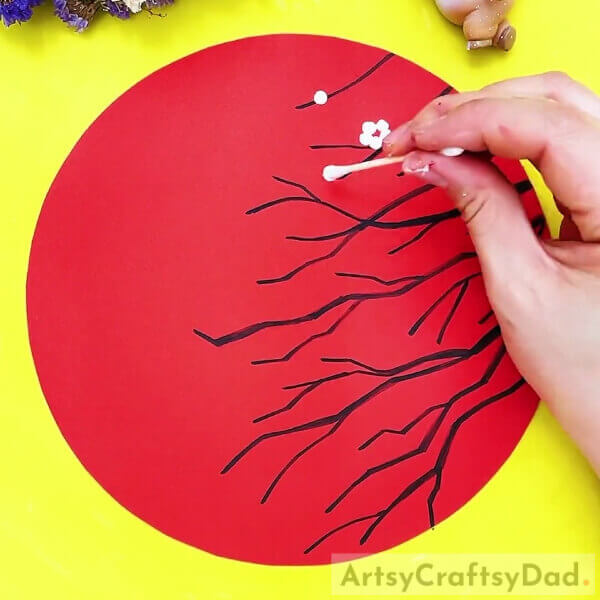
Take one piece of earbud and dip it into white acrylic paint, then put 5 dots on tree branches in round shape to make cherry blossom.
Step 4: Completing Cherry Blossom
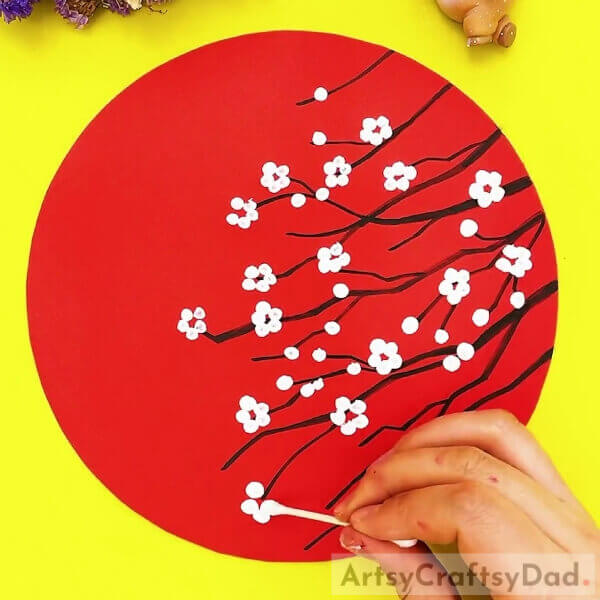
In between those cherry blossom, put some single dots on the tree branches for cherry buds.
Step 5: Putting Yellow Dots For Pollen
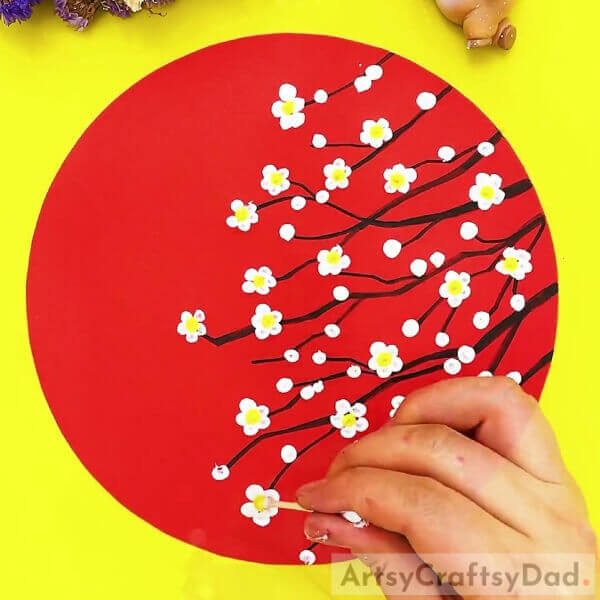
Now, dip another side of your earbud into yellow color acrylic paint and put one dots in the middle of each cherry blossom.
Step 6: Putting Dots Around Tree Branches
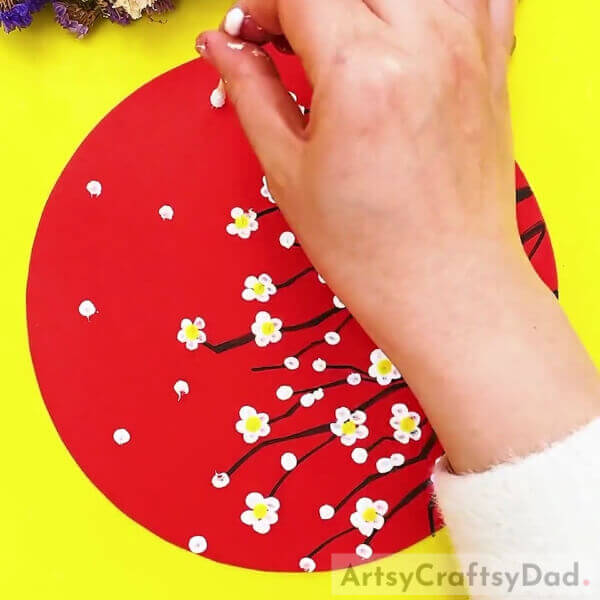
Again once, take white color paint on earbuds and put some dots around your tree branches to make floating cherry petals.
Step 7: Pouring White Paint On Our Cherry Blossom Painting
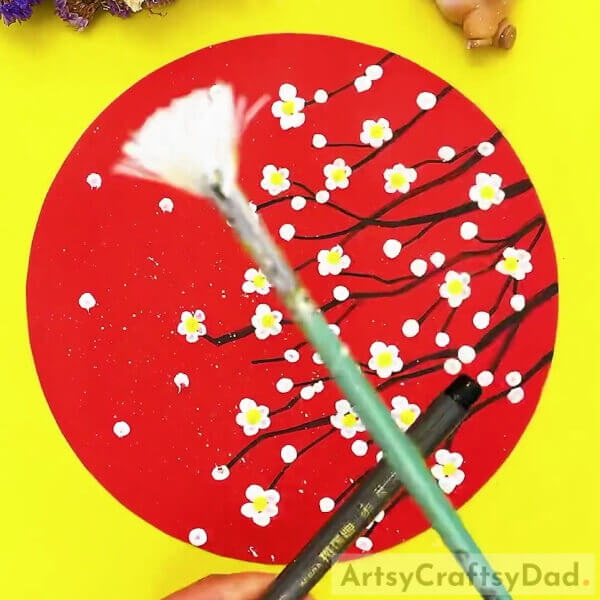
Grab your painting brush and dip it into white paint, then tap your painting brush with any pen or pencil onto your cherry blossom painting as shown in the image.
Beautiful Cherry Blossom Painting Is Completed
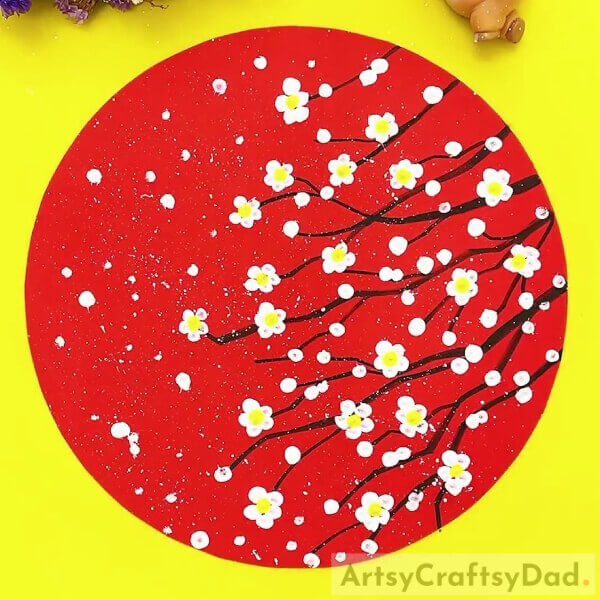
That’s all our beautiful cherry blossom painting is ready! This painting art is such a easy one to paint, with the help of our tutorial you can paint this beautiful art less than 10 minutes.
We hope this easy cherry blossom art tutorial is helpful for you. Share your thoughts about this tutorial in the comment section, visit our website for more craft and art tutorials.
Thank you for visiting our website.
You May Also Like
- Peacock Stamp Painting With Hacks Tutorial
- Painting a vase with stained-glass paints
- Easy Town Landscape Drawing Tutorial For Kids
- Clay Snails On Leaves Craft Tutorial For Kids
- Basic Magical Leafs Pattern Henna Mehndi-Mehendi Designs with gulf rose & Beautiful Bels(Tutorial)


