Feel the vibe of the peaceful farms by creating these cute clay chicks in a garden feeding on worms through this step-by-step tutorial!
Kiddos will definitely have a blast of fun time while creating this cute craft! This step-by-step tutorial will teach you to make cute little chicks in a garden feeding on the worms! Farms have a totally different vibe, lots of greenery, cute animals making noises still peaceful! This craft will surely blend you in that vibe with your imagination! This craft is easy to make and doesn’t require spending a single penny on it! Read the article to make it with us!
DIY Chicks Craft Using Clay
Read Must: Polymer Clay Mushroom Tutorial For Kids
Supply & Tools:
- White Circular Paper Sheet
- Colored Clay (Red, Yellow, Black, And Green)
- Scale
- Markers (Black, Red, And Green)
Clay Chicks Instructions
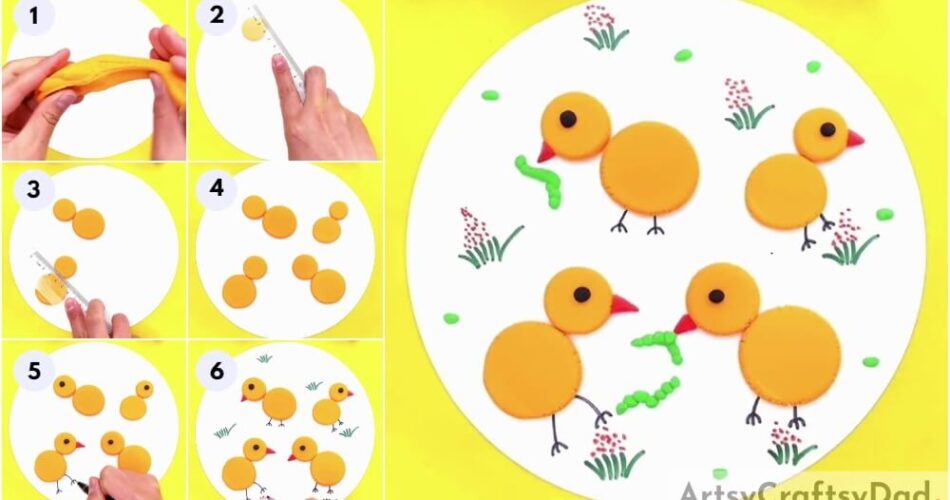
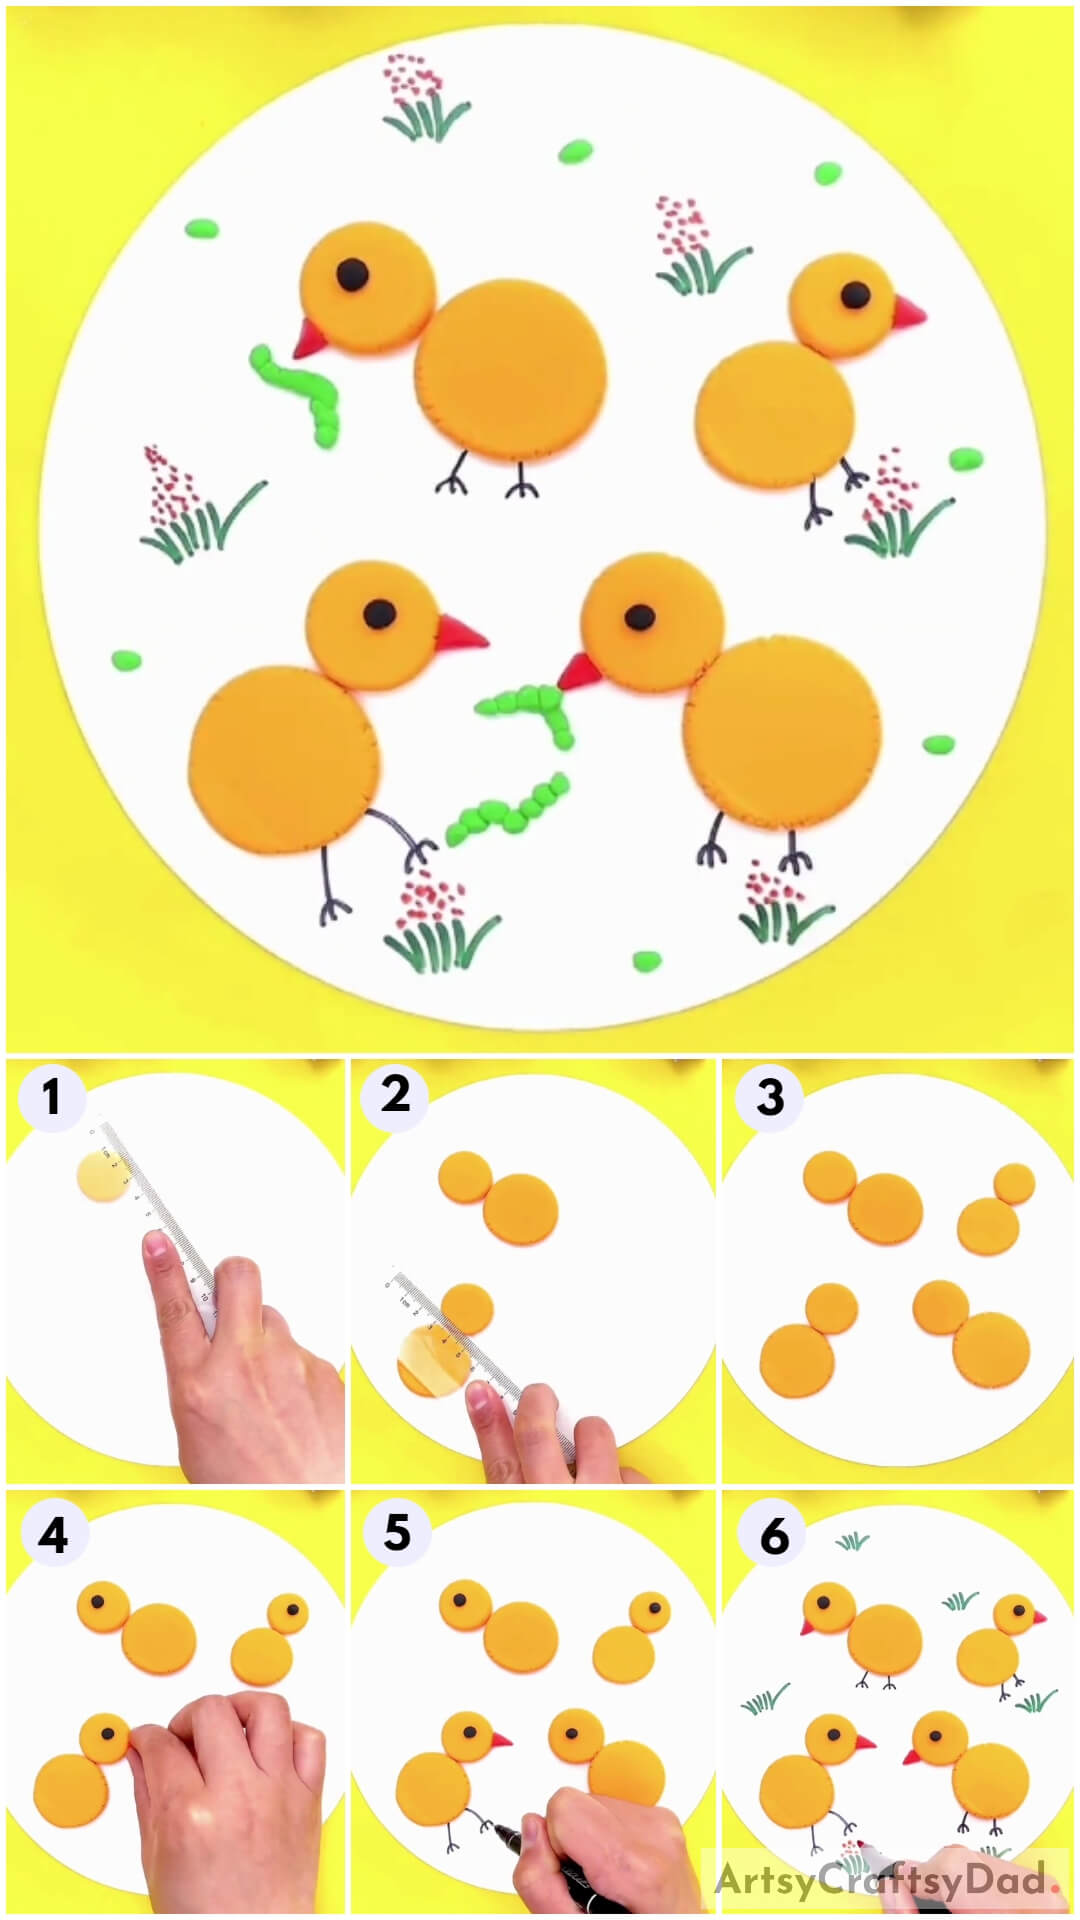
Step #1: Taking Out Some Clay
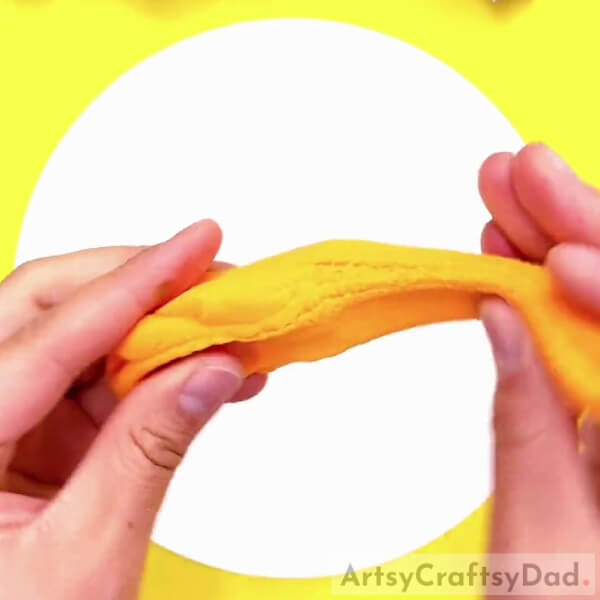
Begin this craft by taking a white circular paper sheet as the base for your craft and yellow-colored clay, stretching it to pull out some clay from the whole.
Step #2: Making A Clay Ball
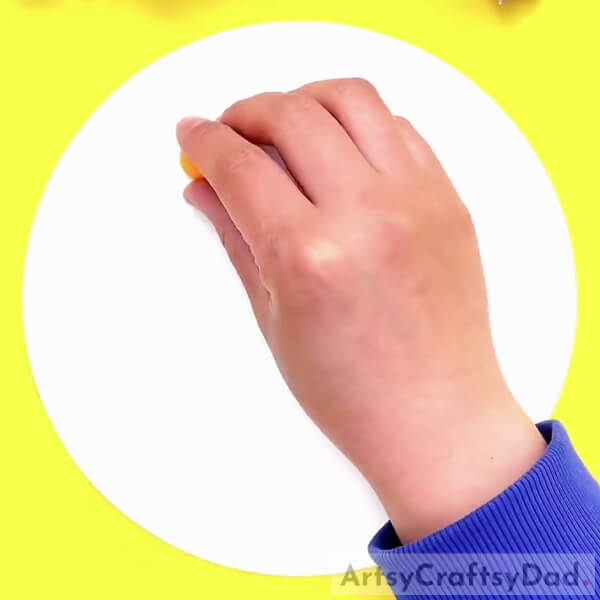
Dough the yellow clay into a small ball and place it over the base on the left top.
Step #3: Pressing The Clay Ball
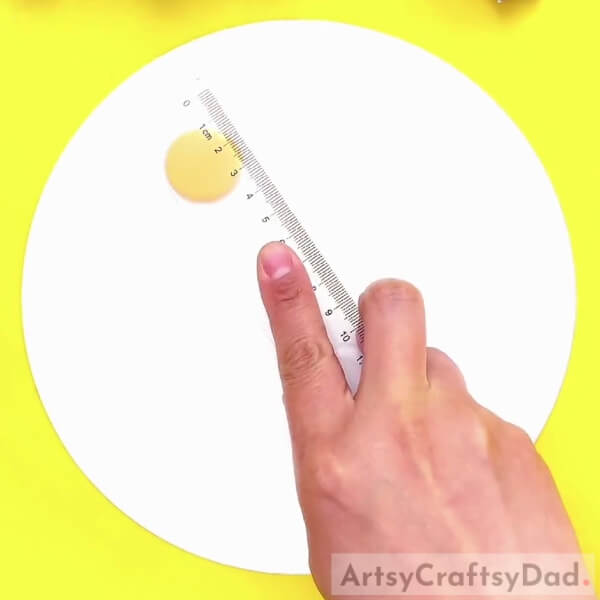
Using a scale, press the clay ball and flatten it into a circle.
Step #4: Making Another Circle

Following the same, make another clay circle a little larger than the previous one right beside it as shown in the image. This will be the body of the chick.
Step #5: Making Another Chick’s Body

Following the same previous steps, make another body of the chick on the left bottom of the base as you made the previous one.
Step #6: Making More Chicks’ Bodies

Make 2 more clay chick bodies on the base as shown in the image.
Step #7: Making Eyes Of The Chicks

Make 4 tiny balls from black clay and place them over the face of the chick and using the scale press them to flatten them into circles. These will be the eyes of the clay chicks.
Step #8: Adding A Beak And Making Legs

From red clay, make a small triangular beak of the chick on the base attached to the face. Now, using the black marker, draw the classic lines legs of the chicks beneath them as shown in the image.
Step #9: Completing Making The Beaks, Legs, And Grass

Following the same, make the re triangular beaks of all the chicks and also draw the legs. Now, using the green marker, draw curvy strokes on the base to make the grass.
Step #10: Making Dotted Flowers

Using the red marker, make some dotted flowers over the grass strokes.
This Is The Final Look Of Your Clay Chicks In Garden Craft!
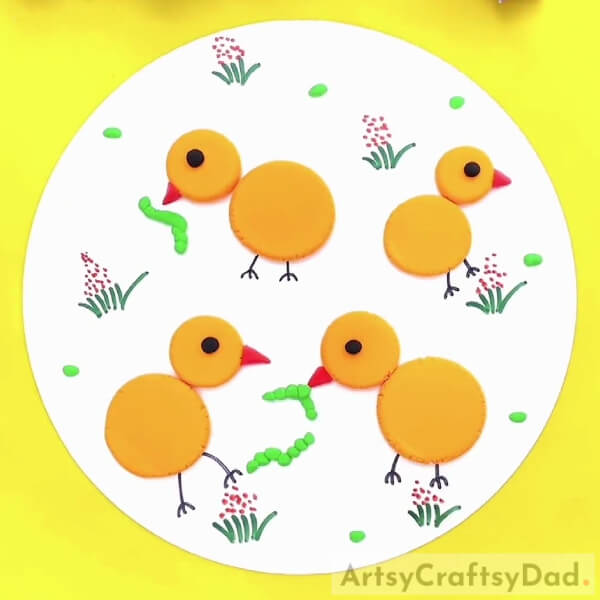
For the last step, make tiny circles of green clay and arrange them side-by-side to make a wavy line over the base and near the beak of the chicks to make them look like the worms that the chicks are eating. Also, put some green circles randomly over the base.
Congratulations! You have finally made your clay chicks in garden craft in no time!
You can now display it over your wall to make it easier to admire your creation every time you look at it! You can even use it as your school craft project! It will definitely be something unique among the other kiddos’ projects in the class and the teacher will admire your skills! Let the kiddos be envious of you when you become your teacher’s favorite!
Hope you liked the article! Share it with your buddies as much as you can! Also, tell us about your craft journey in the comments section! We would love to hear from you!
You May Also Like:
- Butterfly-Inspired Garden Decorations To Upgrade In Your Garden
- Harry Potter Polymer Clay DIYs for Kids
- Baby Footprint Keepsake Ideas With Clay
- How to make polymer clay calla lily necklace
- How to Make Peacock Clay Pot at Home


