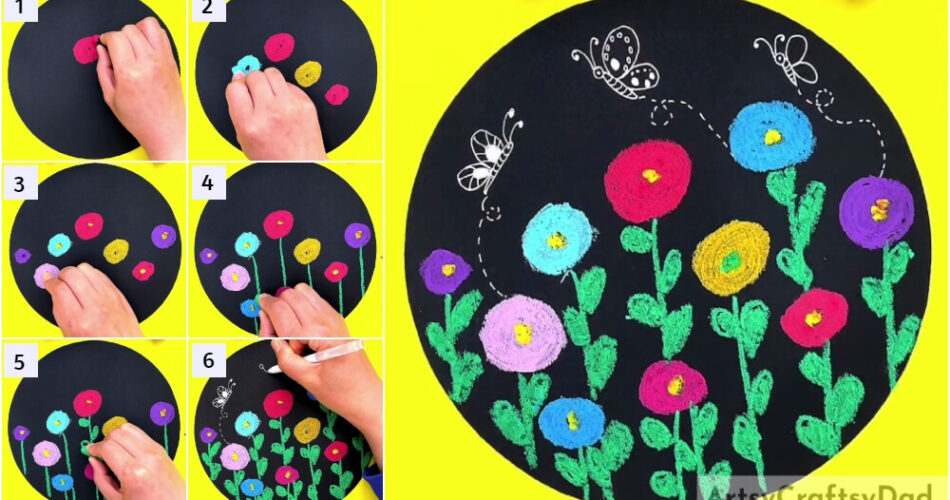
Looking for a drawing to add to your collection? This tutorial will guide you to make the prettiest and easiest flower garden! Check it out!
We are glad you came by! This is a step-by-step tutorial on making a flower garden drawing that will definitely be a hit addition to your drawing collection! This flower garden is not the ordinary one you made previously. All you will need is some basic drawing materials that you already have at home and you will be able to create this drawing in just the blink of an eye, like a pro artist! Just follow the easy steps and grab the listed materials! Let’s begin!
Drawing Flower Garden On Black Base For Kids
Must Read: Simple Paper Tearing Flowers Craft Tutorial
Supplies & Tools:
- Back Circular Paper Sheet
- Crayon Colors
- White Ink Pen
Flower Drawing Instructions
Step #1: Making A Red Oval
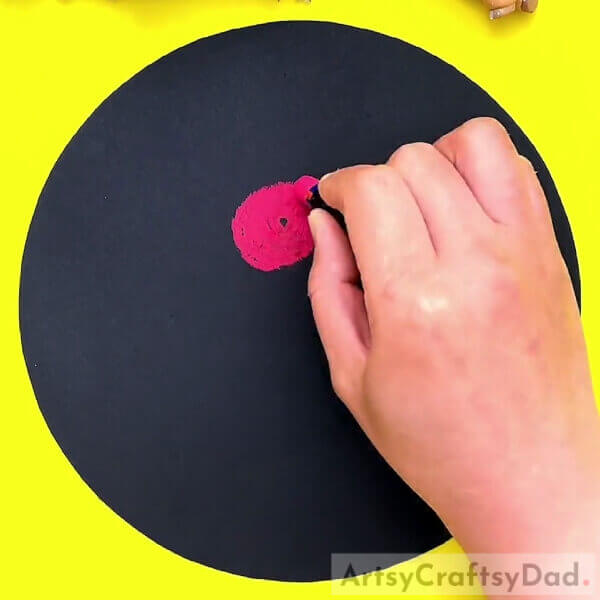
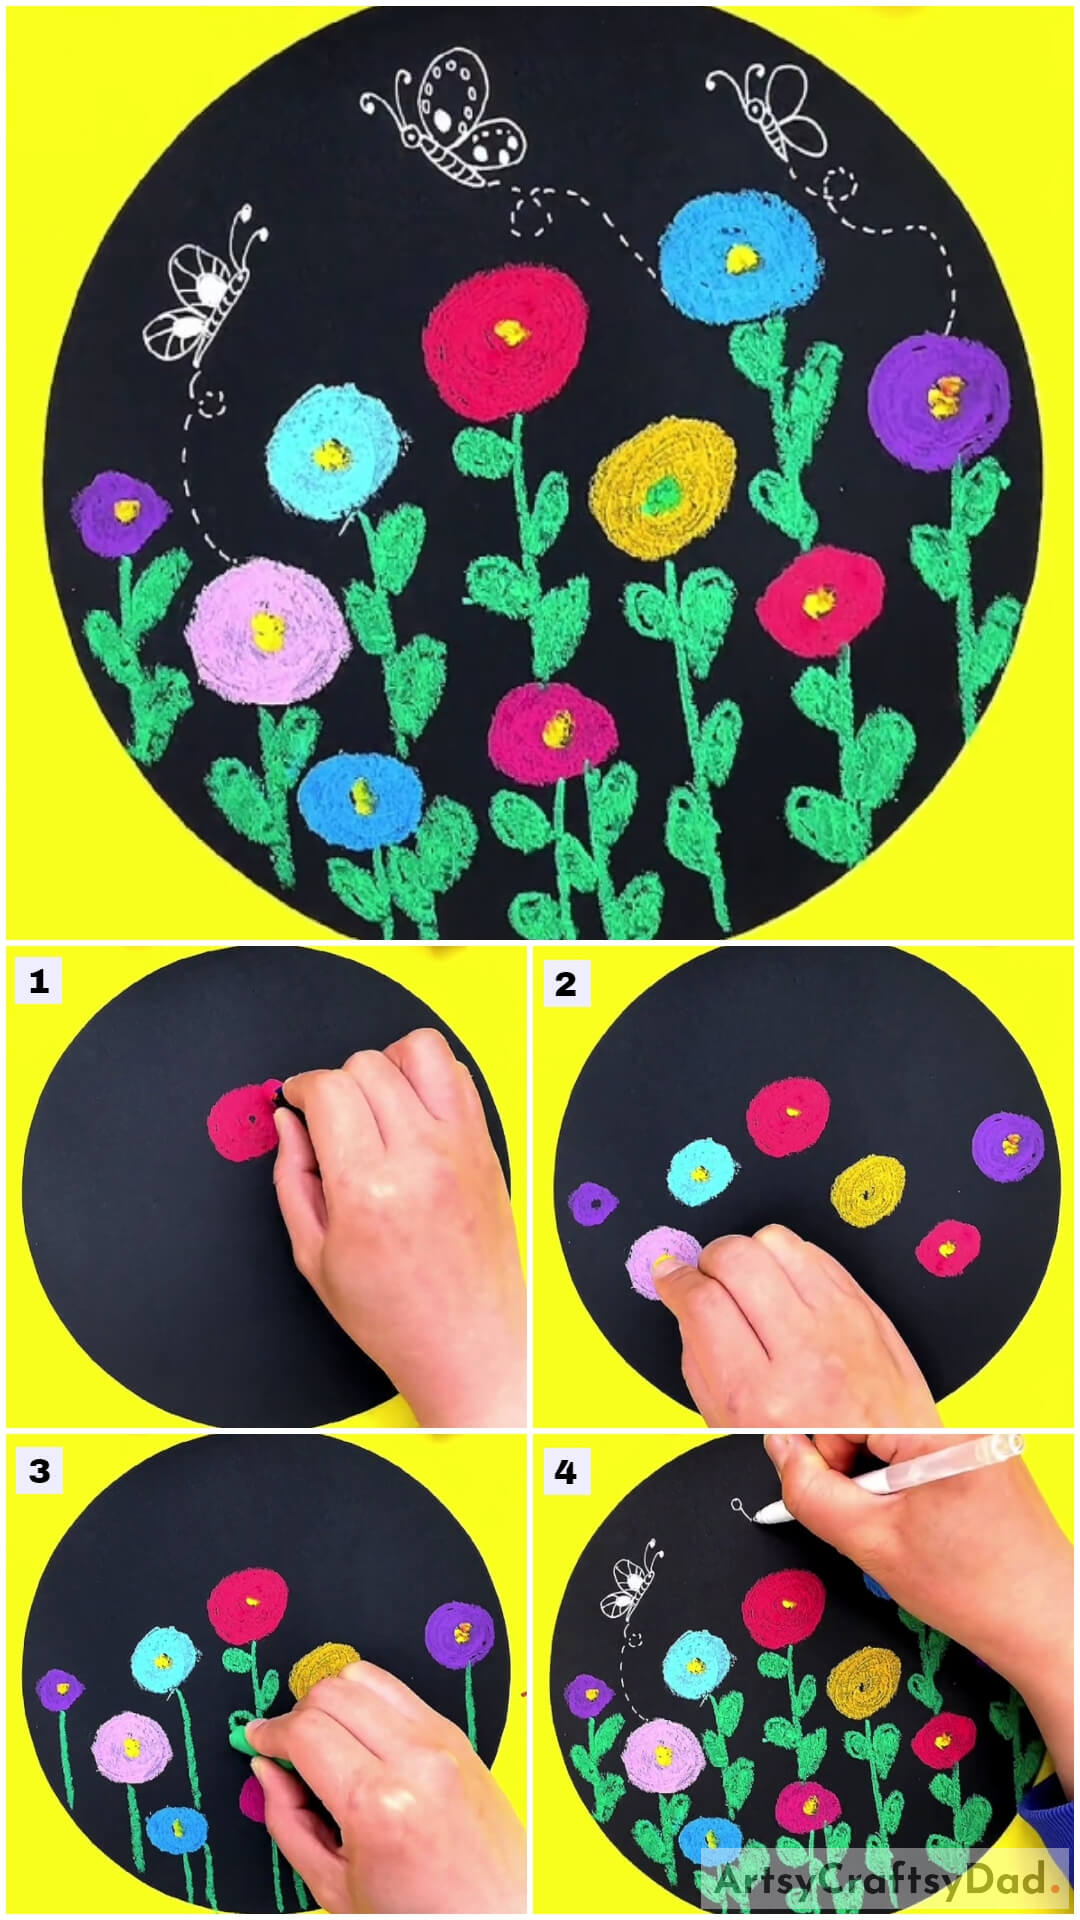
Begin this artwork by taking a black circular paper sheet as the base of the drawing. Now, using a red crayon make an oval in the center, color it out, leaving a tiny hole in the center of it. This will be the petals of your flower.
Step #2: Making More Colorful Petals Of The Flowers
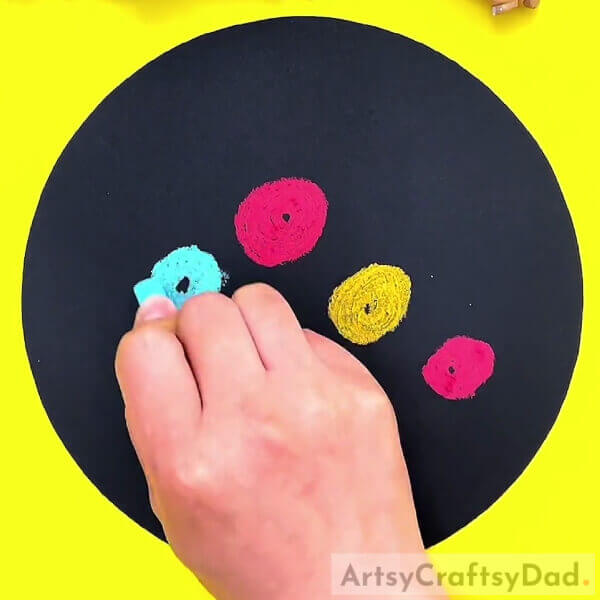
Using yellow, blue, purple, and pink colored crayons make more flower petals on the base randomly on the lower half of it in the same way you made the first one.
Step #3: Making The Centers Of The Flowers
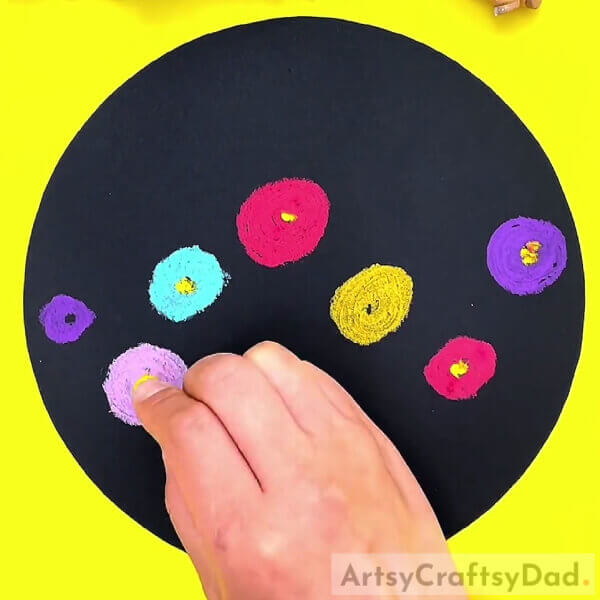
Using the yellow crayon, make the centers of the flowers by coloring out the tiny holes in the petals. Make sure to make all the flower center yellow instead of the yellow flower’s center, which will be made with green crayon.
Step #4: Making The Stems Of The Flowers
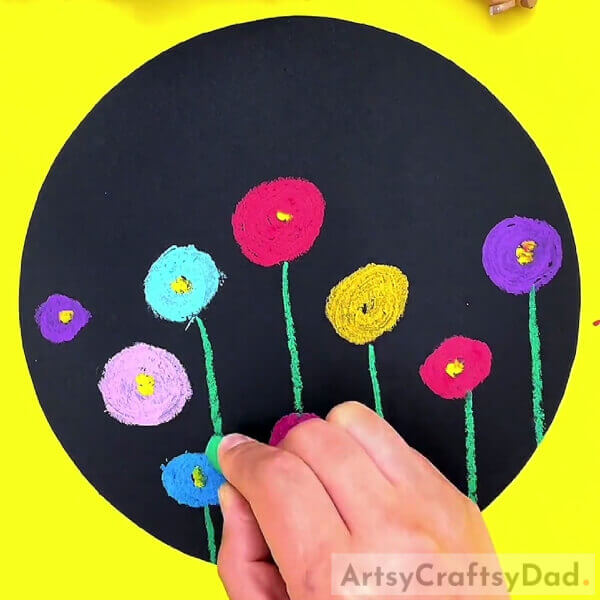
Using the green-colored crayon, make the irregularly straight stem beneath each flower to the end of the base.
Step #5: Making Leaves To The Stems
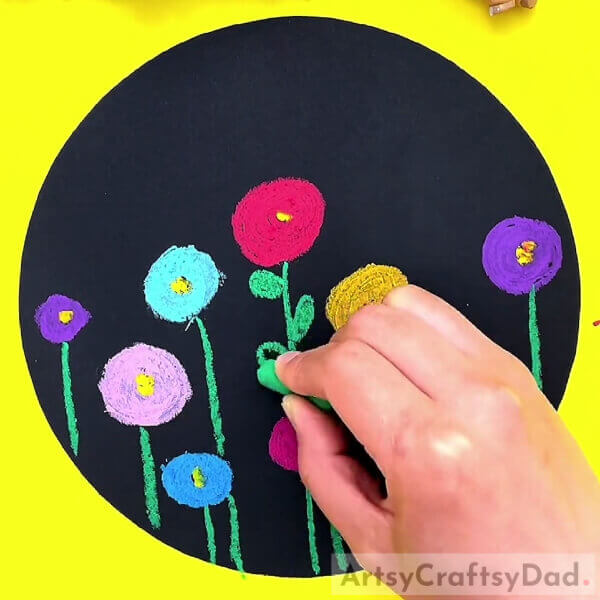
Using the green crayon, make the curved leaves to the stems of the flowers on both sides.
Step #6: Completing Making The Leaves
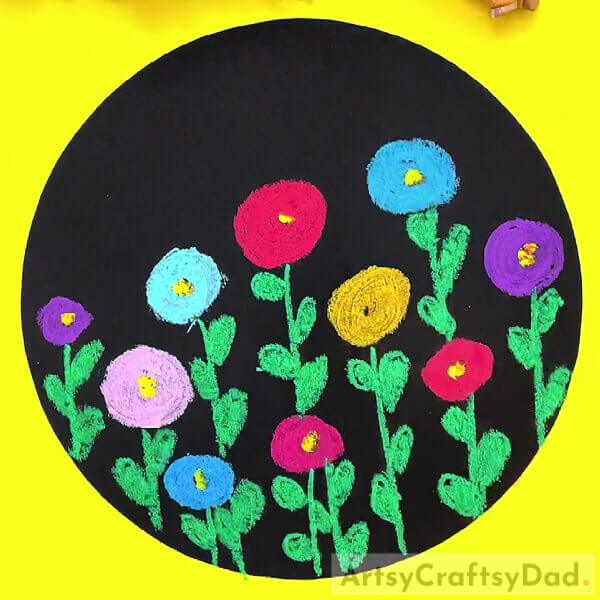
Continue to make the leaves to each and every one of the flower stems as shown in the image.
Step #7: Drawing Butterflies
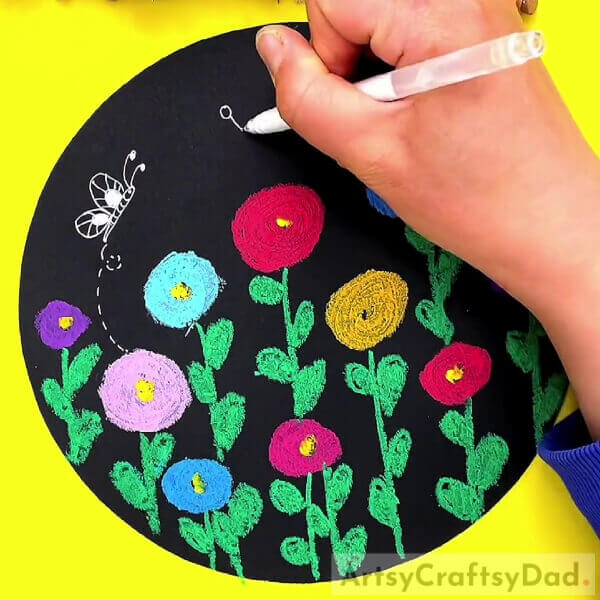
Using a white ink pen, draw different styled 3 butterflies above the flower on the base. Also, make a random dotted line coming from the end of each butterfly, making loops that are wavy.
This Is The Final Look Of Your Crayon Flowers!
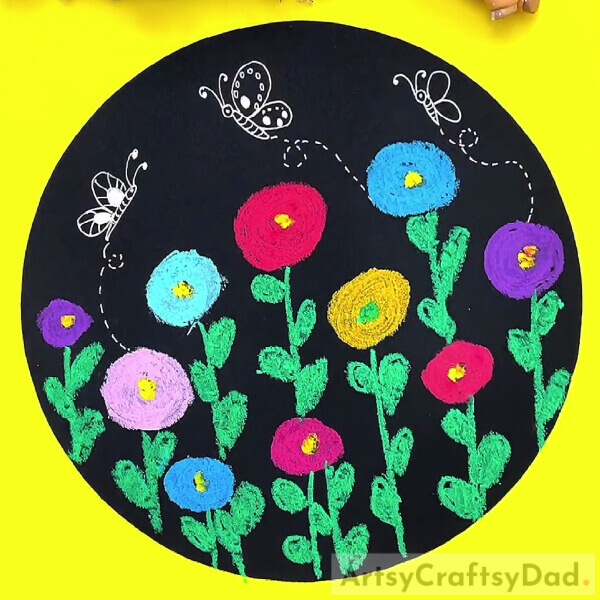
Wow! Look at the astonishing results of your artwork! This looks as if it’s a printout, not drawn!
Show it off to your friends and family and let them be proud of your skills! They will definitely admire your drawing! You can also make some changes to this drawing to make it as unique as you are! Like adding textures to your flowers by using the scraper tool that comes with the oil pastels, or making different shapes of your oval flowers, anything! Your imagination is the limit!
We are hoping that you liked the article! If so, give it a like and share it as much as you can so that we are encouraged to keep bringing such crafts for you!
You May Also Like:
- Kids friendly drawing with numbers as a base
- Kids friendly drawing with numbers as a base (Tutorial)
- Clay-Paper Sunflower Garden Craft Tutorial
- Easy Town Landscape Drawing Tutorial For Kids
- Easy Drawing for Kids – Flowers and Animals


