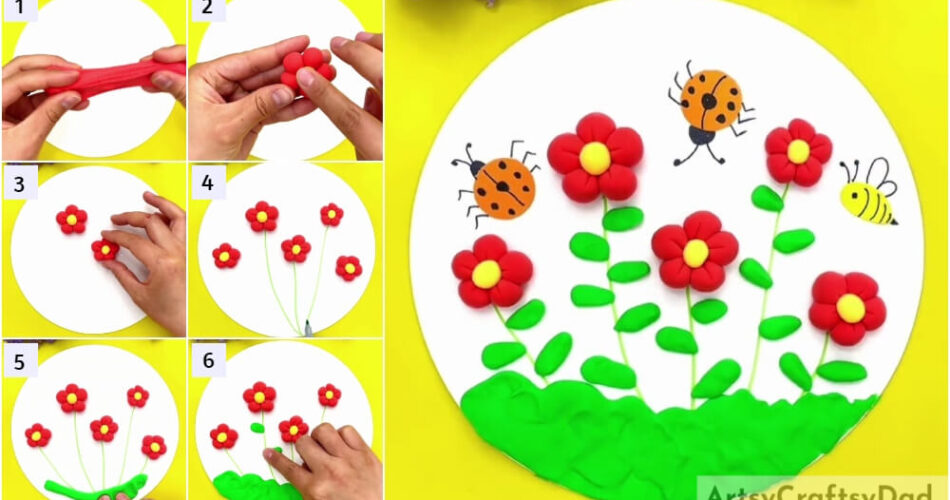
Bring the beauty of red flowers right into your room! This tutorial will guide you on making a red flower garden craft using clay!
Stretch and dough and have fun with clay by making this amazing craft! A pretty red flower garden! This craft will be a fun activity to do for the kiddos in the boring afternoon hours instead of engaging in those harmful screens and devices! Crafts help to drive motor skills, creativity, and imagination! With just some basic craft materials that you can already find at your home, you will create this craft in just the blink of an eye! Read the article to know the steps, so let’s begin!
Beautiful Red Flower Garden With Bees Clay Craft
Must Read: Clay-Paper Sunflower Garden Craft Tutorial
Supplies & Tools:
- Colored Paper Sheets (White, Orange, And Yellow)
- Scissors
- Glue
- Colored Clay (Red, Yellow, And Green)
- Green Sketch Pen
- Black Marker
Clay Bees Flower Instructions
Step #1: Taking Out A Piece Of Red Clay
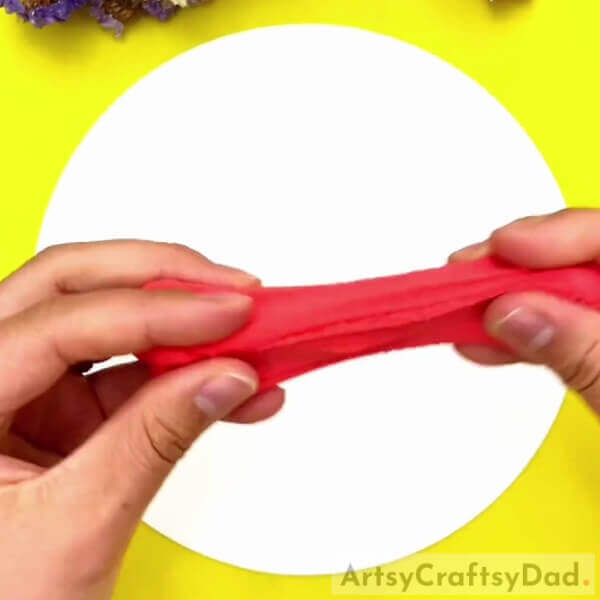
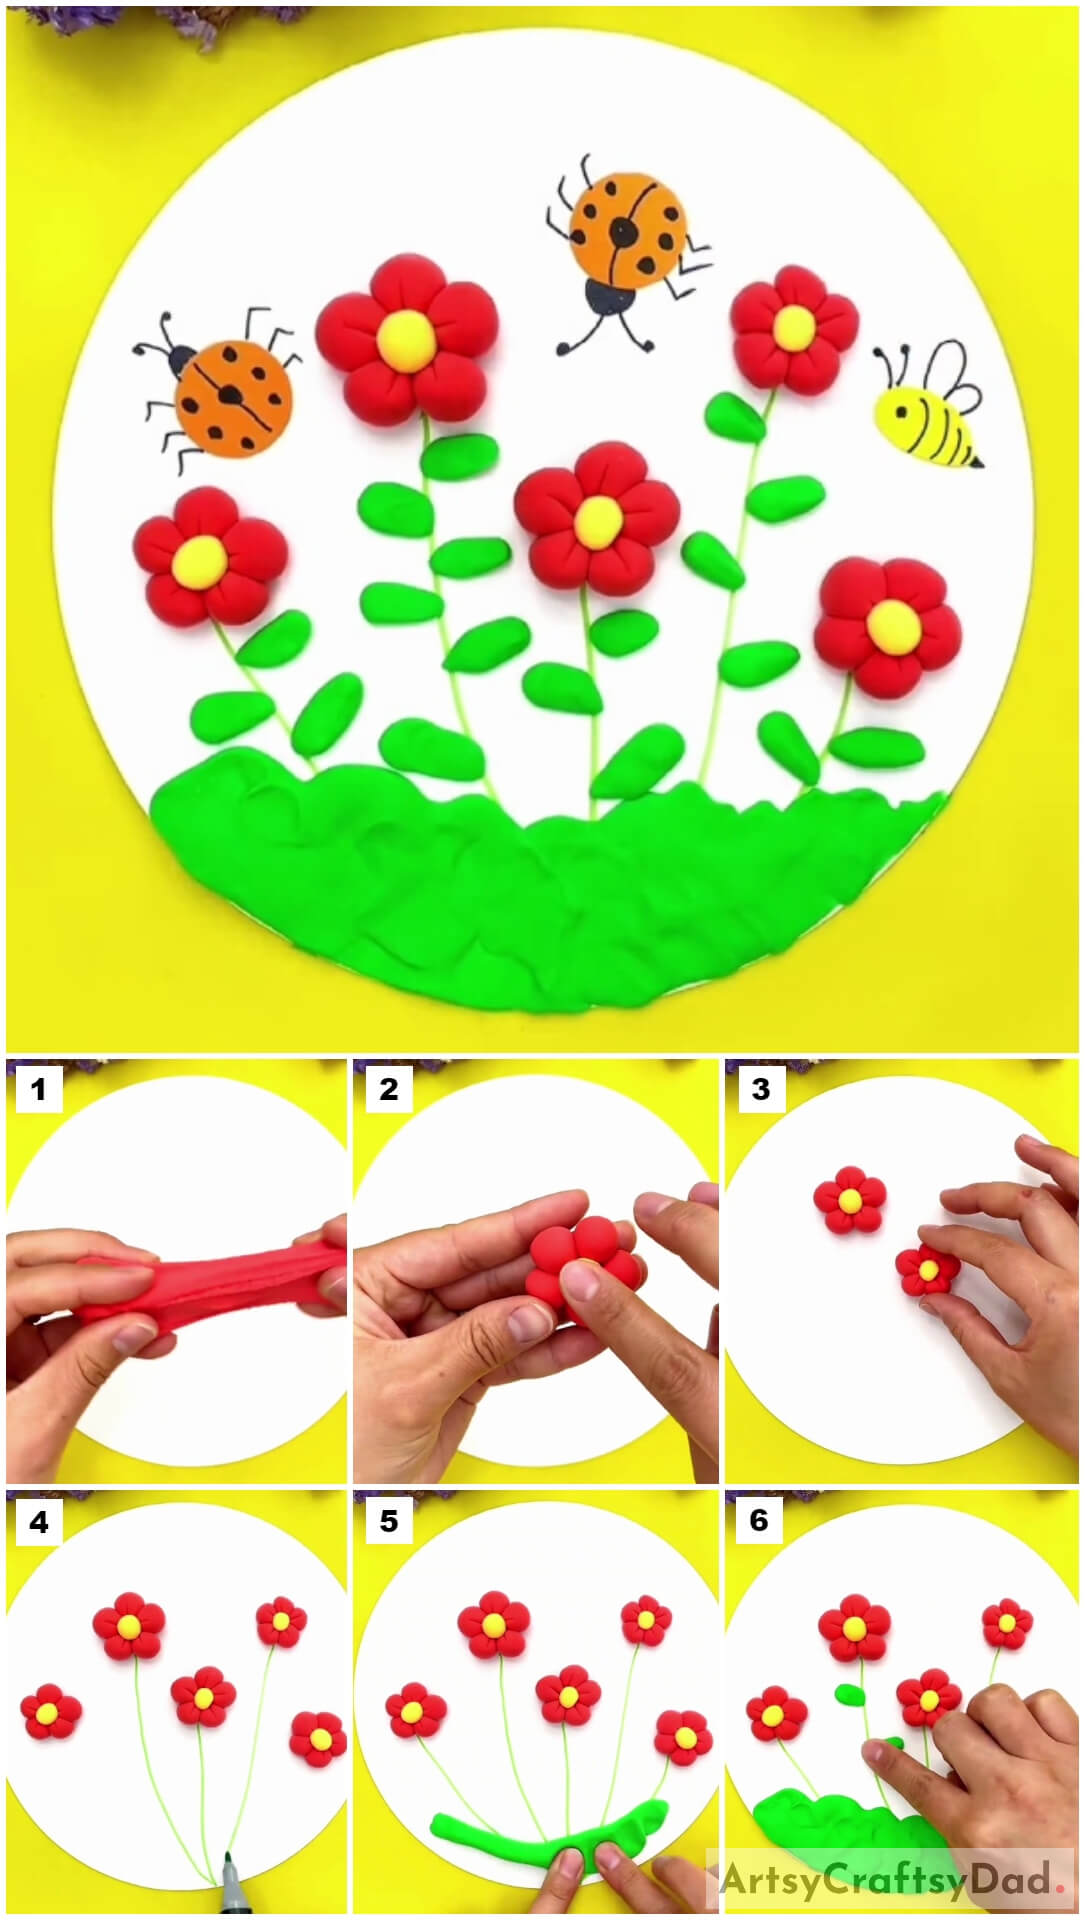
Begin this craft by taking a white paper sheet and cutting it down in a circle using scissors to make the base for this craft and red clay. Stretch out a piece of red clay from the whole.
Step #2: Sticking Two Clay Balls
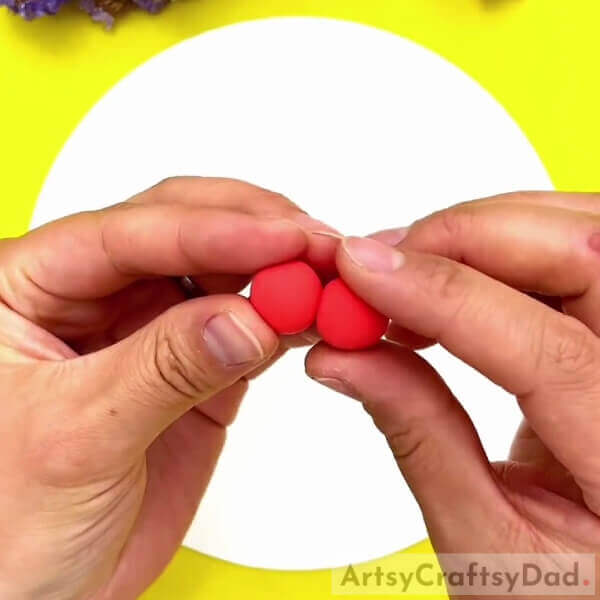
Next, dough 2 small balls from red clay and stick them together.
Step #3: Making A Flower
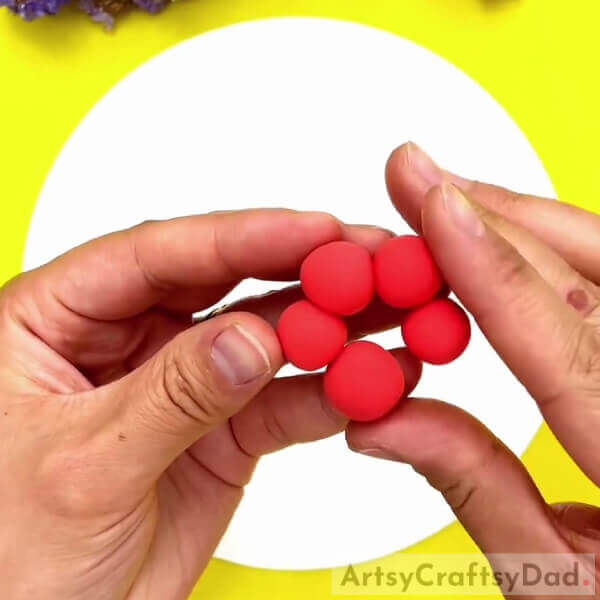
Similarly, make 3 more red clay balls and stick them to the already stuck 2 balls to form a 5-petaled flower.
Step #4: Making The Center Of The Flower
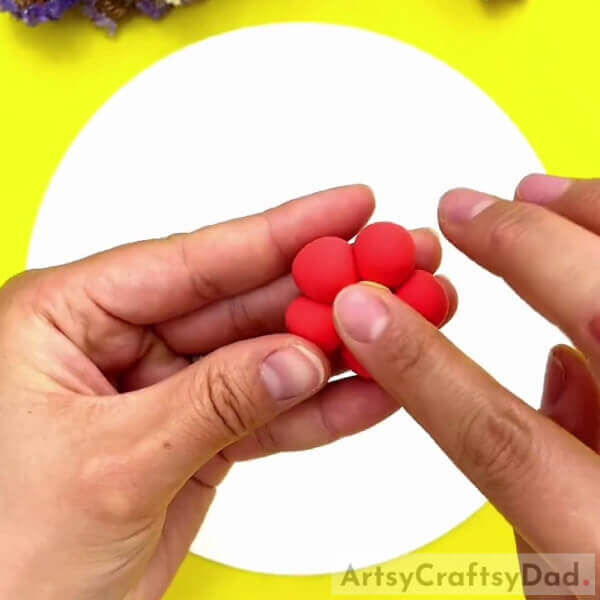
Dough a clay ball from yellow clay and stick it over the flower in the middle to make the center of it. Also, using your nails, carve small lines on the petals from the center.
Step #5: Sticking Flowers On The Base
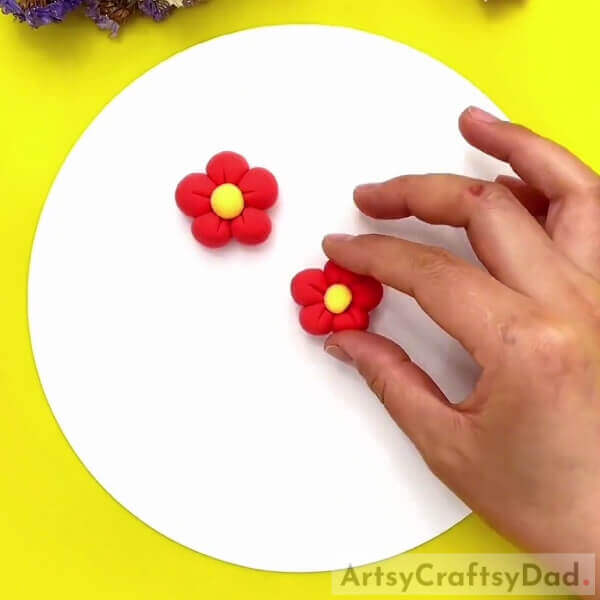
Following the all previous steps, make 4 more flowers and stick them over the base in the middle in a zig-zag horizontal line format i.e. alternately above and below in a horizontal line.
Step #6: Drawing Stems Of The Flowers
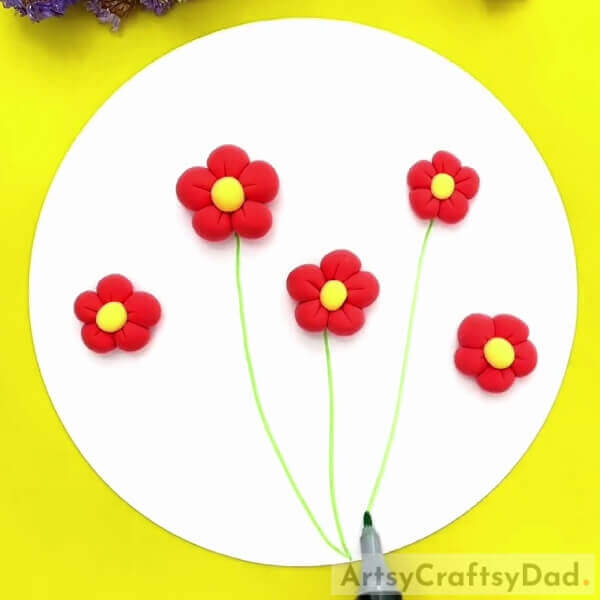
Using a green sketch pen, make irregular stems beneath the flowers and collect their stems to a single point at the bottom of the base.
Step #7: Making Ground
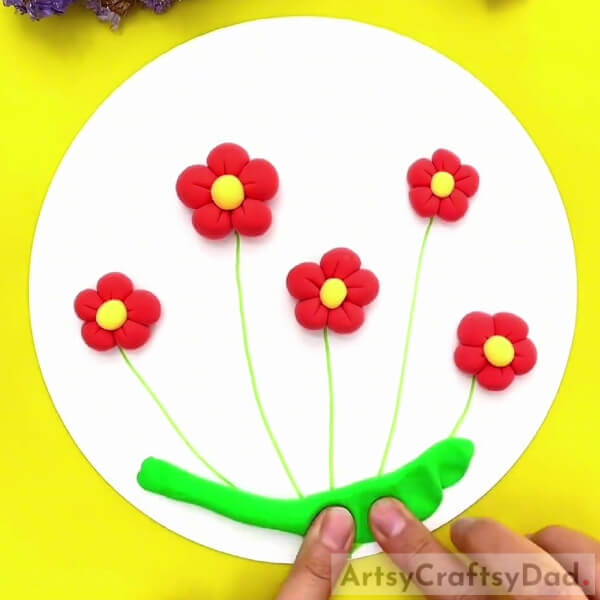
Dough green clay into a thick and long roll. Place this roll over the bottom of the base and using fingers, press the clay to flatten it and spread it on the base to make the ground beneath the flowers.
Step #8: Making Leaves To The Flower Stems
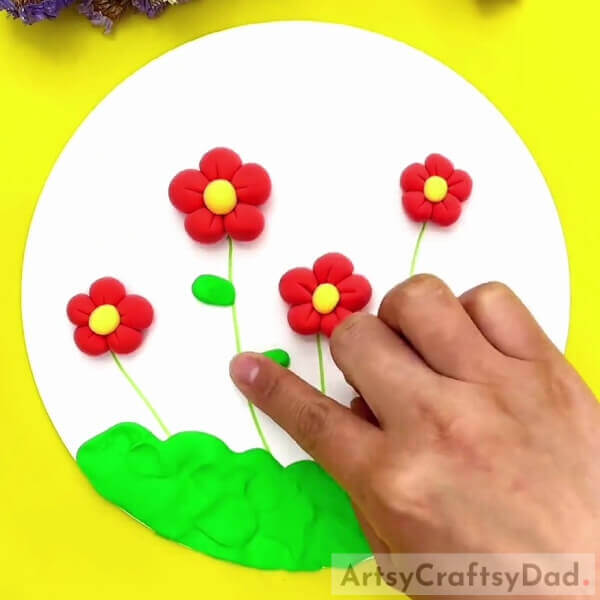
Dough green clay into small ovals and place them on the base on both sides of the flower stems randomly to make the leaves.
Step #9: Pasting An Orange Circle
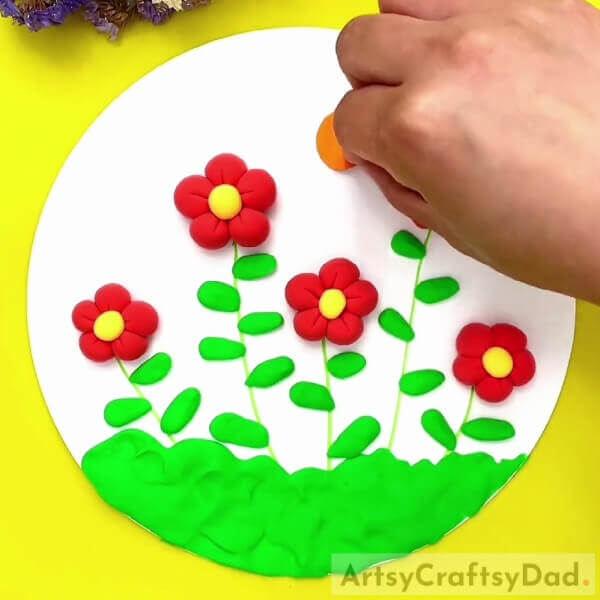
Using scissors, cut a small circle from an orange paper sheet and stick it over the base above the flowers using glue as shown in the image.
Step #10: Making A Bug And A Bee
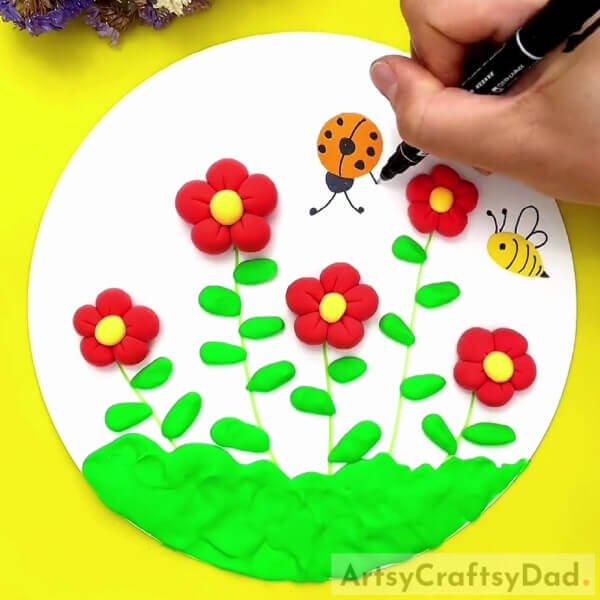
Paste a yellow paper oval shape on the right side of the base using glue. Grab a black marker and draw curved lines over the oval with a dotted eye on the left, also, make wings, curved antennas, and a sting of the bee over the base to the oval.
The orange circle cut out will be the bug, draw the head with antennas on the base using the marker. Detail the bug by making 3-3 dots on both sides of its body and a curvy line in the middle with a large circle in the center, above the line.
This Is The Final Look Of Your Clay Red Flower Garden Craft!
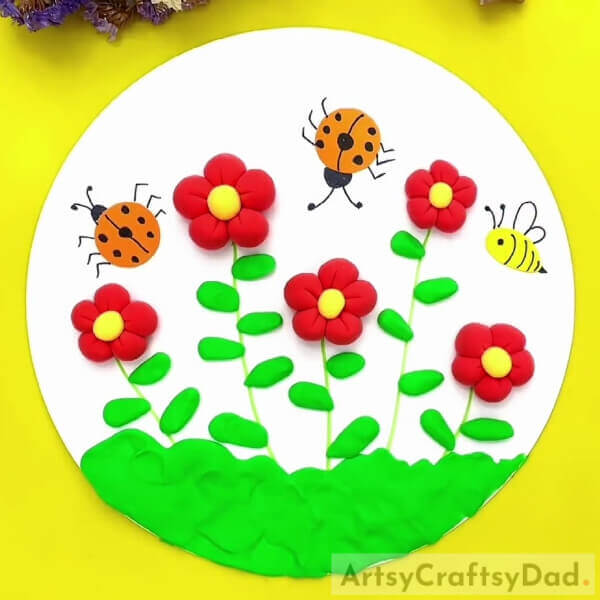
For the last step, cut out and paste another orange circle and make the bug of it on the left side of the base as shown in the image.
Woohoo! You have finally completed making your amazing red flower garden clay craft in no time!
You can now decorate this craft in your room to beautify it even more! You can also customize this craft to your liking! You can even make some other colored flowers, give textures to this one, or draw the whole background of this craft, anything! Your imagination is the limit! You can use this craft as your school craft project! I’m sure everyone will definitely love your craft and will admire you!
We are hoping you loved the article! If so, do give it a like and share it with your friends! Also, don’t forget to leave your feedback in the comments section below!
You May Also Like:
- Clay Chicks In Garden Craft Tutorial
- Clay Heart Leaf Tree Craft Tutorial For Kids
- Easy Craft Ideas from Clay/Plasticine for Easter
- How to Make Peacock Clay Pot at Home
- How To Make New Year’s Toys from Polymer Clay


