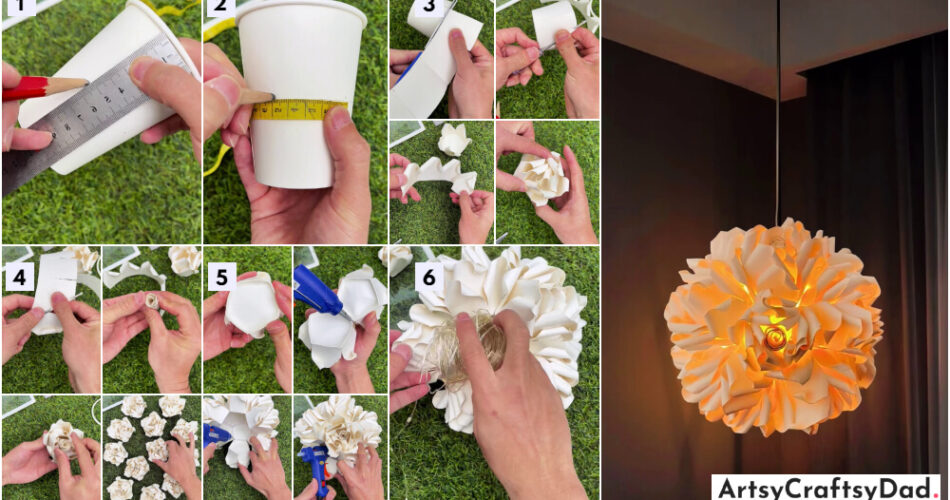
Looking for a unique and creative way to light up your space? Check out our flower chandelier hanging lamp tutorial using paper cups! Learn how to create a stunning and budget-friendly lighting fixture with step-by-step instructions. Perfect for adding a touch of whimsy and charm to any room.
Hey, are you looking for some craft ideas for your home decoration? One such unique and eye-catching idea is the Flower Chandelier Hanging Lamp made from paper cups. This craft tutorial combines the elegance of a chandelier with the simplicity of paper cup art, resulting in a stunning statement piece that can transform any room. Whether you’re looking to add a whimsical touch to a nursery or create a romantic atmosphere in your bedroom, this tutorial will guide you through the step-by-step process of creating your very own Flower Chandelier Hanging Lamp. So, grab your crafting supplies, and let’s get started!
Adorable Flower Chandelier Hanging Lamp Paper Cup Craft

Must Read: Paper Pinwheel Flower Craft Tutorial For Kids
Supplies & Tools
- Scissors
- Pencil
- Steel Scale Ruler
- Paper Cup
- LED String Light
- Paper Cutter
- Glue Gun
- Measuring Tape
- Screw Driver
Flower Chandelier Hanging Lamp Procedure
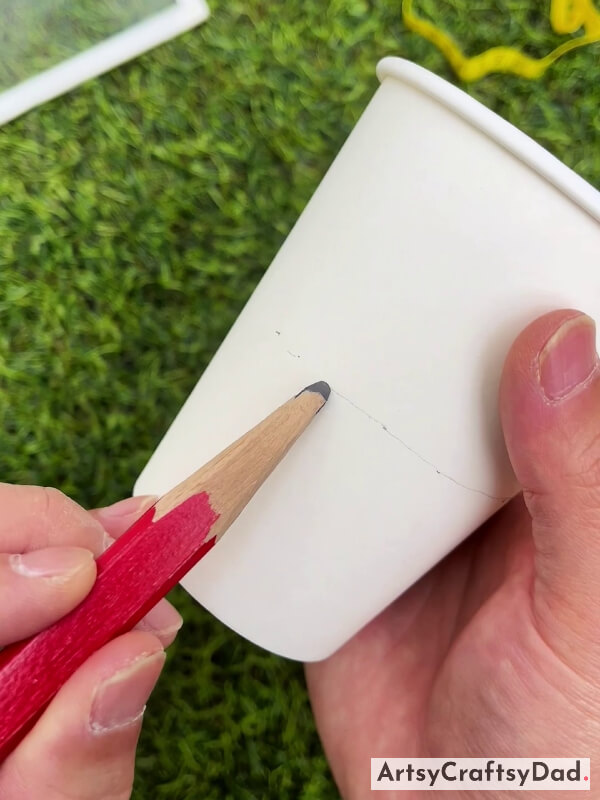
Step #1: Mark a Point On a Paper Cup Using a Scale
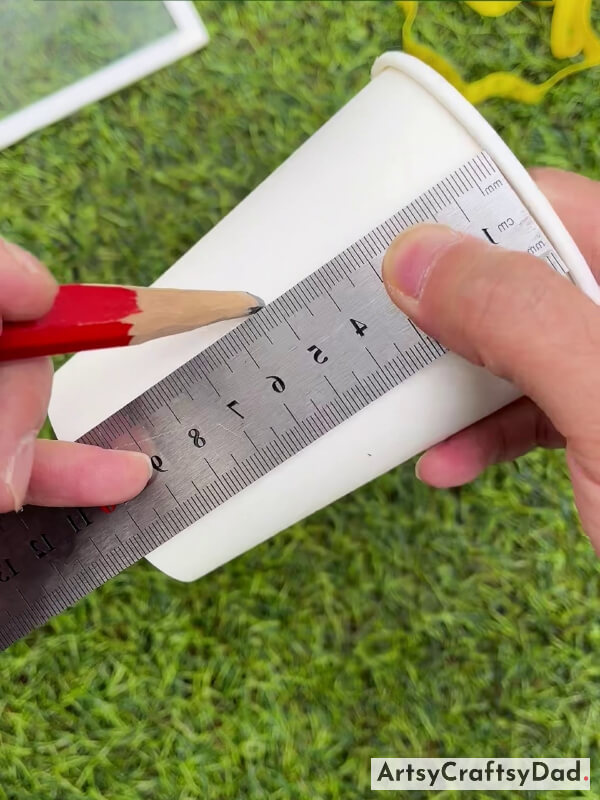
Take a Paper cup & a steel scale ruler. Then, measure the paper cup vertically by 10.4 cm & mark it up to 5.2 cm in the middle of the paper cup & then mark 5.2 cm up to five times by taking the distance between each mark equal to the scale width in the same manner by using a pencil.
Step #2: Drawing A Horizontal Line On Paper Cup
Now, connect all the marking points by drawing a horizontal line in the middle of the paper cup.
Step #3: Measuring With Measure Tape
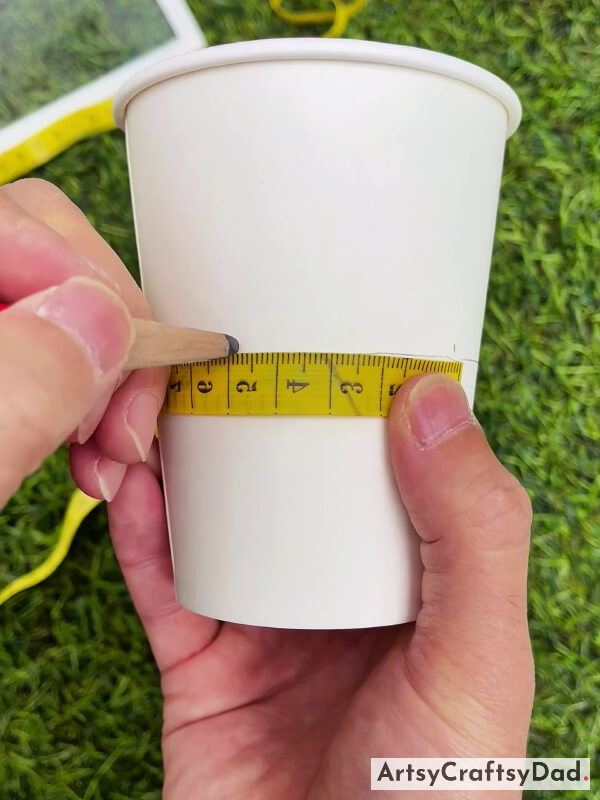
Now, take a measuring tape & measure the middle circumference by 26.6 cm then divide 26.6 cm by 5 (26.6/5). After dividing we get 5.32 cm. Now mark every 5.32 cm distance five times on either side of the horizontal line.
Step #4: Removing Rim Of The Paper Cup
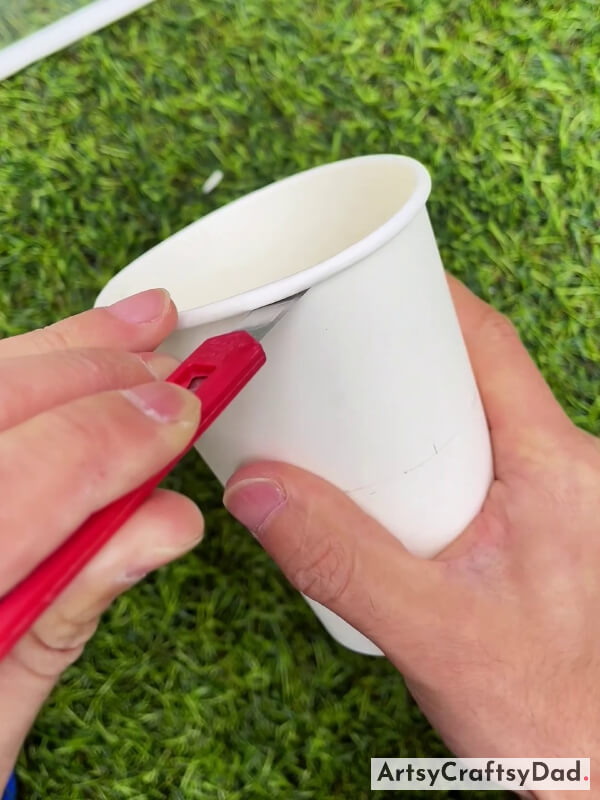
Now, remove the rim of the paper cup by using the paper cutter.
Step #5: Cutting Paper Cup Vertically
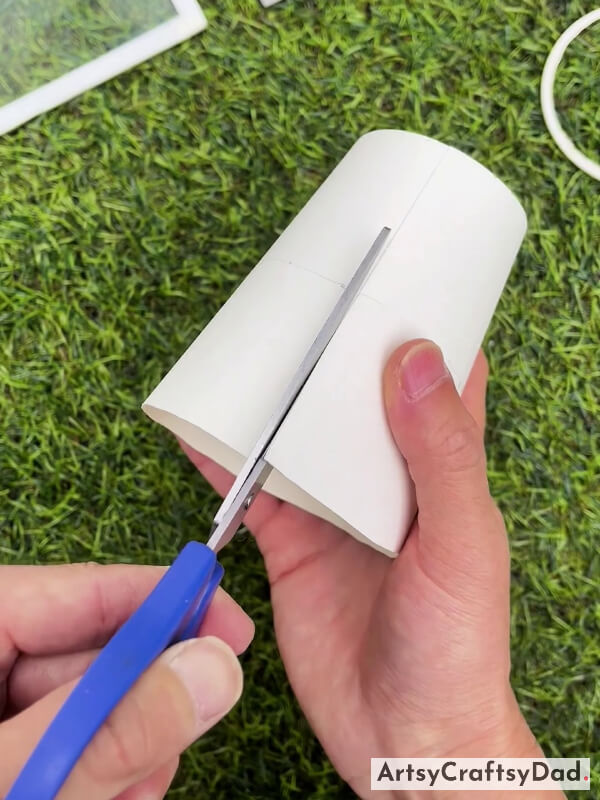
Now, cut toward the middle for each marking.
Step #6: Cutting Completely Top Part

Completely, cut out the top part of the paper cup
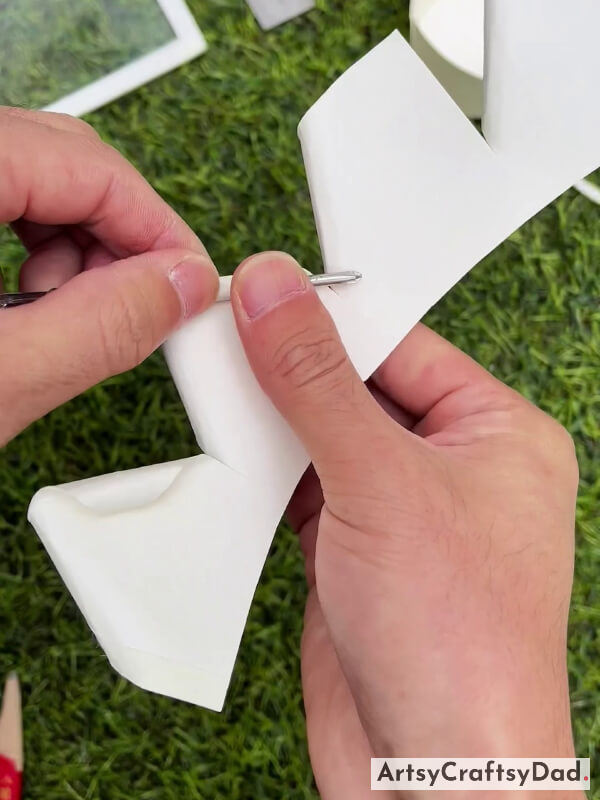
Step #7: Curling Side Of Petal
Now, take a screwdriver & curl each side of the petals diagonally around it.
Step #8: Curling Side Of Other Petal
By following the same process that we mentioned above curl all the sides of the other petals.
Step #9: Making A Cut Towards The Base Of The Paper Cup

Now, cut the paper cup towards the base on each marked point by leaving o.5 cm gap from the bottom of the paper cup.
Step #10: Curling Each Side Of The Petals
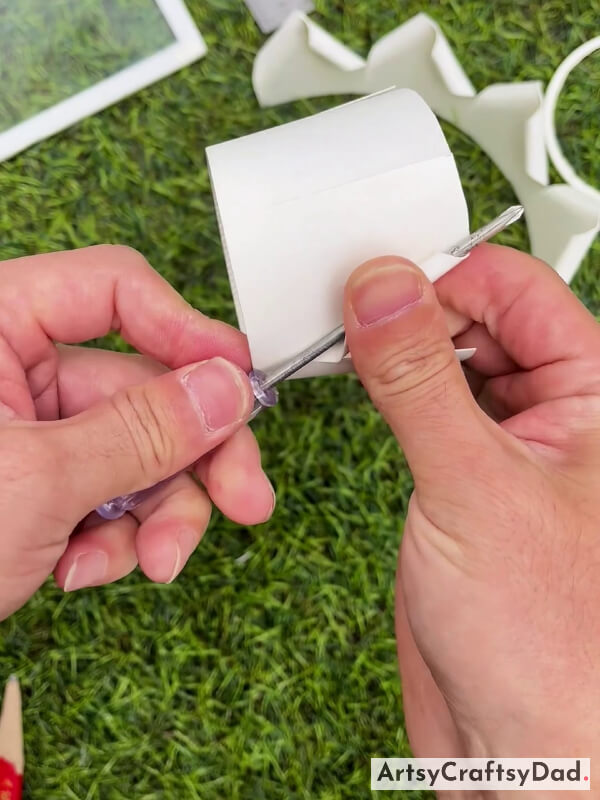
Curl all the sides of each petal diagonally with the screwdriver.
Step #11: Completing Curling The Petals
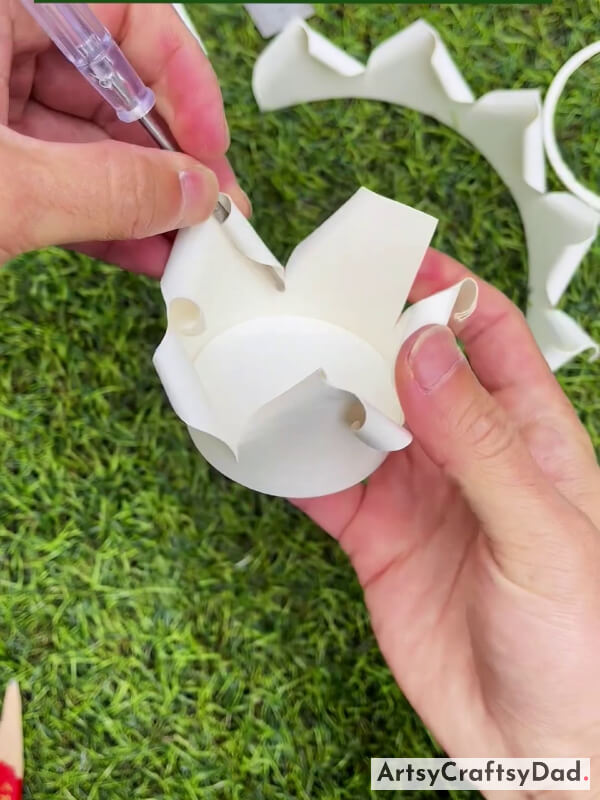
Continue the process of petal curling same as above.
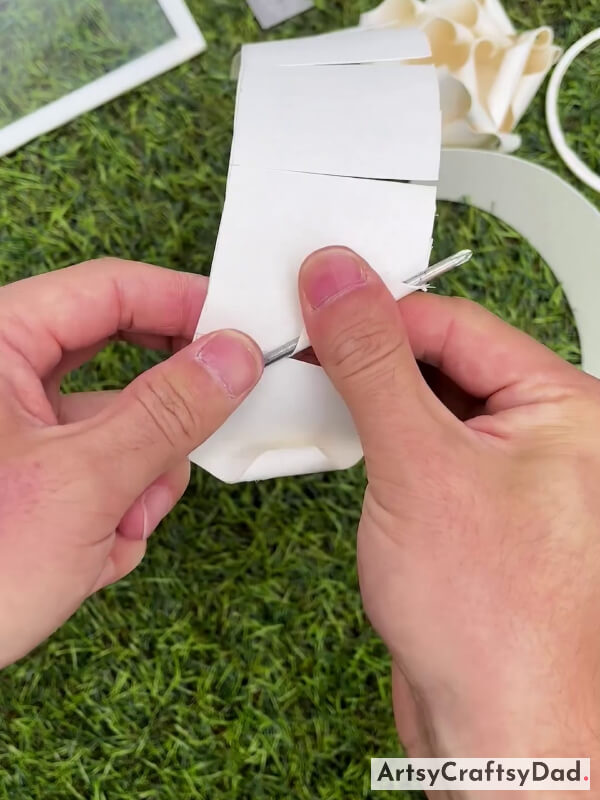
Step #12: Applying Some Glue On Four Marking
Take the paper cup upper part that we made in the above step. Apply some glue drops on four marking points.
Step #13: Lightly Fold It Up & Put Inside The Base
Now, slightly fold it up & place it inside the paper cup bottom base that we made above & push the petal to the side.
Step #14: Remove Paper Cup Rim
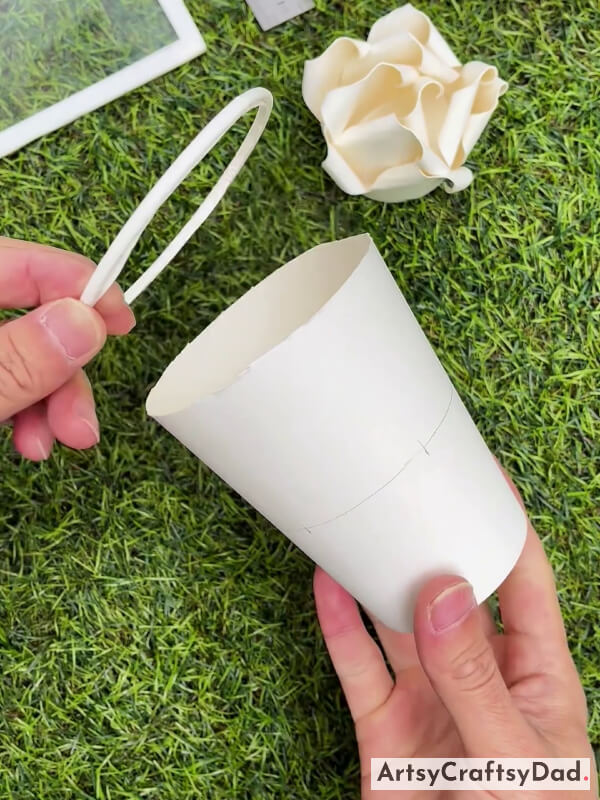
Take another paper cup & remove the rim of the paper cup & mark as we did for the first paper cup.
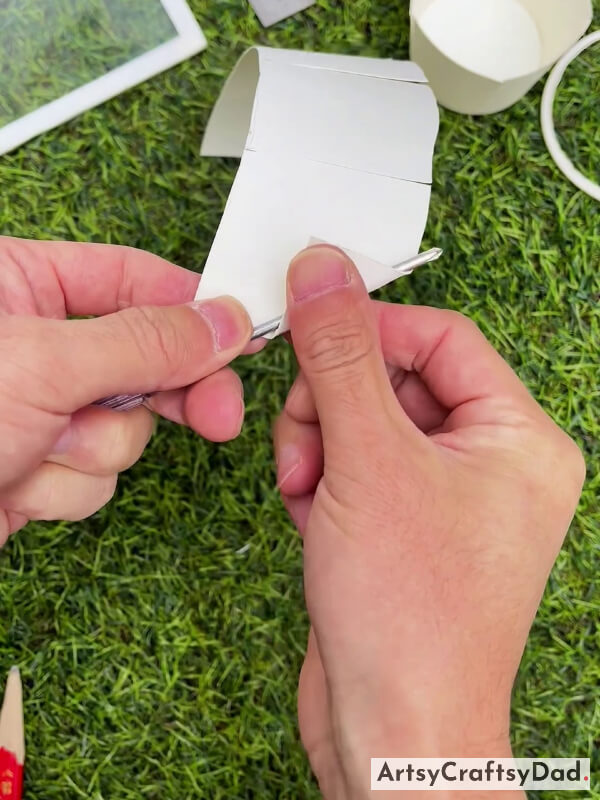
Step #15: Cutting The Bottom Part Of Paper Cup
Cut the top part completely by the same process. After that take the paper cup’s lower part & cut out the paper cup base & make a strip as you see in the above image.
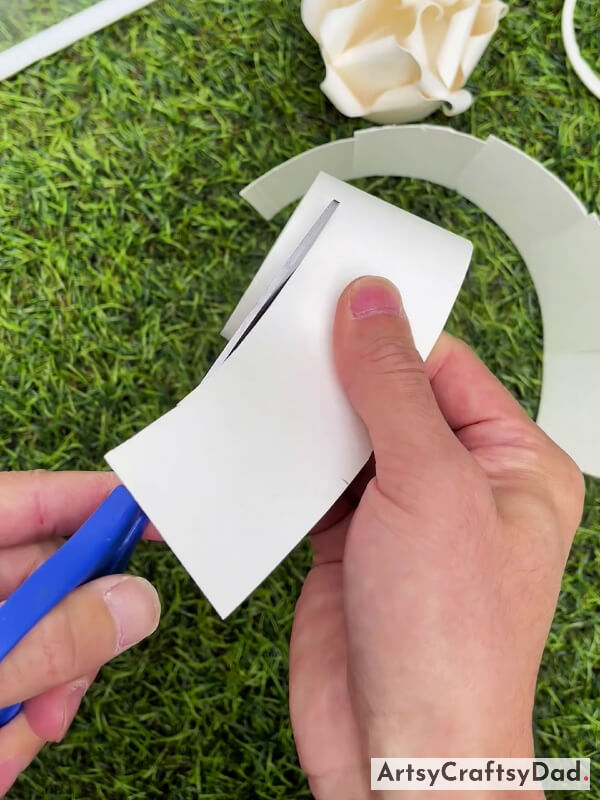
Step #16: Showing Remaining Part & Mark Part
Here take the remaining part & mark part.
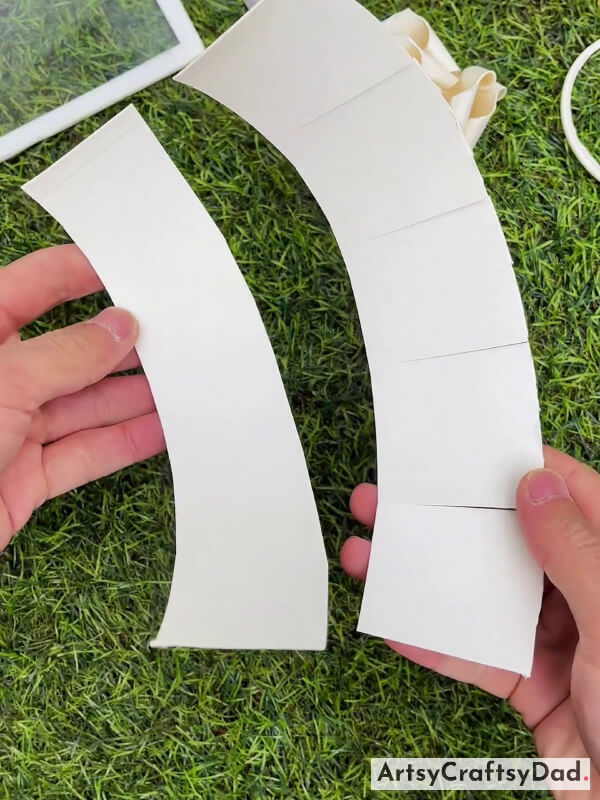
Step #17: Curling Sides Of The Petals
Curl each side of the petals one by one by the same process that we used for the first one.
Step #18: Making A Paper Roll
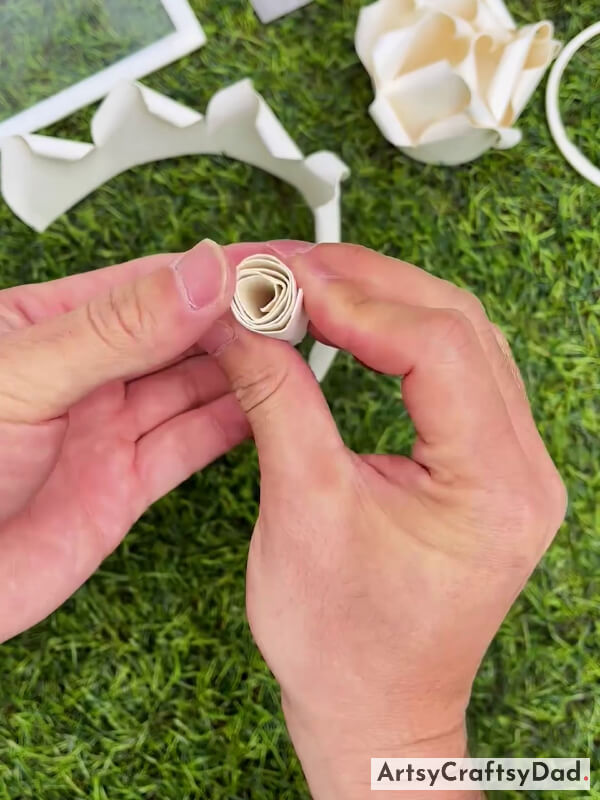
Take the strip that we made by cutting the base of a paper cup & roll it.
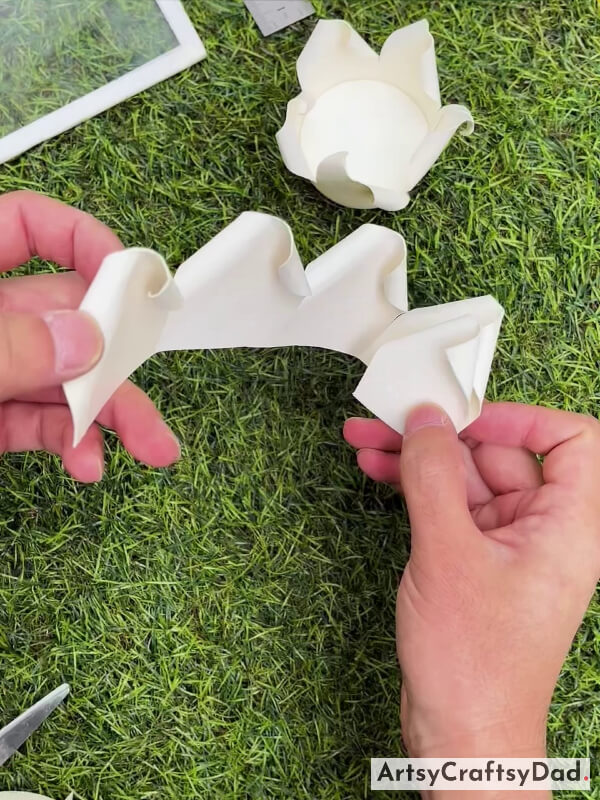
Step #19: Taking The Curled Part
Take the curled part.
Step #20: Lightly Fold It Up & Put Inside The Flower
Apply some glue to the four marks of the petal strip & put it inside the paper cup flower by lightly folding it up & pushing the petal to the side.
Step #21: Putting Paper Roll Inside The Flower
Take the paper roll that we made & put it in the center of the flower.
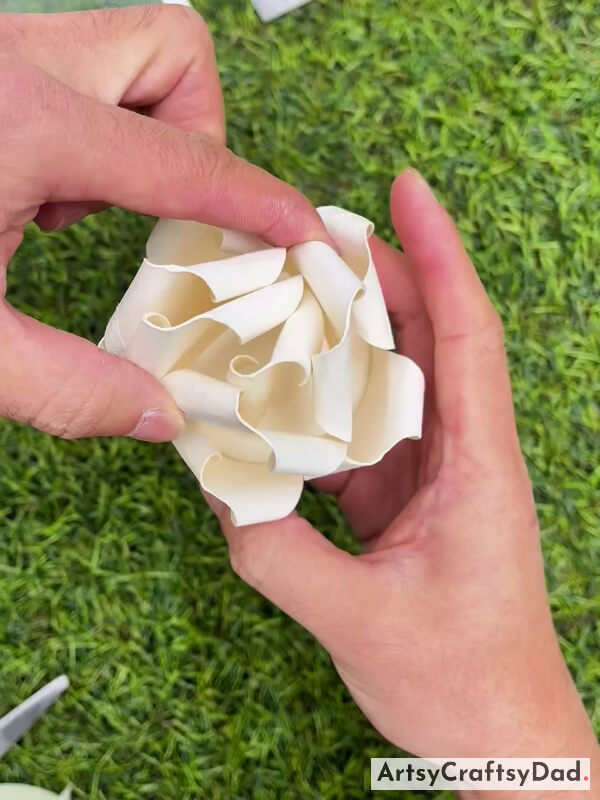
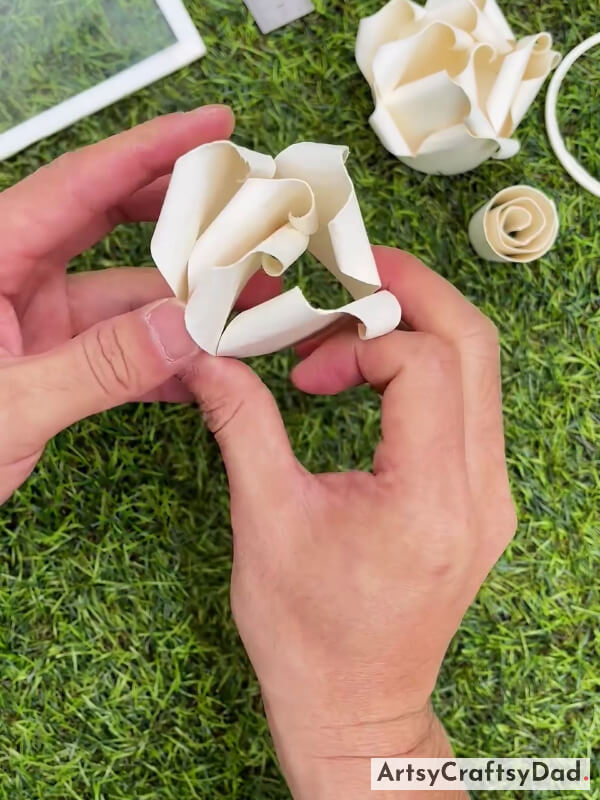
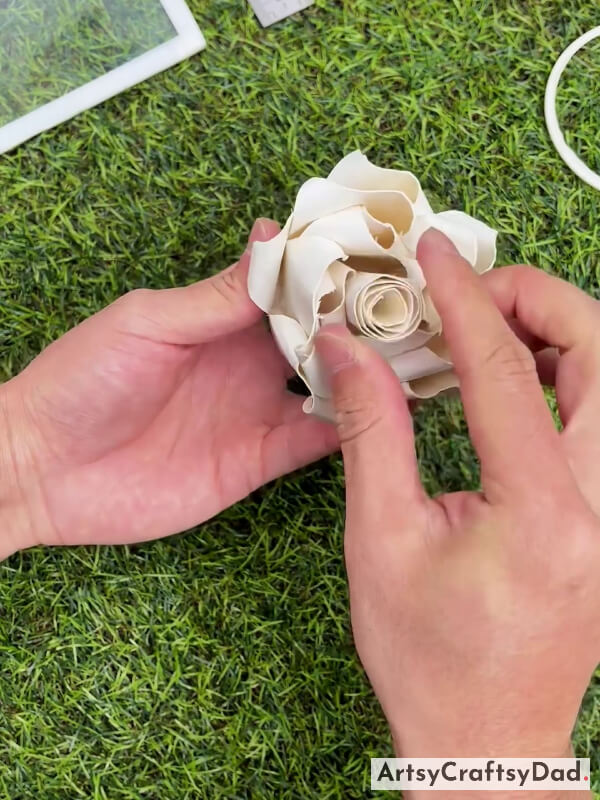
Step #22: Balance Out The Appearance
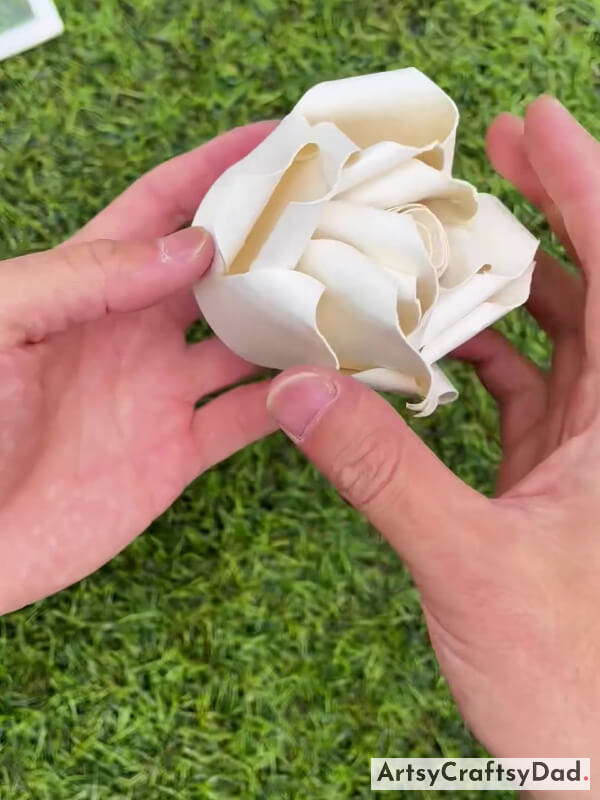
Balance out the appearance of the flower by adjusting the petals.
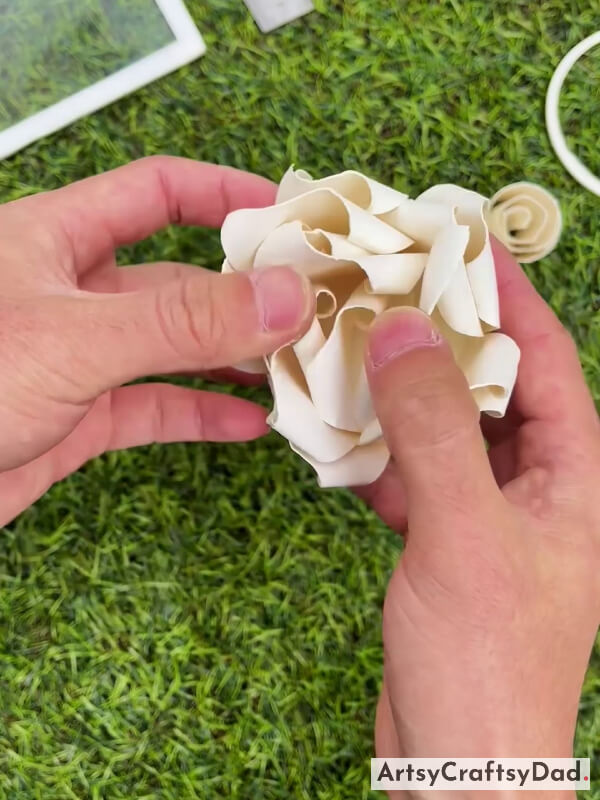
Step #23: Shaping Flower Base Into Pentagon
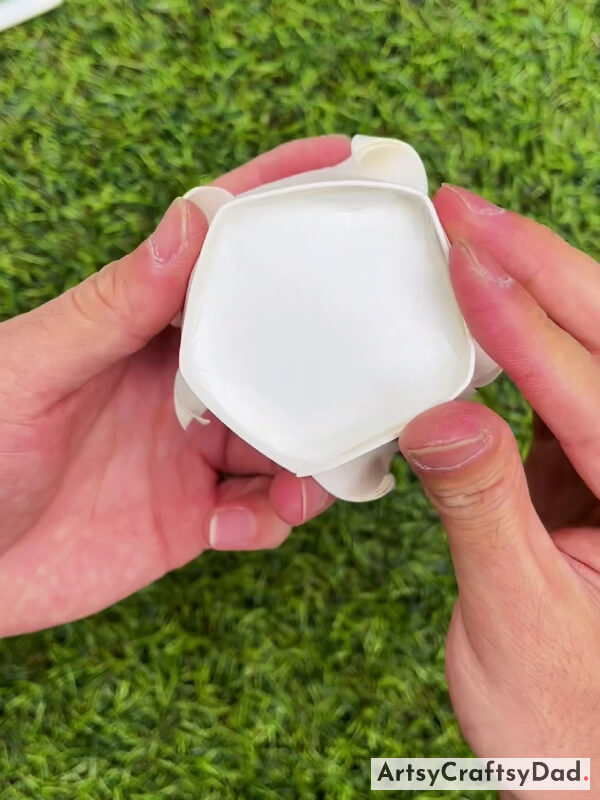
Now, shape the flower’s bottom part into a pentagon from your hand.
Step #24: Making the Same Twelve Flowers
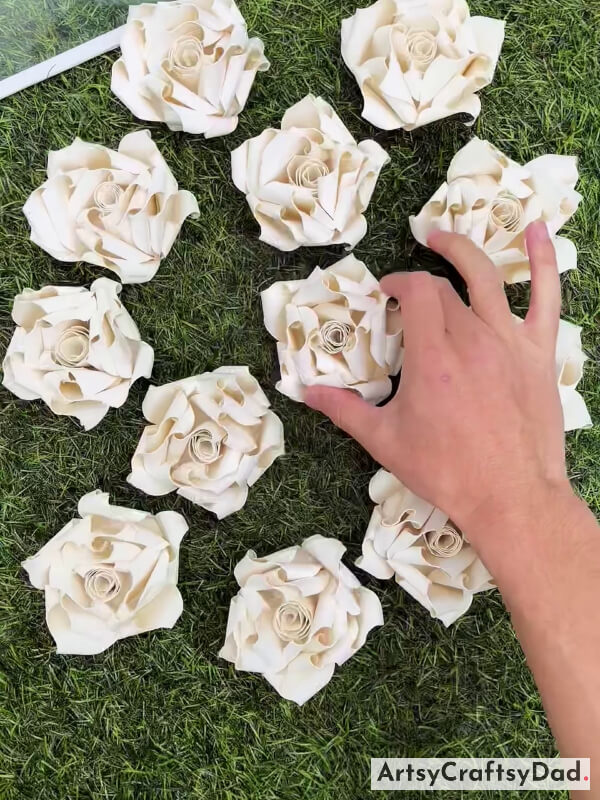
Make up to twelve flowers by the same process.
Step #25: Applying Glue
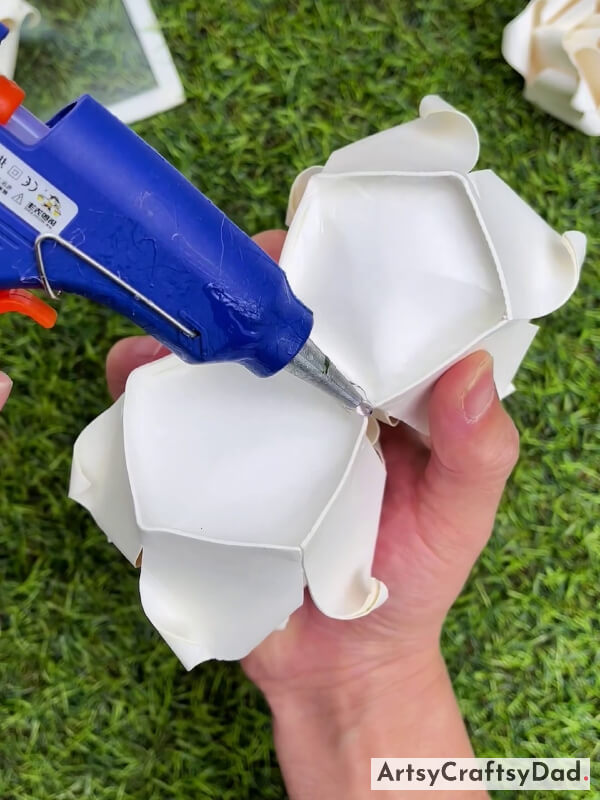
Take a glue gun & apply glue to stick two flowers with each other.
Step #26: Sticking All The Flowers
Stick all the flowers one by one with each other as shown in the above figure.
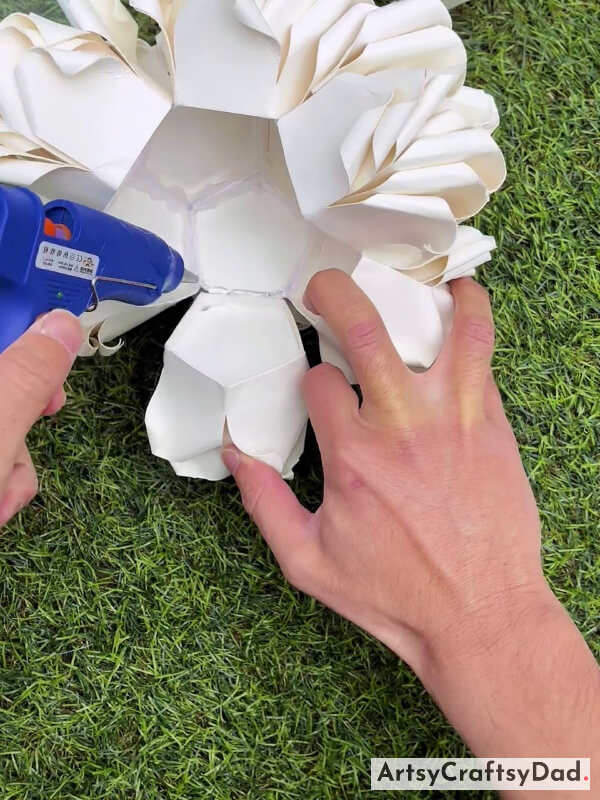
Step #27: Folding Up All The Petals
Folding up all the petals slightly up & shaping them the same way as you see in the picture.
Step #28: Using LED String Light
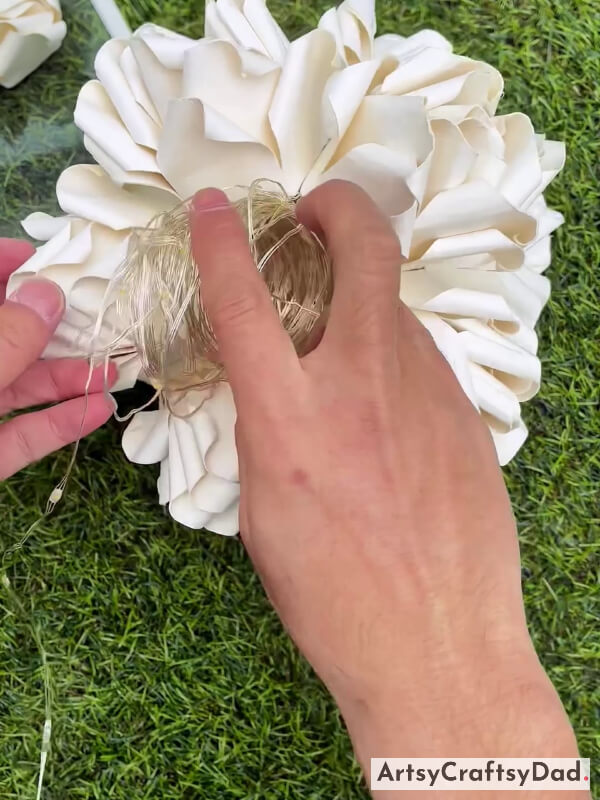
Take an LED string light & put it in the center of the flower.
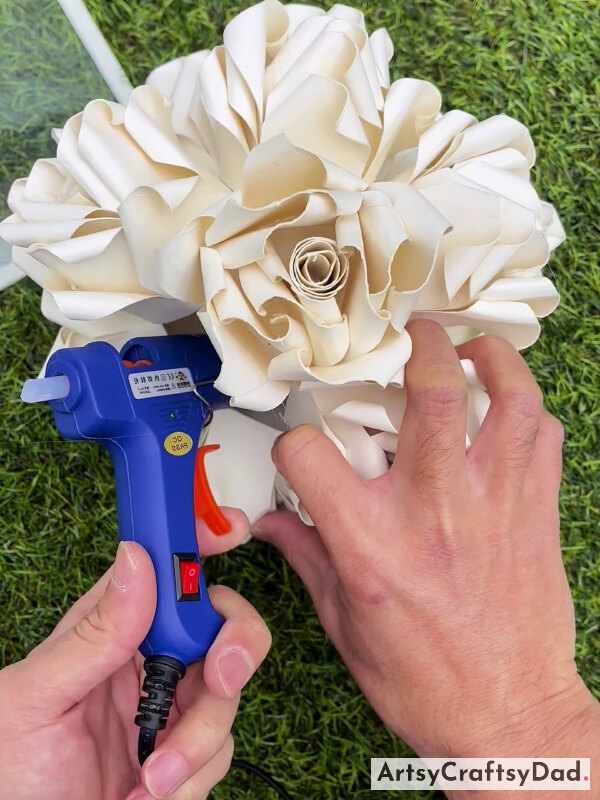
Step #29: Putting The Last Flower At The Top Center Of The Flower
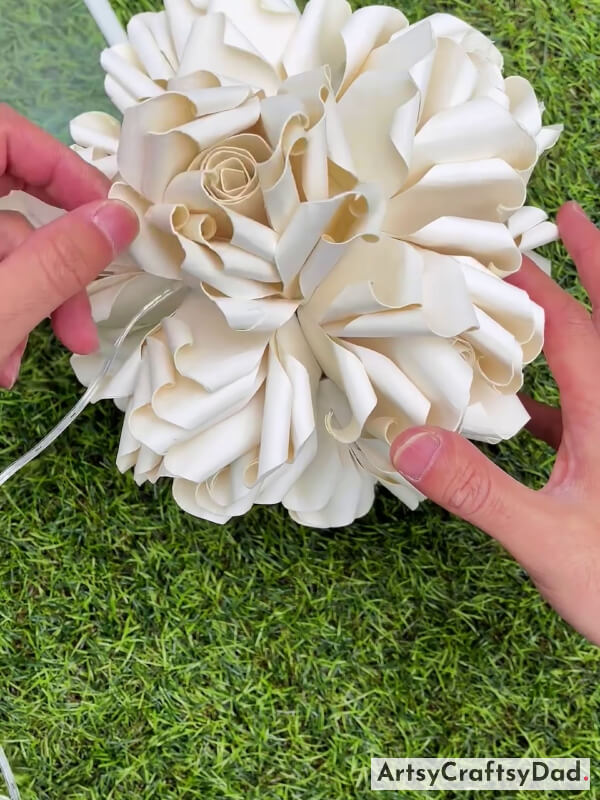
Now, complete the flower by putting the last flower in the center of the flower.
Our Flower Chandelier Hanging Lamp Is Ready Now!
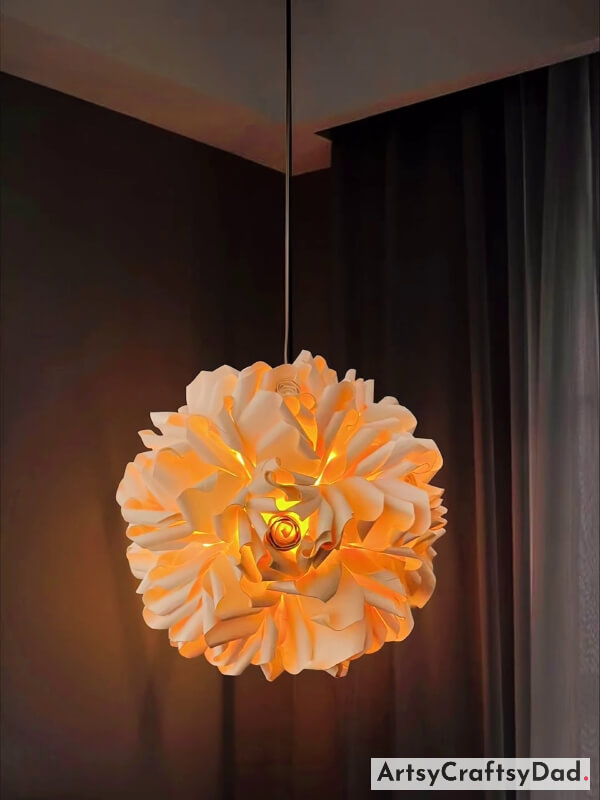
Our flower chandelier hanging lamp is ready now.
Tadda, our flower chandelier hanging lamp is ready now. Crafting a flower chandelier hanging lamp using paper cups is not only a creative and budget-friendly project, but it also adds a touch of elegance to any space. With just a few simple materials and a little bit of patience, anyone can create a stunning and unique decor piece that will surely impress. You could decorate your home with this attractive & unique craft. So why not give it a try and let your creativity bloom with this fun and easy craft tutorial? Don’t forget to share our website with your friends & family. You could visit our other websites for more ideas & other crafts. Please share your thoughts about this craft in the comment section.
Thanks for visiting our website! Happy crafting!
You might also like
- How to Make Paper Flower Wall Hanging (Tutorial)
- How to make wall hanging paper flower
- How to Make a Paper Flower Vase – Paper Craft Tutorial
- Dumpling Dragon Boat Paper Craft Step-By-Step Tutorial
- How to make a floral chandelier from a plastic bottle