“Learn how to create a stunning origami flower design using paper hair sticks with our step-by-step craft tutorial. Enhance your hair accessories collection and add a touch of elegance to your hairstyles. Discover the art of paper folding and unleash your creativity with this unique and stylish DIY project.”
The art of origami has been practiced for centuries, originating in Japan and spreading to various parts of the world. It involves the delicate folding of paper to create intricate and mesmerizing designs. One popular origami craft is the paper hair stick, which combines functionality and beauty. In this tutorial, we will explore the steps to create a stunning origami flower design on a hair stick. Whether you are a fan of origami or simply looking for a unique hair accessory, this tutorial will guide you through the process of creating your very own paper hair stick.
Hair Stick Origami Flower Design Craft Tutorial
Must Read: Paper Origami Chinese Fan Craft Tutorial For Beginners
Supplies & Tools
- Scissors
- Colored Paper
- Glue
- Wooden Stick
Hair Stick Origami Flower Design Paper Craft
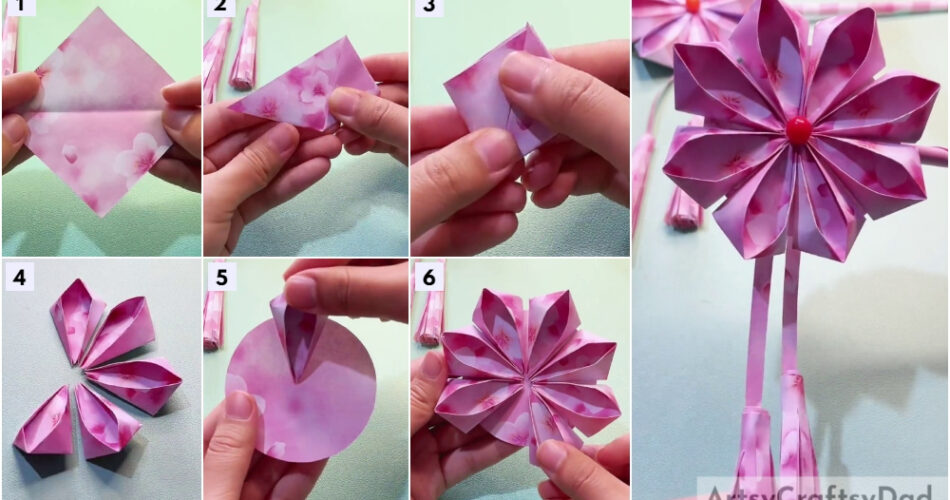
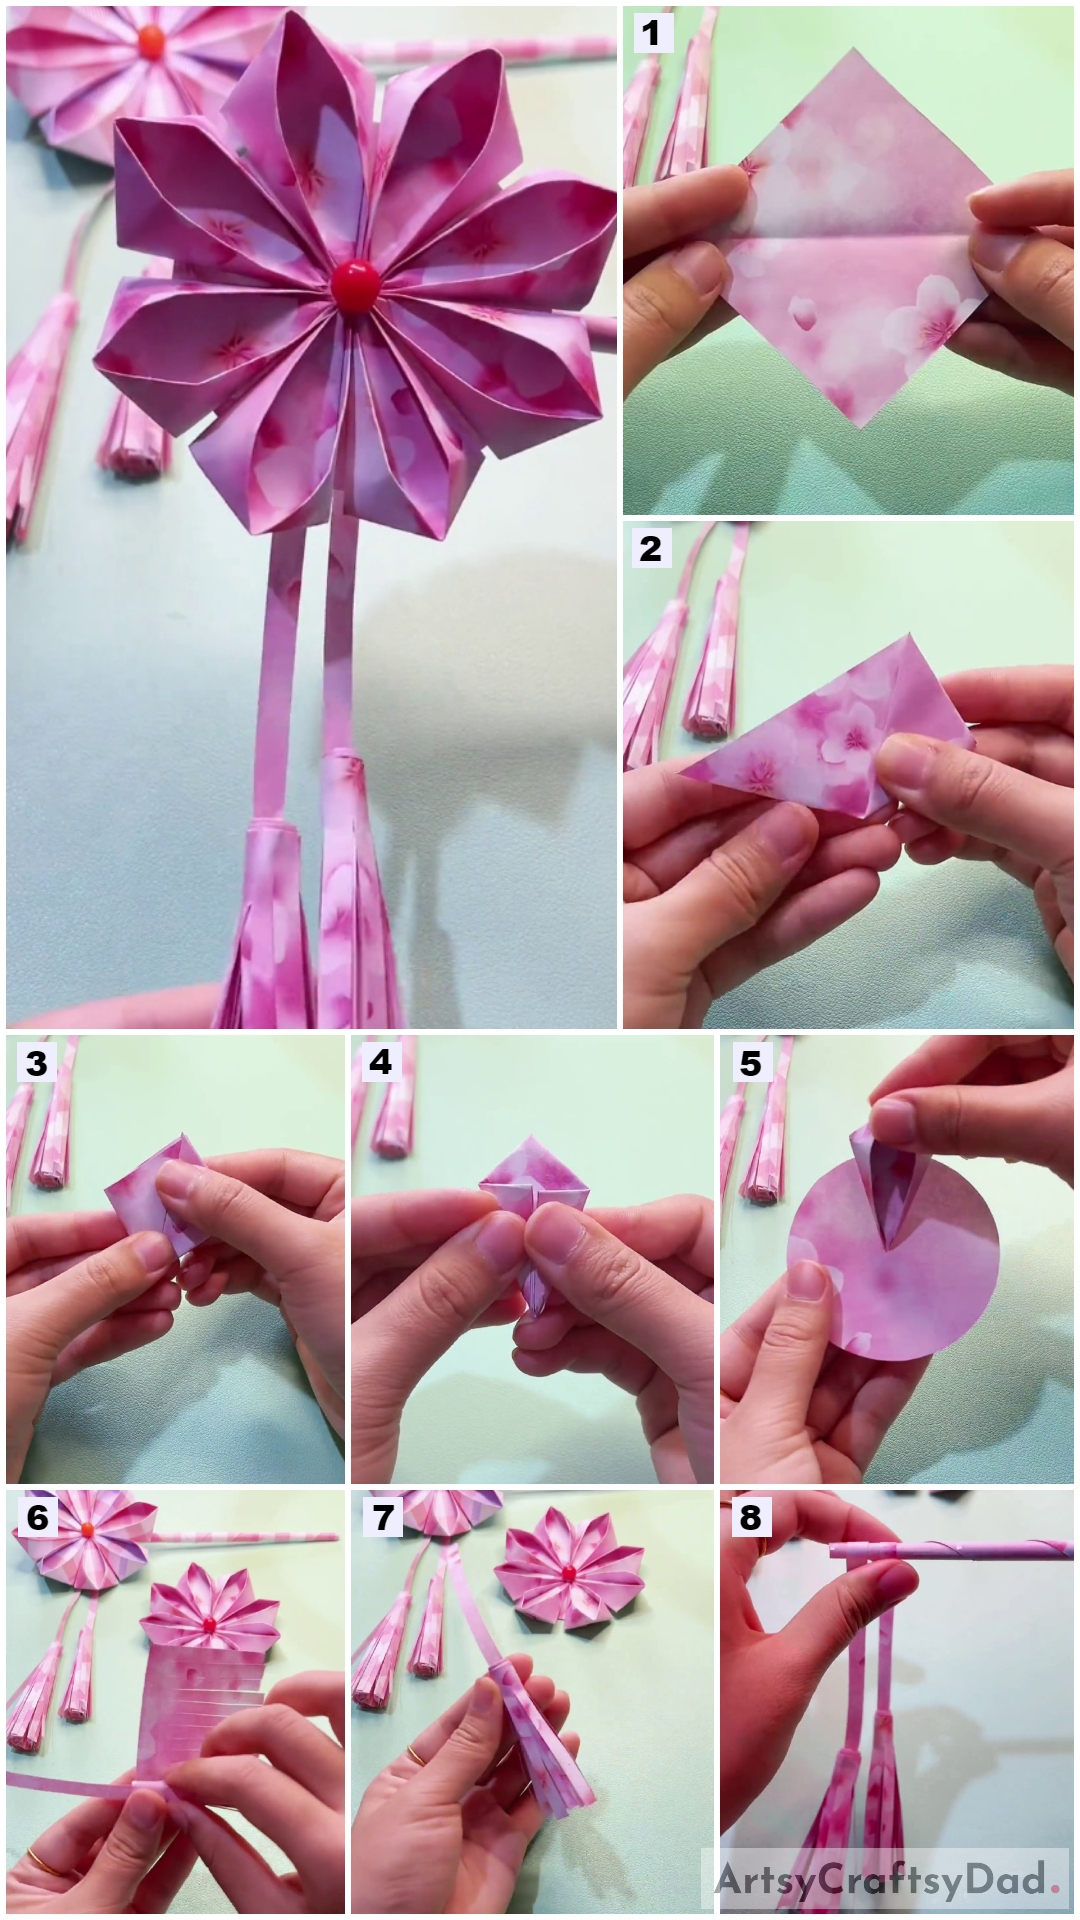
Step# 1: Making A Horizontal Crease On Paper
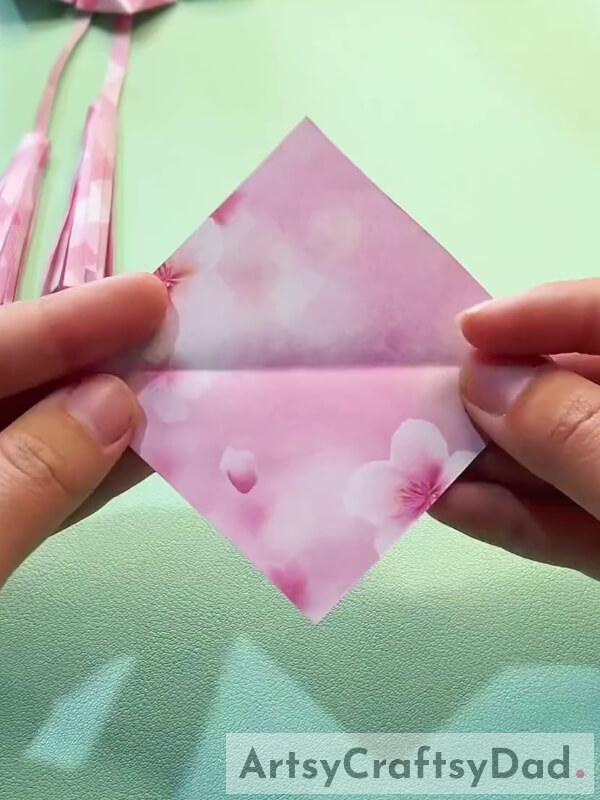
Take a pink color paper & cut it into a square shape with the help of scissors. Now fold the paper horizontally to make creases horizontally on the paper.
Step# 2: Folding Along The Crease
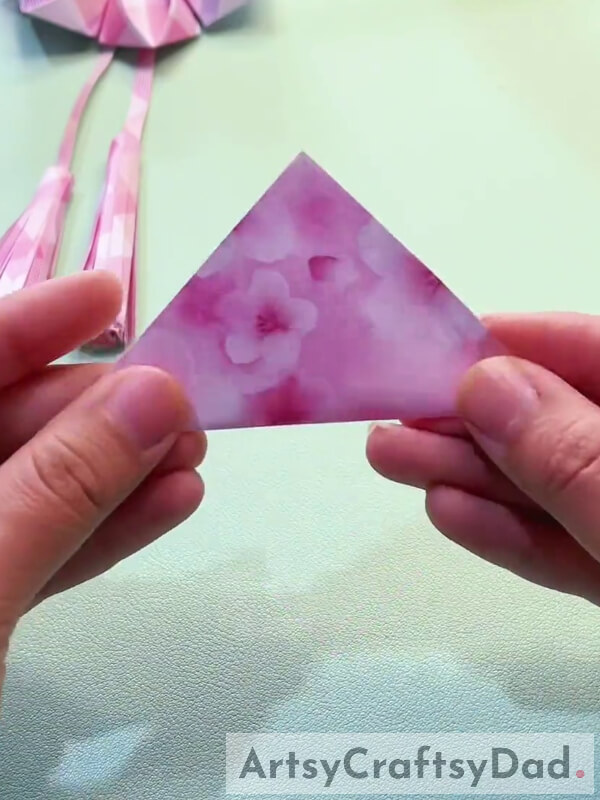
Now fold the paper along the creases.
Step# 3: Folding The Right Corner To the Top

In this step first, fold the right corner of the paper to the mid-top.
Step# 4: Folding The Left Corner To The Top
Now fold the left corner of the paper to the mid-top.
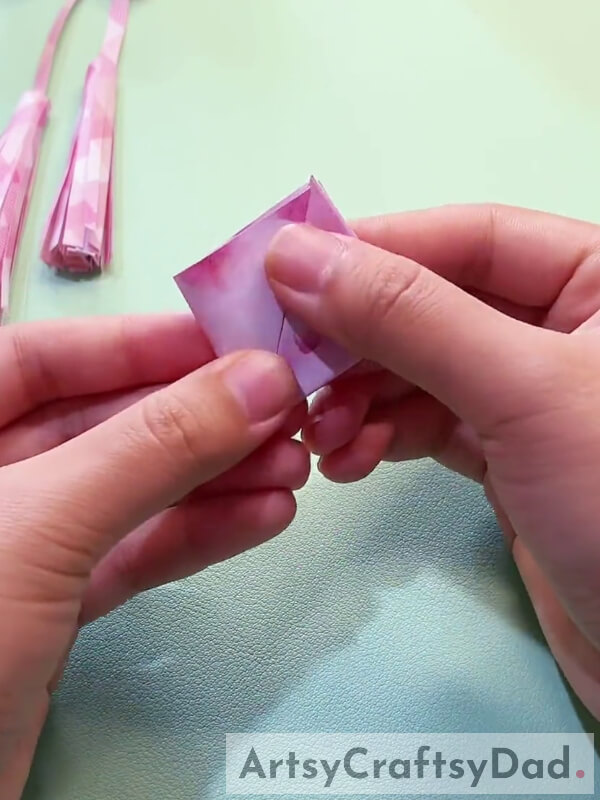
Step# 5: Folding The Left & Right Corners To The Middle
Now we turn it to the other side & bring the bottom part up. Now fold the left & right corners of it to the middle & apply some glue under those folds to stick them perfectly. After that give it a look of petals shape by your hand.
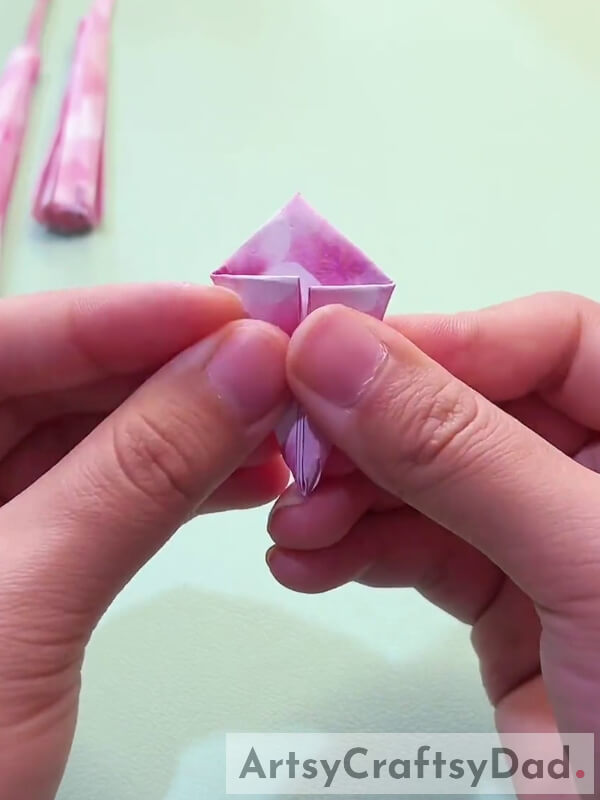
Step# 6: Making More Petals Shapes
By following the same procedure make eight petal shapes as we mentioned in the above step.
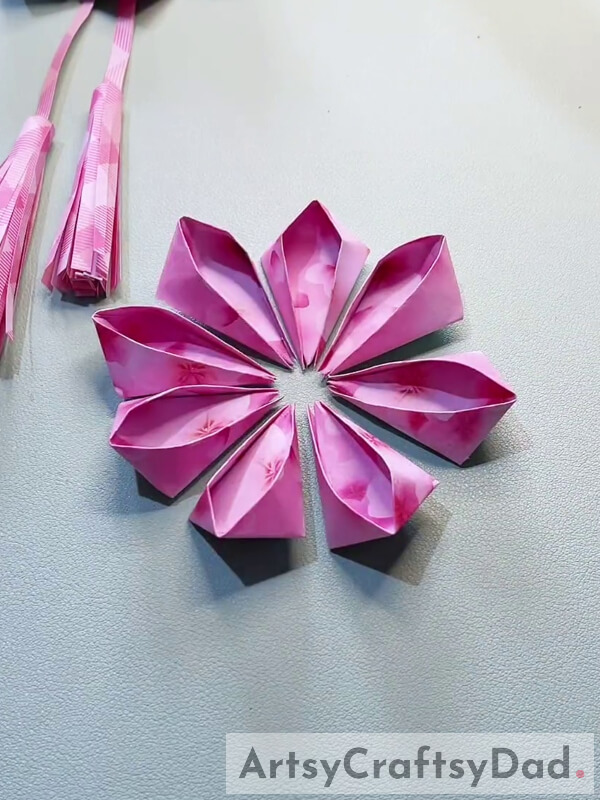
step# 7: Pasting Petals On Round Colored Paper
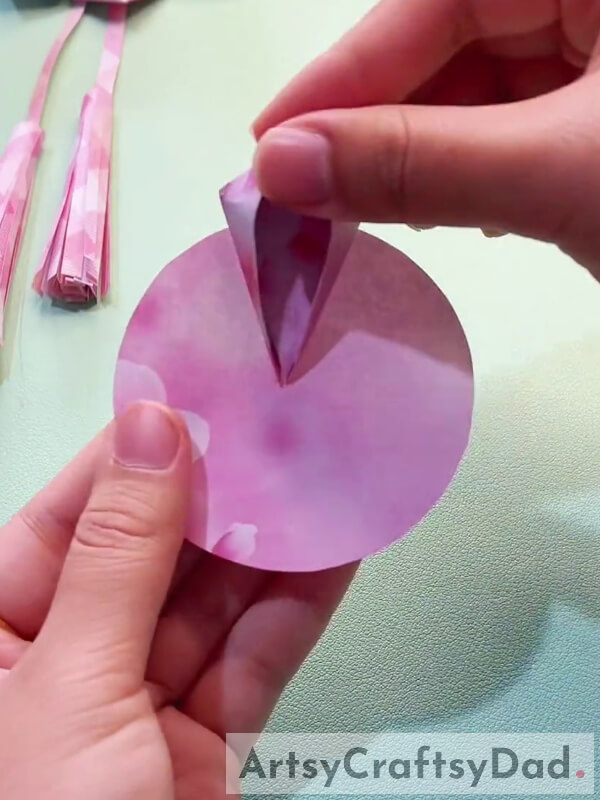
Take a piece of pink paper & cut it into a circle shape with the help of scissors. Now paste a paper petal on it with the help of glue in the same manner as shown in the above image.
step# 8: Pasting More Petals
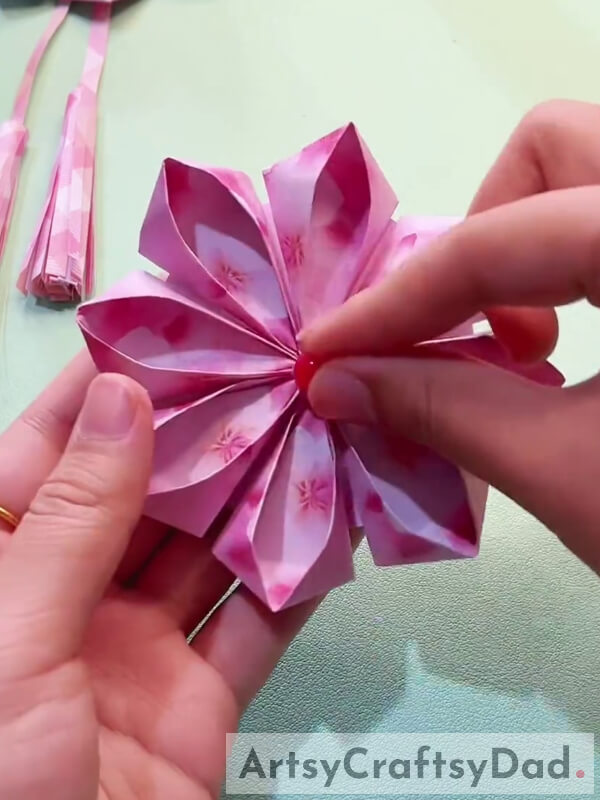
Now paste a red stone on the center of the flower to decorate it with the help of glue.
step# 9: Taking Rectangle Shape Paper
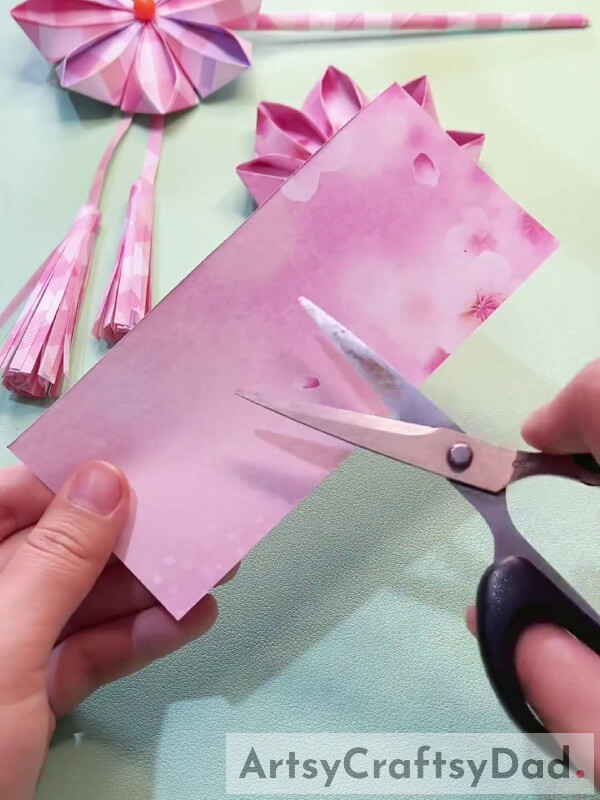
Take a piece of pink paper & cut it into a rectangle shape with the help of scissors.
step# 10: Cutting Paper Into Small Strips From the Bottom
Cut that rectangle-shaped paper into small strips pattern from the bottom side of the paper with the help of scissors. Now again take a piece of pink paper & cut it into a thin strip. Now take that thin strip & roll the strip paper around this thin strip & paste this thin strip with glue around the strip pattern paper.
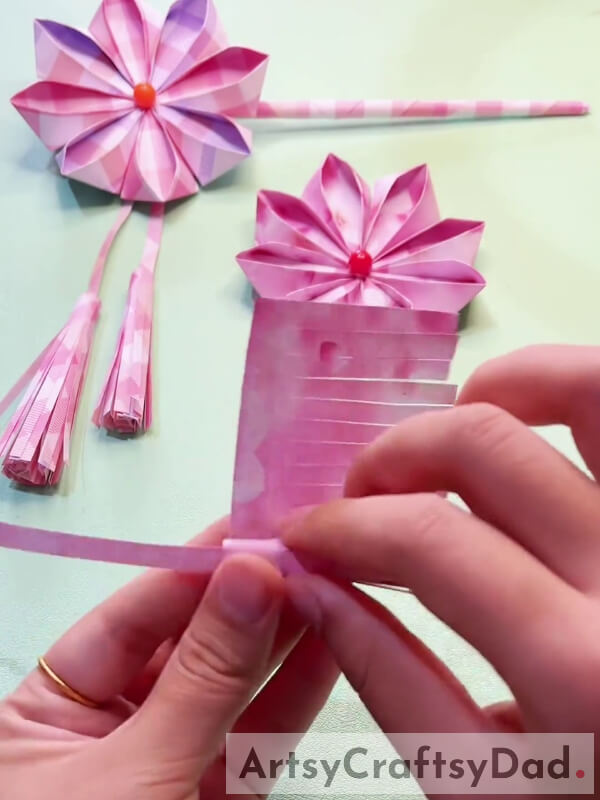
step# 11: Making Roll Of Paper
Take a thin wooden stick & roll the paper around it & use glue to paste paper on the wooden stick.
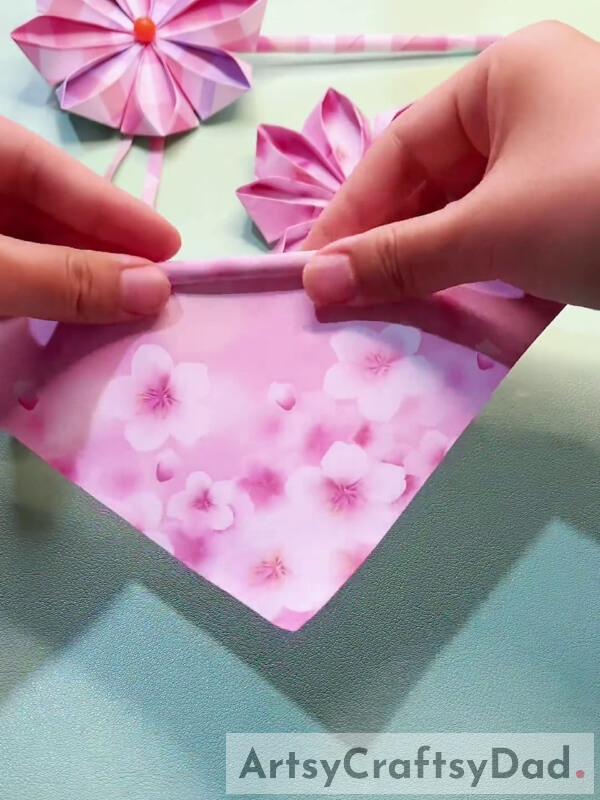
step# 12: Pasting Tassels On The Stick
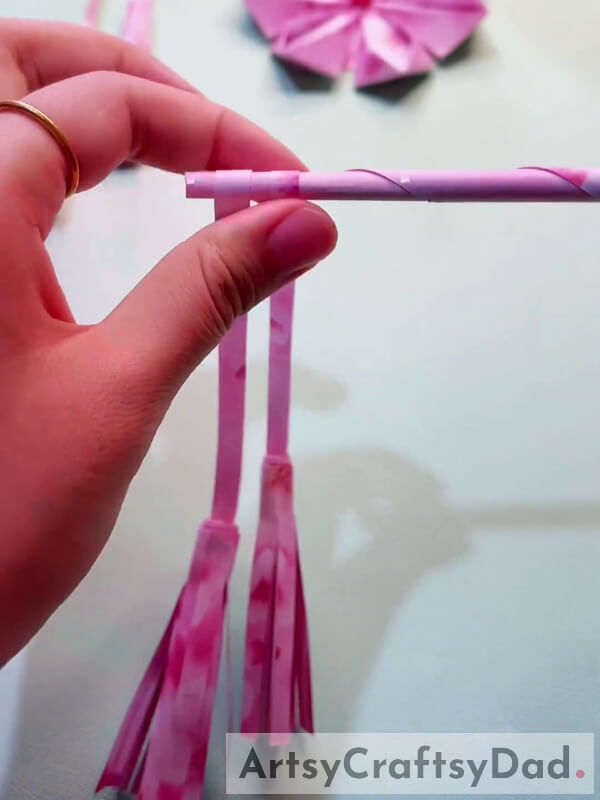
Make one more tassel by following the same procedure as we mentioned in the above step. Paste both the tassels on the stick with the help of glue.
Final Step: This Is The Final Look Of Paper Hair Stick!
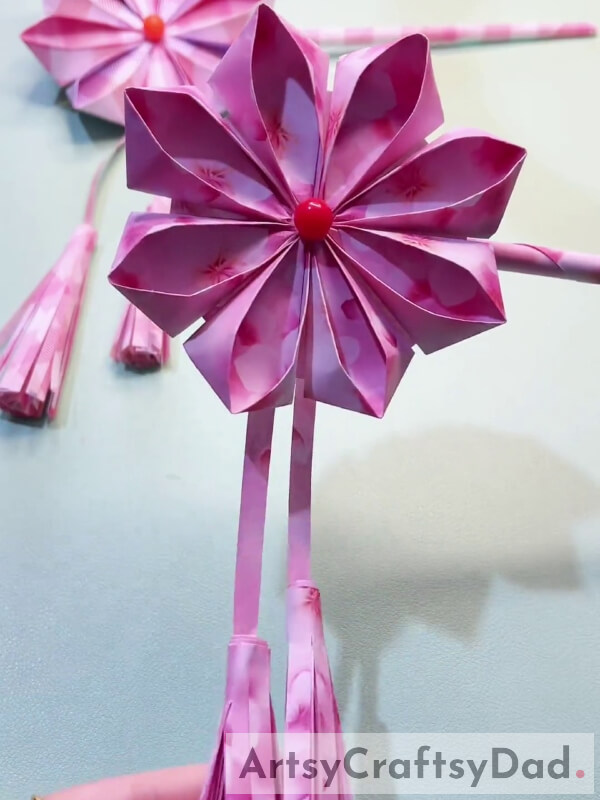
To complete the hair stick craft paste the flower on the stick with the help of glue. Now our paper hair stick is ready.
In conclusion, the paper hair stick with an origami flower design is a fun and creative craft that anyone can enjoy. Not only does it serve as a stylish accessory, but it also showcases the beauty and versatility of origami. By following the step-by-step tutorial provided, individuals can easily create their own unique hair stick and add a touch of elegance to their hairstyles. Whether for personal use or as a thoughtful gift, this craft allows for endless possibilities and endless enjoyment. So why not give it a try and let your creativity bloom?
You Might Also Like
- Paper Lollipop Origami Craft Tutorial For Kids
- Origami Bow Paper Craft Tutorial For Kids
- Paper Origami Tote Gift Bag Craft Tutorial
- DIY Origami Paper Designer Frock Craft Tutorial
- Diamond Flower Wreath: Fruit Foam Net & Stick Craft Tutorial


