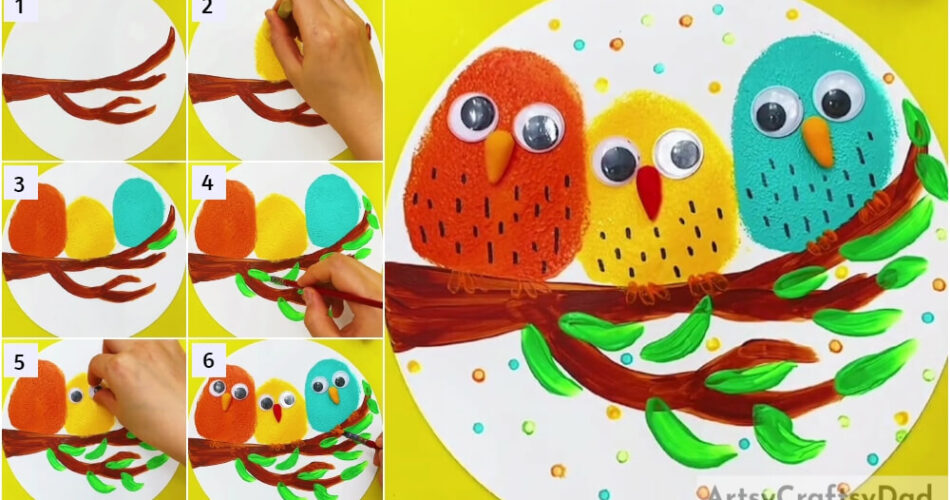
Learn how to make a beautiful painting of three little birds sitting on a tree with this easy, step-by-step tutorial. Wield your paintbrushes and exhibit your magic art skills today!
Fly through time and space with this engrossing and creative painting tutorial of Birds sitting on a Tree Branch. Follow each step to discover that there is never a boring moment in the process of creating this masterpiece. Use easily available stationery items to create a painting that can adorn your walls while also making memories that will decorate your heart forever. So without further ado, let’s dive into the process of making this Birds on a Tree Branch Painting.
Cute Birds On A Tree Branch Painting
Must Read: Cute Birds On Tree Painting Hack Tutorial
Supplies & Tools
- Plain White Sheet
- Paint of Different Colors
- Sketch Pens of Different Colors
- Paint Brush
- Powder Brush
- Googly Eyes
- Glue
- Clay
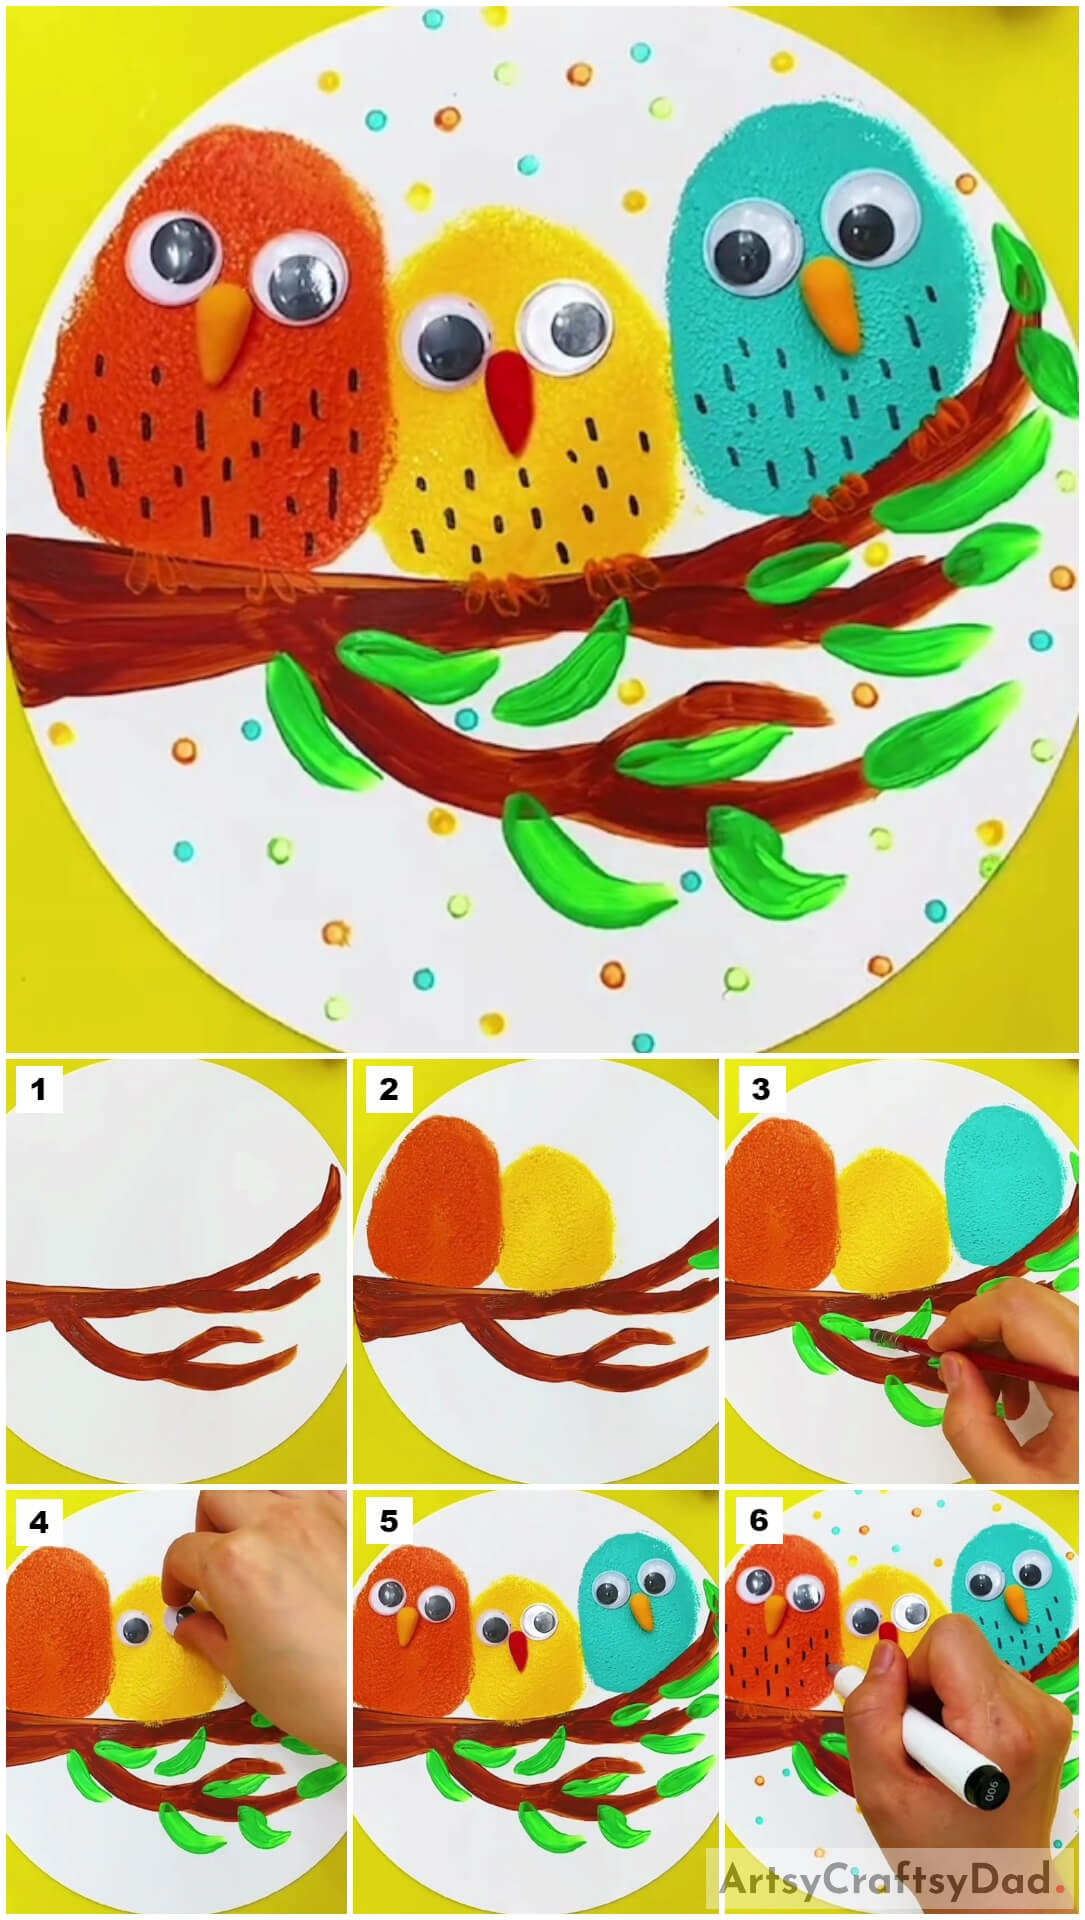
Birds On A Tree Branch Tutorial
Step #1: Drawing A Tree Branch On The White Sheet
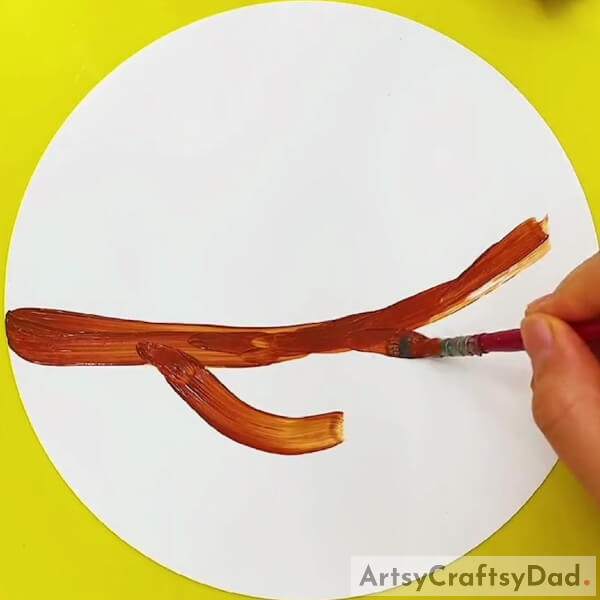
Grab a paintbrush, dip it in Brown paint and paint a tree branch on your white sheet, as depicted.
Step #2: Painting More Branches For The Tree
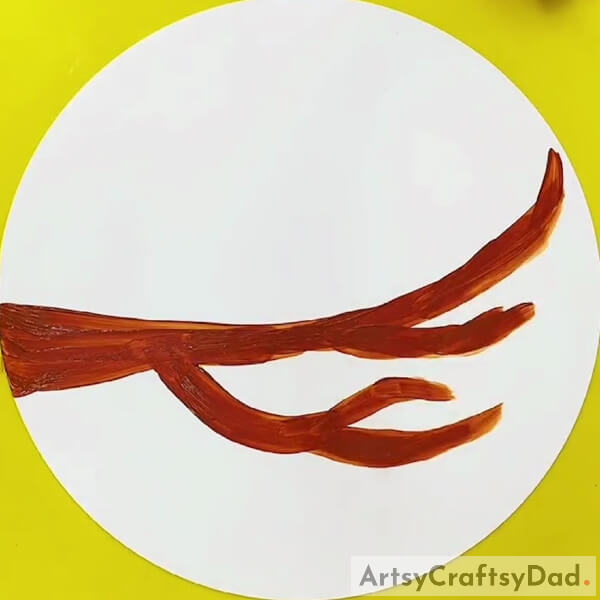
Give the tree branches a more realistic look by adding small branches emanating from the larger branch. Use your creativity to judge and decide on the length and breadth dimensions of the branch.
Step #3: Using Yellow Paint To Make The First Bird
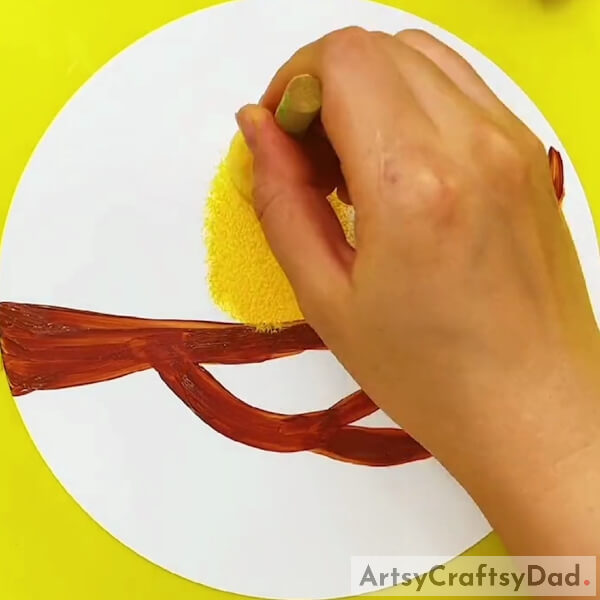
Dip the powder brush into a paint color of your choice. In this demo, we use Yellow paint for the first bird that sits in the center of the picture. After dipping the brush in paint, lightly dab the middle of the sheet, right above the branch in the shape of an oval. When you finish making the shape of your first bird, move on to the next step.
Step #4: Making the Second Bird With Orange Paint
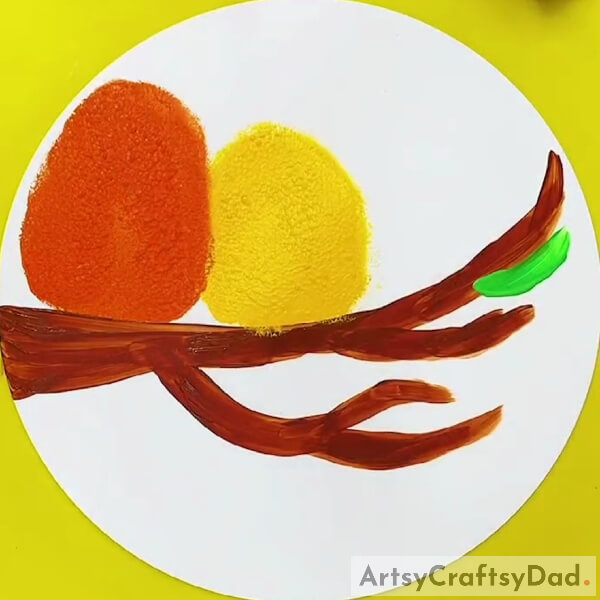
To make the second bird, wipe or wash off the first paint and dip the powder brush into your second colour of paint. Lightly dab the brush onto the sheet, again in an oval shape, positioning the second bird to sit beside the first bird on the same branch. If their bodies overlap a little, that’s very natural and quite alright.
Step #5: Painting The Third Bird With Blue Paint
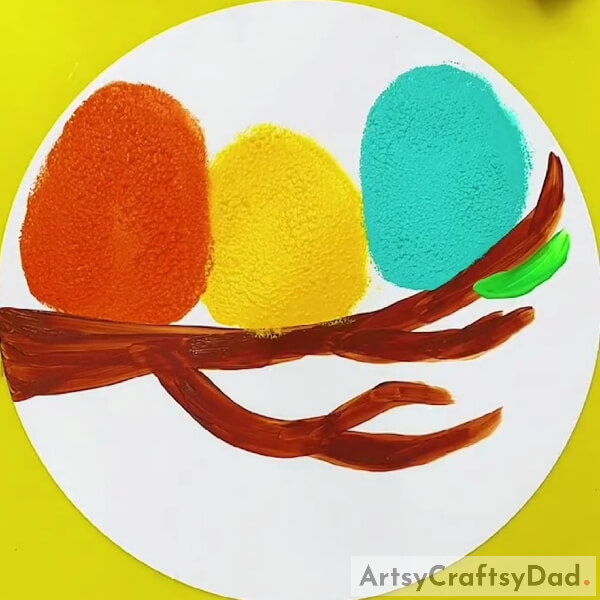
Add a third bird with a new color onto the scene on the vacant side of the first bird. Make sure your three oval birds are of similar build and size.
Step #6: Drawing Leaves On The Tree Branches
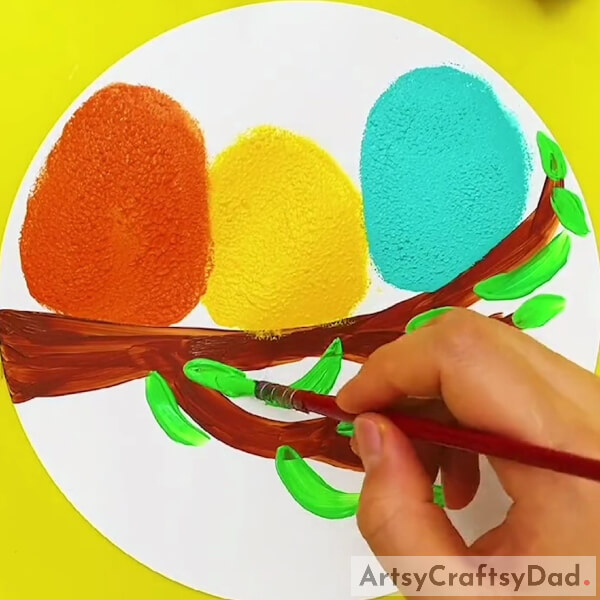
Now let us work on the tree branch. Dip your paintbrush into some Green paint and start making little leaf blades emerge from the tree branch. Make these green strokes have equidistant gaps to capture the likeness of a real tree branch with real leaves.
Step #7: Pasting Googly Eyes Onto The Birds
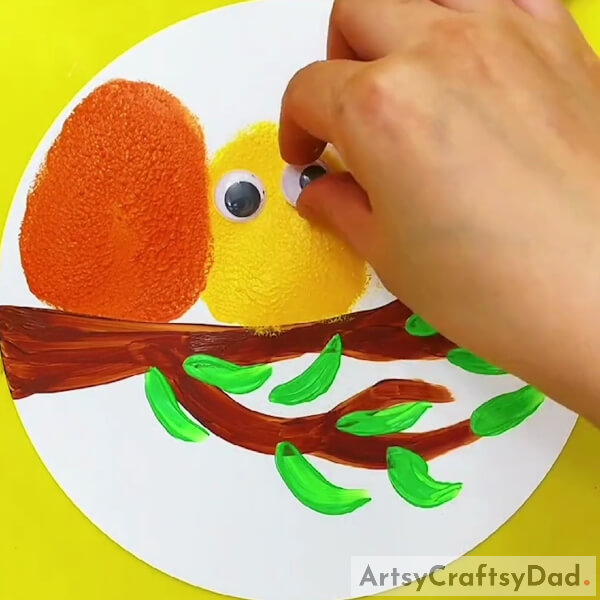
Give the little Birdies the ability to stare directly at you by pasting googly eyes on their feathered bodies. These cute beady eyes will enhance their appearance and add a realistic touch to the painting.
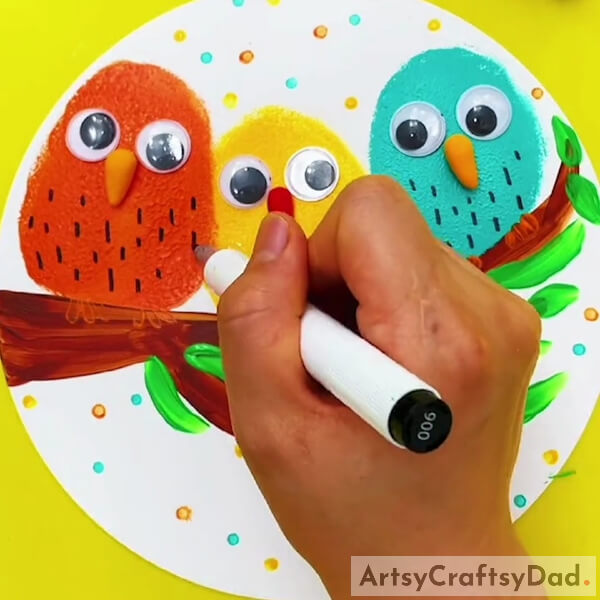
Step #8: Adding Little Clay Noses To The Birds’ Faces
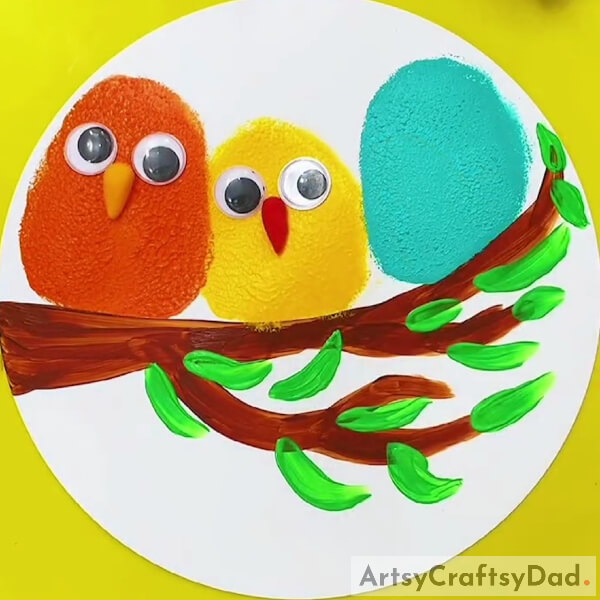
It is now time for a new tool to be employed. Take your soft clay and roll them into little carrot-shapes for the nose of the birds. Make the clay pointed in one end and glue it in the space between the two googly eyes. There is no need for perfection but just make sure not to make the nose of the birds bigger than the eyes!
Step #9: Finishing Attaching The Birds’ Eyes And Nose
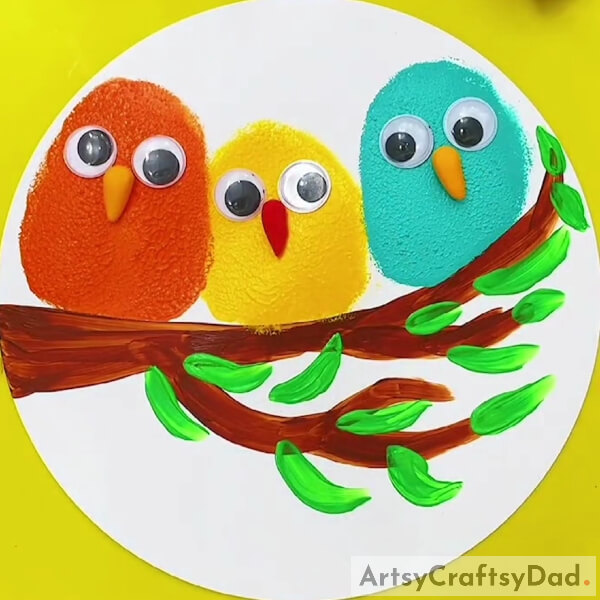
Now that you have finished equipping each Birdie with the necessary two eyes and one nose each, take a step back and admire your work so far. For a little fun, shake the googly eyes to make the birds look at each other or in any direction you choose.
Step #10: Drawing Tiny Bird Feet With Paint
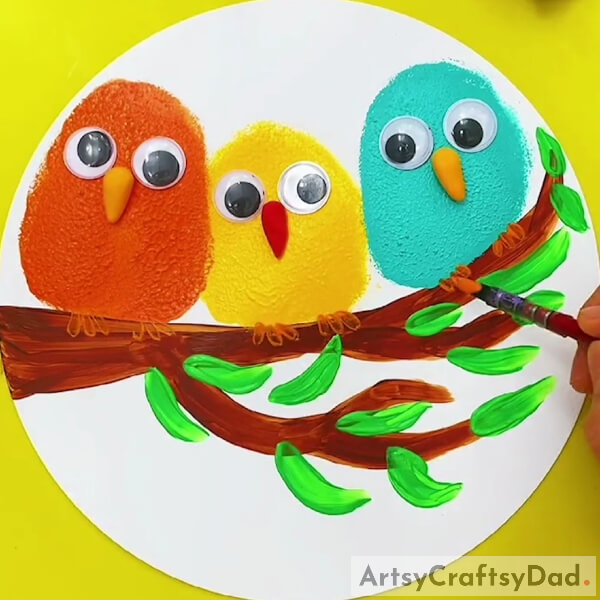
The next important addition to your craft is the bird’s feet. With gentle strokes of your paintbrush, give each bird a pair of legs in light brown color to help their grip on the tree branch be stronger.
Step #11: Adding Bird Feathers And Background Sparkles
Draw straight intermittent lines on the lower half of the birds’ bodies to give a layer of feathers to the little birds. When the area below the eyes and the nose has been fully decorated with a Black sketch pen, take different colored sketch pens and bring life to your background by making colorful dots on the empty white spaces.
The Birds On A Tree Painting Is Officially Complete!
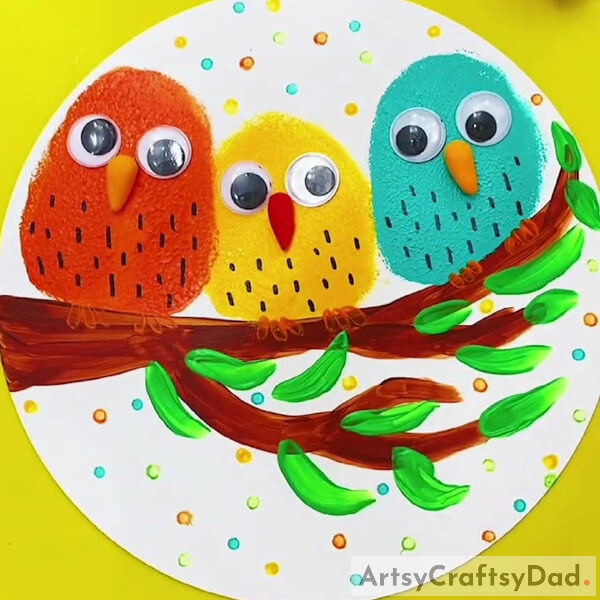
Congratulations on making one of the cutest paintings of all time!
In conclusion, this Birds on a Tree branch painting tutorial is an excellent guide for both beginners and experienced artists. By providing detailed step-by-step instructions and helpful tips, it enables individuals to create stunning artwork that captures the beauty of nature. Whether you are looking to enhance your painting skills or simply indulge in a relaxing and fulfilling hobby, this tutorial is a valuable resource that will inspire and guide you throughout your artistic journey. So, grab your brushes and paints, and let your creativity take flight as you bring these vibrant and graceful birds to life on canvas. Happy painting!
Thank you for visiting our page!
You May Also Like
- Cherries On Tree Branch: Stamp Painting Tutorial
- Giraffe Face Painting Step by Step Tutorial For Kids
- Shaded Cactuses: Stamp Painting Step by Step Tutorial
- Cherry Flowers In Pot Painting Step by Step Tutorial
- Crane Bird Realistic Painting Tutorial For Beginners


