Learn how to create a festive Christmas tree using finger painting techniques with this easy-to-follow tutorial for kids. Engage your child’s creativity and bring the holiday spirit to life as they explore different colors and textures with their fingertips.
Christmas is a time for joy, love, and creativity, especially when it comes to decorating our homes. One popular tradition that brings families together is the art of decorating a Christmas tree. While some may opt for store-bought ornaments, why not add a personal touch to this beloved holiday symbol? In this tutorial, we will explore the fun and exciting world of finger painting and learn how to create a beautiful Christmas tree masterpiece with just our hands. So gather your little ones, grab some paint, and let’s dive into this festive finger-painting adventure!
Beautiful Christmas Tree Finger Painting For Kids
Must Read: Wisteria Finger Painting Artwork Tutorial For Kids
Supplies & Tools
- Scissors
- Glue
- Paints (Yellow, Green, Blue, Red, Brown, Orange)
- Colored Papers (Yellow, White)
- Paint Brush
Christmas Tree Finger Painting Tutorial
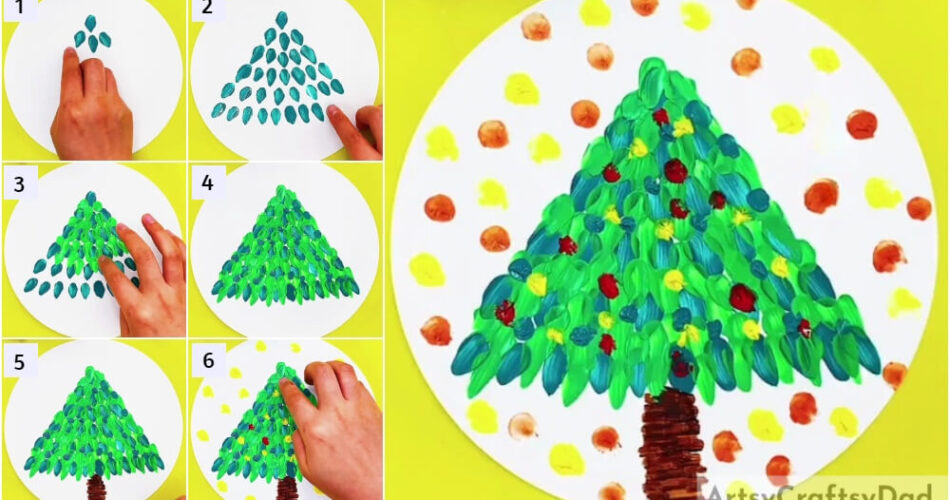
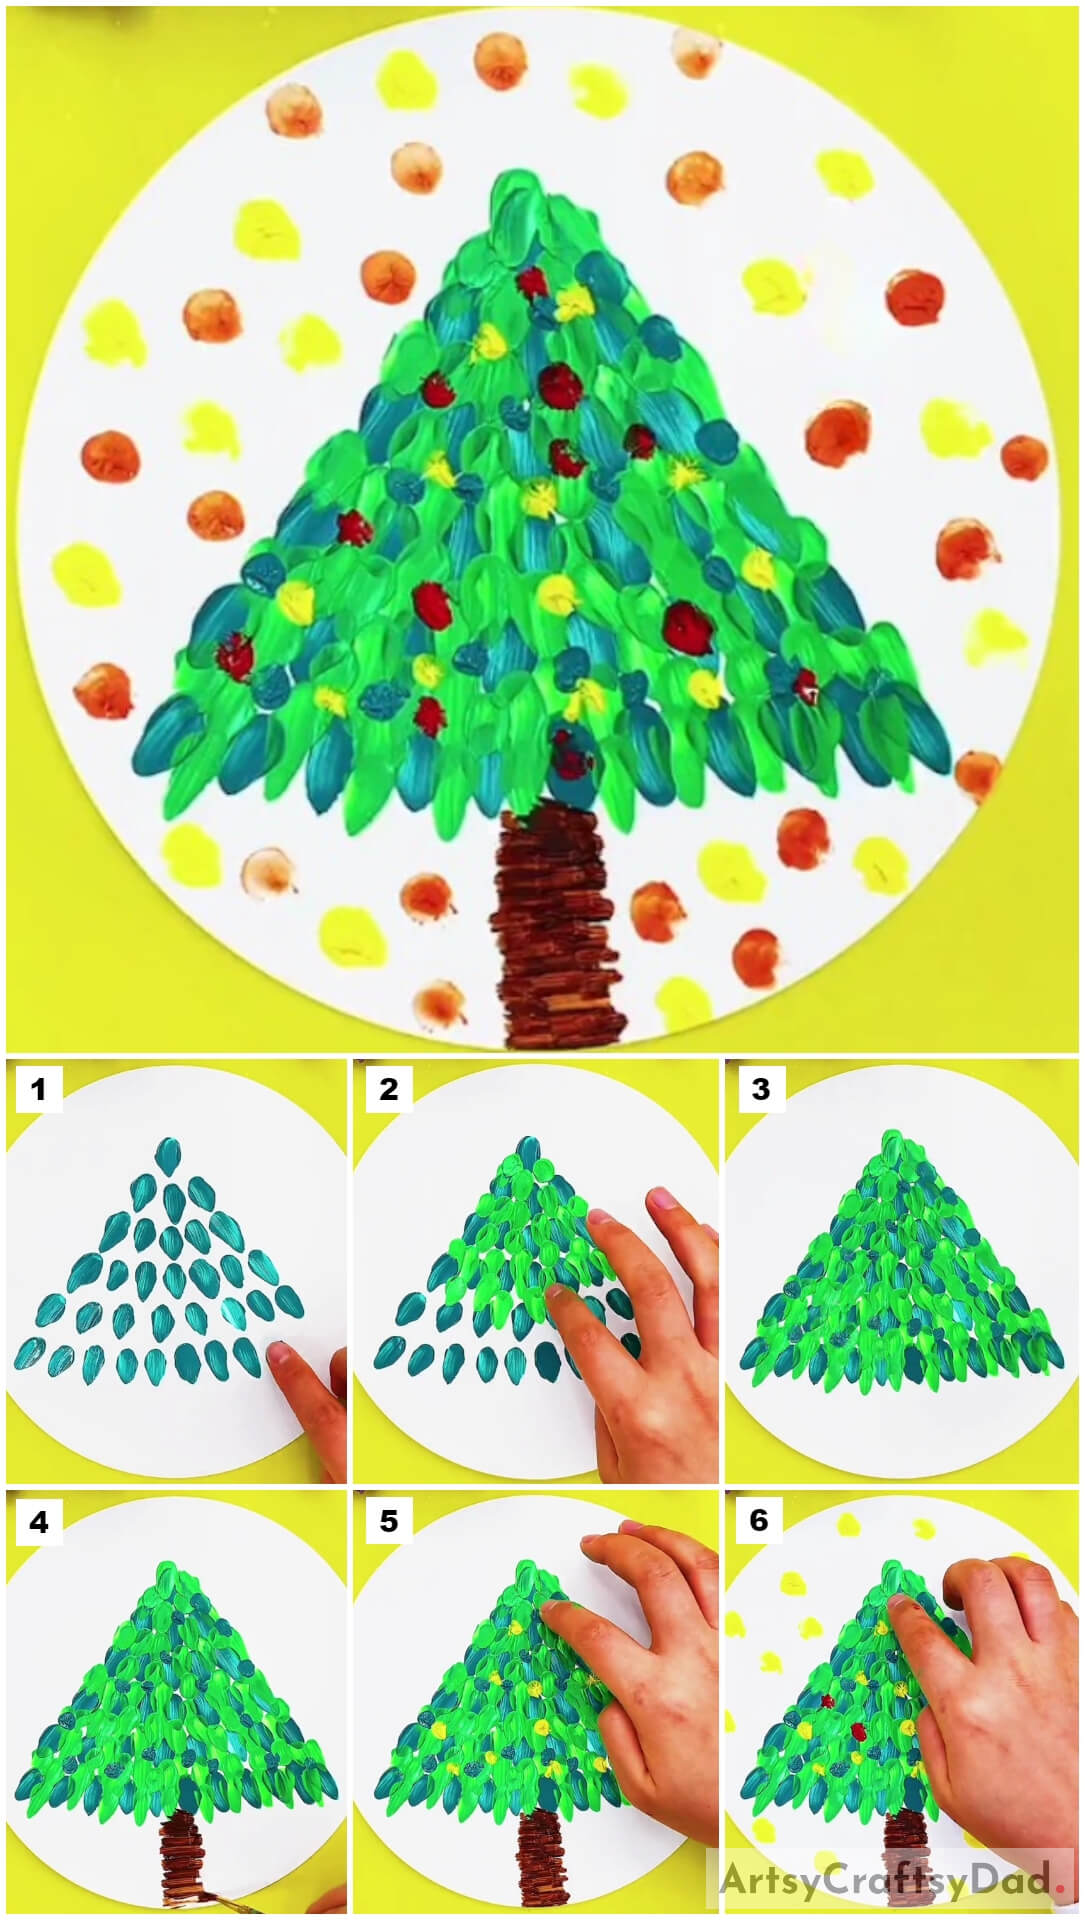
Step #1: Painting Dots By Using Blue Paint

Take a piece of yellow paper as a base. Now take a piece of white paper & cut it into a white circle shape. Now paste it on the yellow paper base with the help of glue. Now dip your right index finger into green color paint & start to put some dots on the upper middle side of the white paper by using your fingertip. First, put one dot on the top then put three dots just below that one dot.
Step #2: Painting a Few More Green Dots

Now, follow the same procedure to make a dot pattern by using your right index fingertip as shown in the above image on the white circle.
Step #3: Completing Painting All Dots

Complete the pattern by following the procedure that we mentioned above. Your pattern should look the same as in the above image. Now let your painting dry.
Step #4: Painting Light Green Dots On Green Dots

Now, we use light green paint. Now dip your right index finger into the light green paint & paint some dots on the other green dots with the help of your right index finger one by one.
Step #5: Completing Painting Light Green Dots

Here we put some more dots of light green paint on the complete pattern.
Step #6: Painting Tree’s Lower Part With Brown Paint Using Paint Brush

Here we paint the lower body of the tree at the bottom of the tree with brown color paint by using a paint brush.
Step #7: Painting Yellow Dots Using Yellow Color

Now, use yellow color paint. Dip your right index finger into the yellow paint & put some dots on the green dots one by one using your right index finger.
Step #8: Painting Yellow Dots On White Circle Paper

Now dip Your right index finger in the yellow color paint. Now paint yellow dots on the lower side under the tree by using your right index finger. Now let your painting dry.
Step #9: Painting Red Dots Using Red Paint

Repeat the above step on the white circle. Now again dip your finger into the red color paint & put red dots on that green pattern one by one
Hurry! This Is the Final Look Of The Christmas Tree Finger Painting!

Now dip your finger into the orange color paint & paint some dots on the white circle on the left & right sides by using your index finger. Now the final look of our Christmas tree is ready.
In conclusion, finger painting a Christmas tree is not only a fun and creative activity for kids, but it also allows them to explore their imagination and develop their fine motor skills. The step-by-step tutorial provided in this article makes it easy for parents and teachers to guide children in creating their festive masterpieces. So gather the paints and brushes, and let the holiday spirit come alive through the colorful and unique Christmas trees created by little hands. Happy painting and Merry Christmas!
You Might Also Like
- Colorful Flowers Drawing & Finger Painting Tutorial
- Giraffe Face Painting Step-by-Step Tutorial For Kids
- Shaded Cactuses: Stamp Painting Step-by-Step Tutorial
- Cherries On Tree Branch: Stamp Painting Tutorial
- Cute Birds On Tree Painting Hack Tutorial


