Love Barbie dolls? Well, this step-by-step tutorial will guide you to make a girl, not the Barbie, but one with curly hair! She is cute!
Get yourself a paper cup because we are making a girl doll! Yes, you heard it right! We will be making a curly hair girl which will replace your Barbies! Kiddos love to play with the things they make on their own and this one will be a perfect fit for a budget-friendly craft toy! This craft will be the best afternoon activity for your kid to do in the boring time to have fun and even drive his/her motor skills! This makes this craft a fun learning one too! Grab the benefits by making it with us!
Girl With Curly Hair Craft Using Paper Cup
Must Read: How to make a Paper Flower Vase – Paper Craft Tutorial
Supplies & Tools
- Paper Cup
- Sketch Pens
- Black Marker
- Scissors
Curly Hair Instructions
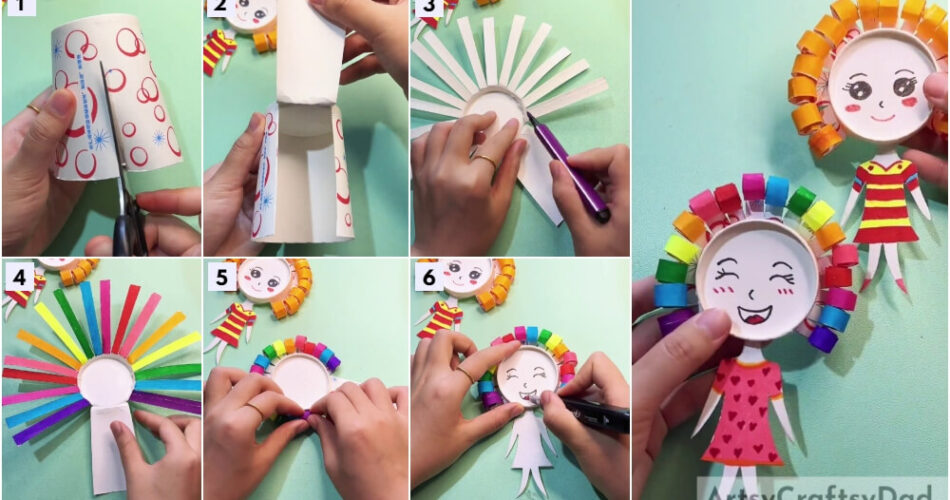
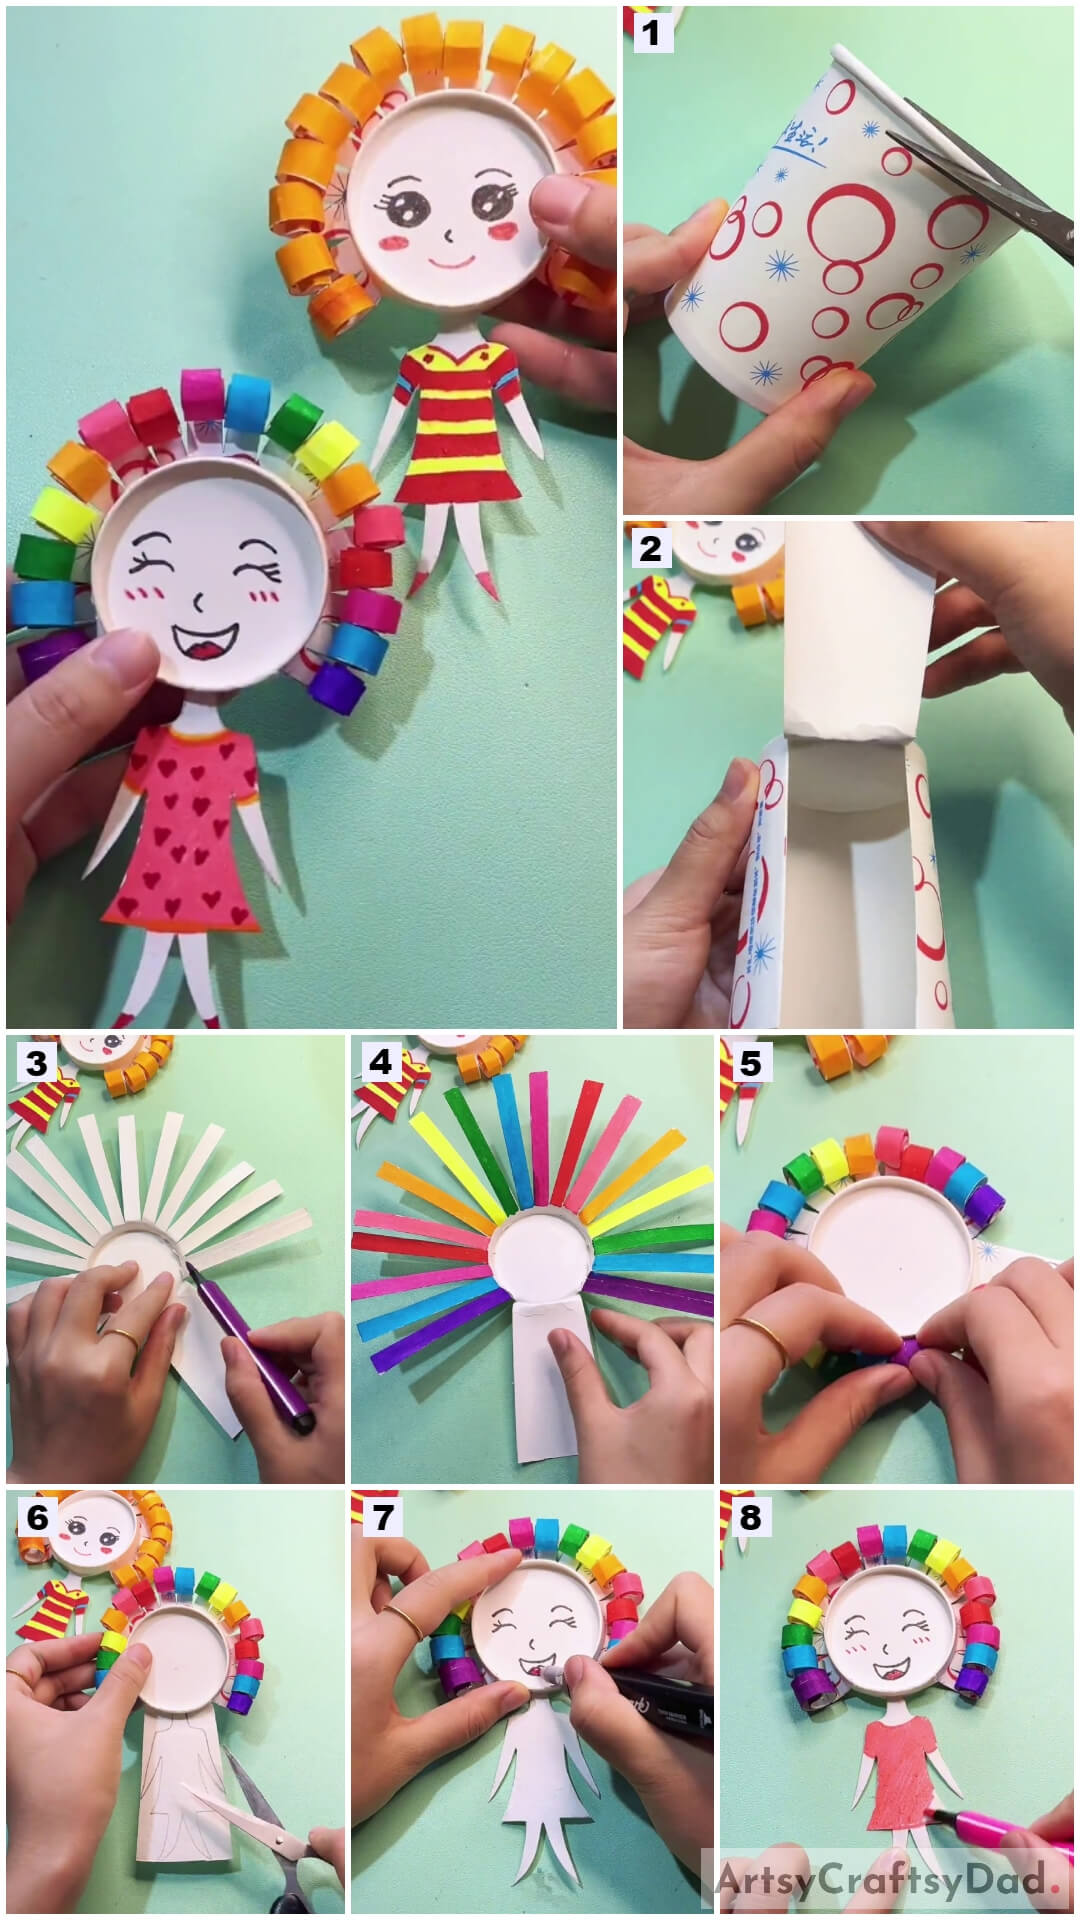
Step #1: Cutting Out The Edge Of The Paper Cup
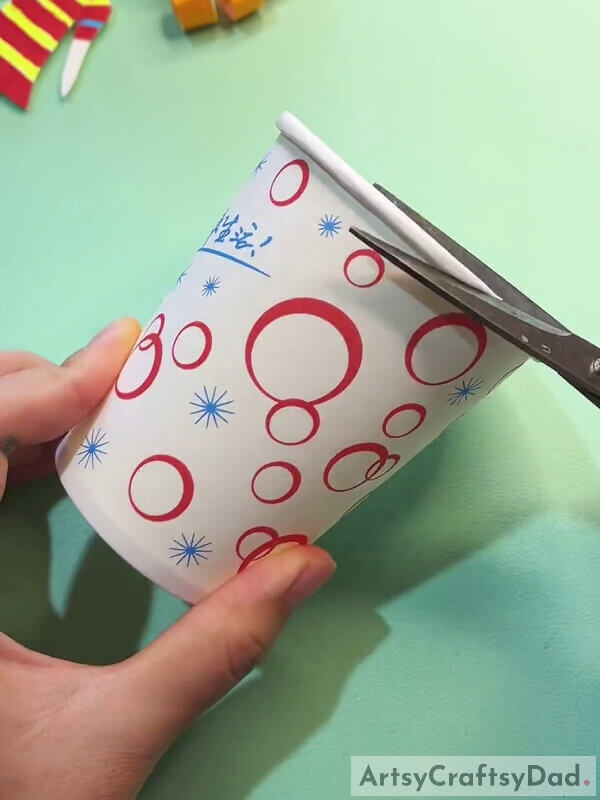
Begin this craft by taking a paper cup and a pair of scissors. Using the scissors, cut out the edge of the paper cup as shown in the image.
Step #2: Making A Cut On The Paper Cup
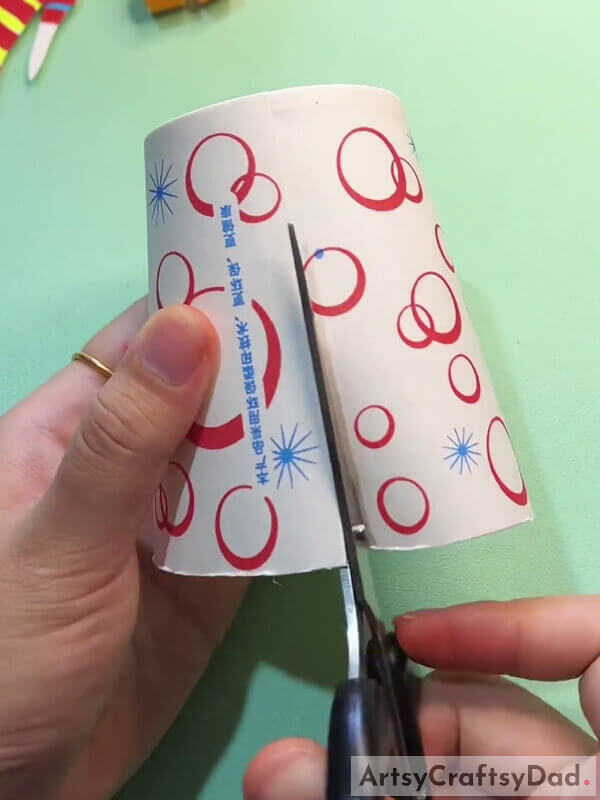
Using scissors, make a vertical cut on the paper cup from the top of the paper cup as shown in the image.
Step #3: Cutting A Broad Strip From The Paper Cup

Make another cut on the paper cup parallel to the previous one by leaving a broad gap using the scissors. Make sure to not cut out the strip from the cup. See the image for reference. Bend the broad strip above the paper cup.
Step #4: Cutting Thin Strips
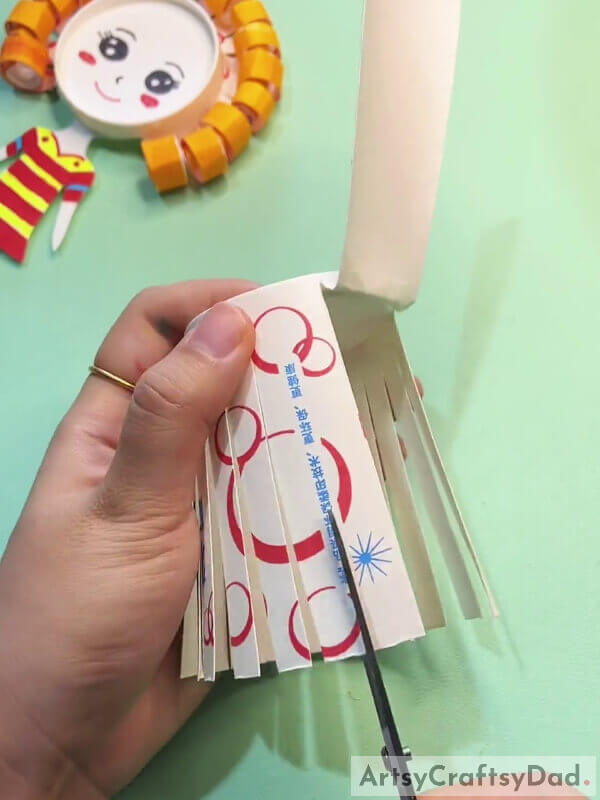
Leaving the broad strip, cut thin strips on the rest of the paper cup. Do not make the cuts til the end of the cup, leave some space from the base.
Step #5: Bending The Thin Strips
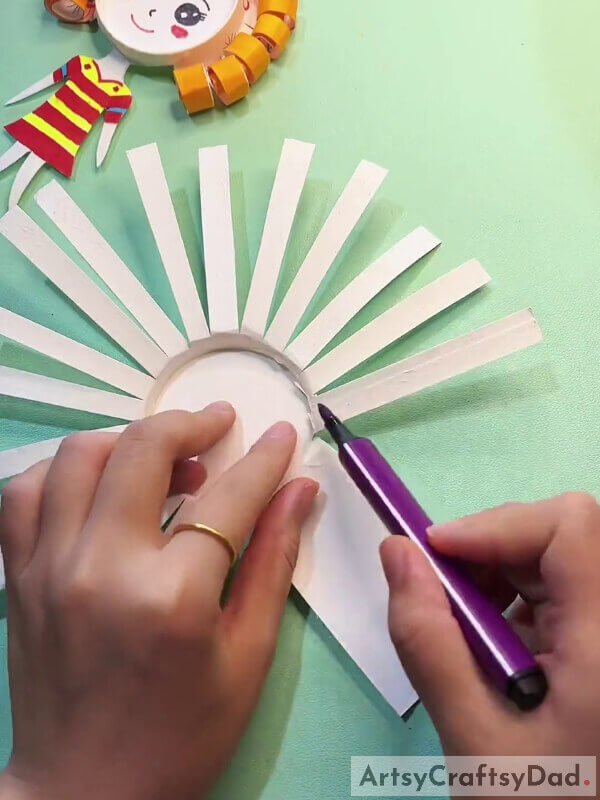
Bend the thin strip to the back of the paper cup aligning with the inner circle base of the paper cup.
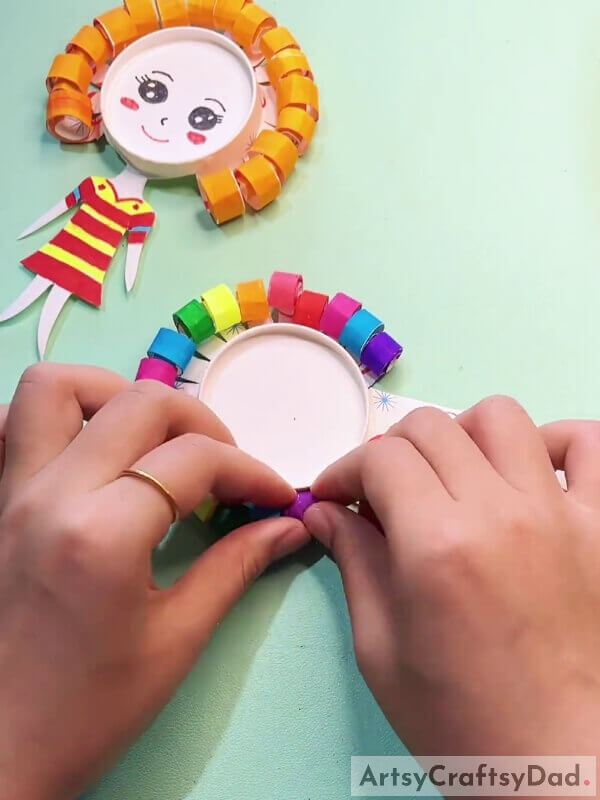
Step #6: Coloring The Thin Strips
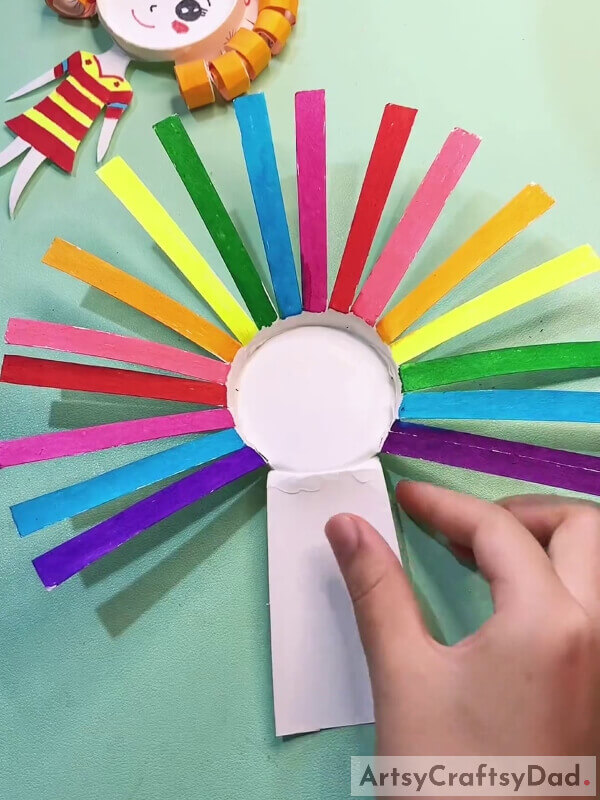
Using the sketch pens, color the thin strips in a rainbow pattern, See the image for reference.
Step #7: Rolling The Thin Strips
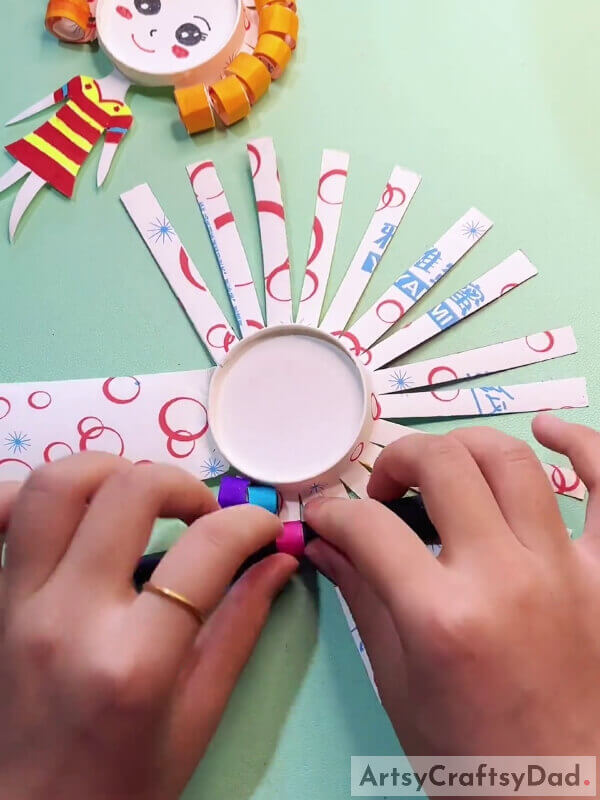
Flip the figure to the back and using the marker as a curler, roll over the thin strip to the back one by one.
Step #8: Completing Curling The Strips
Continue to curl the thin strips until you reach the last one. These curled strips will become the hair of your girl.
Step #9: Peeling Off The Pattern Cover Of Cup
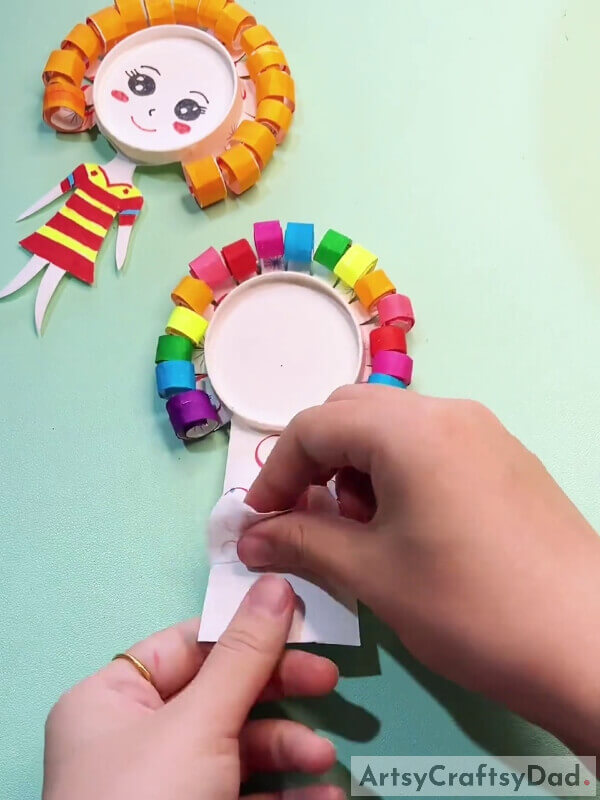
Peel off the patterned cover of the paper cup from the broad strip.
Step #10: Cutting Out The Girl’s Body
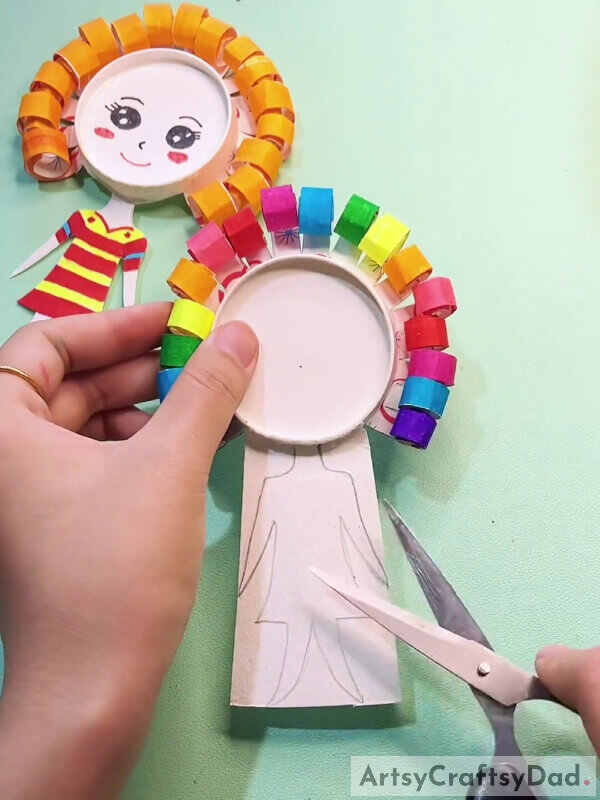
Using a pencil, draw the body of the girl on the broad strip. See the image for reference. Using scissors, cut out the body of the girl from the strip along the pencil outline.
Step #11: Making Facial Features Of The Girl
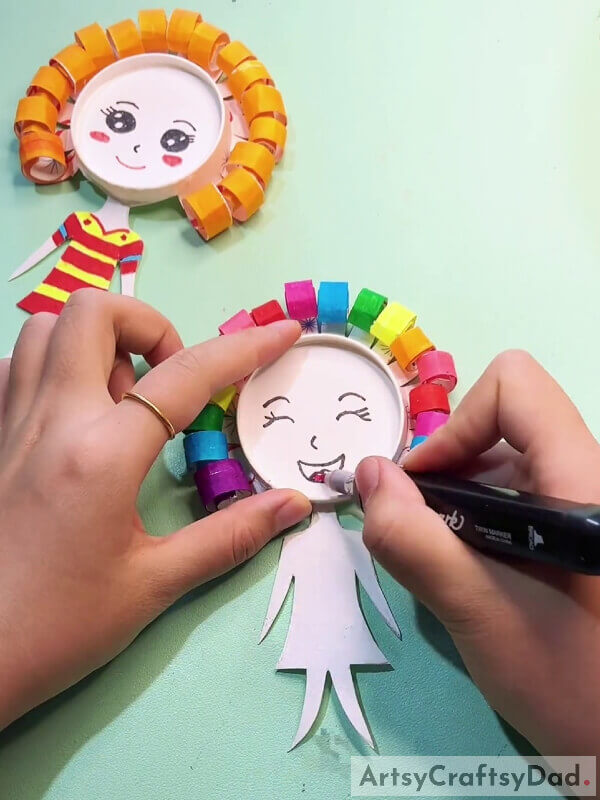
Using a black marker, draw the curved eyebrow of the girl on the circle base side by side. Make the curved closed eyes below the eyebrows with 3-3 eyelashes on the sides of the eyes. Draw the small pointed nose below and in between the eyes on the base. Also, draw the open-curved mouth of the girl below the nose and the curved tongue at the bottom of the mouth. Color the tongue red using the red sketch pen. Also, make 3-3 tilted dashed lines on both sides of the nose as the blush using the red sketch pen.
Step #12: Making Dress of The Girl
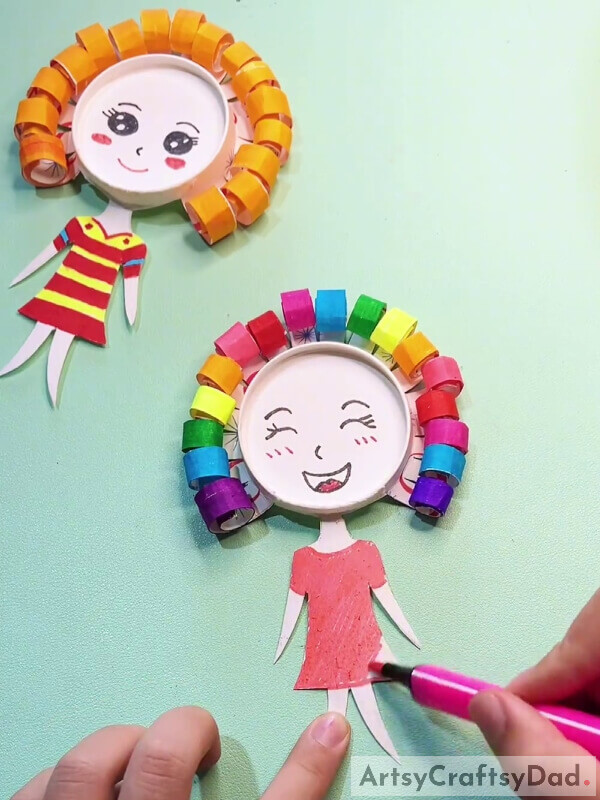
Using a pink sketch pen, make the dress of the girl over the body cut out as shown in the image and color it out.
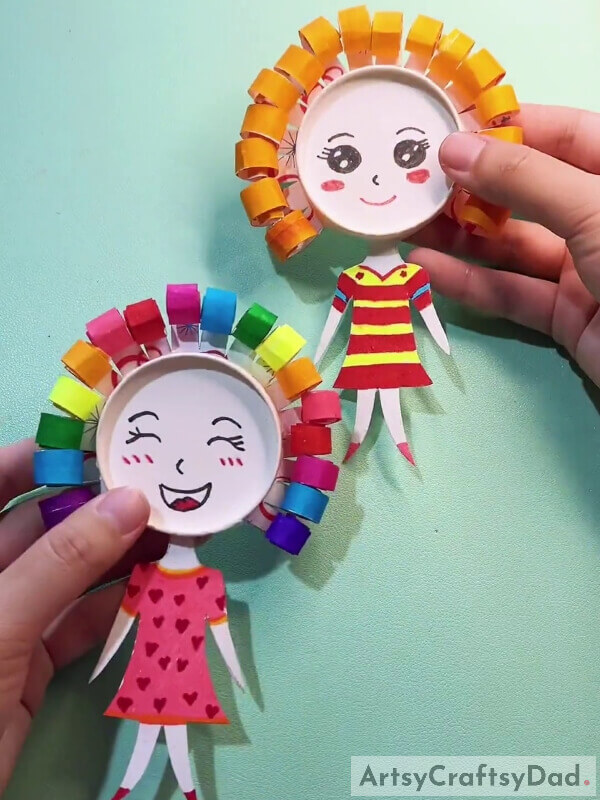
This Is The Final Look Of Your Curly Hair Girl Craft!
For the last step, make little hearts in the dress of the girl using a dark pink sketch pen and color the tips of the legs as her shoes. Also, using the orange and yellow sketch pen, outline the dress as shown in the image.
Congratulations! You have finally made your cute curly hair girl in no time!
It’s time to play with this cutie! You can make more of them t have a whole family of these! Haha! What a fun idea! You can also customize your girl in any way you like, customize her fashion, her hair, the color of her hair, anything! This craft will definitely be a rocking one! Have a little fashion show of yours! Woohoo! I’m getting excited to do it! And the best part is, you can make any many as you want without spending a single penny!
Hope you liked the article! Do give it a like and share it with your buddies! Also, drop your feedback in the comments section below!
You May Also Like
- Top 30 Amazing Girl’s Hairstyles for Short Hair
- Clay Snails On Leaves Craft Tutorial For Kids
- Clay-Paper Sunflower Garden Craft Tutorial
- Simple Paper Tearing Flowers Craft Tutorial
- How to make flower fairy girl from quilling


