Hurry! We are starting to make the cutest bouquet of colorful flowers in this step-by-step tutorial! Grab the listed supplies to begin!
Seriously! You don’t want to miss this one! This step-by-step tutorial is on making a flower bouquet of colorful clay flowers and a tissue paper bouquet sleeve! This craft is suitable for kids and teenagers! The results will definitely be loved by everyone! This craft is great to make on a boring afternoon to add fun to it while also learning and driving your motor skills as well! This craft is a budget-friendly alternative to those expensive bouquets and wall decors! Let us begin to make it!
Pretty Flower Bouquet Using Clay And Tissue
Must Read: Clay Chicks In Garden Craft Tutorial
Supplies & Tools
- Colored Clay
- Red And Green Sketch Pen
- Tissue Paper
- Glue
- White Circular Paper Sheet
Clay Flower Instructions
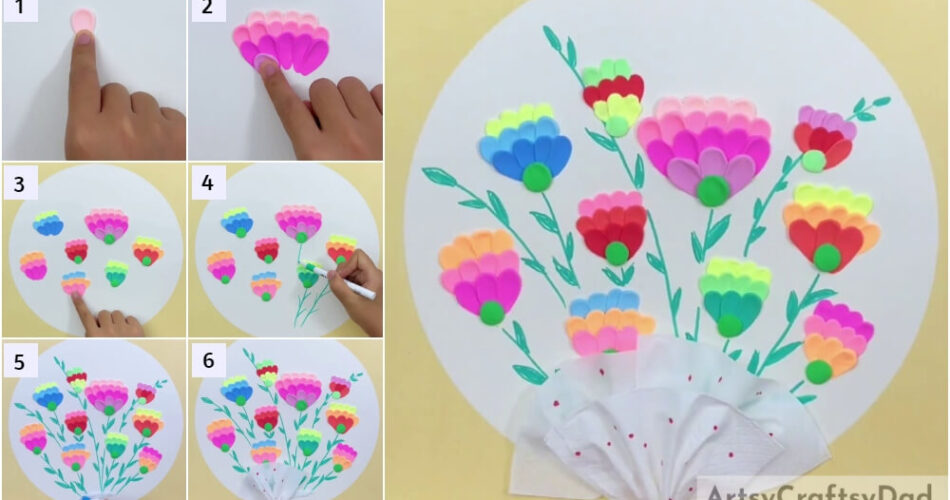
Step #1: Making A Peach Colored Petal
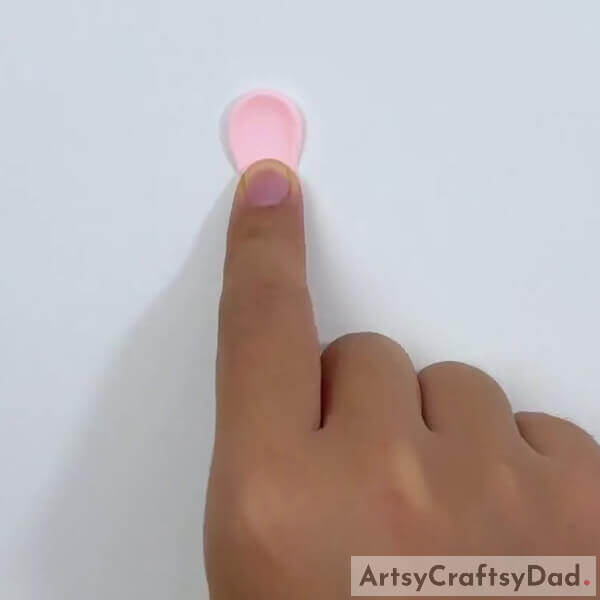
Start this craft by taking a white paper sheet as the base for this craft and peach-colored clay. Dough the clay into a small ball and place it over the base. Now, press and drag your clay ball on the base to form a petal on the base.
Step #2: Making More Peach & Pink Colored Clay Petals
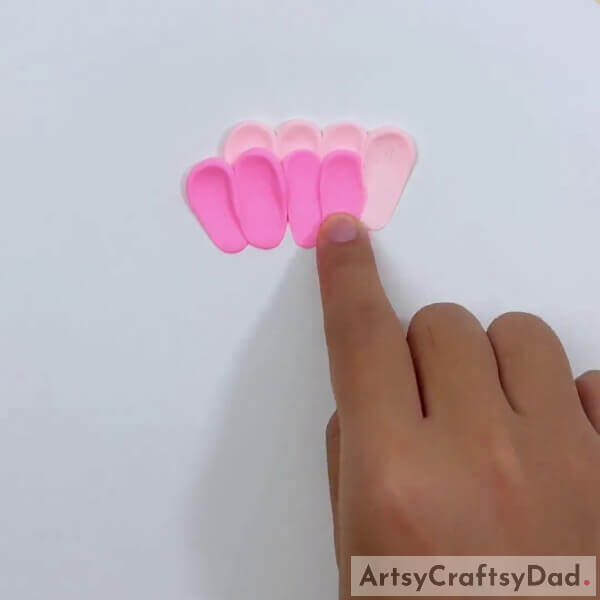
Following the same previous step, make 3 more petals of peach-colored clay beside the already made one side by side, without leaving any gap. Now, make petals using pink-colored clay, but this time make the petals below the peach ones and slightly over them. Make 6 petals of the pink clay over and below the peach ones.
Step #3: Making Dark Pink & Purple Colored Clay Petals

Make another layer of 5 petals below the pink ones of dark pink colored clay as you made the previous layer. Again, make the last layer of 3 petals of this flower from purple-colored clay over the dark pink ones.
Step #4: Taking Out A Piece Of Yellow Clay
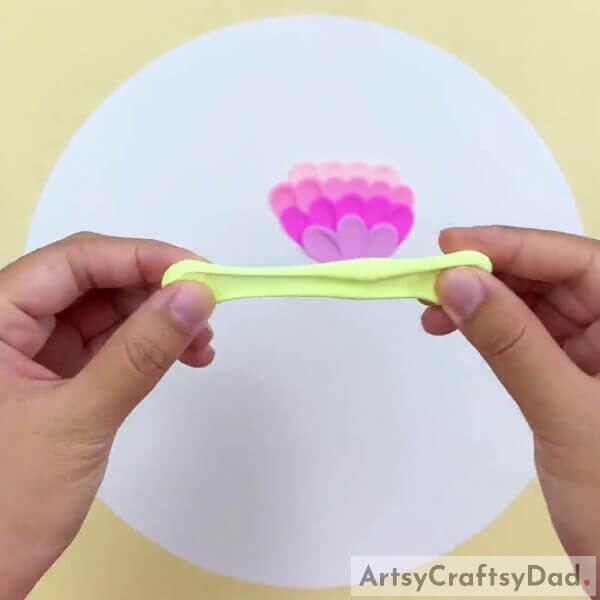
Take yellow-colored clay, stretch it, and take out a piece of it from the whole.
Step #5: Making Another Flower’s Layer Of Petals
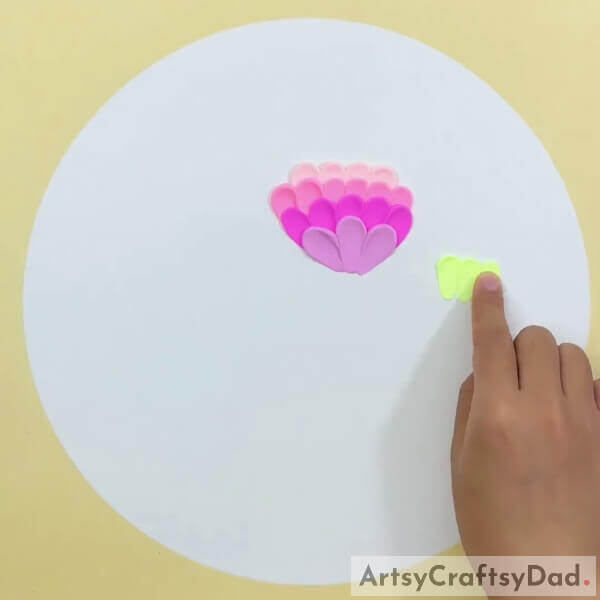
Now, as you made the layer of the previous flower, make another flower’s layer of 4 petals on the right bottom side of the pink flower.
Step #6: Making The Other Layers Of Flower
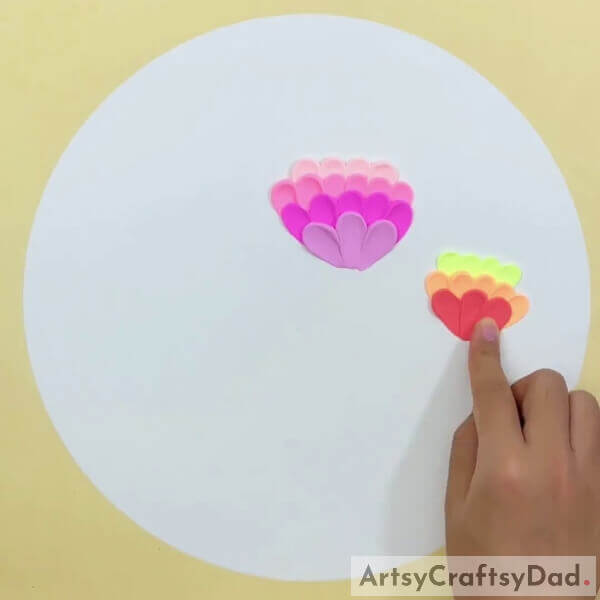
Similarly, make the second layer of this flower of 5 petals from orange-colored clay, and the last one of 3 petals below the orange one, to complete this flower.
Step #7: Making More Flowers And Sepals Of Them
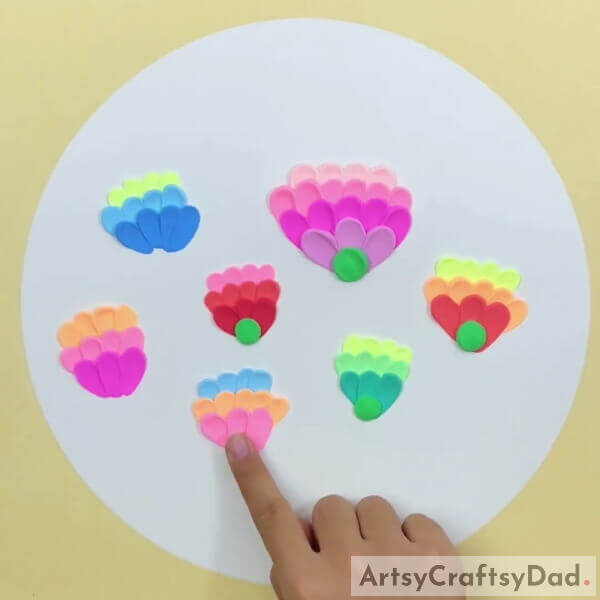
Similarly, make 5 more flowers over the base of different colored and numbered petals and layers of them. See the image for reference. Now, take green clay and dough small balls. Place these balls on the end tips of the flower and press to flatten them. these will be the sepals of your flowers.
Step #8: Drawing Stems And Leaves Of The Flowers
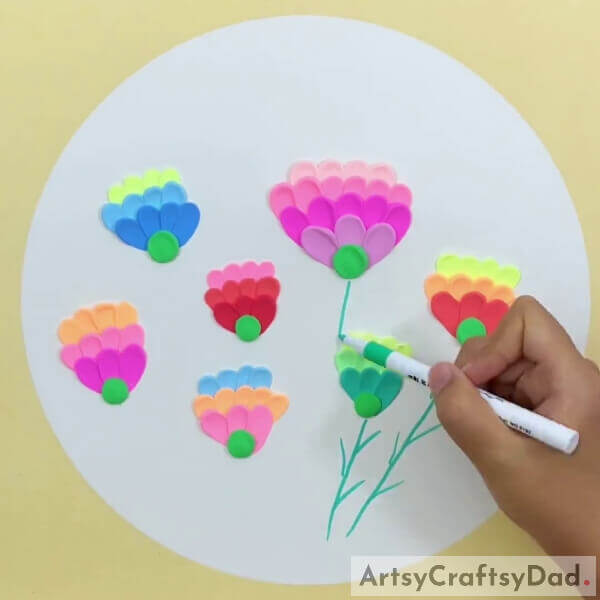
Using a green sketch pen, draw the irregular stems of your flowers beneath them and all coming to the bottom mid of the base. Draw the curvy leaves to the stems randomly on both sides of the stems.
Step #9: Making Dots On A Tissue Paper
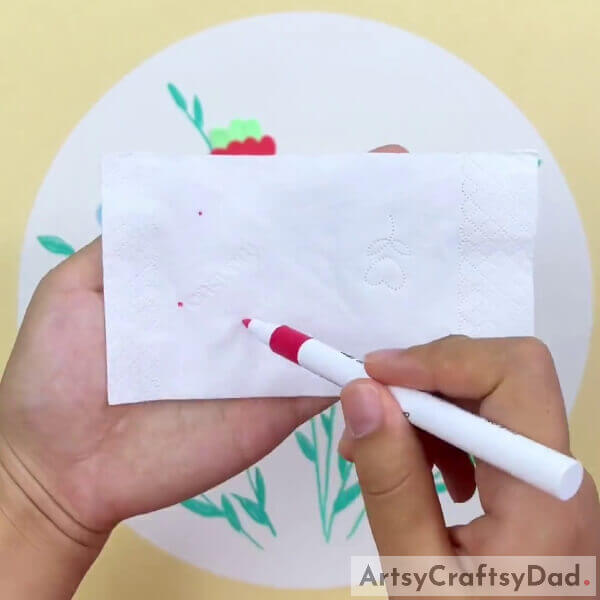
Take a tissue paper and using a red sketch pen, make dots over it randomly.
Step #10: Collecting The Tissue From One Side
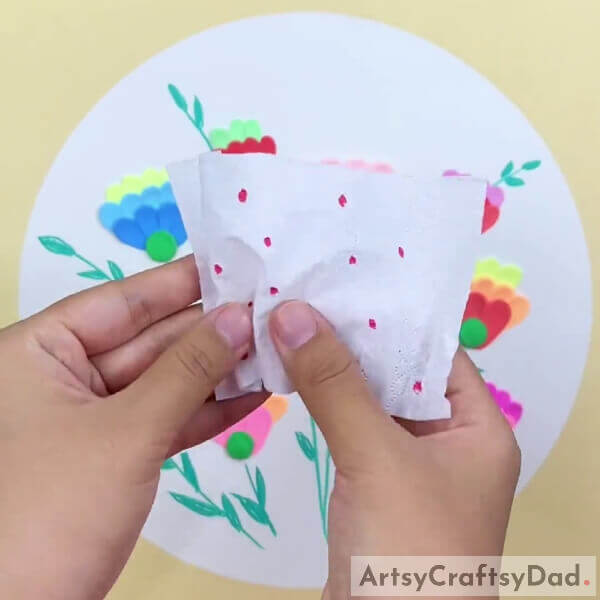
From the bottom side of your tissue, collect it. See the image for reference. This will become the bouquet sleeve of your bouquet.
Step #11: Applying Glue On The Bottom Mid Of The Base
Apply glue horizontally over the base on the bottom mid where your stems of all the flowers are nearby.
Step #12: Sticking The Bouquet Sleeve
Stick the bouquet sleeve over the bottom mid of the base where the glue is applied.
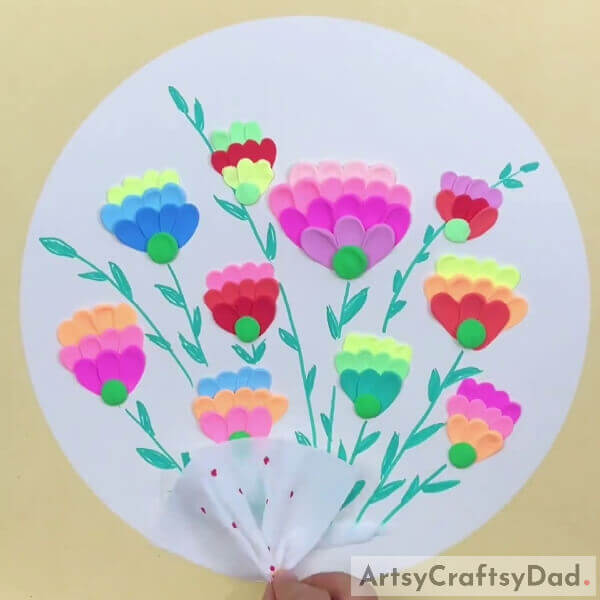
Step #13: Making And Bouquet Sleeve
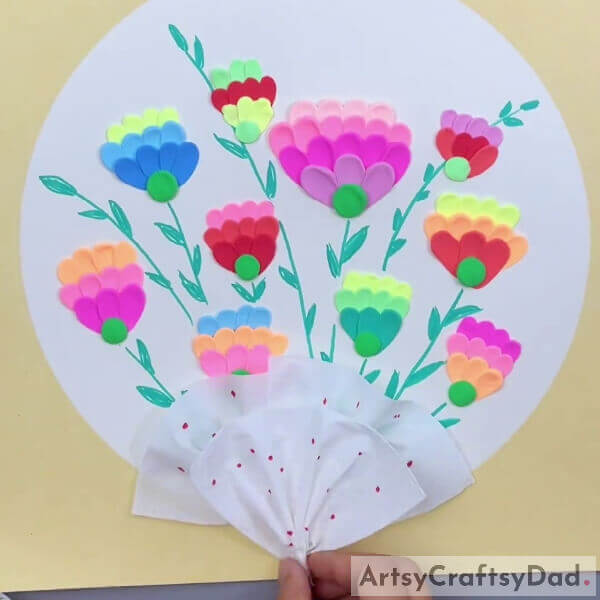
As you made the previous bouquet sleeve, make another one and paste it over the previously pasted one a little lower to give it a pretty look as shown in the image. Wide open the tissue from the top side to make the bouquet sleeve look like it covers all the flower stems.
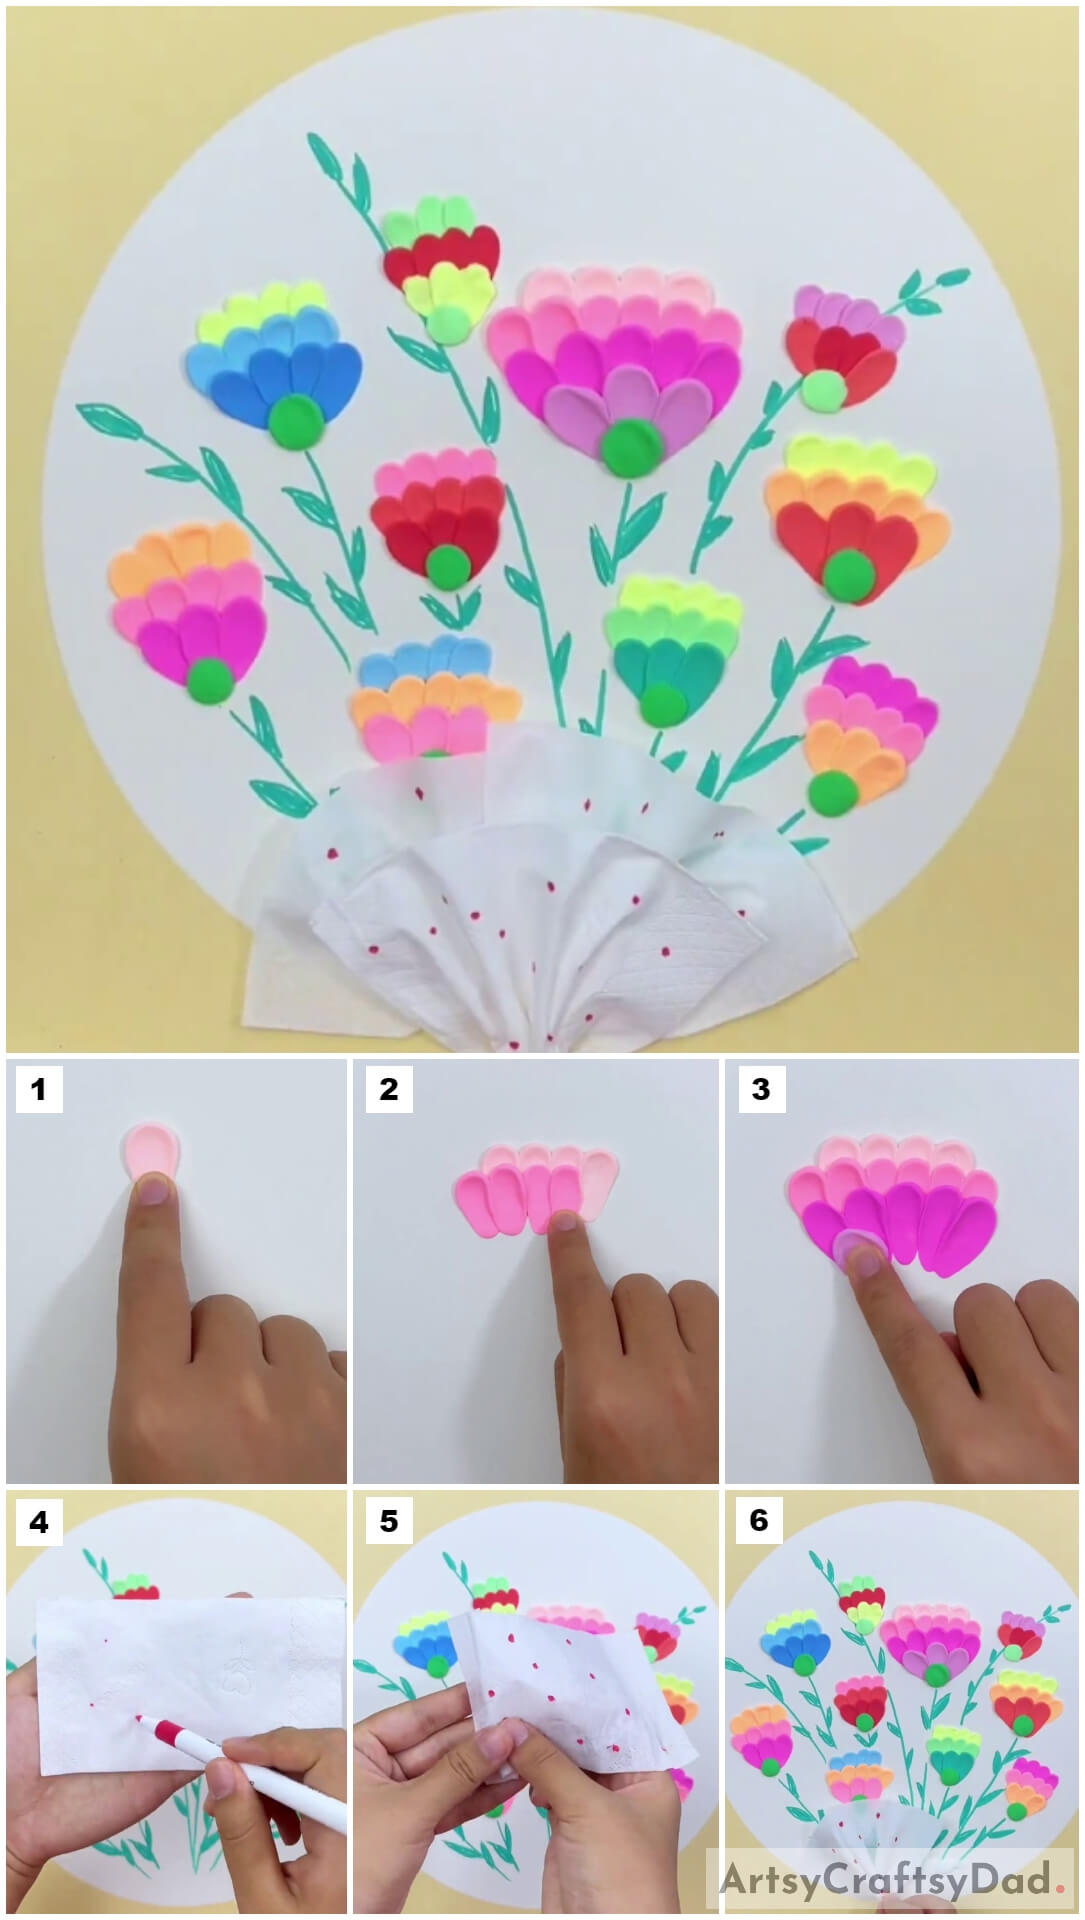
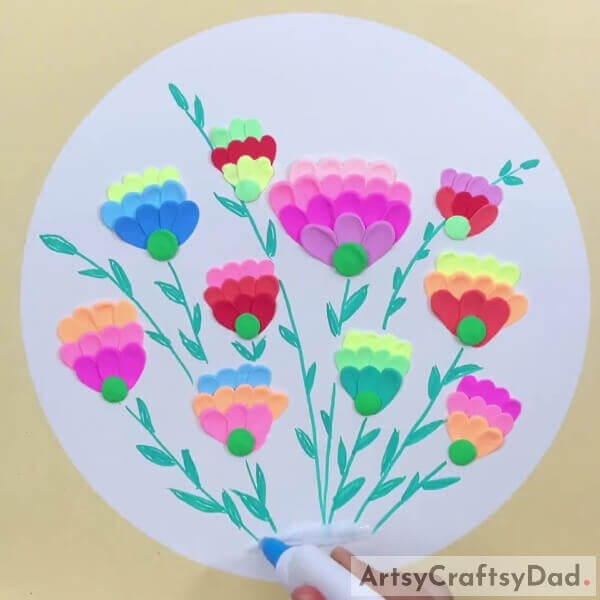
This Is The Final Look Of Your Clay And Tissue Flower Bouquet!
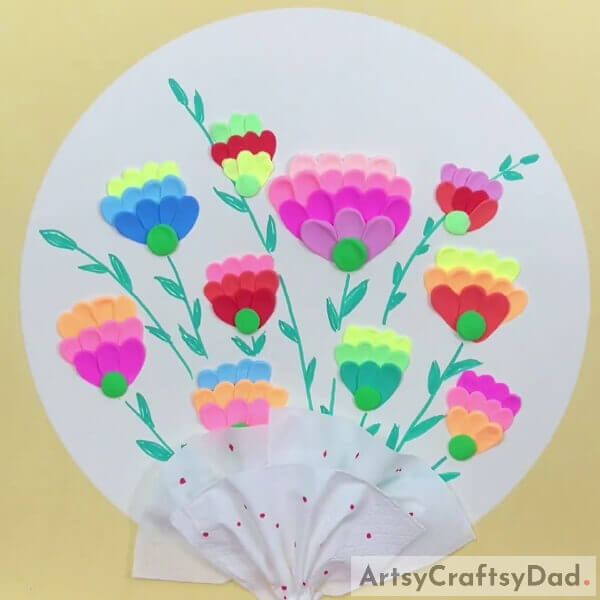
Woohoo! You have finally made your prettiest flowers’ flower bouquet just in time!
You can now take a minute to admire your creation! You should also show it off to all your friends and family to make them feel proud of your creation and your skills! You can also customize this craft by adding your touch of creativity like making different colored bases, carving textures on the flowers, different colored flowers to match the color of your room, anything! Your imagination and creativity are the limits to making this craft as unique as you are!
Hope you enjoyed making this craft! Give it a like and share it with your friends as much as you can! Also, tell us your feedback and the craft journey in the comments section below!
You May Also Like
- How To Make Round Tissue Paper Flower – Tutorial
- Clay Snails On Leaves Craft Tutorial For Kids
- Clay-Paper Sunflower Garden Craft Tutorial
- How to make a Bouquet Flower Pop-up Card
- Clay Heart Leaf Tree Craft Tutorial For Kids


