Make a beautiful rose bouquet with this easy stamp painting tutorial for kids! Learn how to use simple tools to create a colorful, one-of-a-kind piece of art your children will be proud of.
This tutorial is perfect for kids who want to learn how to paint a beautiful rose bouquet. It includes step-by-step instructions and helpful tips for producing a beautiful, realistic painting. It’s a great way for kids to have fun and learn a new skill.
Rose Bouquet Painting For Kids
Must Read: How to make Rose from Plastic Garbage Bags
Supplies & Tools
- White Paper Sheet
- Paintbrushes (Rounded And Flat)
- Cotton Earbuds
- Paint Colors
- Circle Stamp
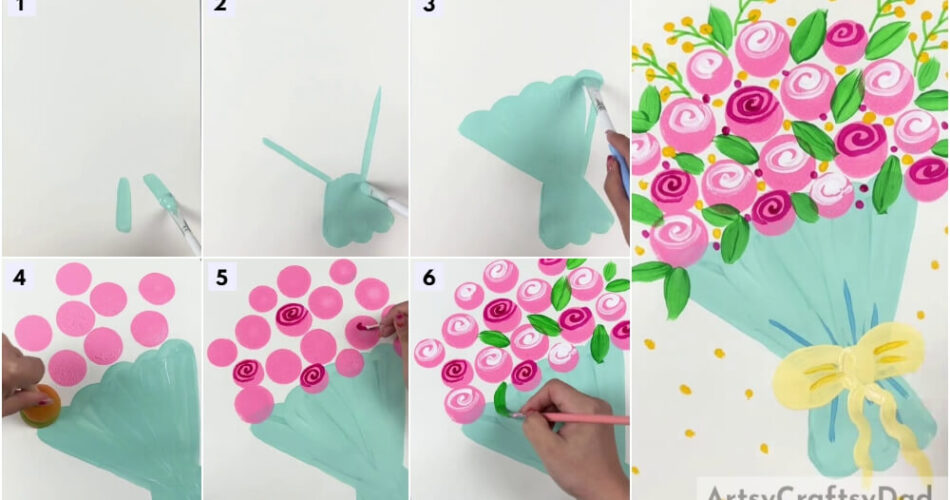
Rose Bouquet Instructions
Step #1: Painting 2 Small Lines
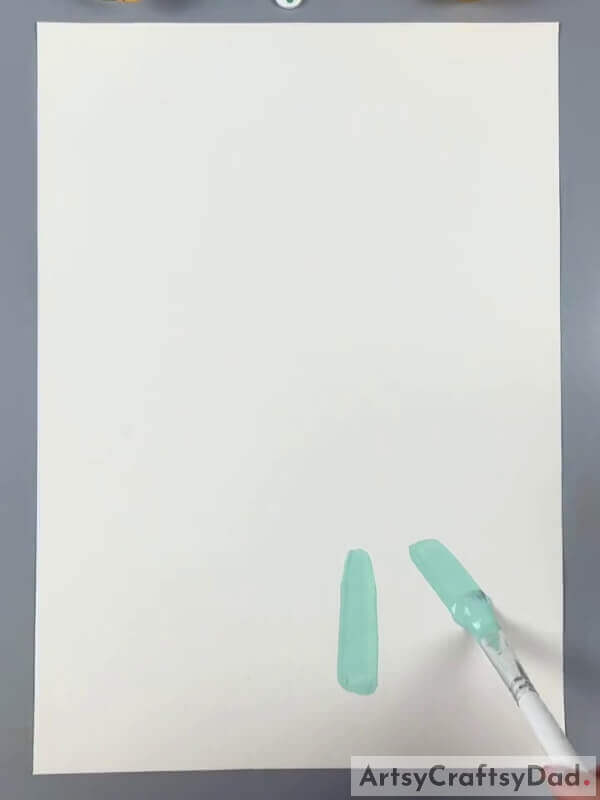
Begin this painting by taking a white paper sheet, a flat paintbrush, and light blue paint color. Dip the paintbrush into the paint and make 2 tilted outward lines on the bottom right corner of the paper as shown in the image.
Step #2: Making The Bouquet Wrap
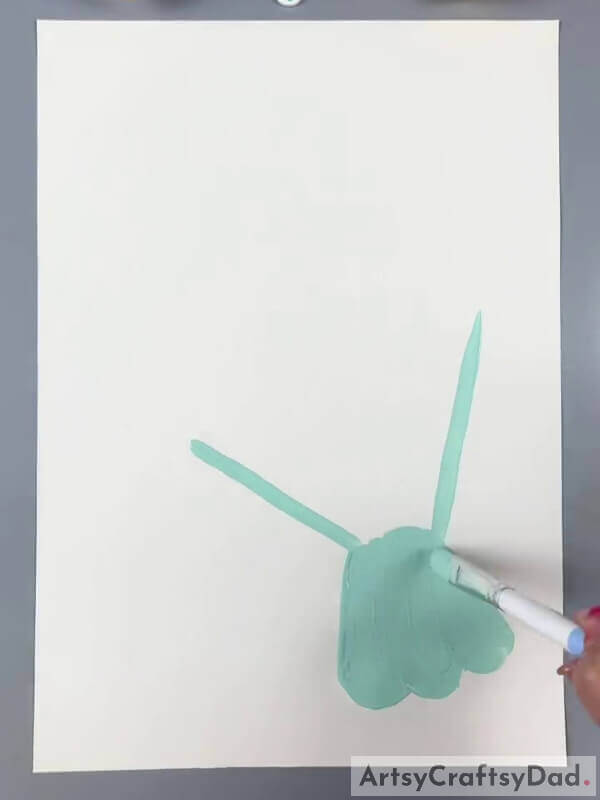
Using the same paintbrush, make two tilted lines outward above the already made ones to form a bouquet wrap shape and start painting the inner part to fill the color by enclosing the bottom with a bumpy line. See the image for reference.
Step #3: Completing Making The Bouquet Wrap
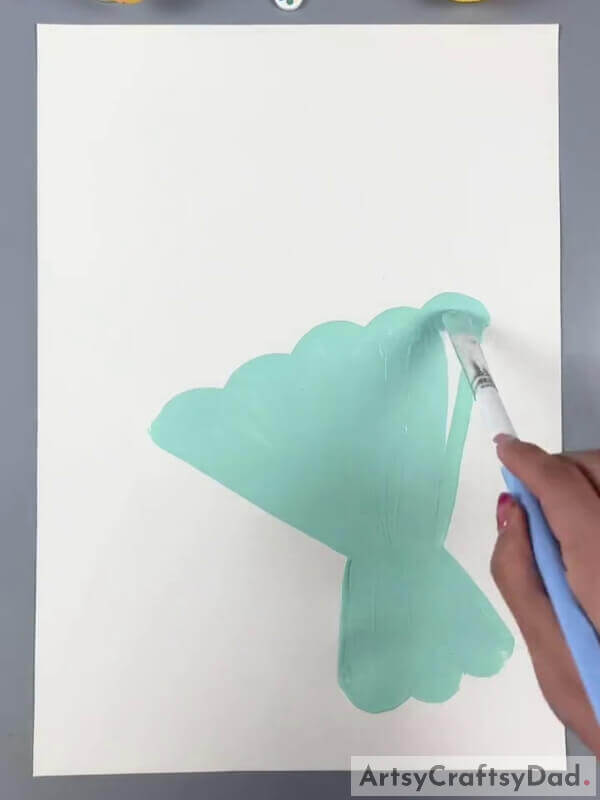
Make a bumpy line on the top part of the bouquet joining the 2 tilted lines and paint the inner part of the bouquet wrap to complete it.
Step #4: Stamping Circles
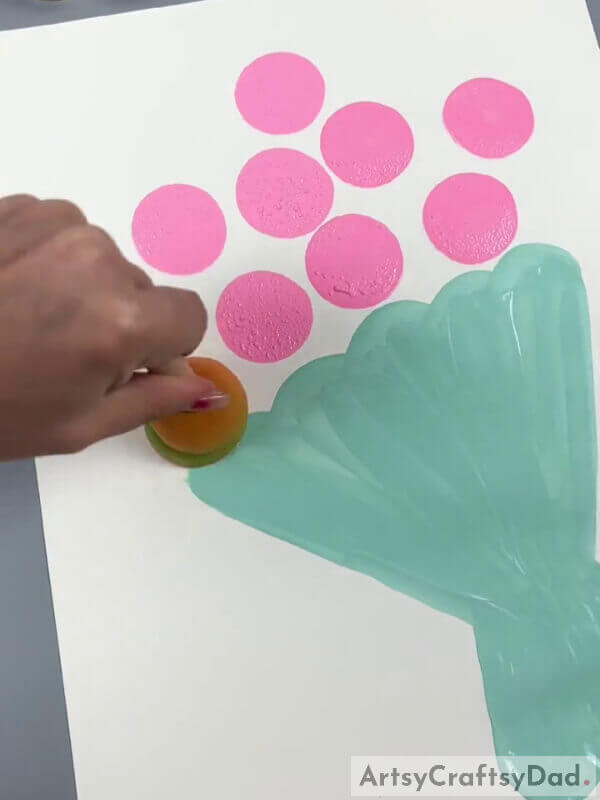
Take a circle stamp and dip it into pink paint. Stamp circle on the base above the bouquet wrap and also some over the bouquet wrap top boundary.
Step #5: Making Spirals
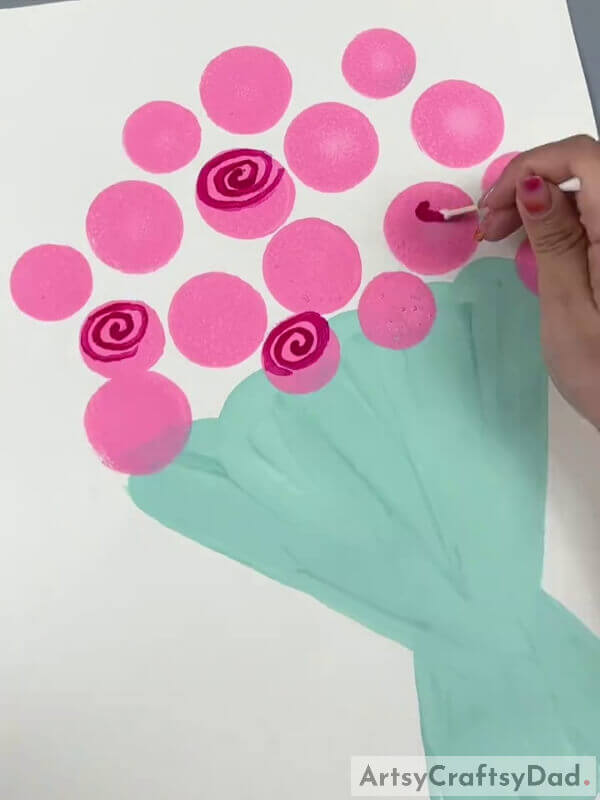
Dip a cotton earbud into dark pink paint and make oval spirals on the upper half of the circles that you have stamped. These spirals will represent the folded petals of your circle roses. Make these pink spirals randomly on the circles and leave the rest.
Step #6: Making White Spirals
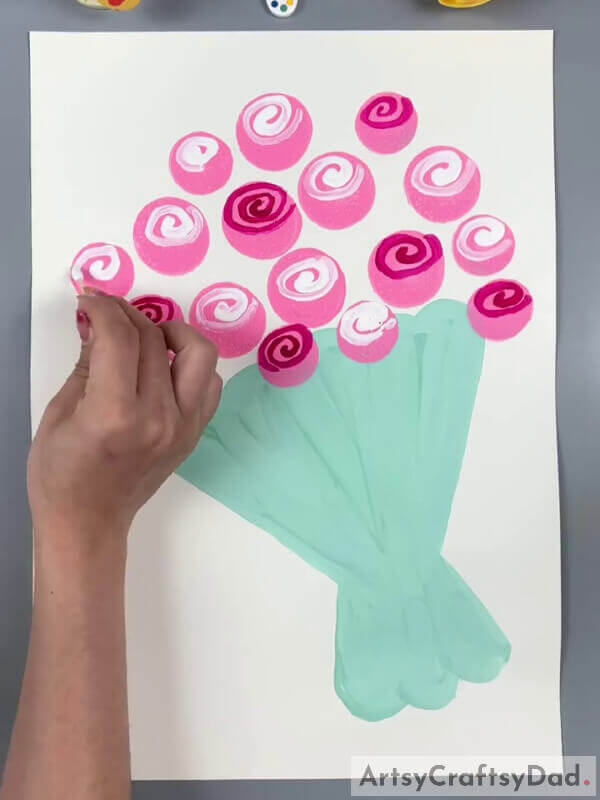
Dip another cotton earbud into white paint and make white spirals over the remaining roses as you made the dark pink ones.
Step #7: Making Leaves
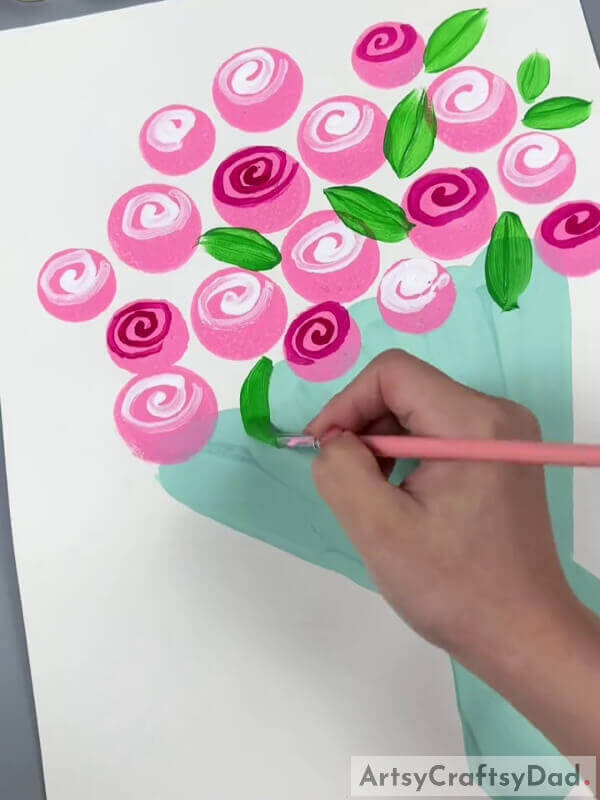
Dip a round paintbrush into green paint and make the curvy leaves between the roses randomly as shown in the image.
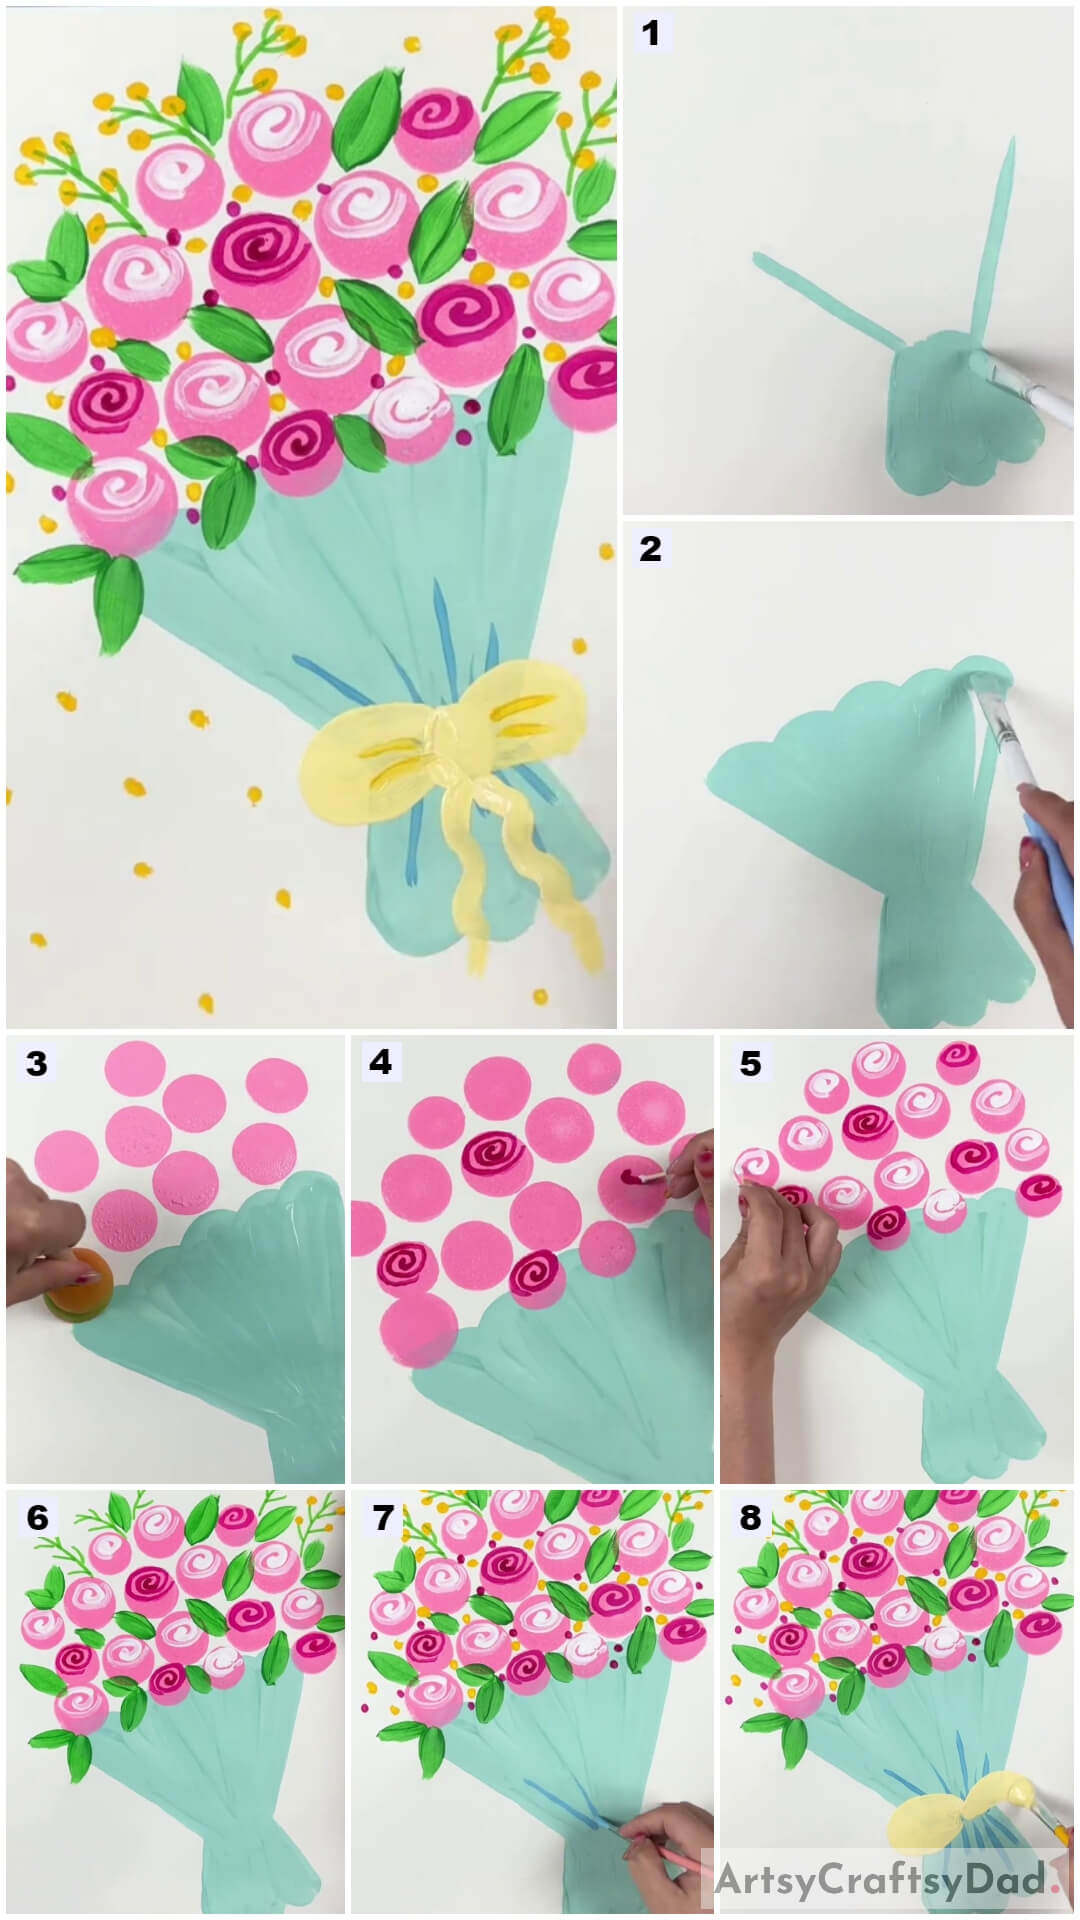
Step #8: Making Grassy Leaves
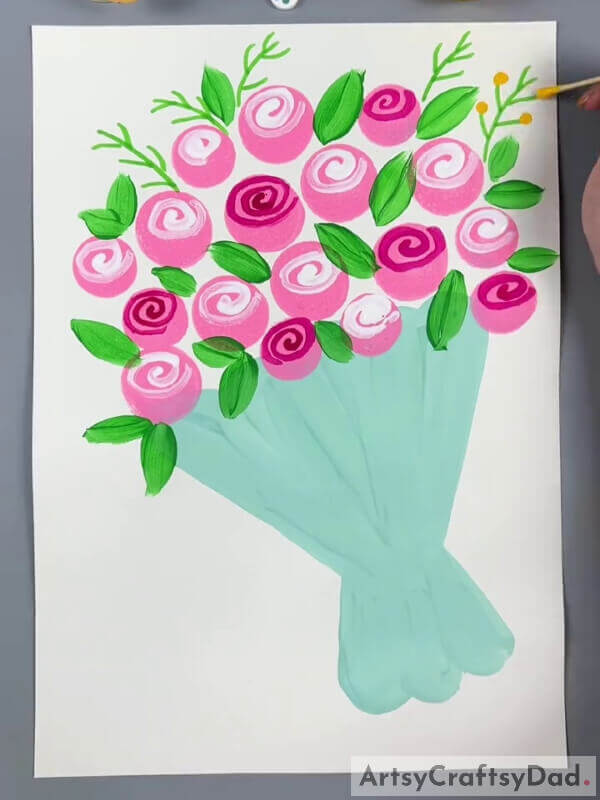
Using a green sketch pen, draw the grass leaves stems randomly on the top of the bouquet as shown in the image. Then dip another cotton bud into yellow paint and dab it one by on the tip of these leaves’ stems.
Step #9: Making Dotted Flowers
Cover the tips of all grassy leaves with the yellow dots and make these dots randomly between the roses as well. Again, dip the cotton earbud into dark pink paint and make dots randomly between the roses along the yellow ones. These will represent the dotted flowers of your bouquet.
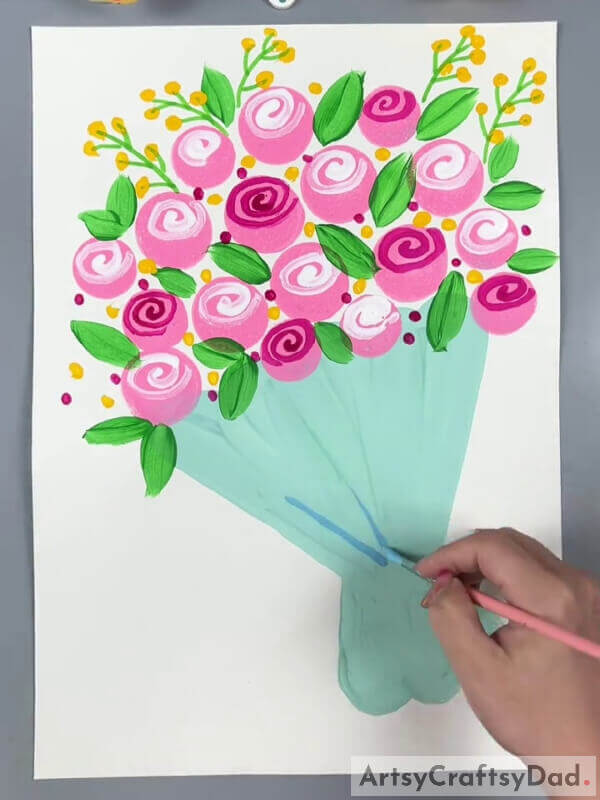
Step #10: Detailing The Bouquet Wrap And Adding A Bow
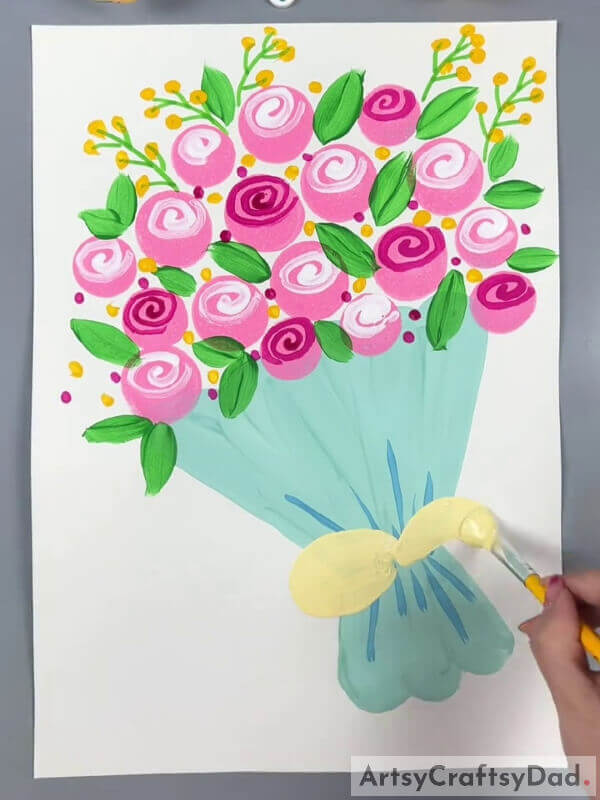
Dip the rounded paintbrush into the blue paint and make strokes over the twitched part of the bouquet wrap to give it a realistic look. Now, dip the flat paintbrush into yellow paint and make a bow over the twitched part horizontally.
This Is The Final Look Of Your Rose Bouquet Painting!
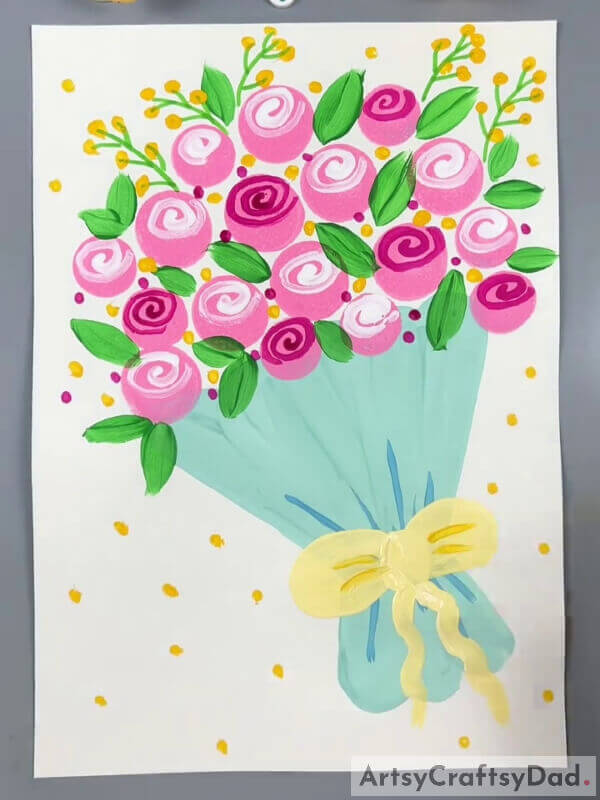
For the last step, make the wavy ribbons of the bow beneath it. Also, dip the rounded paintbrush into dark yellow paint and make the bow curves creases on both starting sides of it. See the image for reference. Now, using the same yellow painted paintbrush, make dots on the base randomly as shown in the image.
Congratulations! You have finally succeeded in making your amazing rose bouquet painting!
Through this painting, you have learned many hacks to paint and color! You can now decorate this painting in your room as a wall decor or can also use it as a gift for your loved one! I’m sure they will love to receive such a pretty painting of a bouquet that will stay fresh and beautiful forever! This painting can also be suited as a gift for the teachers on the teacher’s day! You can also customize the color of this painting to your liking!
Hope you liked the article and the painting idea! Share it with your buddies and drop your feedback in the comments section below! We would love to hear from you!
You May Also Like
- Peacock Stamp Painting With Hacks Tutorial
- Create a cascading bouquet of artificial flowers (Tutorial)
- DIY Handmade Satin Rose – Tutorial
- How to make rose with pot
- How to make charming bouquet of flowers from felt (Tutorial)


