
Learn how to paint easy finger stamp trees with butterfly art with the help of this tutorial, kids and beginners can try this easy art in boring times.
Welcome to this finger stamp trees with butterfly art tutorial! In this tutorial, we will teach you how to paint simple trees with butterfly art with finger print. This easy art tutorial is perfect for kids and beginners, with very few supplies and few steps, paint this easy art without any effort. Let’s get started!
Stamping Trees With A Butterfly Artwork For Kids

Must Read: How to Make Felt Finger Puppets in Easy Steps
Supplies & Tools
- Craft Paper
- Scissors (if needed)
- Watercolor Paint or ink (light and Dark Green, Light Blue and Orange Colors)
- Black Marker
Stamping Trees Instructions
Step #1: Drawing Wavy Lines Around White Sheet For Tree Branches
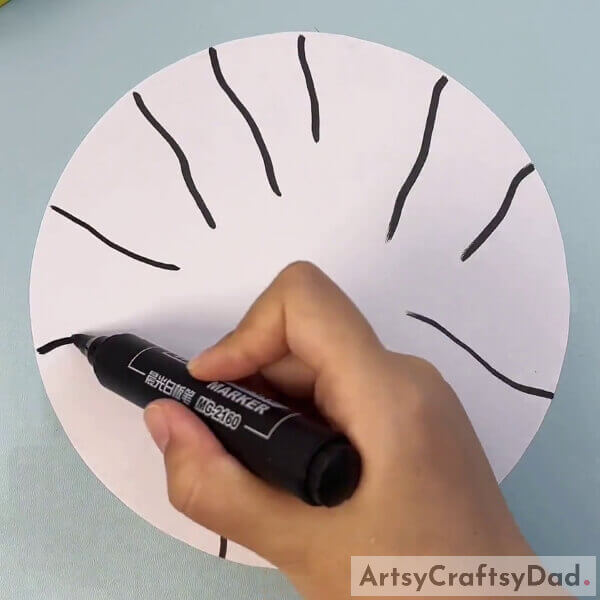
Cut your white color craft paper into a circle shape and then, draw a few wavy lines around your white sheet with the help of black marker for tree branches.
Step #2: Dipping Index Finger Into Green Color Paint

Dip your right index finger into green color stamp ink or green watercolor paint to paint leaves.
Step #3: Drawing Green Leaves On Branches

After dipping into green ink, start to put your finger on the right and left sides of some wavy lines till the end (leave some lines in between) which we drew before to draw green leaves.
Step #4: Drawing Light Blue Color Leaves On Remaining Branches
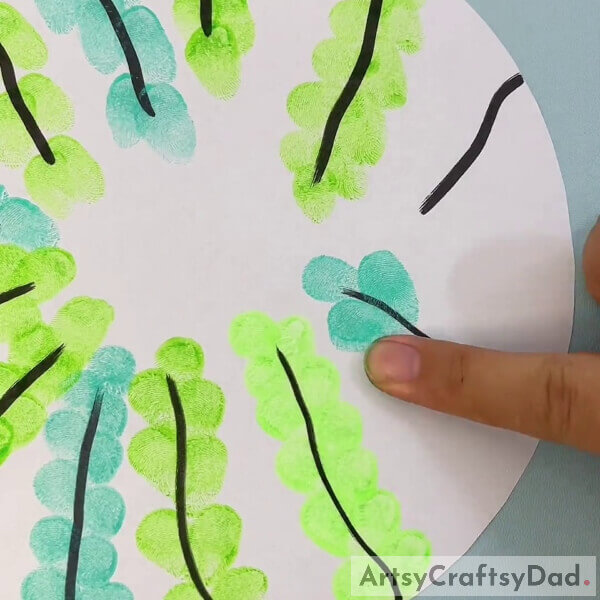
Again, wash your finger dip your right index finger into the light blue color ink, and start to draw leaves on the remaining wavy lines as well using the same method.
Step #5: Drawing Green Leaves And A Butterfly

Now, dip your finger in dark green color ink or paint and put a print in between your tree as shown in the image. Then, take orange color ink and closely put four dots in the middle of your white sheet which should look like butterfly wings.
Step #6: Drawing Antenna For Our Butterfly Using A Black Marker

Draw the long oval-shaped body of the butterfly in the middle butterfly wings and draw two antennae on top of the butterfly’s body.
Our Fingerprint Tree With Butterfly Art Is Completed
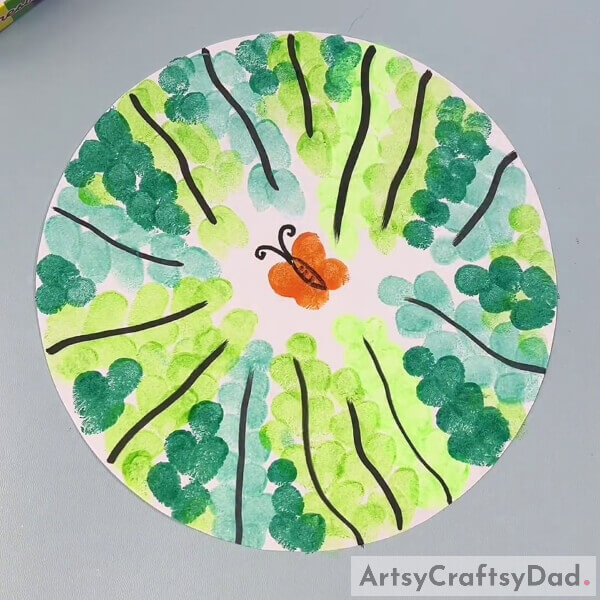
Draw little lines on your butterfly’s body to complete your butterfly artwork. That’s it, we have completed our finger stamp tree art. This art would be easy for even preschool kids and kindergarten kids, without any effort kids can make this art easily and this art is also a fun activity for your kids.
Hope you like this step-by-step finger stamp trees with butterfly tutorial. We like to read your comments in the comment section, for more craft, drawing, and art tutorials visit our website.
Thank you for visiting our website.
You May Also Like
- Peacock Stamp Painting With Hacks Tutorial
- 2 Basic finger tip mehndi design tutorial
- Easy Town Landscape Drawing Tutorial For Kids
- Clay Snails On Leaves Craft Tutorial For Kids
- How To Make Trees from Plastic Bottles


