Learn how to create your own beautiful cotton buds sunflower garden with this step-by-step tutorial. From planting the seeds to nurturing the plants, we will guide you through the entire process. Discover the joy of gardening and attract honeybees to your garden with these vibrant and stunning sunflowers.
Welcome to the step-by-step tutorial on creating a beautiful sunflower garden using cotton buds. In this tutorial, we will guide you through the process of creating a vibrant and realistic sunflower garden using simple materials such as cotton buds and paint. Sunflowers are known for their bright yellow petals and iconic brown centers, and in this tutorial, we will show you how to recreate their beauty with the help of cotton buds. Additionally, we will also include a honeybee element to add a touch of nature and liveliness to your artwork. Collect all the materials that we will use in this craft & start to make our craft.
Beautiful Sunflowers Garden & Honeybee Craft
Must Read: Cotton Bud Sunflower Garden Step-By-Step Tutorial For Kids
Supplies & Tools
- Brown Drawing Sheet
- Earbuds
- Coloured Clay(Red, Yellow, Blue, Orange, Purple, White)
- Marker(Green, Black)
- Scissors
- Glue
Sunflower Garden Instructions
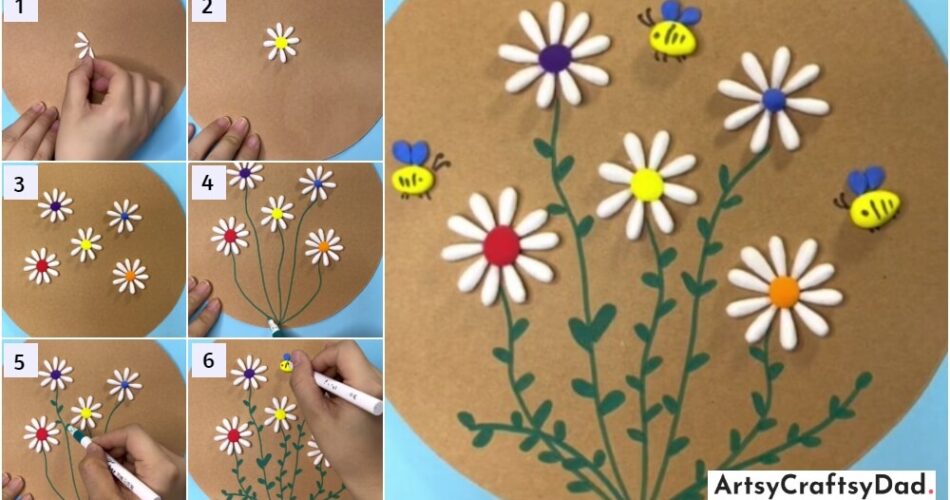
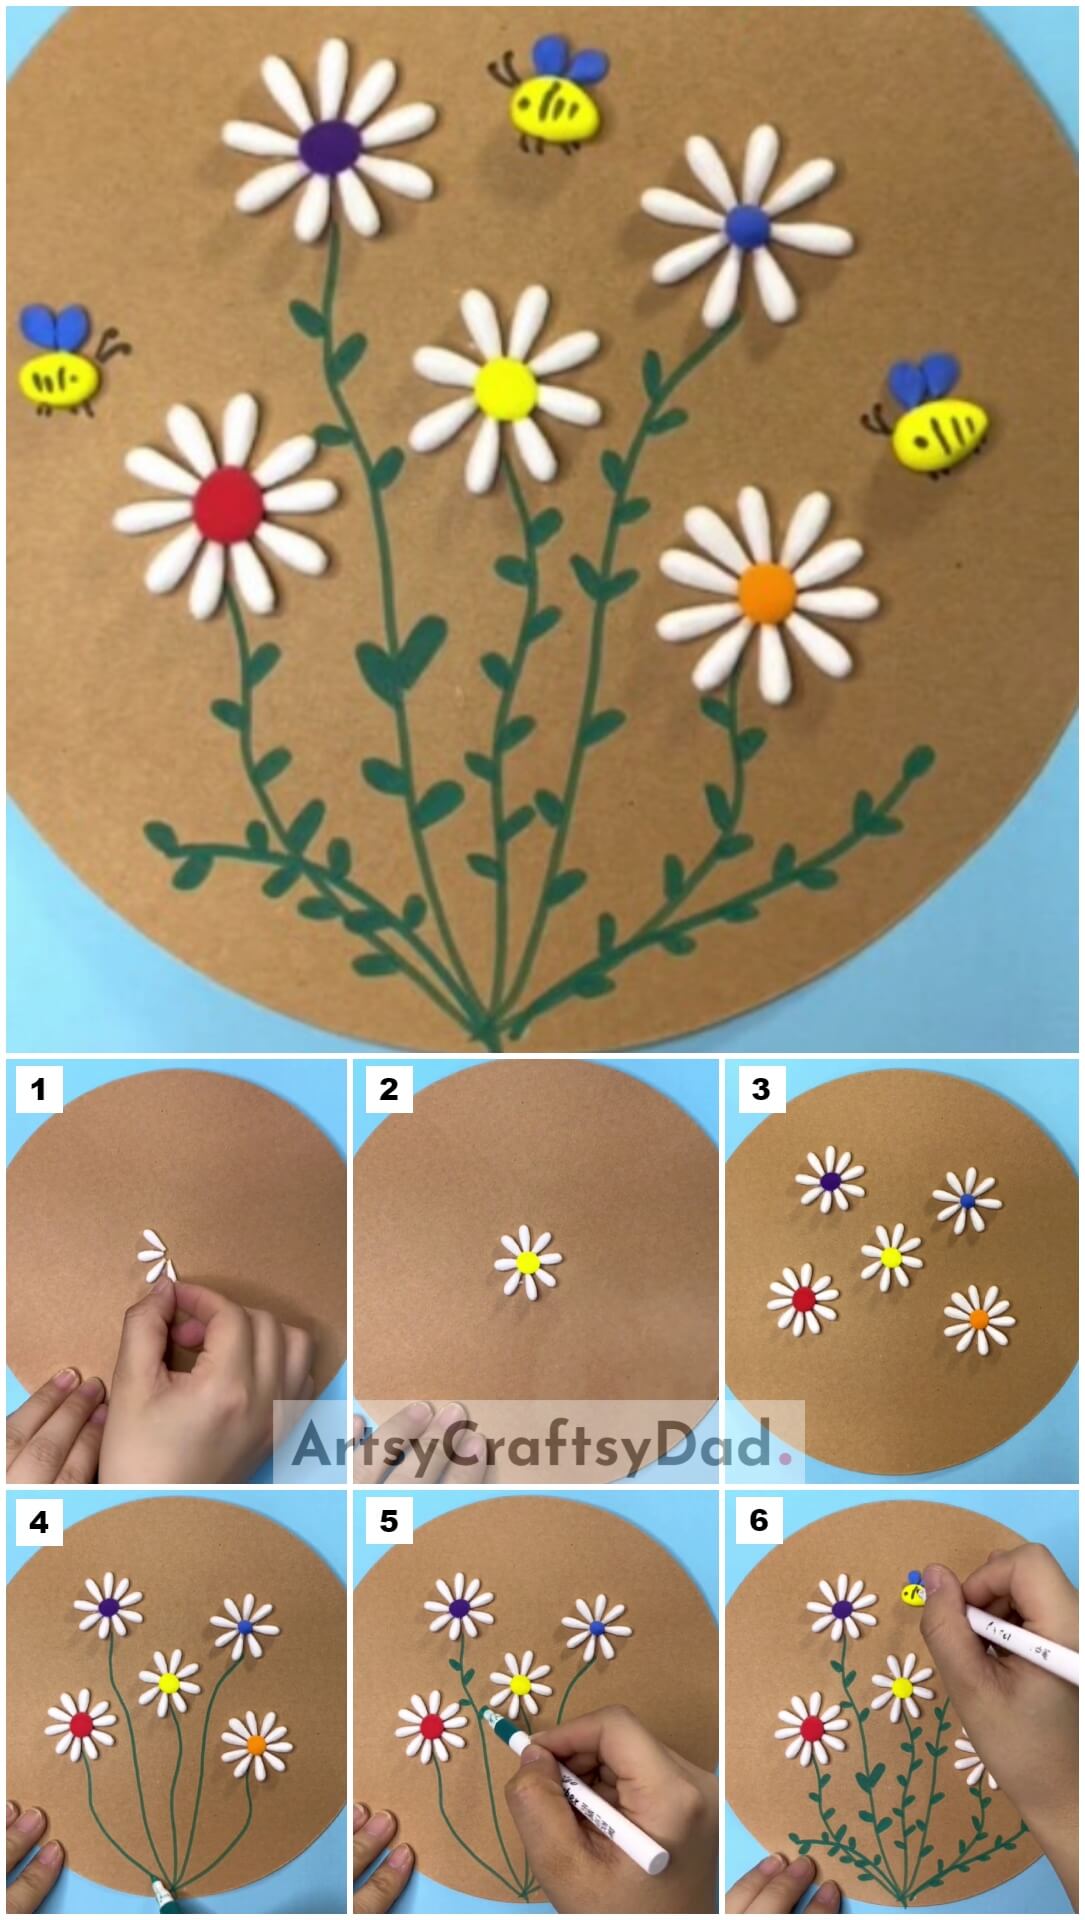
Step #1: Start Making Flower With Earbuds
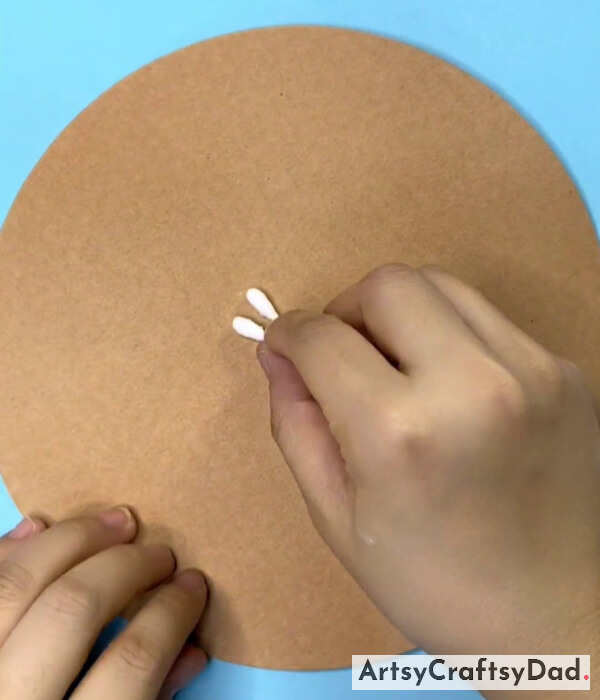
Step #2: Continue Making Flower
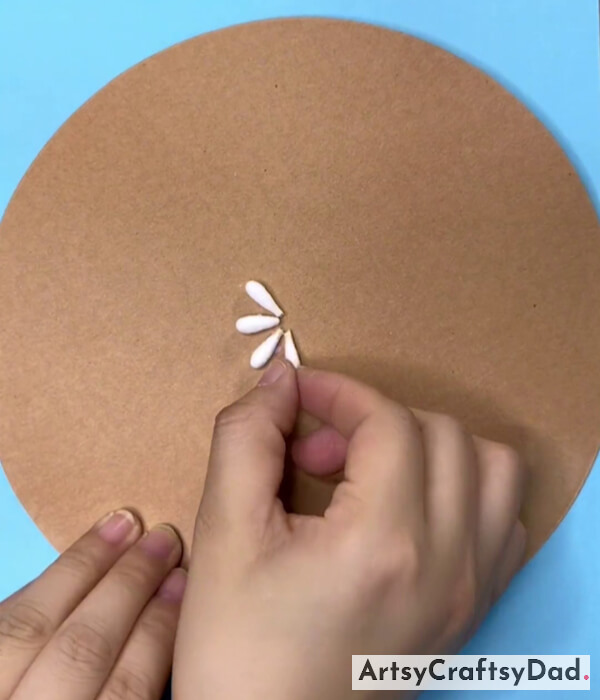
Continue making the flower with earbuds.
Step #3: Completing Flower
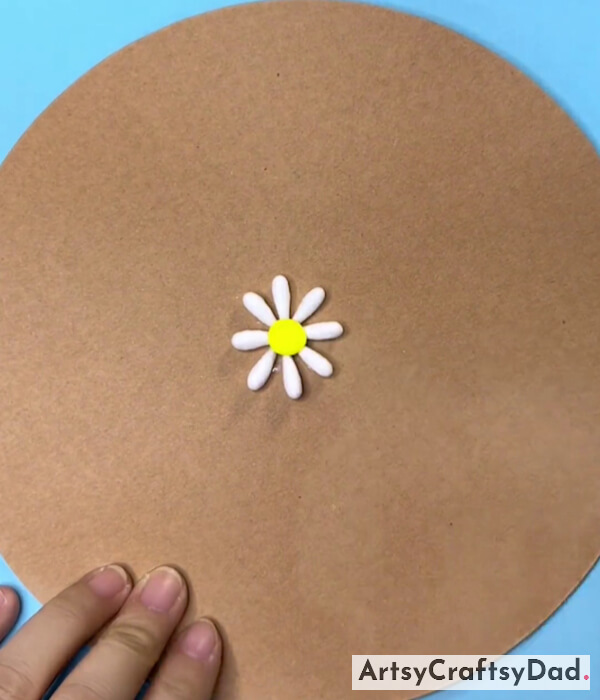
Take some yellow clay and create a ball from it & paste it in the center of the flower, the center part of any flower is called the pistil.
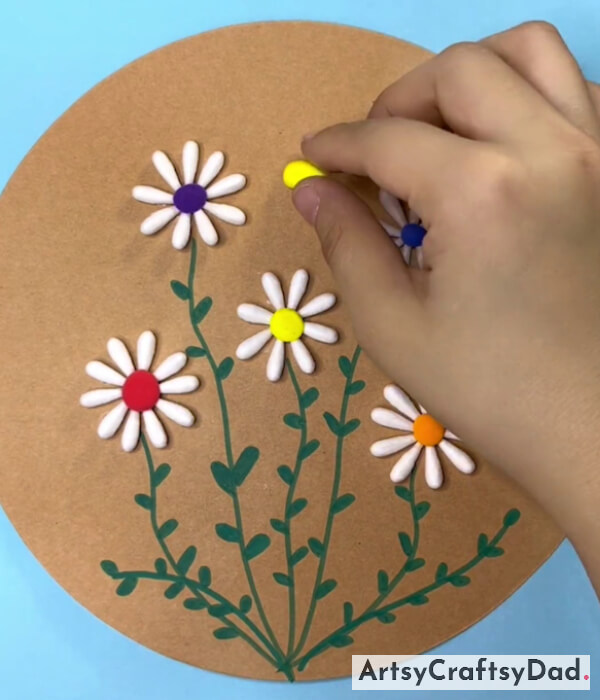
Step #4: Creating More Flowers
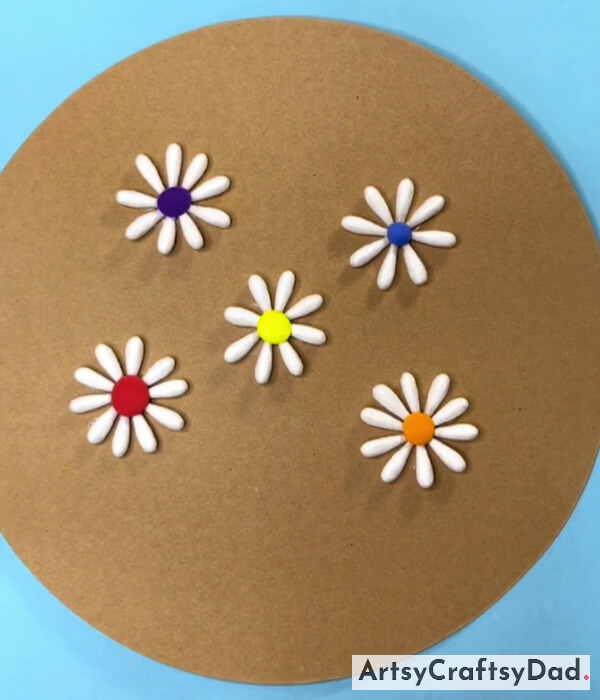
Similarly, create more flowers & take orange, purple, red, and blue clay & make different balls of them one by one & paste them at the center of each flower in the same manner as we did in the above step.
Step #5: Drawing Stems
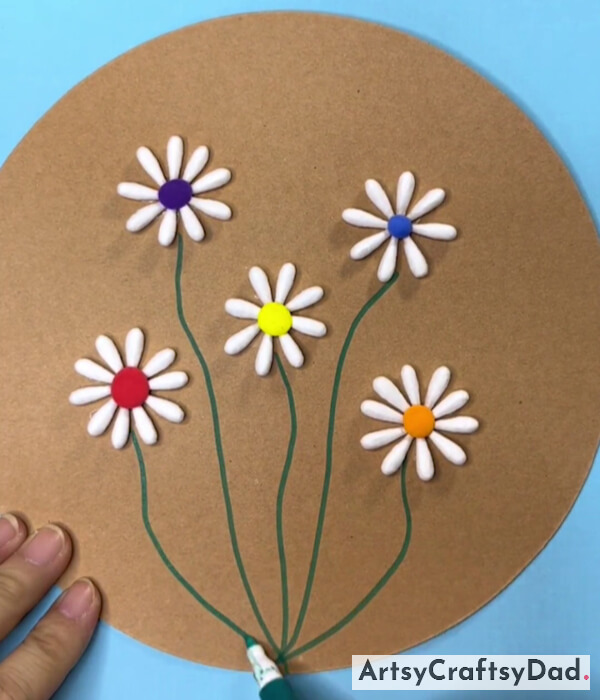
Now, pick a green marker and start creating stems of flowers.
Step #6: Drawing Leaves
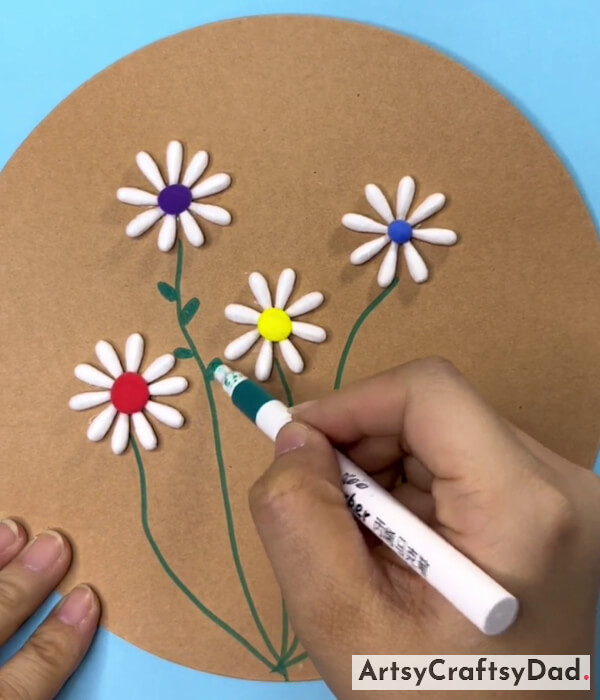
Draw leaves around all the stems.
Step #7: Start Making Honeybee
Take a yellow clay ball, and paste it on the top side in between the flowers as a honeybee’s body.
Step #8: Drawing Wings And Eyes Of Bee
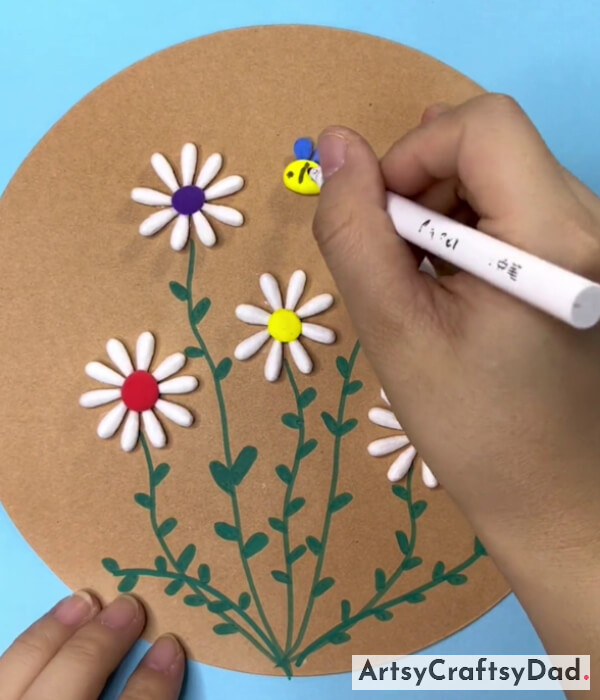
Take blue clay & make the wings of honeybees and draw the eyes with black marker & small verticle lines on the body.
Final Glimpse Of Our Gardens Craft!
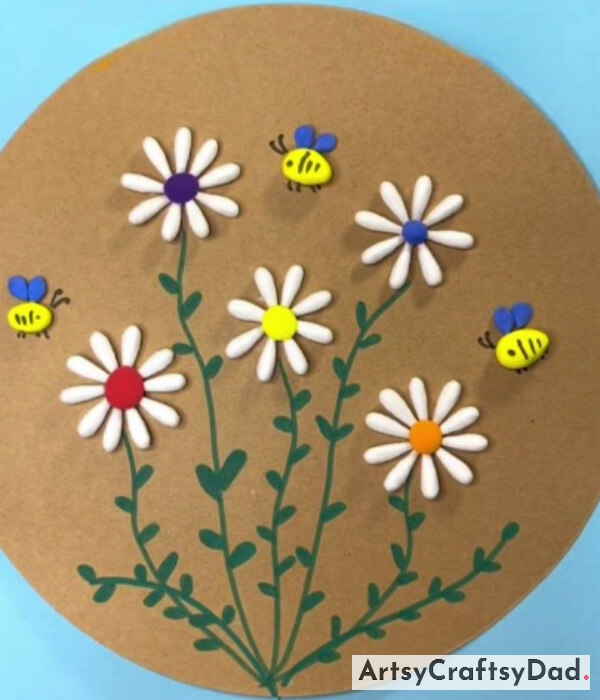
Make the legs and antennae of the honeybee. Complete the craft by creating two more honeybees in the craft by using the same process.
Hurry, you have created this beautiful craft. You could show your craft to your friends & family. I am sure they will love it. You should encourage your friends also to create crafts like this. You could enjoy having a competition with your friends who will create the best craft. This tutorial not only allows for artistic expression but also provides an opportunity to learn about the importance of pollinators in our ecosystem. Drop your comment in the comment section & keep visiting in the future for more beautiful crafts.
Thank you for visiting us! Have a nice day!
You Might Also Like This
- Clay-Paper Sunflower Garden Craft Tutorial
- How To Make Snowman From Cotton (Step-by-Step Tutorial)
- Cherry Blossom: Cotton Bud Painting Tutorial
- Sunflower Paper Tearing Craft Tutorial For Beginners
- Hedgehog: Sunflower Seeds & Clay Craft Tutorial


