Learn how to create a beautiful 3D flower garden using paper with this fun and easy tutorial for kids. This step-by-step guide will teach children how to fold and cut paper into different flower shapes, and then assemble them to create a vibrant and colorful garden.
Welcome to our tutorial on creating a 3D flower garden paper craft for kids! This fun and engaging activity is perfect for children who love arts and crafts and want to explore their creativity. In this tutorial, we will guide you through the step-by-step process of creating a beautiful flower garden using simple materials like paper, scissors, and glue. Not only will this project allow your child to practice their fine motor skills, but it will also provide them with an opportunity to learn about different types of flowers and how they can be arranged in a garden.
3D Flower Garden Craft Tutorial For Kids
Must Read: Paper Flower Garden Craft Tutorial For Kids
Supplies & Tools
- Beige Color Craft Paper
- Brown Sketch Pen
- Light Green Clay
- Flower & Grass Printed Sheet
- Scissors
- Glue
3D Flower Craft Instructions
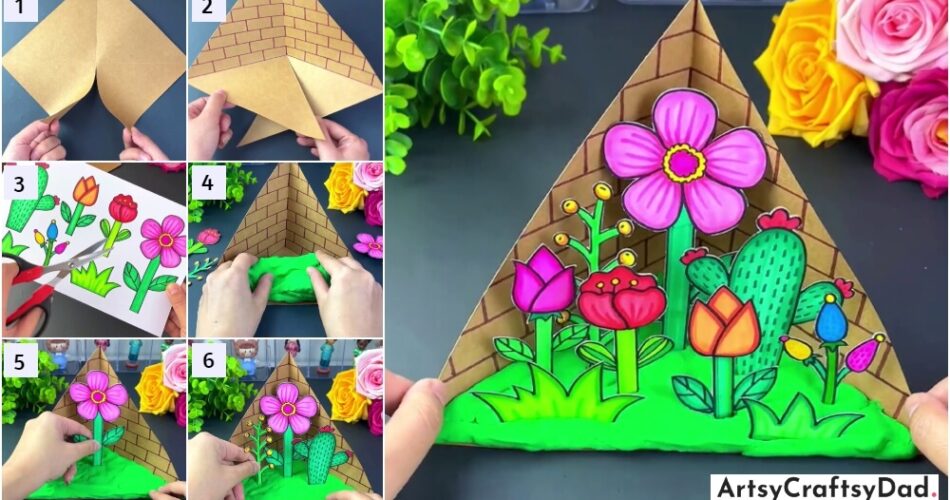
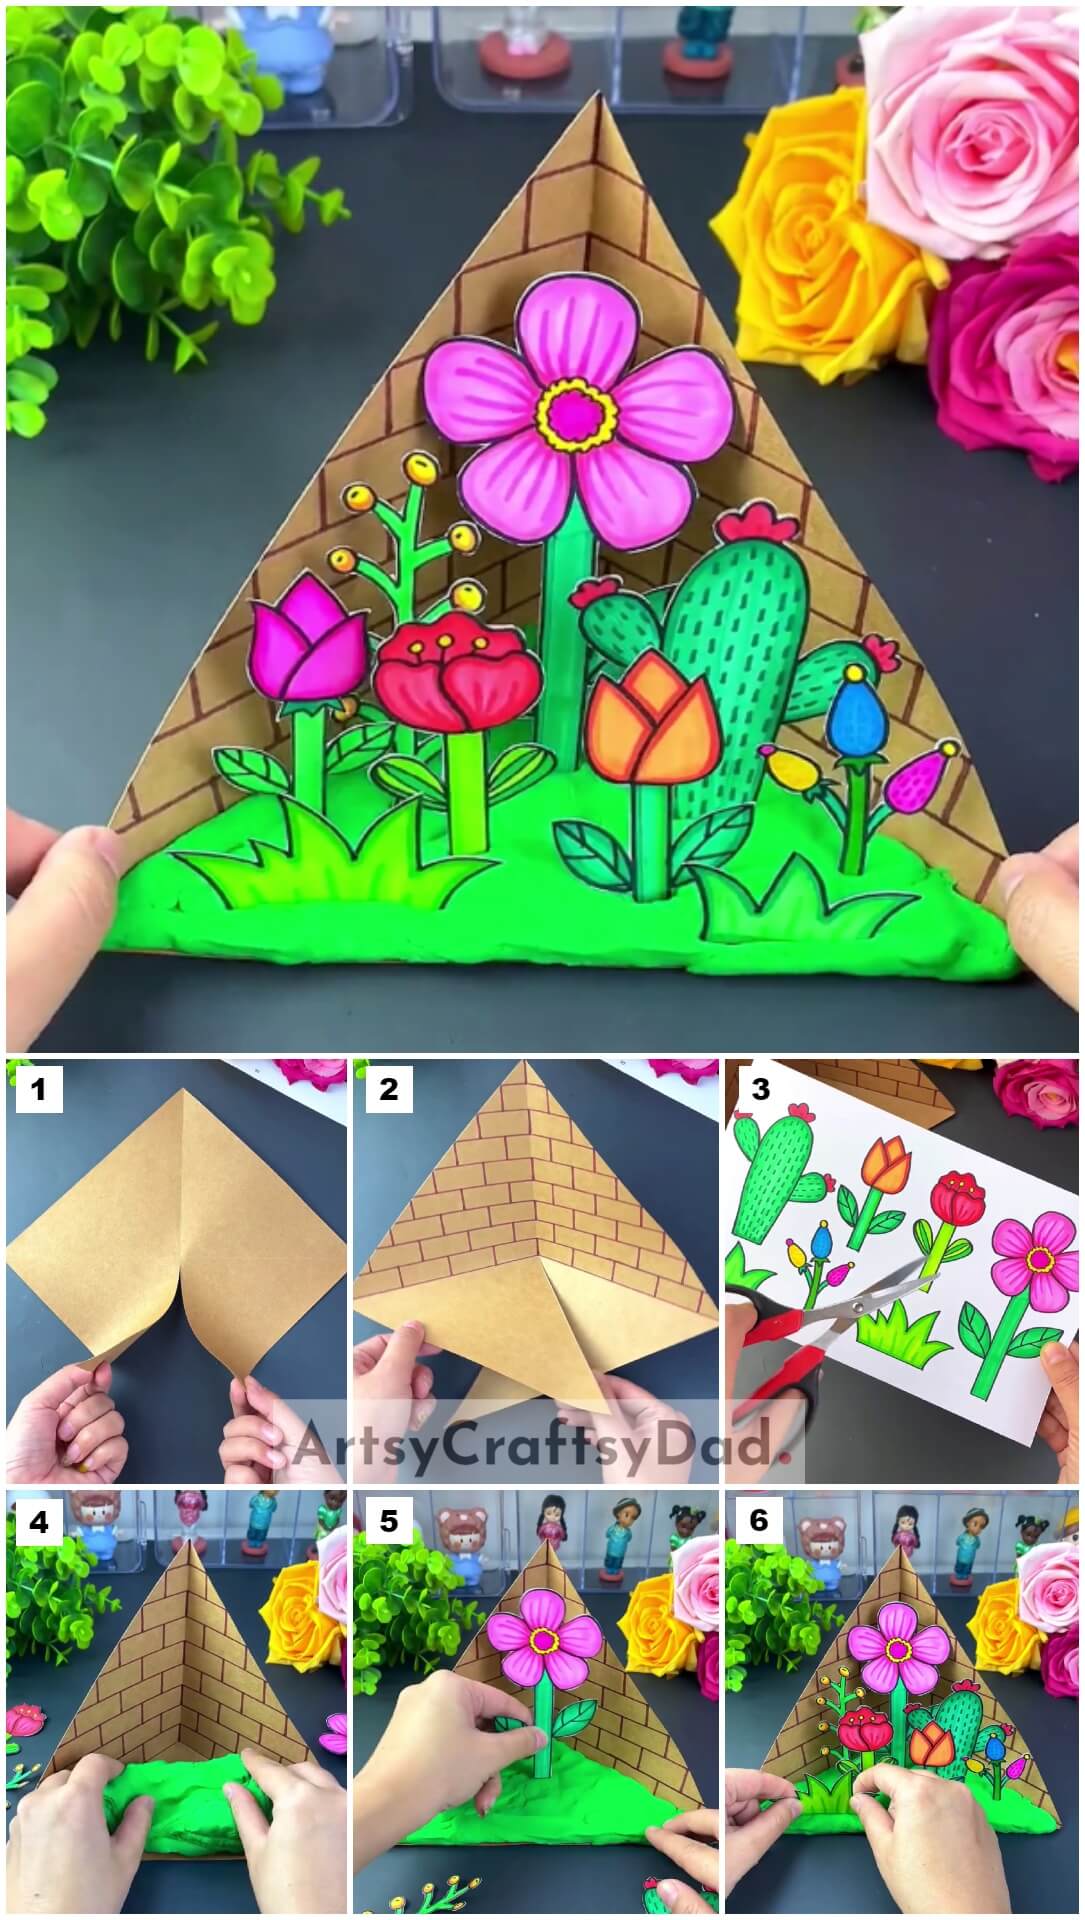
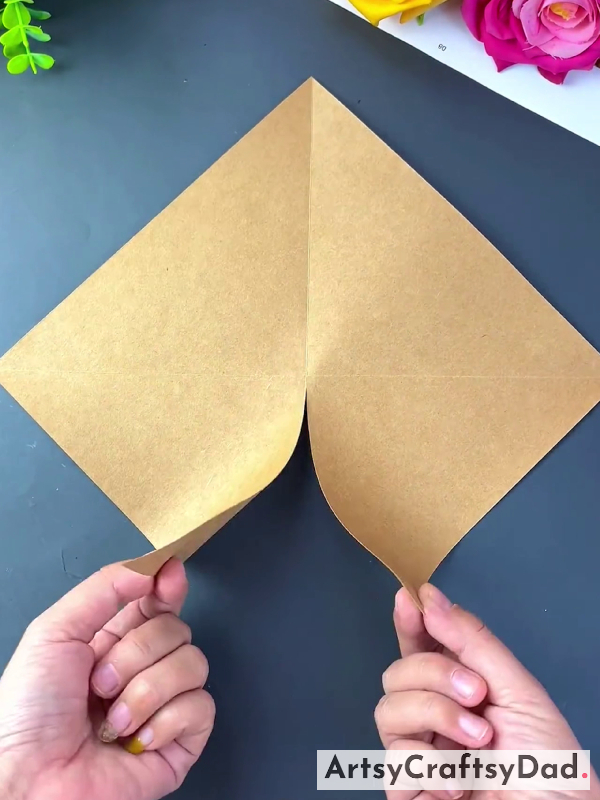
Step #1: Folding The Paper To Make Creases

Take a beige color craft paper & cut it into a square shape using scissors. Then put the paper in a diamond shape. Now, fold the paper horizontally & vertically from the center to make creases as shown in the above figure.
Step #2: Cutting Paper From Corner To Center
In this step, cut the paper from the bottom corner towards the center where both horizontal & vertical creases cross each other.
Step #3: Drawing Brick Design
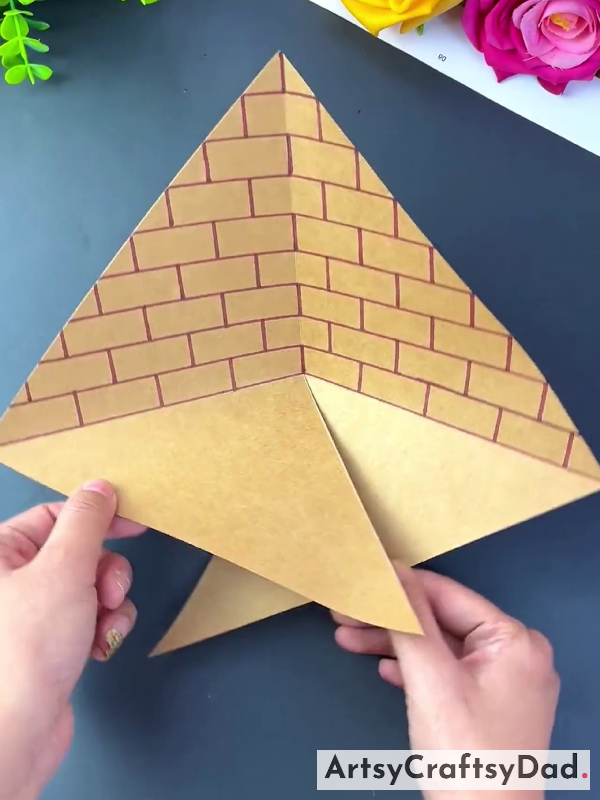
In this step, using a brown sketch, start drawing a brick design on the upper half of the paper that has not been cut.
Step #4: Pasting Cut Paper Together

Now, paste the cut paper together with the help of glue, as shown in the above image.
Step #5: Cutting The Flowers And Grass Sheet
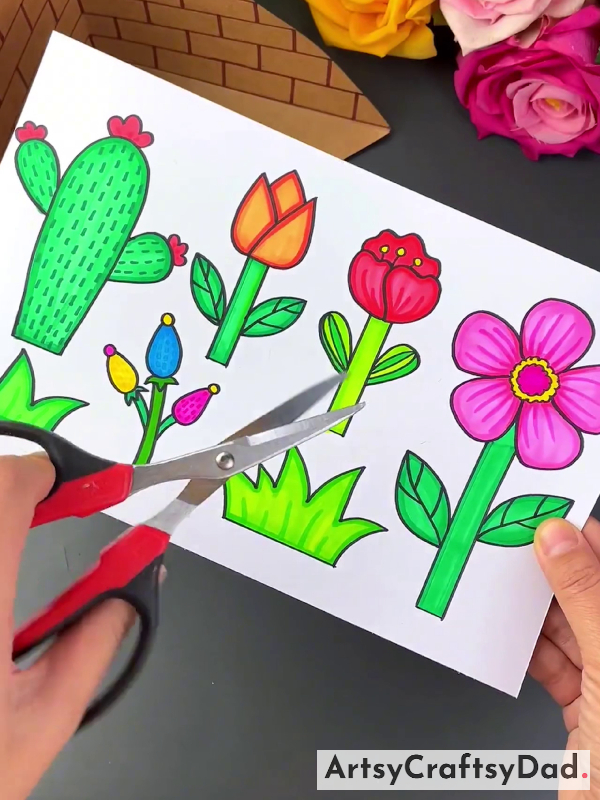
In this step, take a flower & grass printed sheet & cut all of them out carefully along their outline.
Step #6: Placing Clay At The Bottom Of Paper

Take a light green clay & put it at the bottom of brown paper & spread it with your fingers & use it to create a garden.
Step #7: Placing Flower On Green Garden
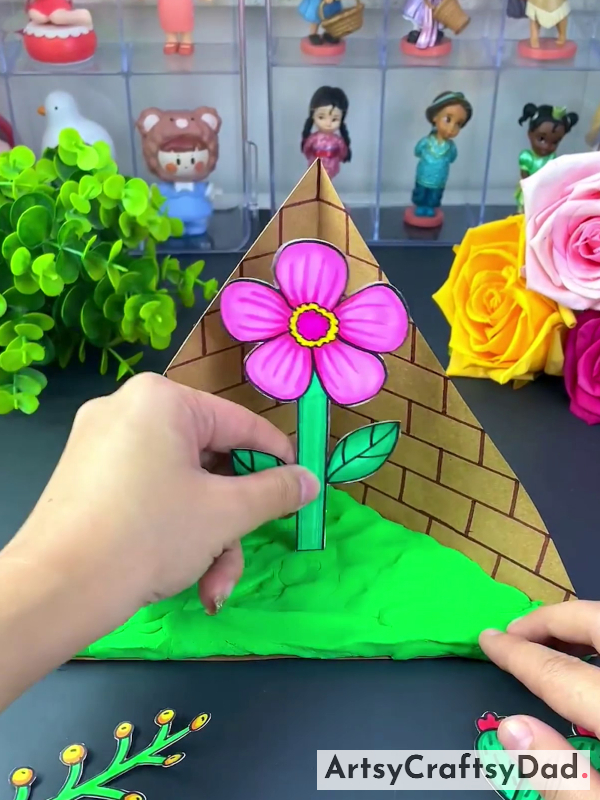
In this step, place the flower that you previously cut from the printed paper in the middle of the green garden. Press it into the clay with the help of your hand.
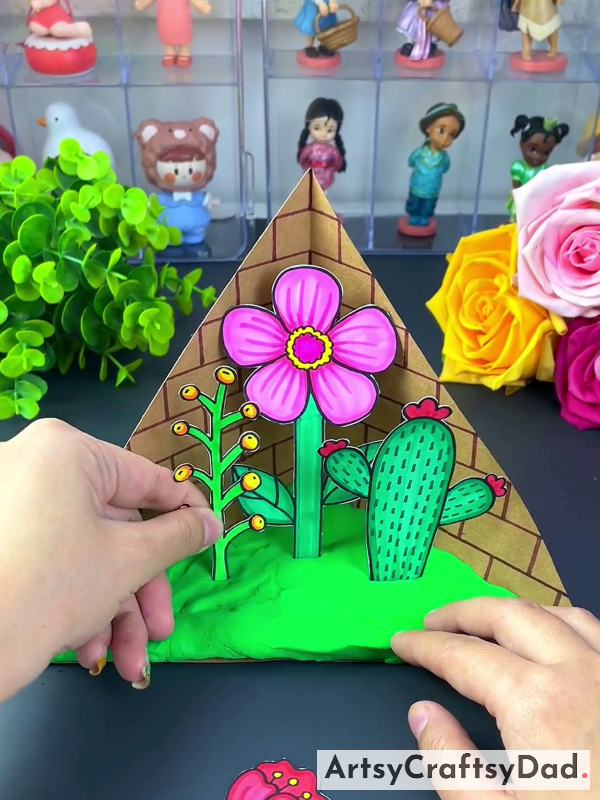
Step #8: Placing Another Plants
Now, once again, place the other plants into your garden with the help of your hand and press them into the clay to secure their position.
Step #9: Placing Grass
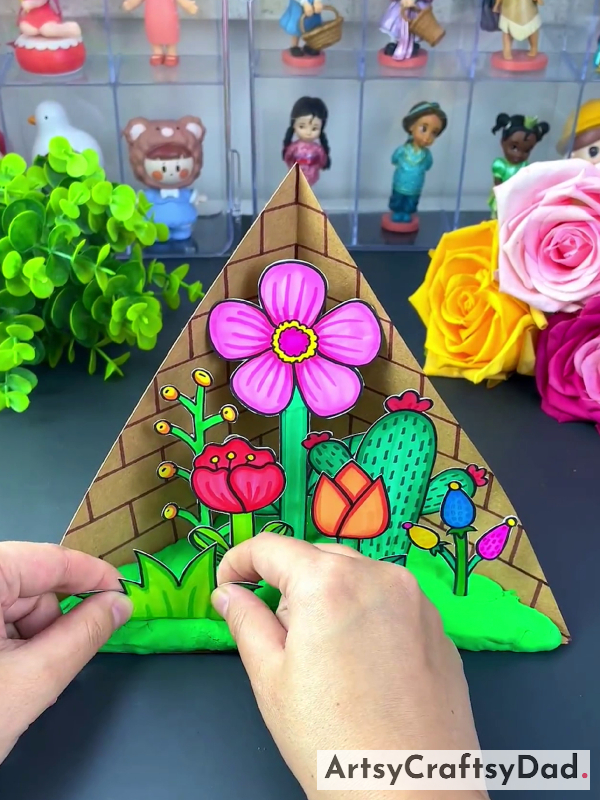
Now, it’s time to place the grass into the craft. Use your hand to press it into the clay to secure its place.
This Is A Complete Look Of Beautiful Flower Garden Craft!
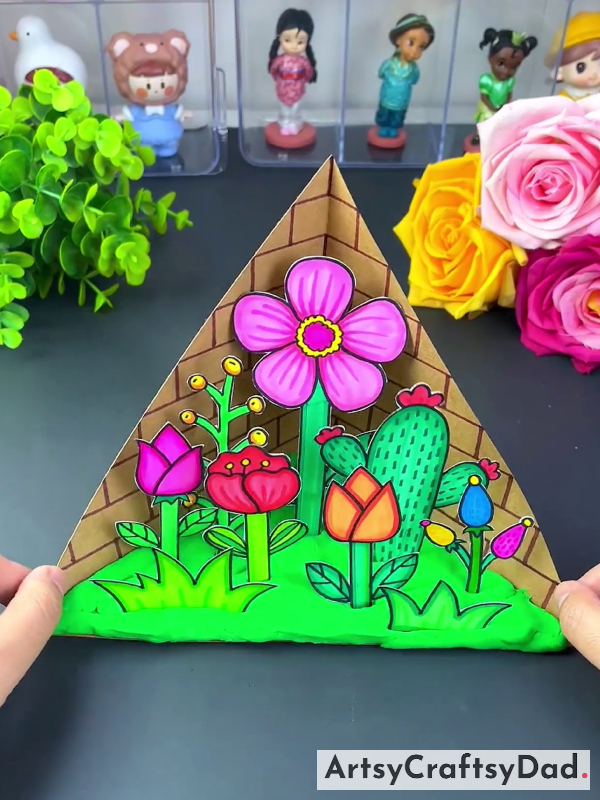
Awesome! Looks like this Flower Garden is so attractive!
3D flower garden paper craft ends here. This craft is perfect for all events and ideal for showcasing in your home. You can develop it with different flower shapes and colors, adding a touch of unique creativity. It’s a delightful craft that brings joy and beauty to your space. Now, Show your creation to everyone, and I am sure everyone will love it! Please give your feedback in the comment section because it gives us a hint about your craft interests & which type of craft you like. If you want to create more crafts then visit our other websites there you can get a different variety of crafts.
Thanks for visiting us!
You Might Also Like This
- Chrysanthemum Flower Garden: Clay & Pistachio Shells Craft Tutorial
- Beautiful Clay Flower Garden Craft Tutorial For Beginners
- Paper Pinwheel Flower Craft Tutorial For Kids
- Paper Flower Bouquet Artwork Craft Tutorial For Kids
- Clay-Paper Sunflower Garden Craft Tutorial


