Do you adore cherry blossom? If yes, then this painting is perfect to decorate in your room and get the feels of it through this tutorial!
We welcome you to this amazing painting tutorial on making a beautiful cherry blossom tree! This step-by-step tutorial will guide you through each and every step of this painting-making! This painting is suitable for kiddos of every age and is very easy to make with a hack of using cotton earbuds! This artwork is full of motor skills and the kids will able to drive theirs for sure! So, what are you waiting for? Get a grab onto the benefits by making it with us!
Beautiful Cherry Blossom Cotton Bud Painting

Must Read: How to Make Cherry Blossom Flower from Satin Ribbon
Supplies & Tools
- White Circular Paper Sheet
- Paint Colors (Pink And Brown)
- Paintbrush
- Cotton Earbud
Cotton Bud Painting Instructions
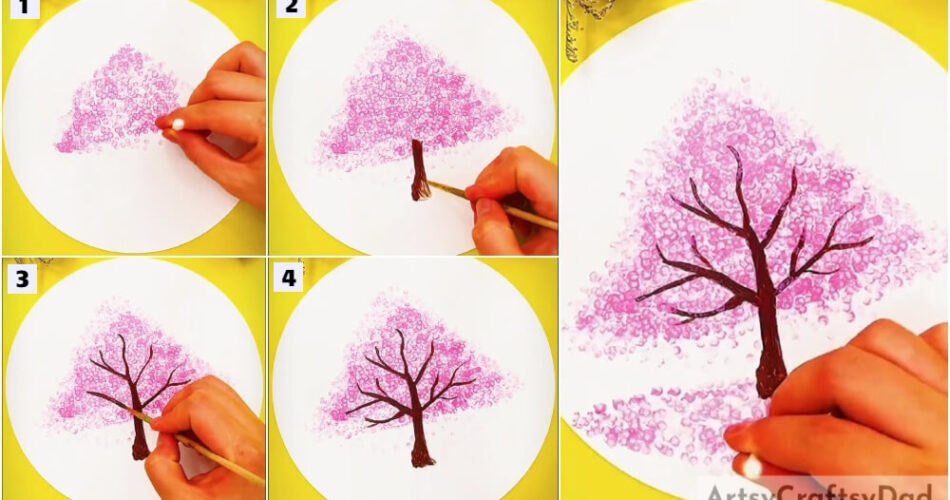
Step #1: Making Leaves Of Cherry Blossom Tree
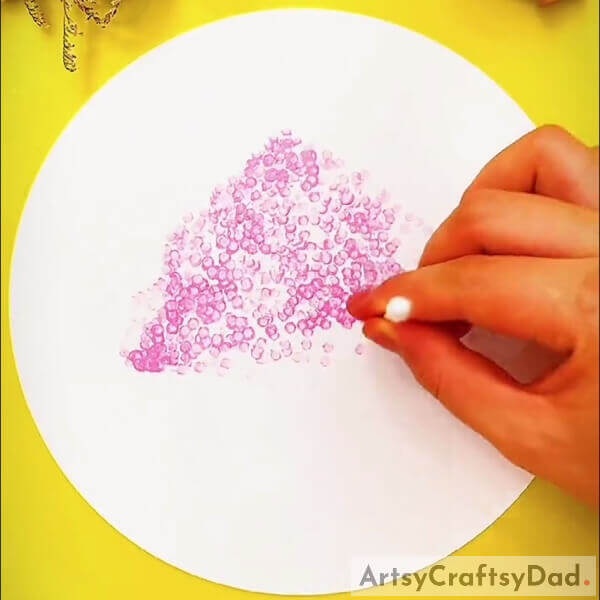
Begin this painting by taking a white circular paper sheet as the base for the artwork and a cotton earbud. Dip the cotton earbud into pink paint and dab it over the base randomly to form an irregular triangular bunch of leaves in the middle of the base as the leaves of the cherry blossom tree.
Step #2: Making The Tree Trunk

Dip a paintbrush into brown paint and make a thick tree trunk beneath the tree in the middle and a little over the leaves. See the image for reference.
Step #3: Making Tree Branches
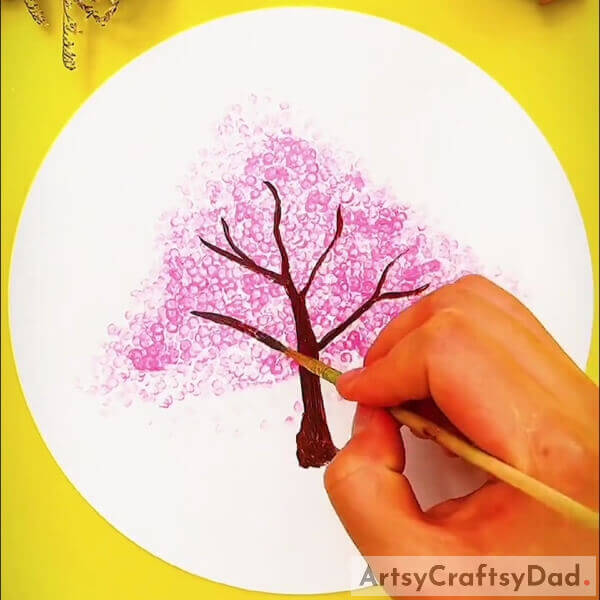
Using the same brown-painted paintbrush, make the thin branches of the tree over the leaves bunch to the tree trunk. See the image for reference.
Step #4: Completing Making The Tree Branches
Make the tree branches completely spread over the leaves bunch and make them thin from the ends as shown in the image.
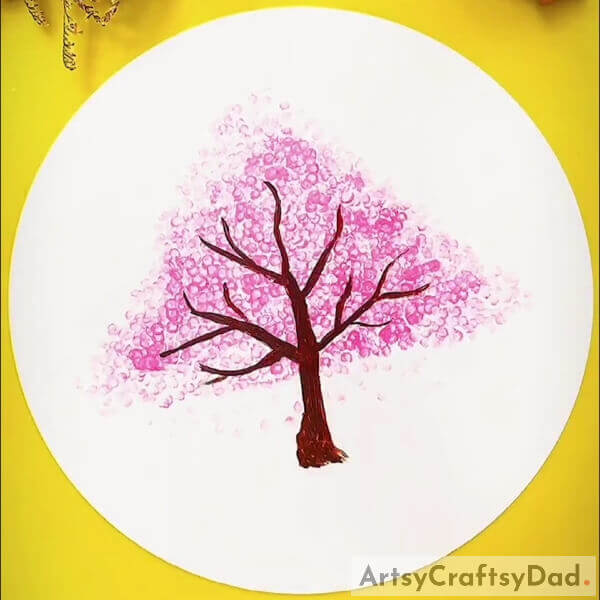
This Is The Final Look Of Your Cherry Blossom Tree!
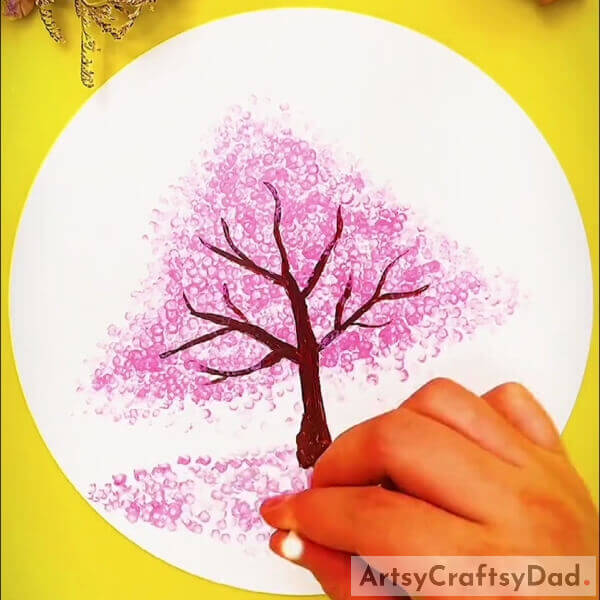
For the last step, make the ground beneath the tree using the same pink-painted cotton earbud to make it look like covered with the fallen cherry blossom tree. See the image for reference.
Congratulations! You have successfully made your prettiest cherry blossom tree like a pro!
You can take a minute to gaze at your creation, it is so pretty, right? You can now decorate this artwork in your room to show it off to everyone and also get the feels of spring season cherry blossoms right in your room! Ahh, so peaceful and lovely! You can also add more to it, you can make a larger painting of so many cherry blossoms and decorate your room, imagine what a giant view would look like! The thought is so pretty in itself! Create something unique as you are using your imagination!
We are hoping you liked the article and the painting! Share your feedback in the comments section below! We would love to hear from you!
You May Also Like
- Beautiful White Cherry Blossom Painting Art Tutorial
- Winter Cherry Blossom Artwork Craft Tutorial
- Cherry Flowers In Pot Painting Step by Step Tutorial
- Bubble Wrap Snowman Painting Craft Tutorial For Kids
- Rose Bouquet: Stamp Painting Tutorial For Kids


