Learn how to create beautiful clay flowers with this step-by-step craft tutorial for the spring season. From shaping the petals to adding intricate details, explore the art of sculpting clay flowers. Plus, discover how to incorporate adorable honeybees into your floral designs for an extra touch of whimsy.
Spring is a season that brings forth vibrant colors, blooming flowers, and the sweet melodies of buzzing honeybees. It is a time of renewal and growth, where nature awakens from its winter slumber. To celebrate this joyous season, why not embark on a creative journey and craft your very own clay flowers with honeybees? Not only will this craft project add a touch of charm to your living space, but it will also serve as a reminder of the important role honeybees play in pollinating the flowers that grace our gardens. So, let your creativity bloom and join us as we delve into the art of clay flower crafting, accompanied by the delightful presence of honeybees.
Easy Flowers With Honeybees Clay Craft For Kids
Must read: Spring Season Theme Food Plate Decoration Ideas
Supplies & Tools
- Yellow Clay
- Crayon Colour (Green)
- Marker (Blue & Black )
- White Drawing Sheet
Flowers & Honeybees Instructions
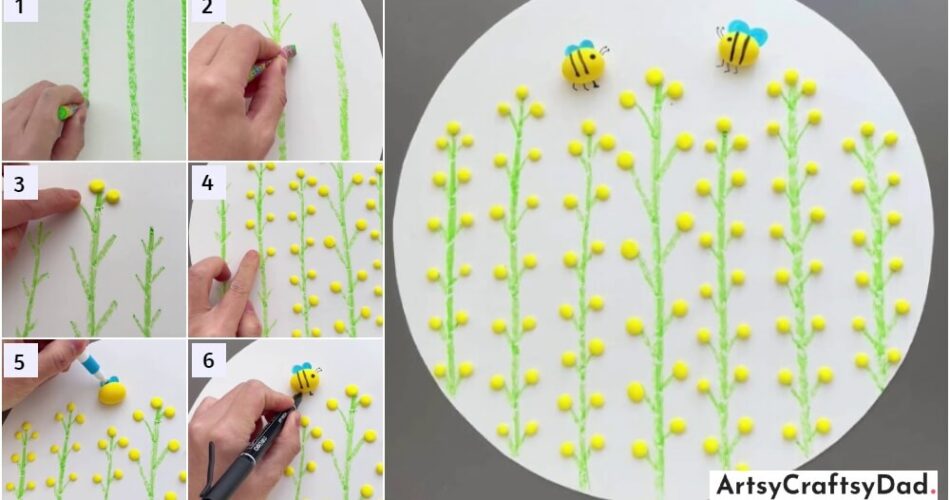
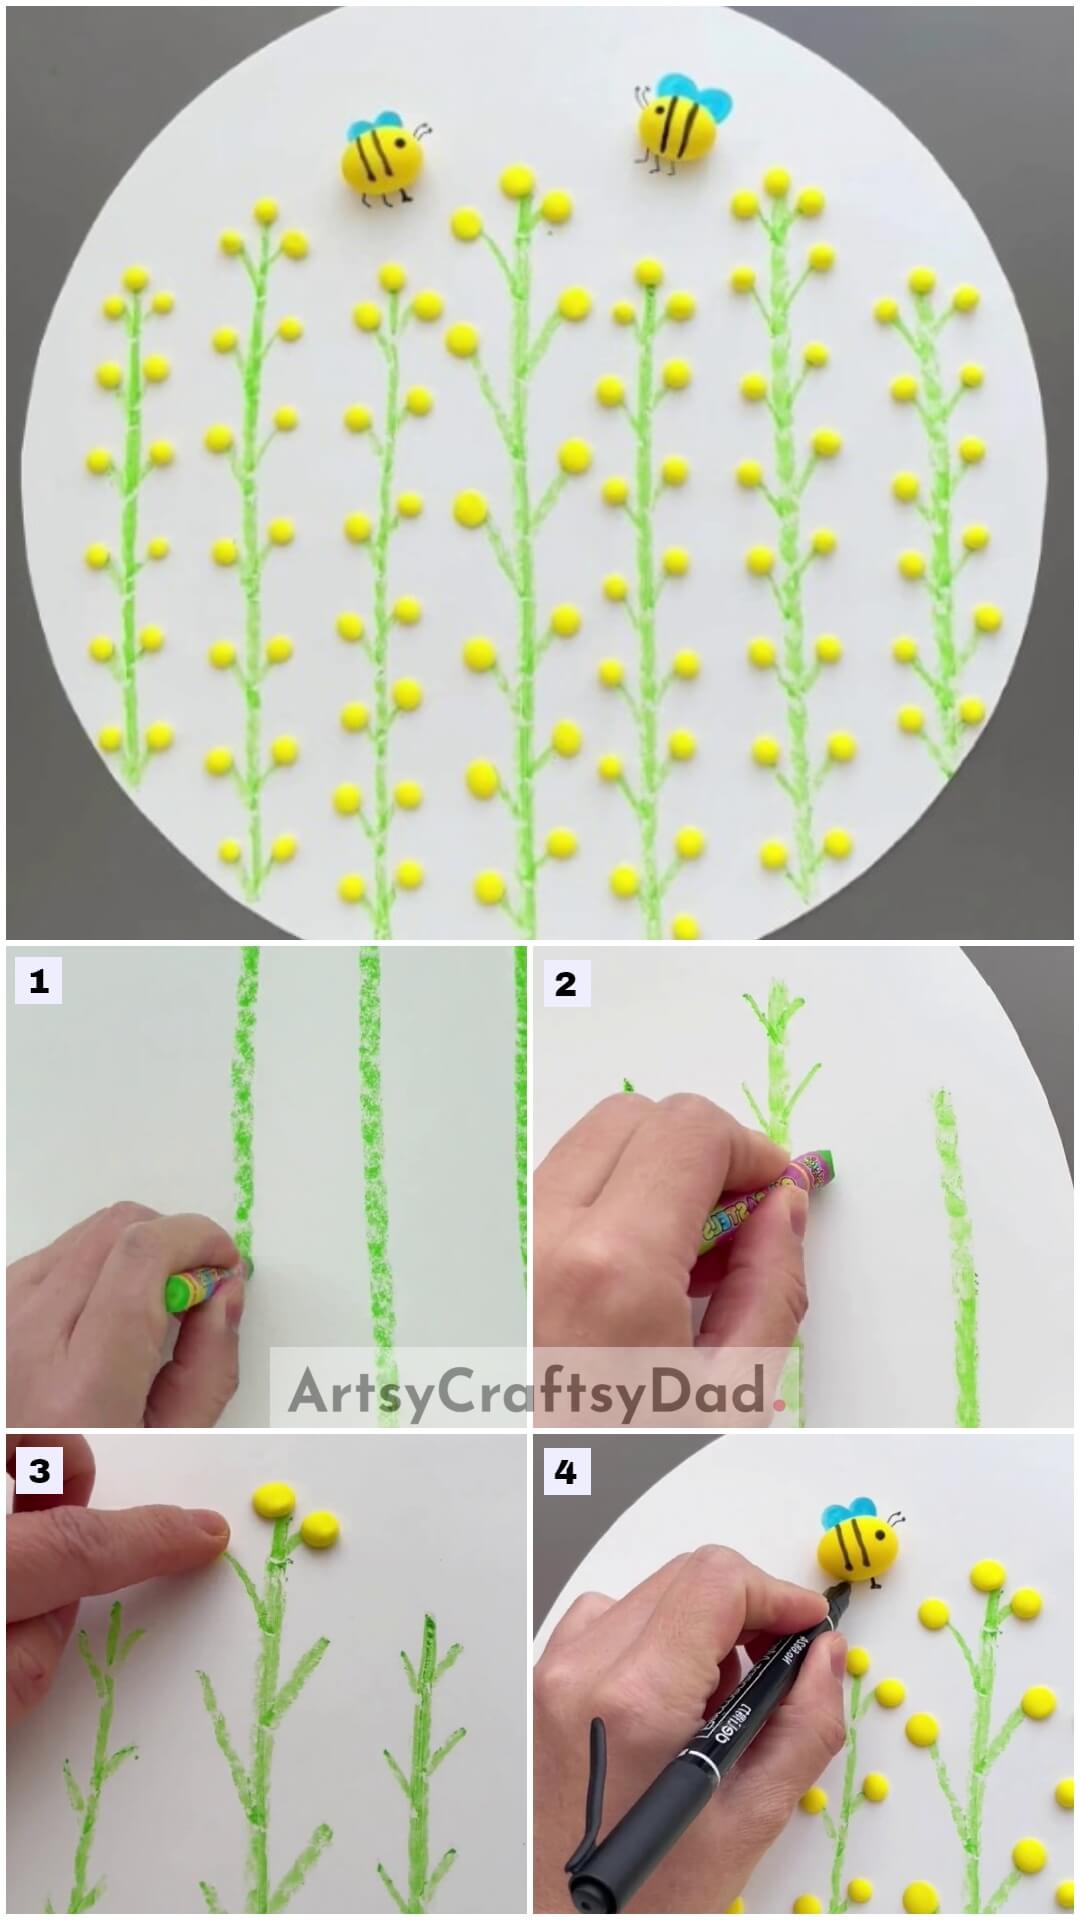
Step #1: Drawing Stems For Flowers
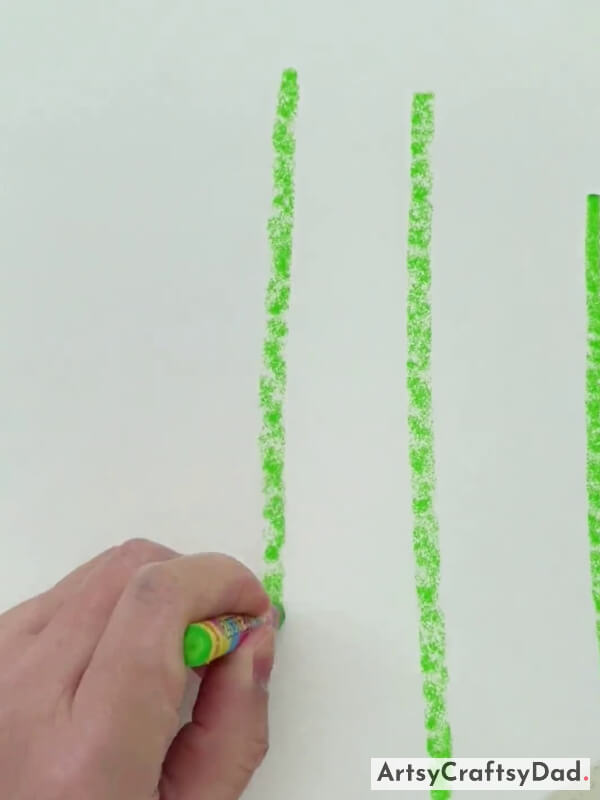
Take a white drawing sheet & cut it into a circle shape using scissors. Take a green crayon color & draw straight lines as stems for flowers.
Step #2: Drawing Branches
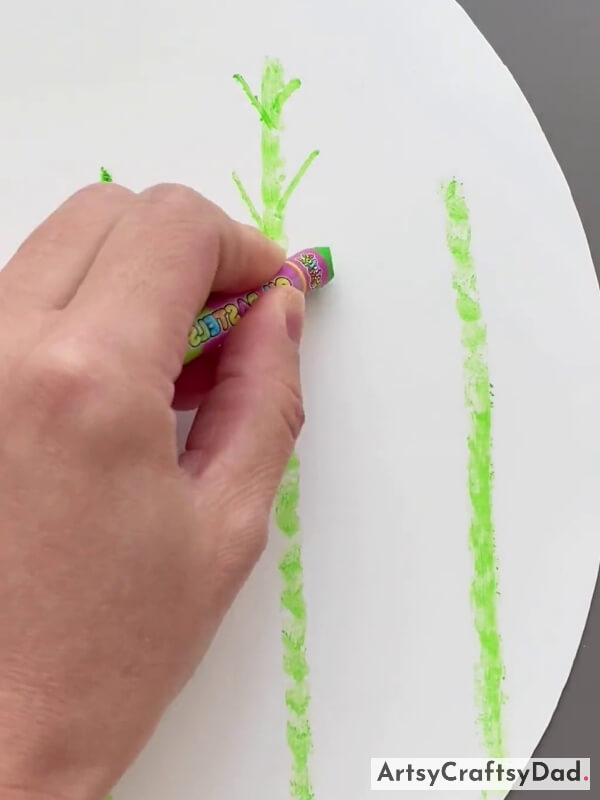
Now, draw some small branches around all the stems.
Step #3: Making Clay Flowers
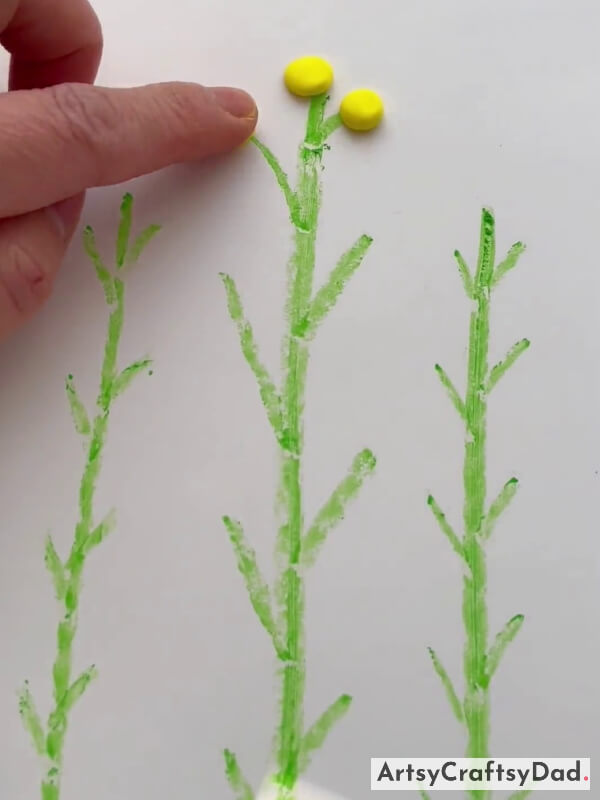
Now, take yellow color clay & make some little circles that represent flowers & paste them on the branches.
Step #4: Pasting More Clay Flowers
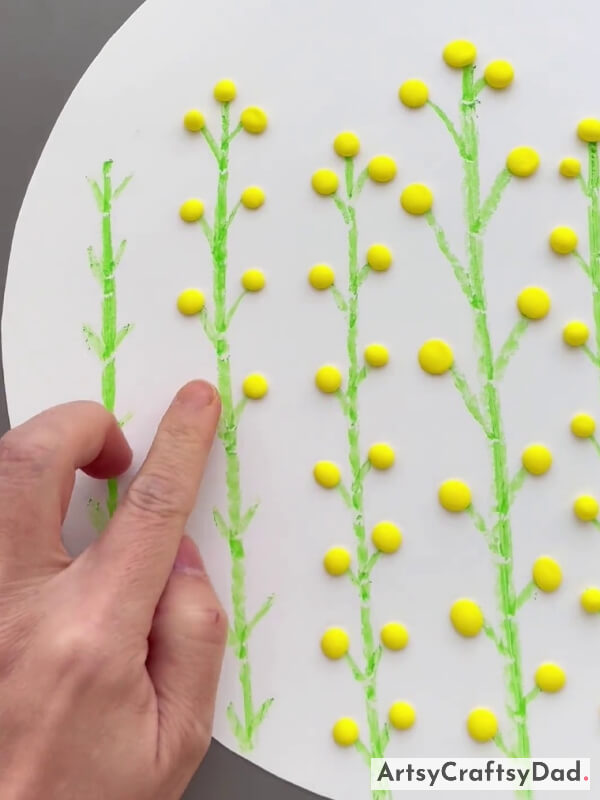
Continue the process of pasting more flowers around the rest of the branches.
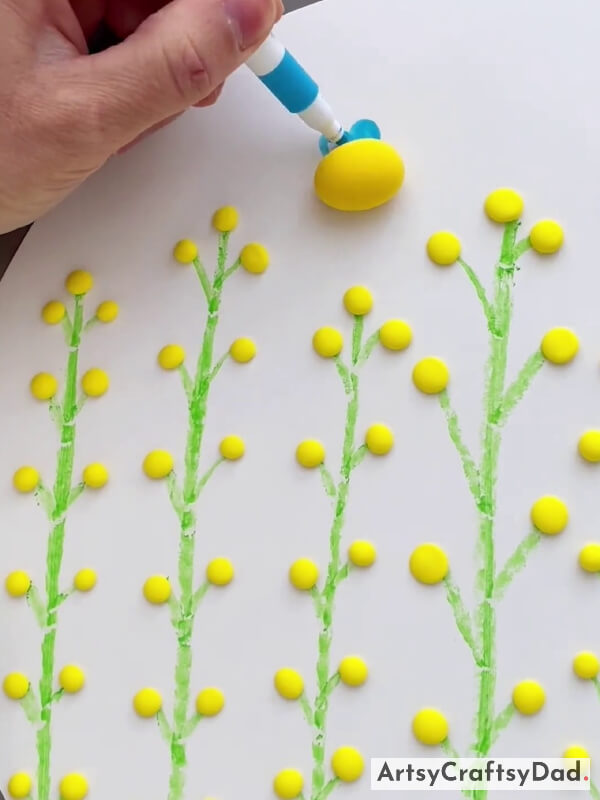
Step #5: Making Honeybees

Take a piece of yellow clay & make two oval shapes that represent a honeybee’s body & paste them on the top of a white craft base.
Step #6: Drawing Wings Of Bees
Take a blue color marker & draw wings over the honeybee as shown in the above image.
Step #7: Drawing Legs
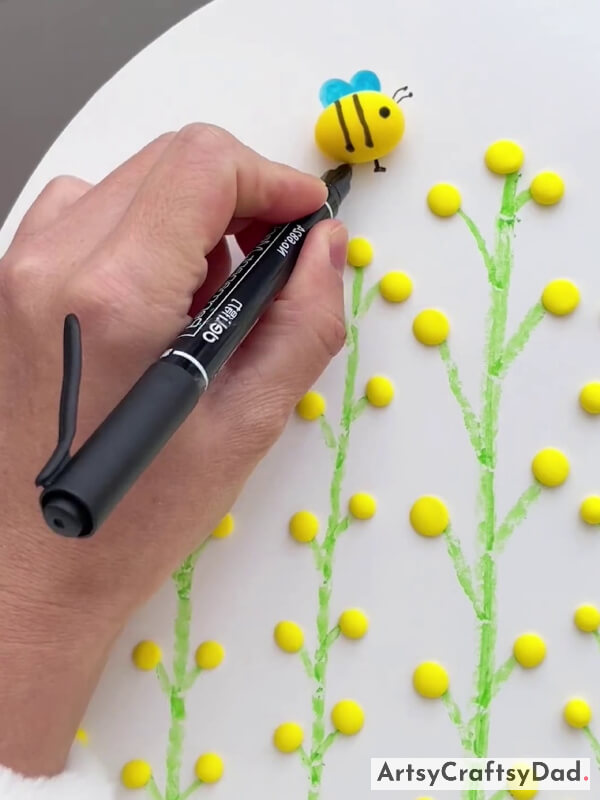
Take a black marker & draw eyes & antennas & two lines on the honeybee’s body. Then draw legs for the honeybee.
Final Appearance Of Our Clay Flowers With Honeybees Craft!
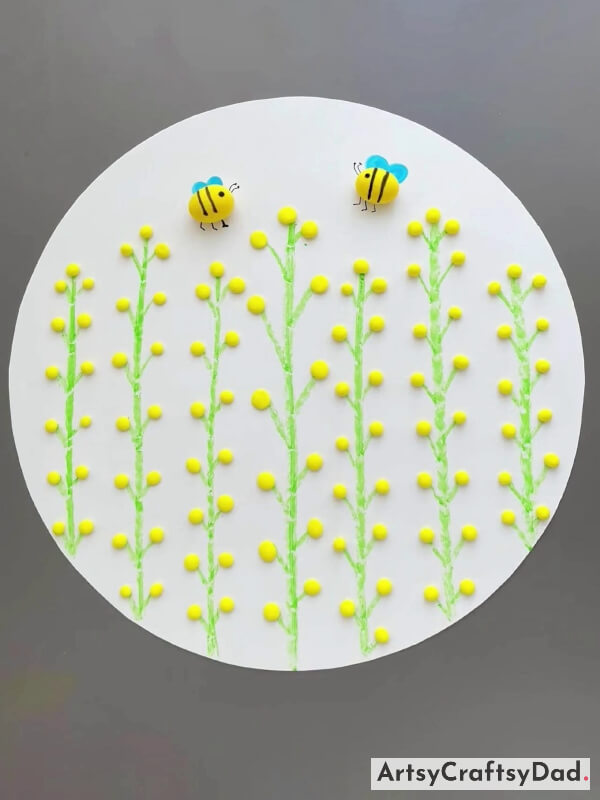
Repeat the same process for the other honeybee. This is the final image of our craft.
Finally, Your Clay Flowers & Honeybees Craft is Ready!
Our craft is ended here. I hope you have created the craft without any difficulty. This clay flower with honeybees is a delightful craft for the spring season. It also allows us to appreciate the beauty of nature and the important role that honeybees play in pollination. You could customize this craft by making other flowers with different colors of clay that will make it more attractive & beautiful. If you want to try more crafts like this then you could visit our other websites where you could get infinite crafts & ideas. Keep visiting in the future also for more crafts. Don’t miss to drop your comment in the comment section.
Thanks for visiting us! Have a nice day!
You Might Also Like This
- Heart Flowers Bouquet: Clay & Tissue Craft Tutorial
- How to make a bouquet of spring flowers
- All Four Season Trees Painting Tutorial
- Clay Flower Pot Model Craft Tutorial For Kids
- Wool Thread Pom-Pom Flowers Craft Tutorial
- Designer Chicks: Tissue And Clay Craft Tutorial


