Learn how to make beautiful clay Chinese knots for the Spring Festival with this step-by-step tutorial. Discover the traditional art of Chinese knotting and create stunning decorations for the festive season. Get creative and add a touch of cultural charm to your Spring Festival celebrations with these handmade clay Chinese knots.
The Spring Festival, also known as the Chinese New Year, is a highly anticipated holiday in China that marks the beginning of the lunar calendar. During this festive time, families gather together to celebrate and usher in good luck and fortune for the coming year. One of the traditional crafts associated with the Spring Festival is the clay Chinese knot. This intricate and beautiful craft involves the shaping and intertwining of clay strings to create intricate designs and patterns. In this tutorial, we will make a clay Chinese knotting by following step-by-step instructions & creating festive decorations for the Spring Festival. To create this Chinese knotting craft you just need clay & paper. So why not give it a try and add a touch of Chinese charm to your Spring Festival celebrations?
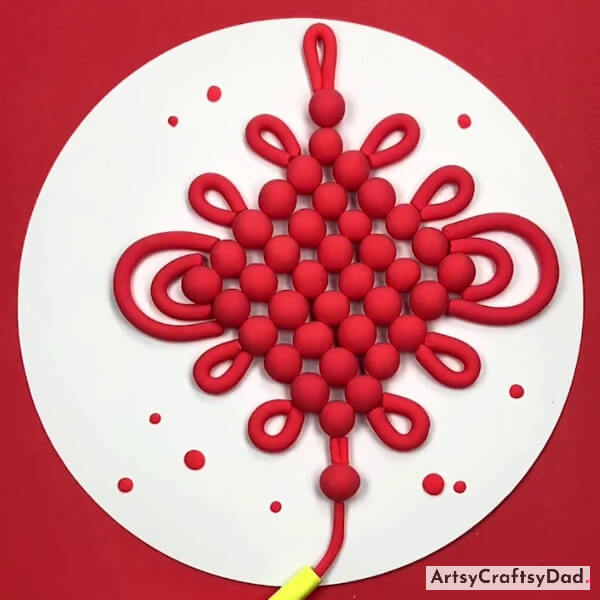
Adorable Chinese Knot Clay Craft Tutorial For Decoration
Must Read: Paper Origami Chinese Fan Craft Tutorial For Beginners
Supplies & Tools
- Scissors
- White Construction Paper
- Red Color Clay
- Detailed Knife
- Craft Paper ( Red, Yellow)
Chinese Knot Craft Instructions
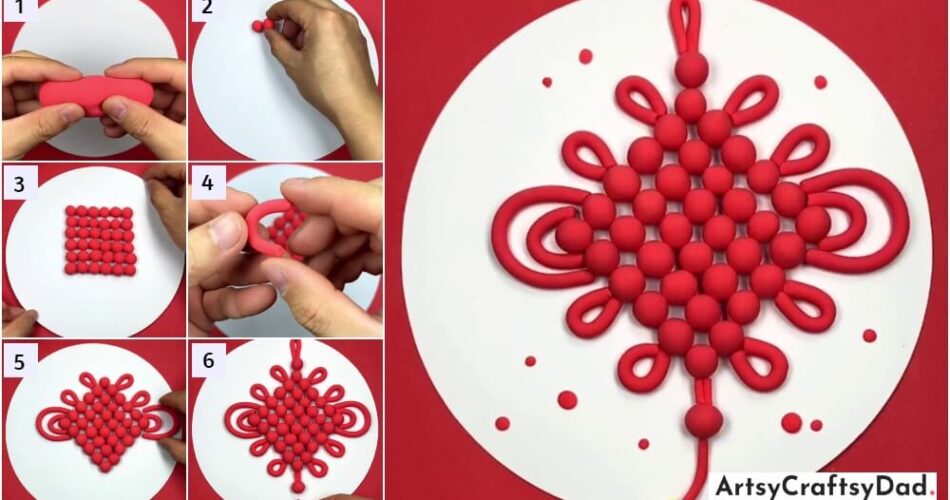
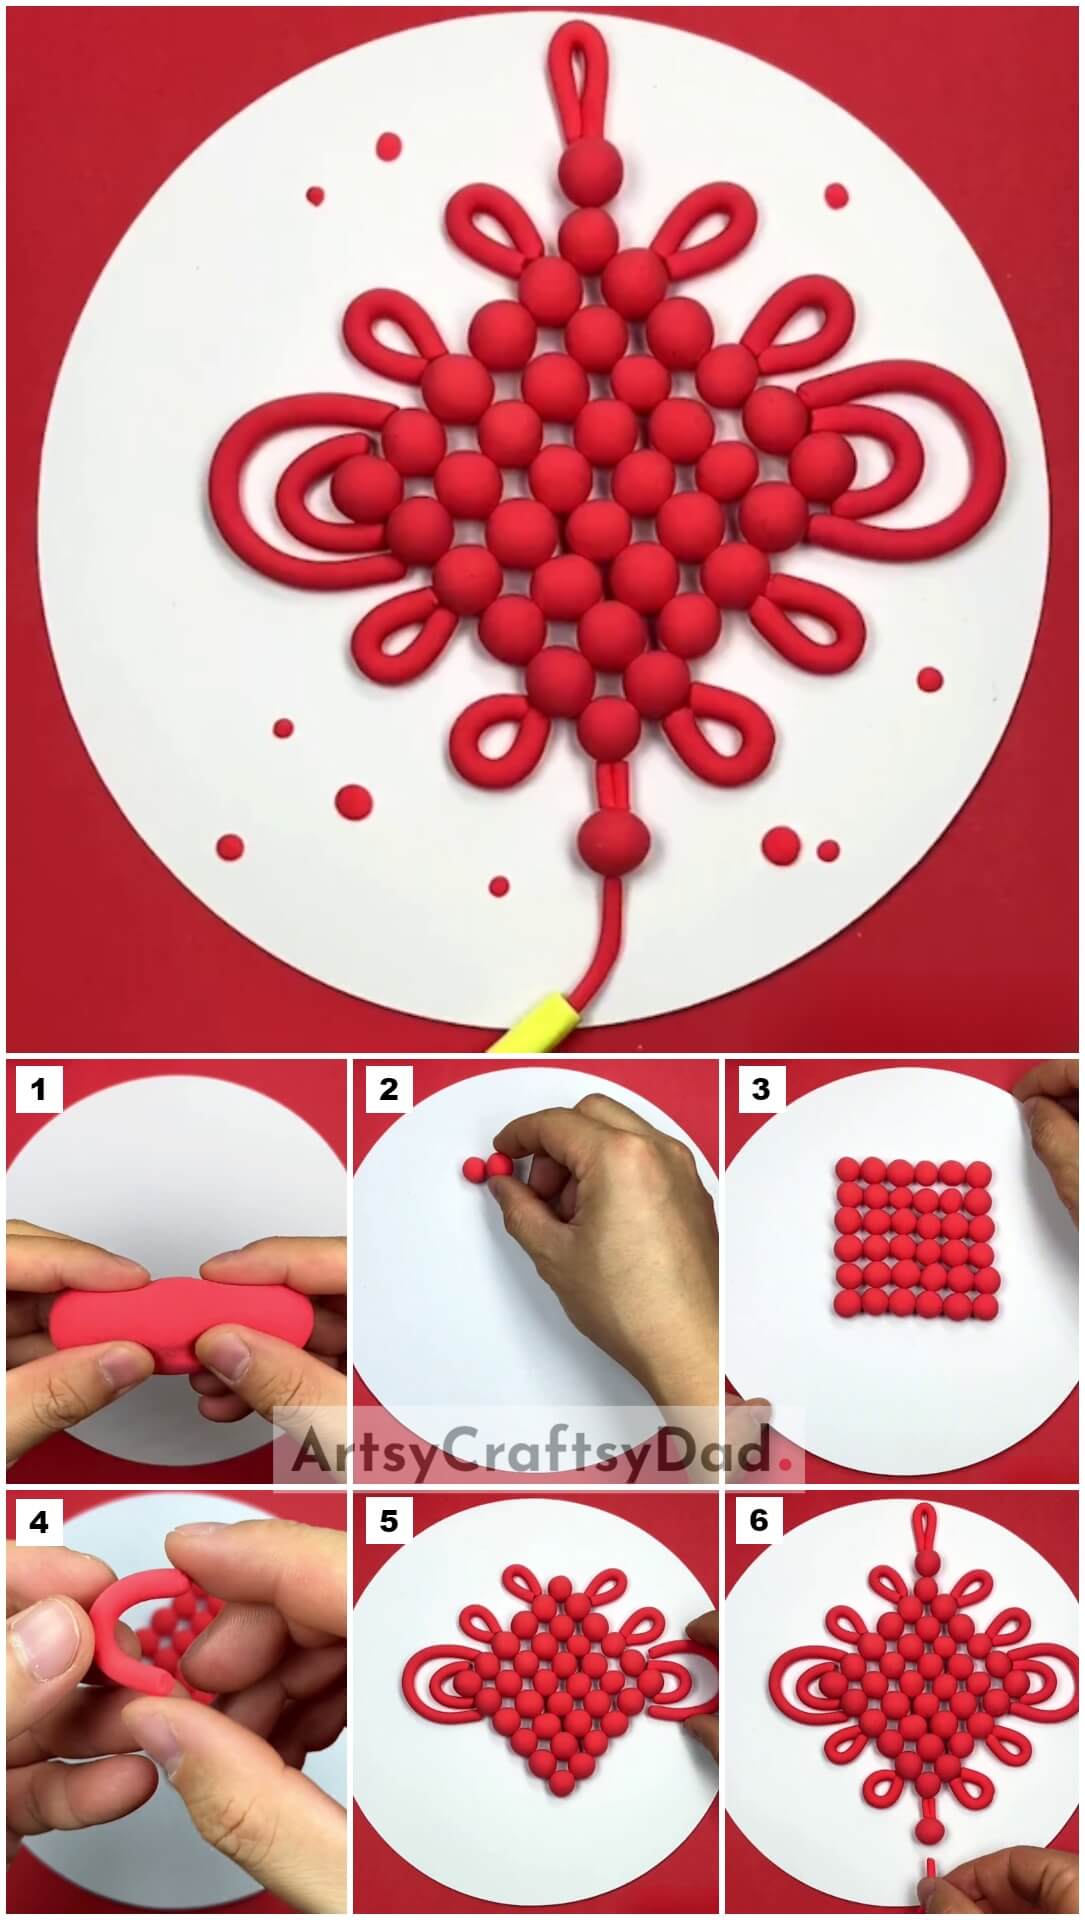
Step #1: Take A Color Clay Piece
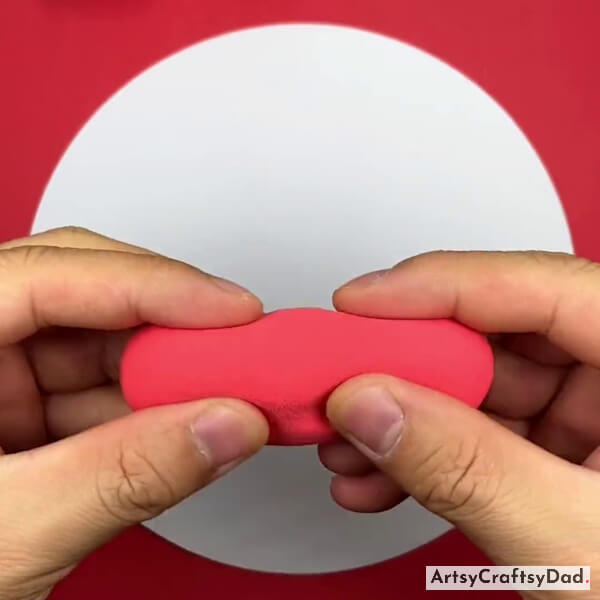
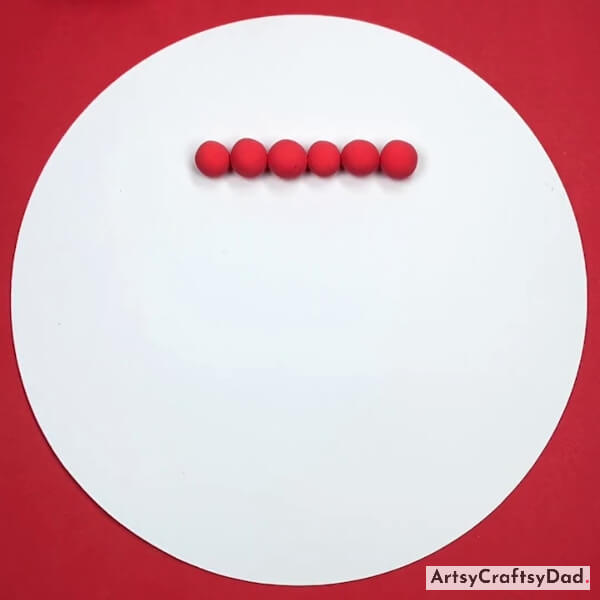
Take a white construction paper & cut it out into a circle & use it as a craft base. Take a red color clay.
Step #2: Making Small Balls Of Clay
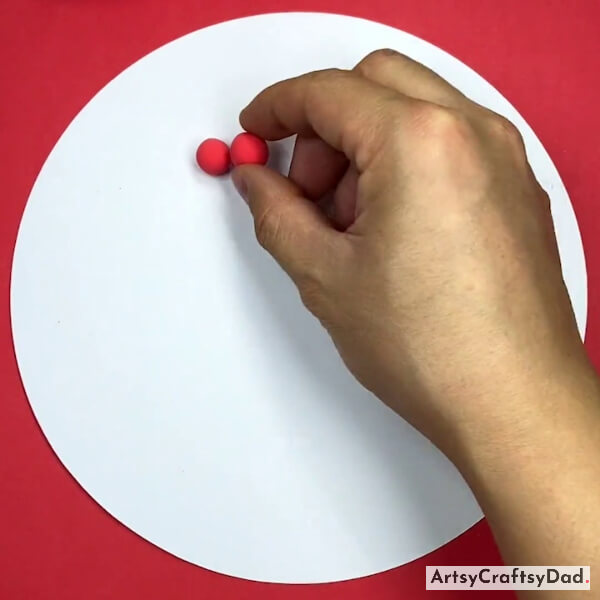
Make two small balls from red clay & put them on the upper side of the craft base in touch with each other & make one layer.
Step #3: Pasting Clay Balls On A Craft Paper
Make four more little balls & paste them near the other two balls in layer.
Step #4: Pasting More Clay Balls
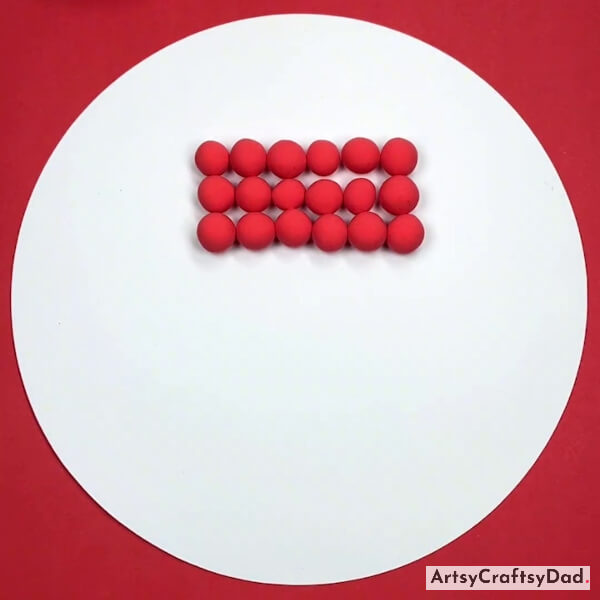
Make the second layer under the first layer & third layer of the ball under the second layer in the same manner.
Step #5: Completing Pasting Clay Balls in a Square Shape
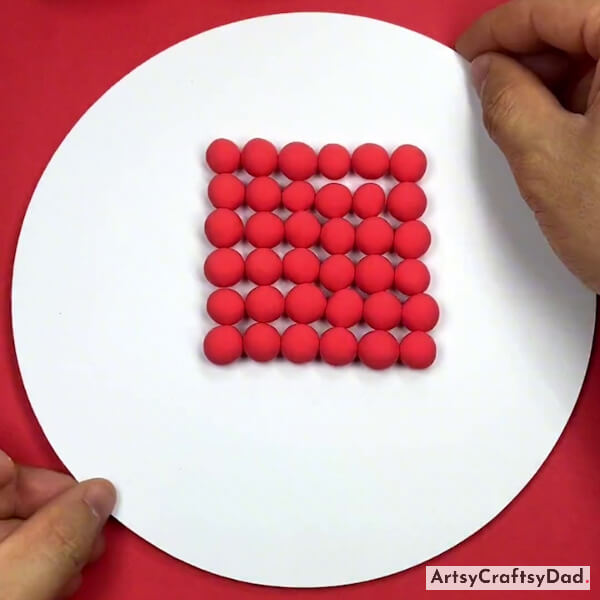
Make the 4th, 5th, and 6th layers by following the same process.
Step #6: Making Red Clay Loop
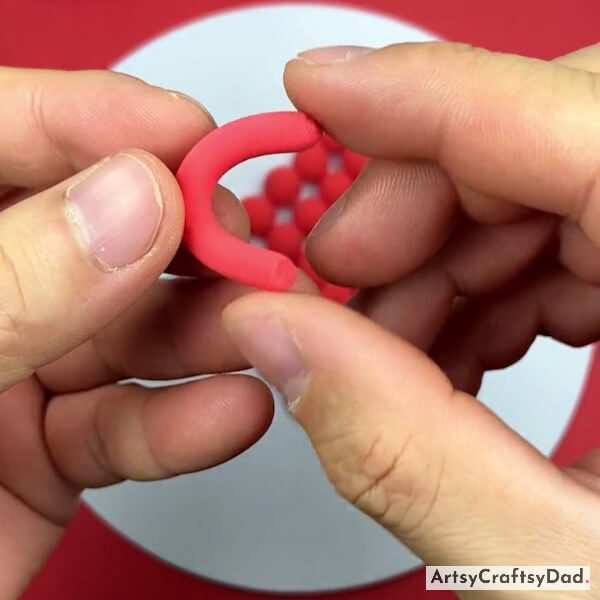
Now, first, hold the craft base & put it as the pattern looks like a rhombus. Take a piece of red clay & roll it out into a curved tube.
Step #7: Pasting Red Clay Loop
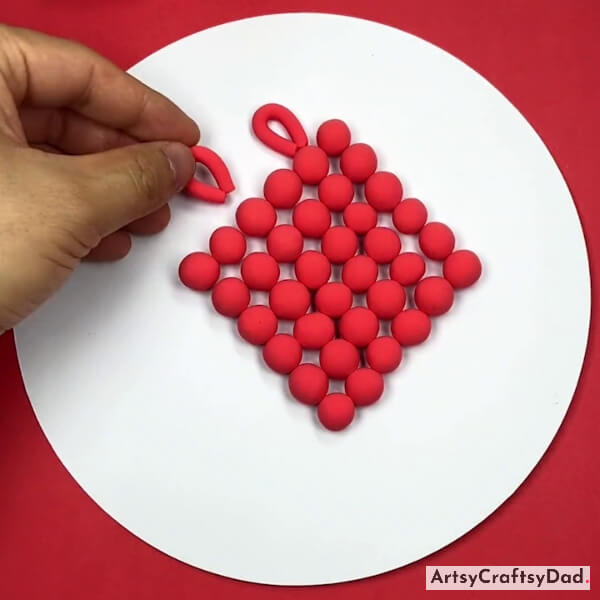
Cut off the ends of the curved tube by using a detailed knife & attach the two ends of the curved tube as shown in the above image & paste it on the upper left side of the rhombus. Paste another clay loop near the first one on the same side.
Step #8: Adding Some More Loops
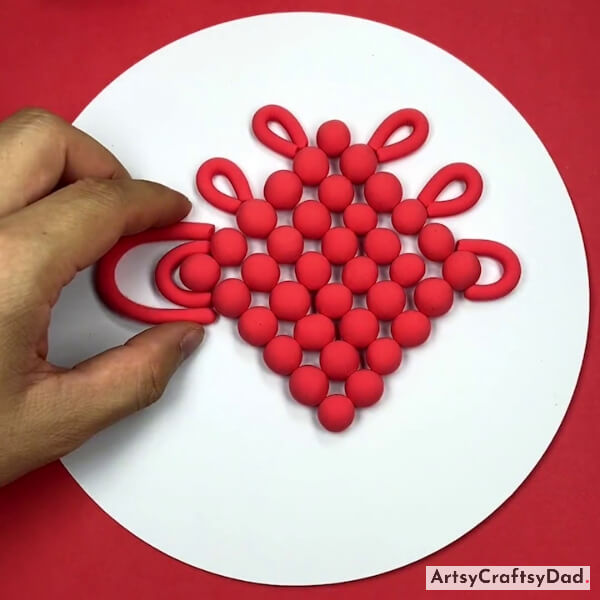
Add two more loops on the right side of the rhombus in the same manner. Then take red clay & roll it to make two curved tube shapes one is bigger & the other is smaller & first paste the smaller and then bigger on the left corner of the rhombus.
Step #9: Adding On The Right Side Also
Follow the same process and paste two more curved tubes on the right corner of the rhombus.
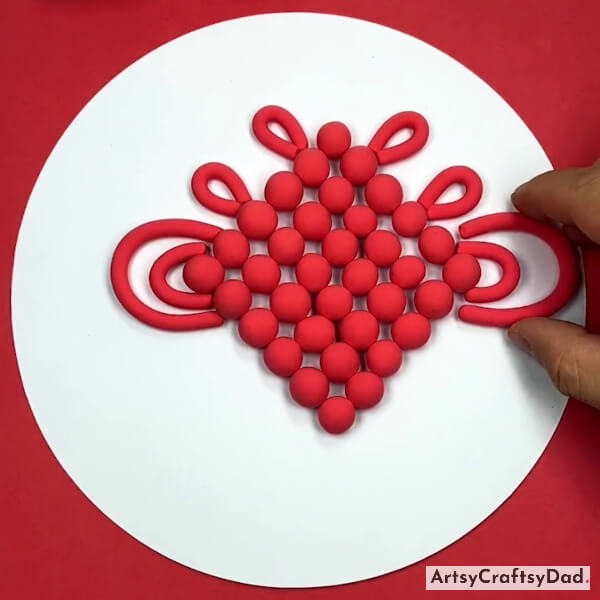
Step #10: Pasting More Loops
Take red clay & make five loops by the same process & paste the two on the lower left side & other two on the lower right side of the rhombus. Paste the fifth loop on the top upper corner of the rhombus.
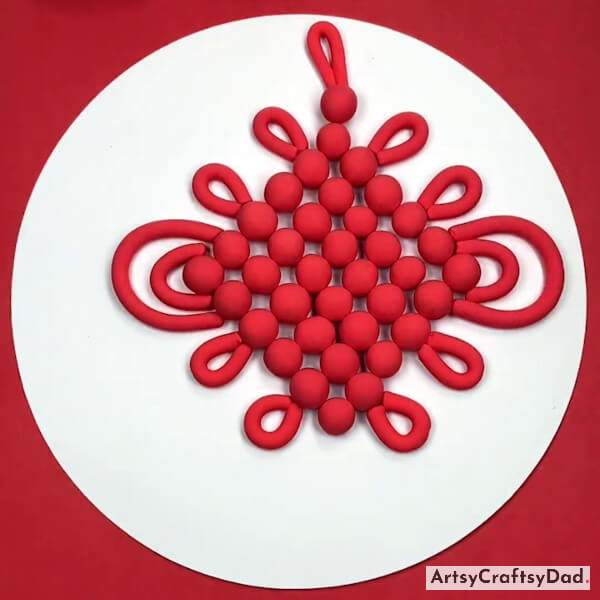
Step #11: Adding Clay Thread
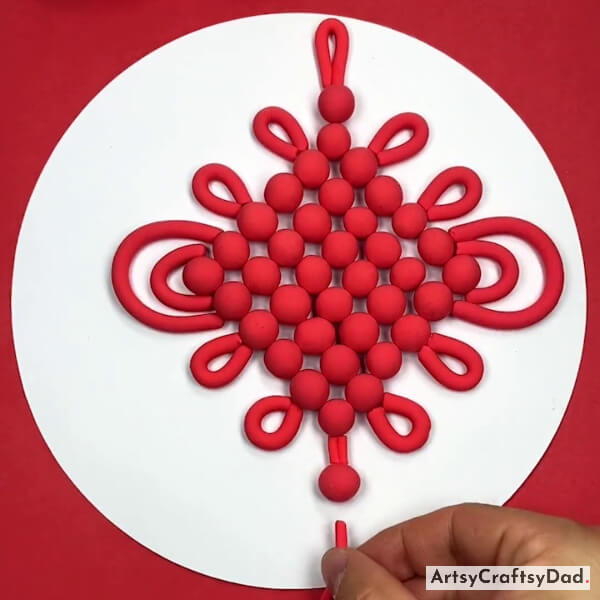
Take red color clay & roll it into a thin layer & cut it into two small pieces & paste them on the lower corner of the rhombus that shows thread. Then make a red ball & paste it on the lower end of the thread. After that take a piece of red clay & roll it to make a thin layer & paste it below the red ball as thread.
Step #12: Making A Tassel Using Red Paper
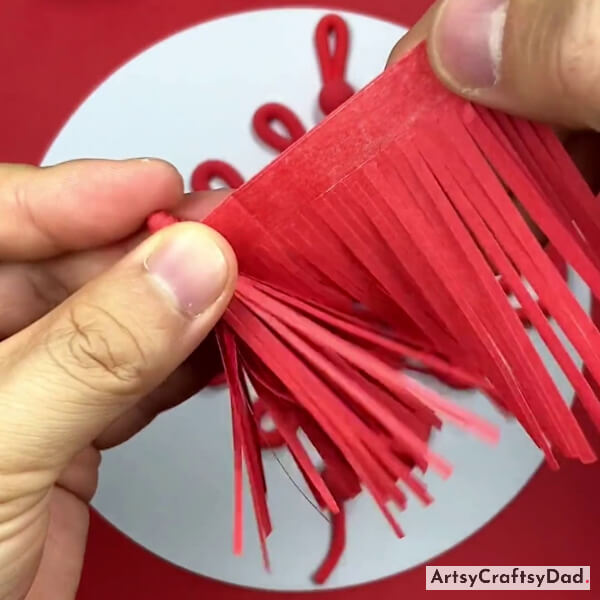
Take a piece of red craft paper & cut it into a rectangle & cut the lower side of it into small strips but do not complete it & apply some glue on the upper part of the cut strip & then roll it.
Step #13: Pasting A Yellow Strip On The One End Of The Tassel
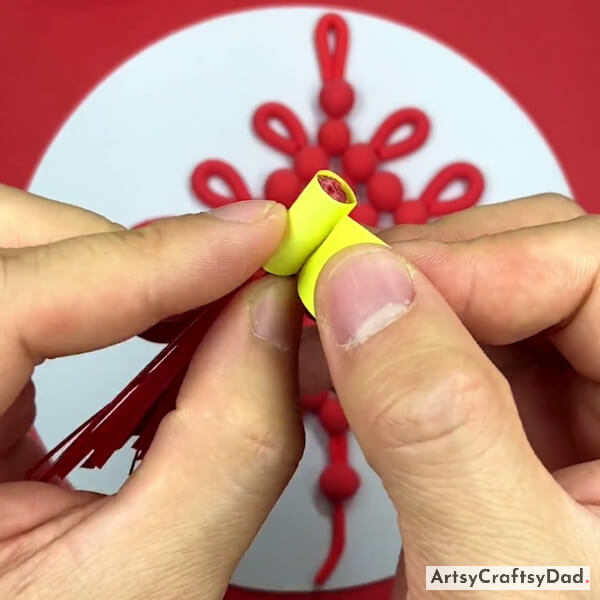
Take a yellow paper & cut it into a strip & wrap it around one end of the tassel.
Step #14: Pasting Tassel On The Bottom Of Thread
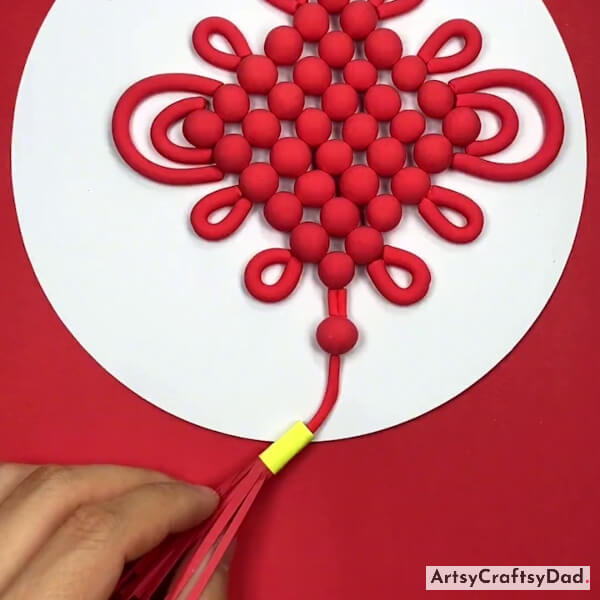
Take the tassel & paste it on the bottom end of the thread.
Yeah! Clay Chinese Knot Craft For Spring Festival is Ready!
Complete the craft by making some small & big balls & putting them on the craft base & pressing them with a finger.
We have completed our Chinese knot clay craft here. Learning the art of clay Chinese knot craft for the Spring Festival is not only a fun and creative activity, but also a meaningful way to connect with Chinese culture and traditions. By following this tutorial, individuals of all ages can create beautiful and intricate clay Chinese knots that can be used as decorations or gifts during the festive season. Don’t forget to share your thoughts in the comment section.
Thanks for visiting us!
You Might Also Like This
- Colorful Clay Cactuses Craft Tutorial For Kids
- Mini Rose Bouquet: Clay & Surgical Mask Craft Tutorial
- Clay Flower Vase Model Craft Tutorial For Kids
- White Clay Flowers Craft Tutorial For Kids
- Clay Snails On Leaves Craft Tutorial For Kids


