Learn how to create a stunning clay flower bouquet artwork with this step-by-step craft tutorial. From shaping the clay to painting the intricate details, we guide you through each stage of the process. Discover tips and techniques for achieving realistic textures and vibrant colors in your clay flowers.
Are you looking for a fun and creative craft project to try? By following some simple steps we will make a flower bouquet by using simple materials like clay, colored sketch pens, tissue paper, etc. Whether you are a seasoned artist or a beginner, this tutorial is perfect for anyone wanting to create a beautiful and unique piece of art using clay. Follow along as we guide you through each step, from shaping the clay flowers to arranging them into a stunning bouquet. Let’s dive in and create a masterpiece together!
Flower Bouquet Artwork Craft Tutorial Using Clay
Must Read: Flower Bouquet: Clay & Tissue Craft Tutorial
Supplies & Tools
- Tissue Paper
- Scissors
- Glue
- Colored Clays (Pink, Sky Blue, Red, Yellow)
- Green Color Sketch Pen
- White Drawing Sheet
- Golden Ribbon Note
Flower Bouquet Craft Procedure
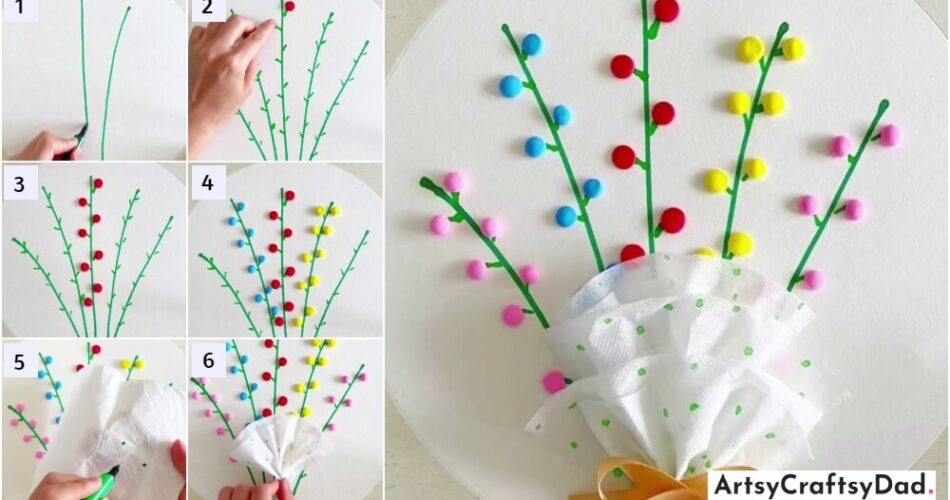
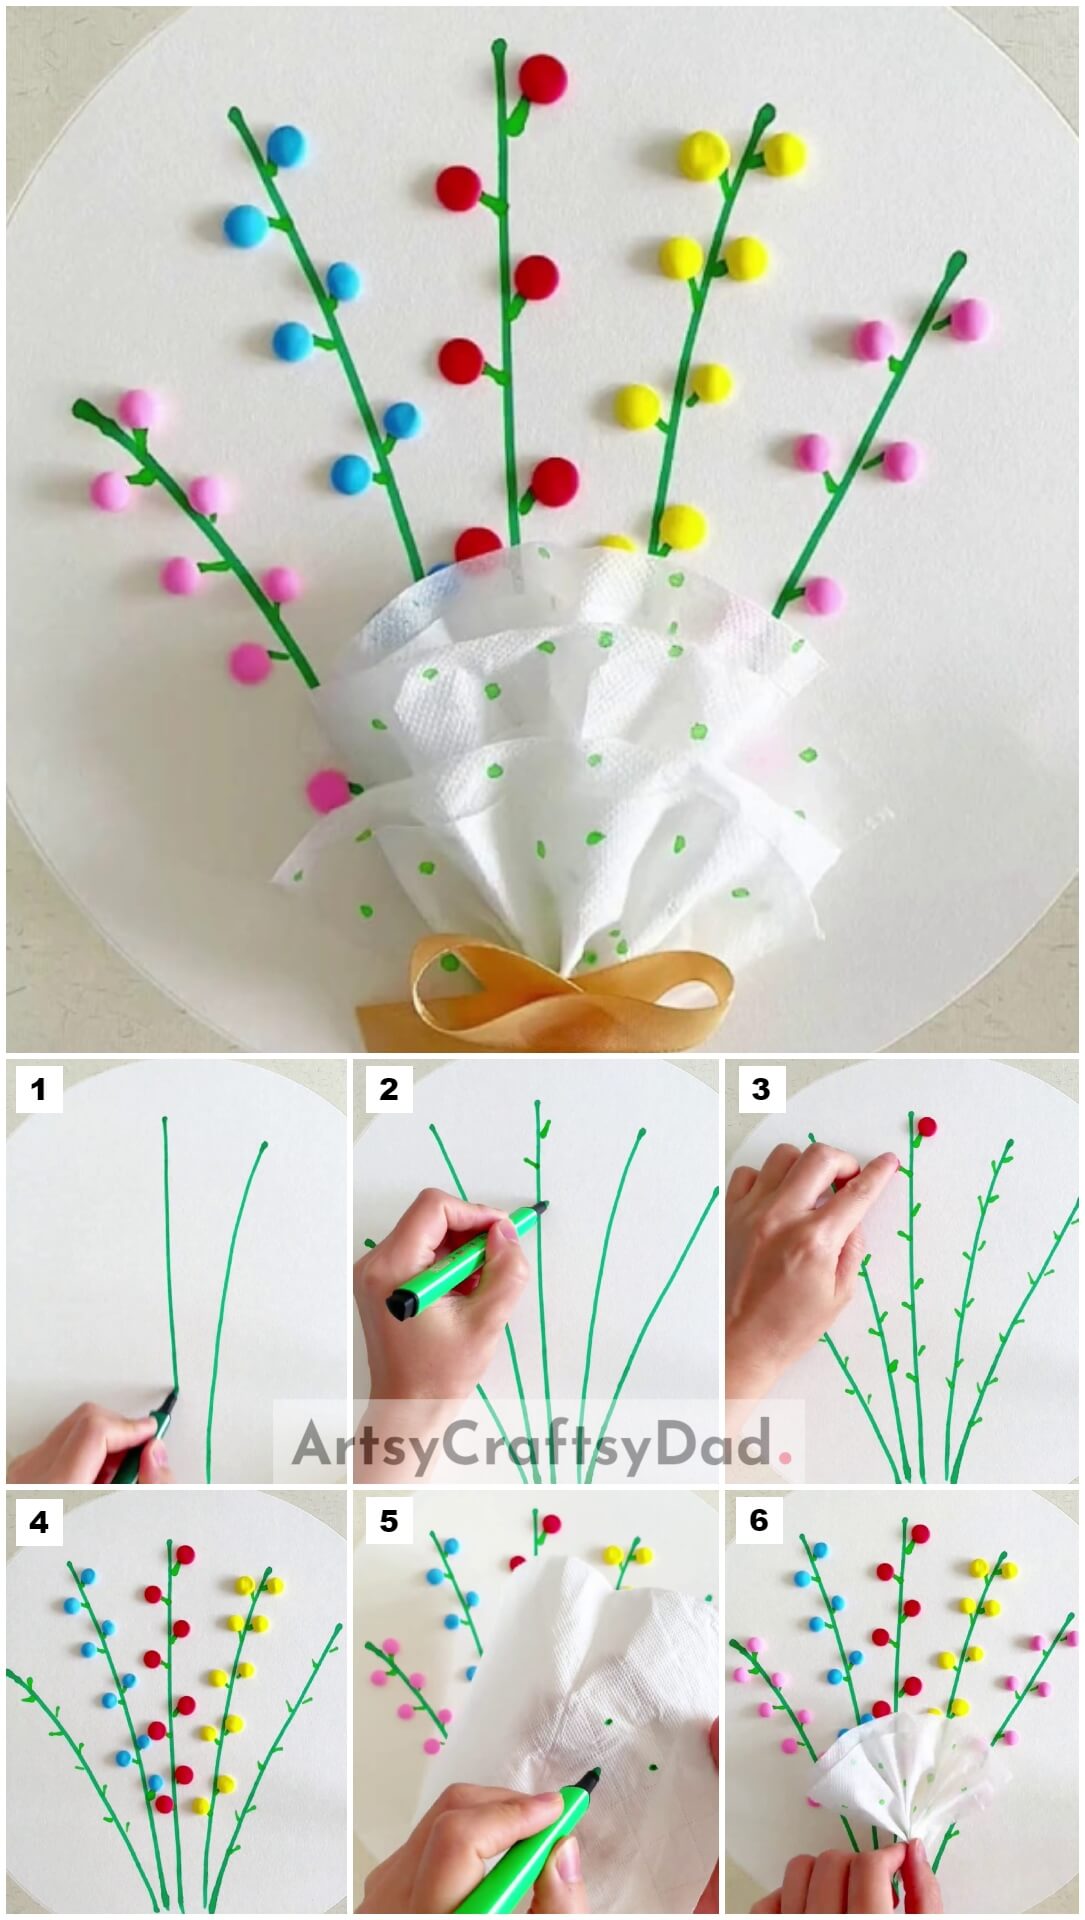
Step #1: Drawing On The White Sheet
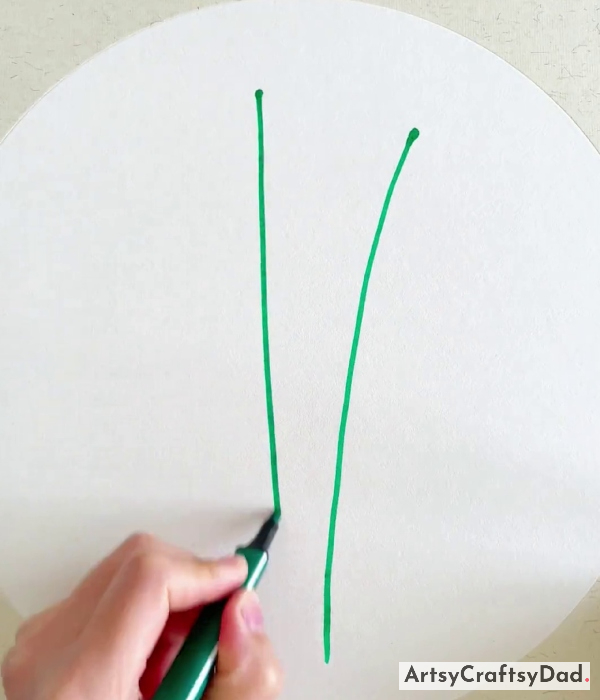
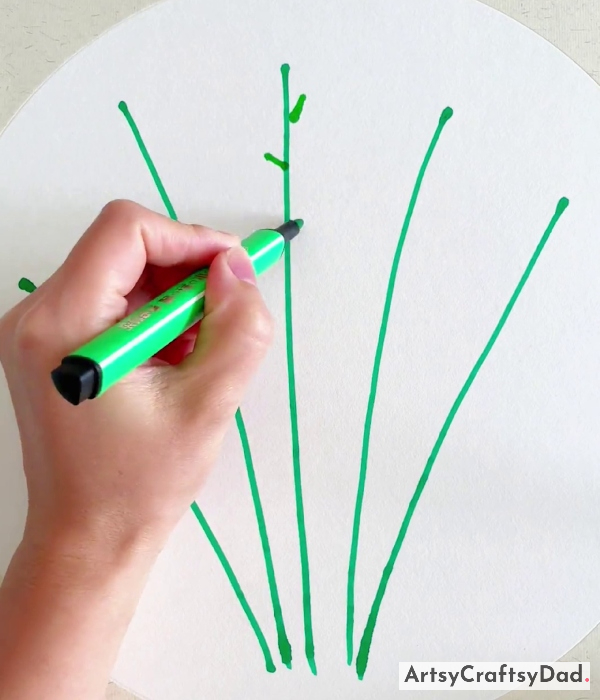
Take a white drawing sheet, draw a large circle on it, and carefully cut it out with scissors & use it as a base for our drawing.
Take a dark green sketch pen and draw some long, straight, and tilted lines on the white base for the stem of the flowers.
Step #2: Drawing Flower Branches
Take another light green color pen & draw around 3 more stems as mentioned above. Now, start drawing little lines on stems as branches.
Step #3: Making Clay Flowers
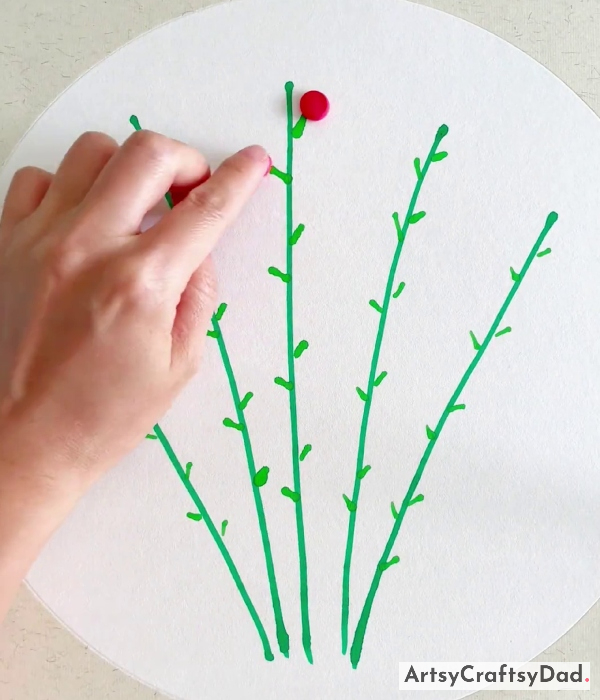
Follow the same process & draw little branches on the rest of the stems. Now, take red clay and make a small ball with it & paste it on the little branch as a flower & apply some pressure with your finger.
Step #4: Making More Red Clay Flowers
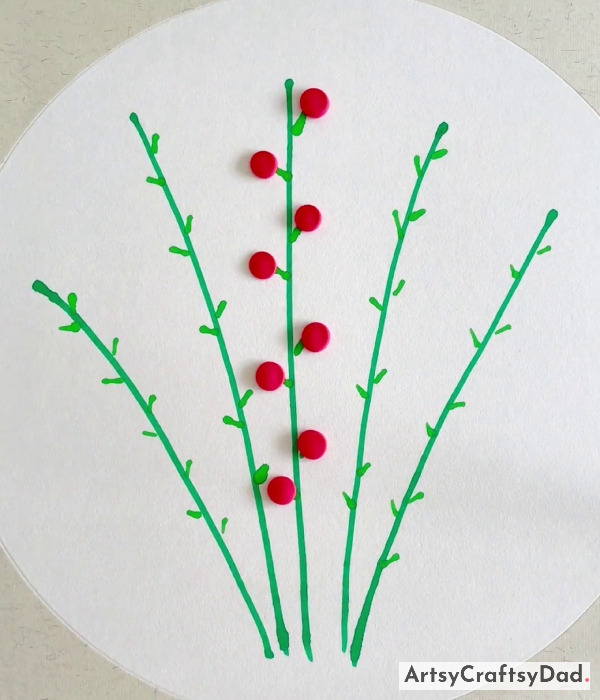
Make some more clay flowers and paste them on all the branches by the same process as we mentioned above.
Step #5: Making Yellow Clay Flowers
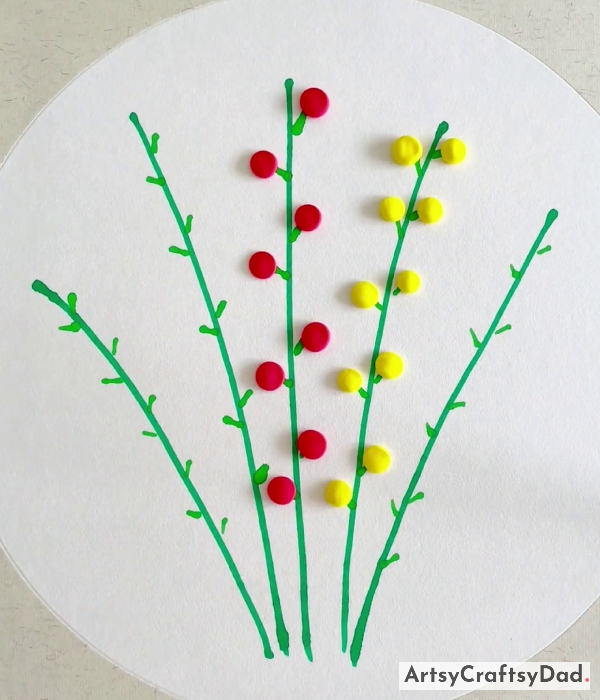
For another branch, use yellow-colored clay & make flowers, and paste them by the same process along the entire branch.
Step #6: Making Sky Blue Clay Flowers
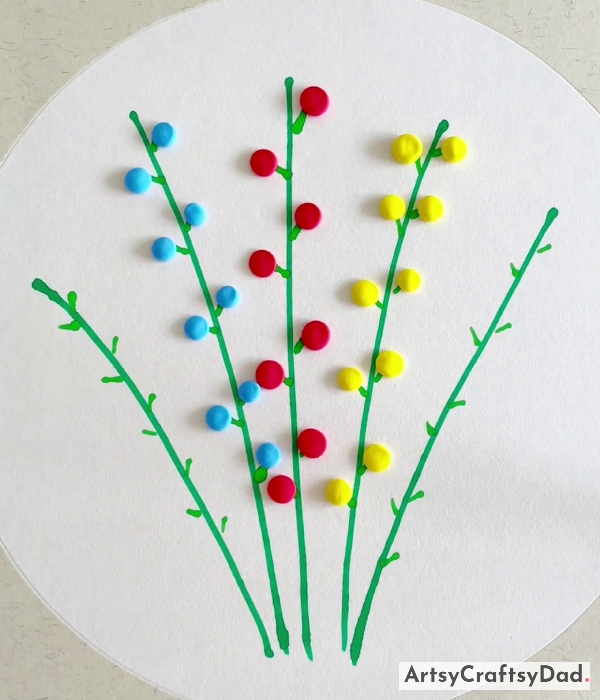
Similarly, take sky blue clay & create more flowers using the same process and paste them on the branches of another stem.
Step #7: Making Green Dots On Tissue Paper
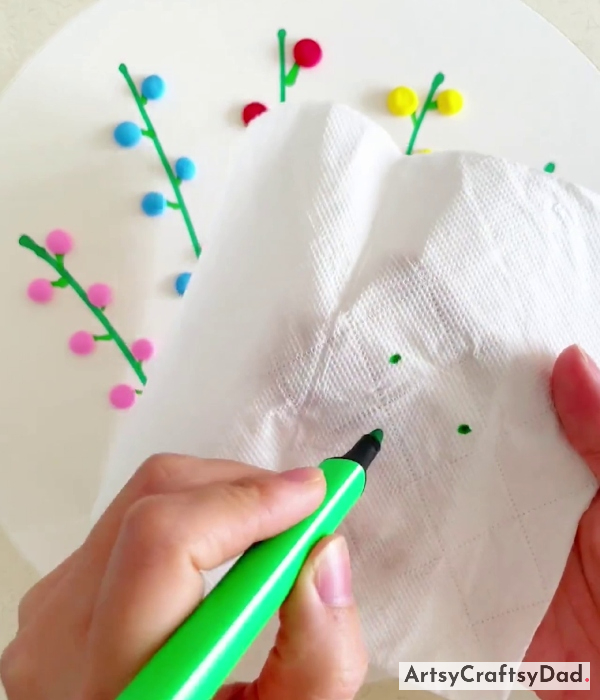
Take pink clay & make some flowers & paste them on the empty stems. Take a tissue paper and a green marker & draw green dots on the tissue paper.
Step #8: Working With Tissue Paper
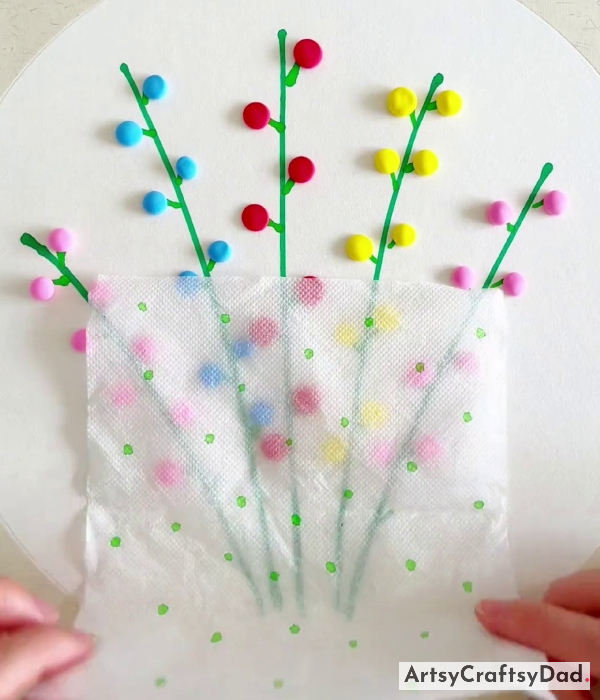
After marking the dots, unfold the tissue paper to show the completed design.
Step #9: Making Bouquet Shape
Afterward, collect the tissue paper in a bouquet shape.
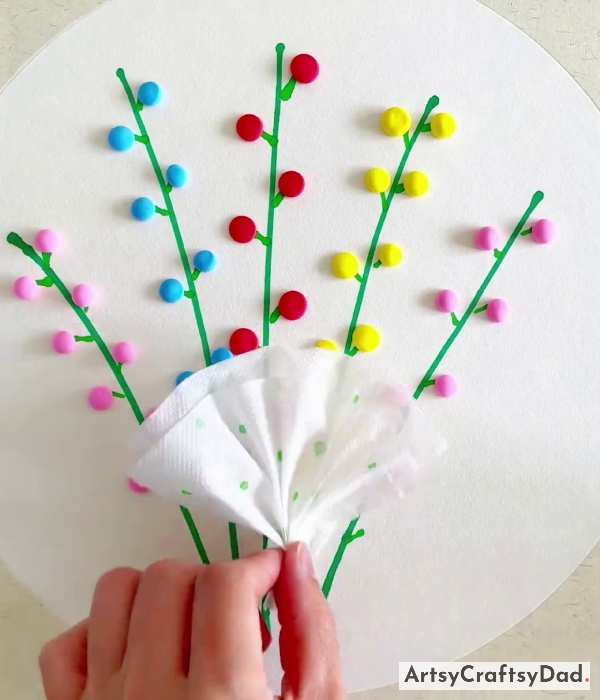
Step #10: Pasting Bouquet Shape
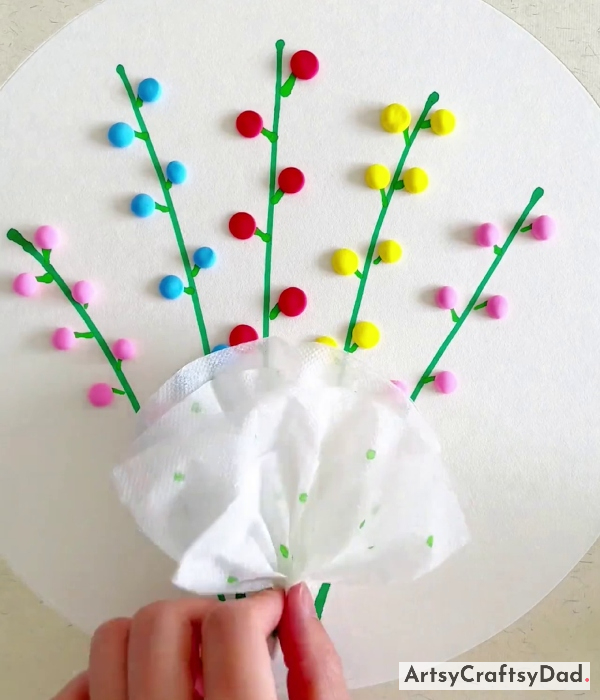
Now, paste the bouquet shape at the lower side of the flower stem.
Step #11: Making A Bow From Golden Ribbon
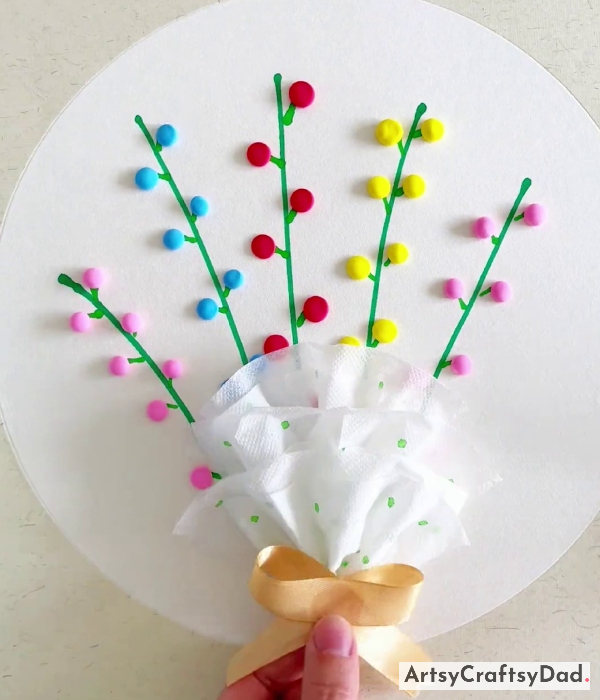
Take a golden ribbon & make a bow shape from it & paste it on the bouquet’s lower end.
Our Clay Flower Bouquet Artwork Is Completed Now!
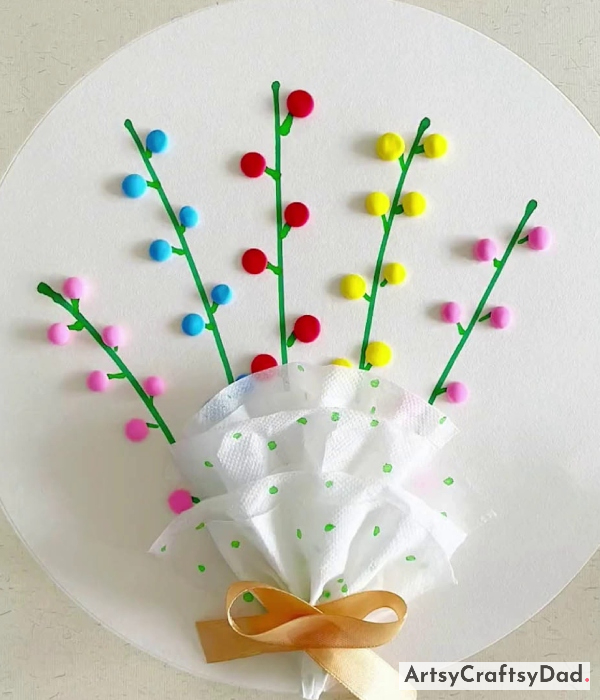
Here is the final picture of our clay flower bouquet.
We have completed our lovely flower bouquet craft tutorial. By following the step-by-step tutorial, anyone can learn how to mold and shape clay into beautiful flowers that can be arranged into a stunning bouquet. So, let your imagination bloom with this delightful clay flower bouquet artwork craft. You could customize this craft by adding your ideas & creating craft in your way. Show this craft to your family & friends they will surely be proud of you. Don’t miss to share your thoughts in the comment section.
Thank you for visiting our website!
You Might Also Like This
- Heart Flowers Bouquet: Clay & Tissue Craft Tutorial
- Clay Circles Tree Artwork Craft Tutorial For Kids
- Beautiful Clay Peacock Paper Artwork Tutorial
- Clay Flower Pot Model Craft Tutorial For Kids
- Clay Flower Vase Model Craft Tutorial For Kids


