Get the feels of all the seasons in just 1 painting! This tutorial will guide you in making a pretty nature painting of trees in all seasons!
Hello young artist! We welcome you here in this step-by-step tutorial on making trees in all 4 seasons i.e. summer, autumn, winter, and spring! Get the feels of all seasons and pretty nature just by looking at one painting! This painting will surely be a great addition to your art collection! You will have a fun time making this painting and the results will be flawless because we will instruct you on each and every step of this painting! Grab the basic painting materials listed below to begin!
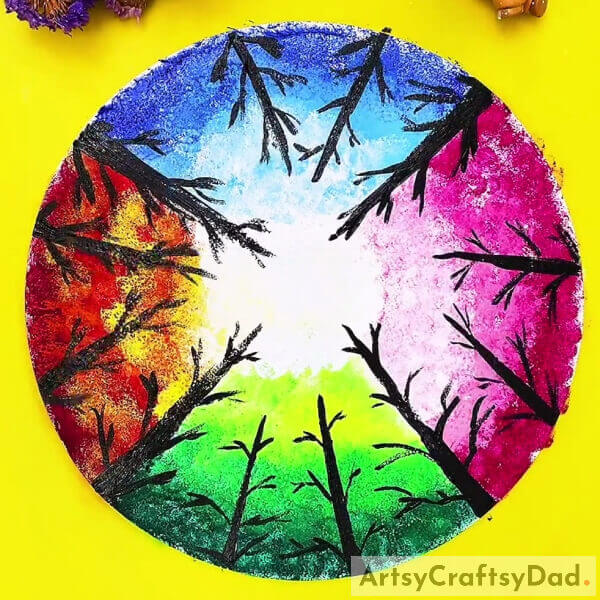
Beautiful Four Season Trees Painting
Must Read: Clay Snails On Leaves Craft Tutorial For Kids
Supplies & Tools
- White Circular Paper Sheet
- Circle Stamp
- Paintbrush
- Paint Colors
Season Trees Painting Instructions
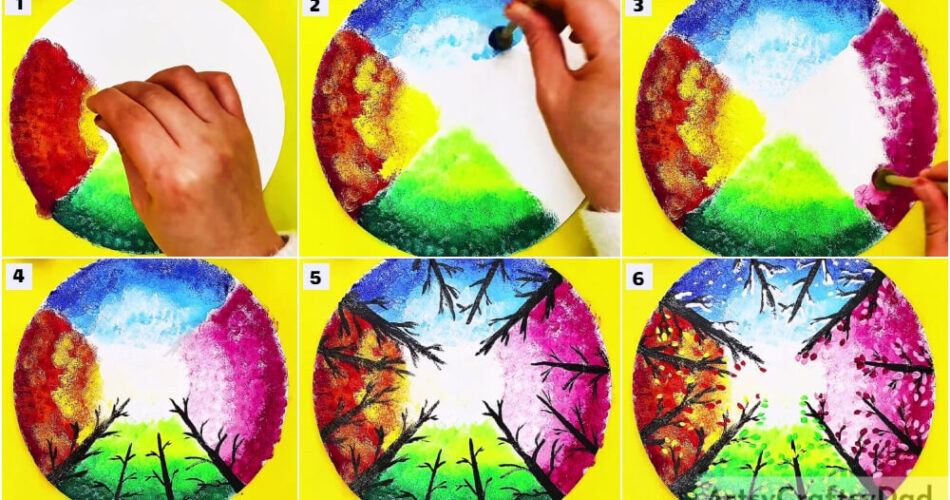
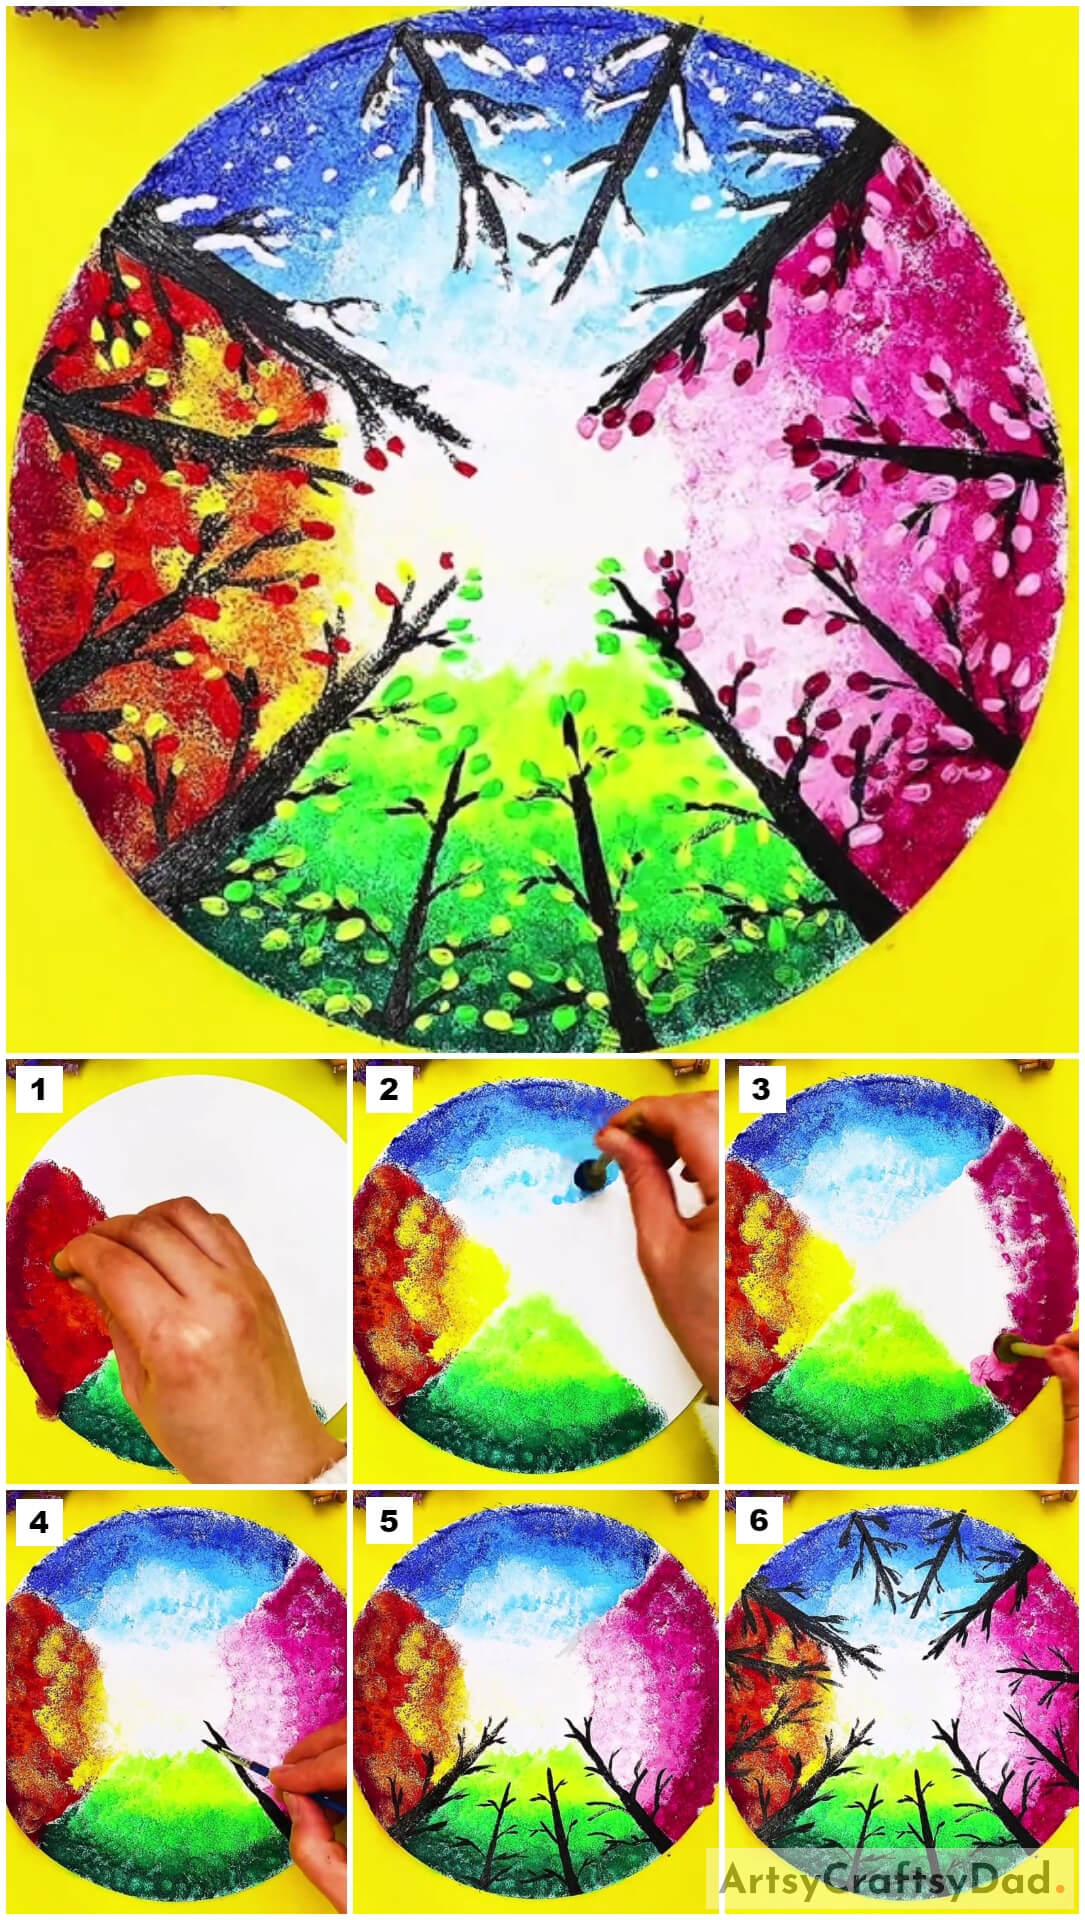
Step #1: Stamping Green Paint
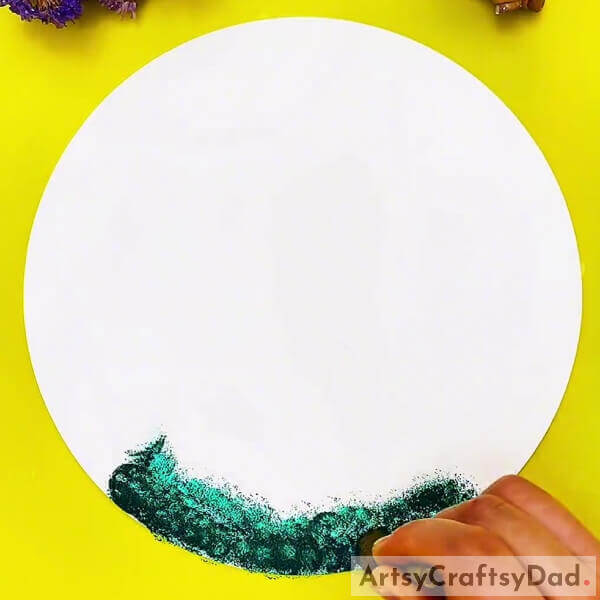
Begin this painting by taking a white circular paper sheet as the base for the painting and a circle small stamp. Dip the stamp into green paint and dab it over the 1/4th boundary of the whole circle. Make sure to keep the paint on the very end boundary dark and gradually lighter when moving inside.
Step #2: Shading The Green Paint
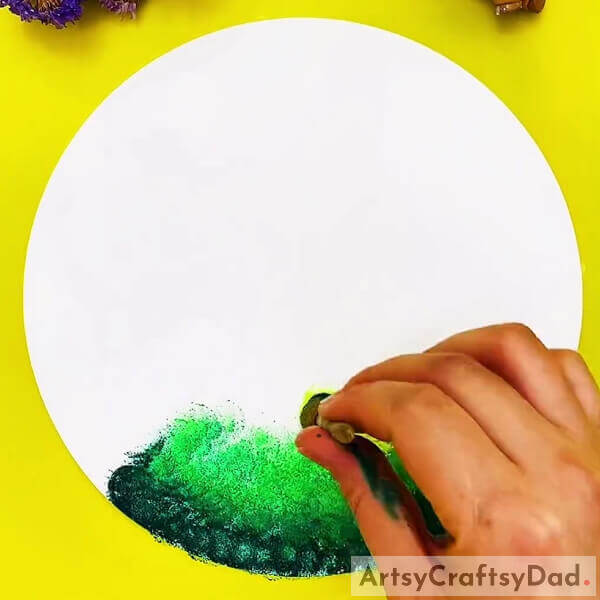
Dip the stamp into light green paint and shade with the green one inside. In the same way, keep it darker from near the boundary and lighter as you move inside.
Step #3: Shading The Light Green Paint
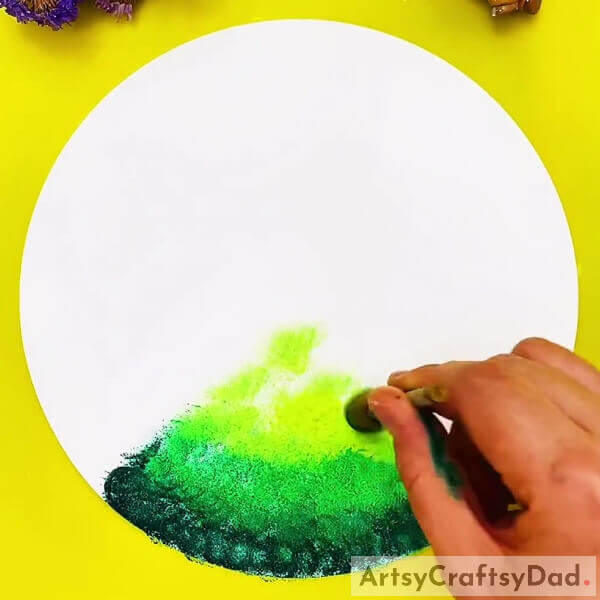
Dip the stamp into lime green paint and shade it with the light green one as you did previously. This completes the painted quarter of the summer background. Make sure to not paint it to the very center of the base but before that.
Step #4: Making The Autumn Background
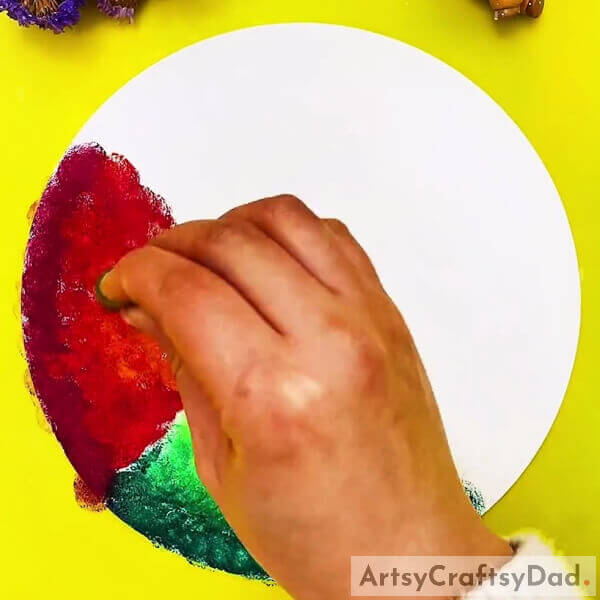
On the left quarter of the summer one, make the red-orange autumn background as you made the summer one. Keep the boundary darker and lighter when you move inward.
Step #5: Competing Making The Autumn Background
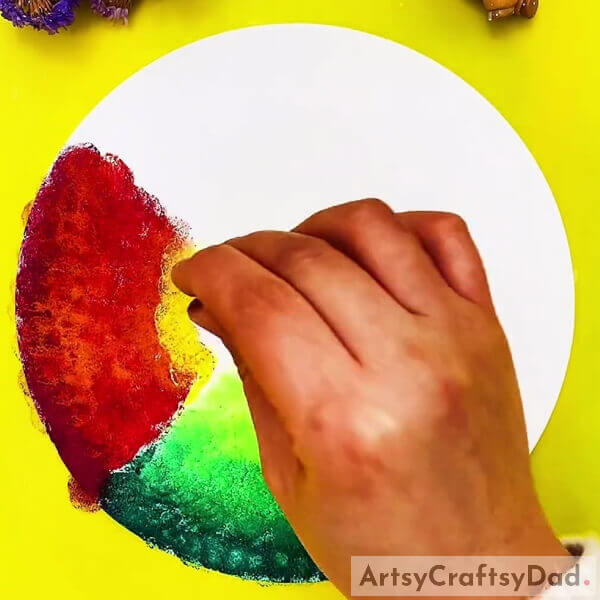
To complete the autumn background, dip the circle stamp into yellow paint and shade it with the orange one inside as you did the summer one.
Step #6: Making The Winter Background
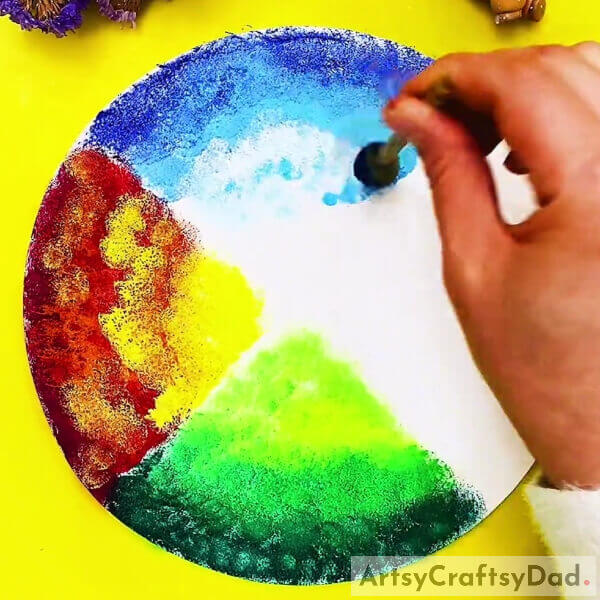
In the next quarter to the autumn one, make the icy blue winter background with blue-light blue-white shade of paint. See the image for reference.
Step #7: Making The Spring Background
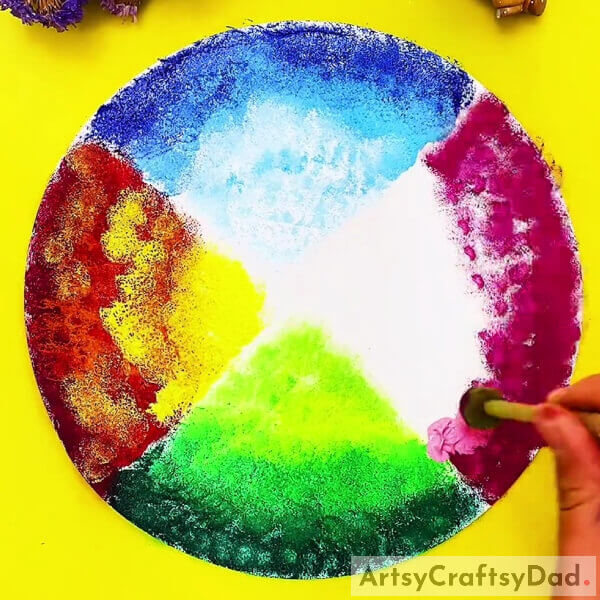
At least, make a pinky spring background using the dark pink-pink-white shade of paint. See the image for reference.
Step #8: Making A Tree Trunk
Using a paintbrush and black paint, make a tree trunk between the boundary of the summer and spring background. Make the tree trunk a little bigger, reaching the top of the painted backgrounds.
Step #9: Making The Tree Trunks Of Summer Background
Using the same black-painted paintbrush, make another tall tree trunk between the joint of the autumn and summer background and relatively smaller 2 tree trunks in the middle of the summer background. See the image for reference.
Step #10: Making The Tree Trunks Of Spring Background
As you made the trees of summer background, make spring ones too. Taller tree trunk at the joint of the winter and spring background and relatively smaller tree trunks in the middle of the spring background.
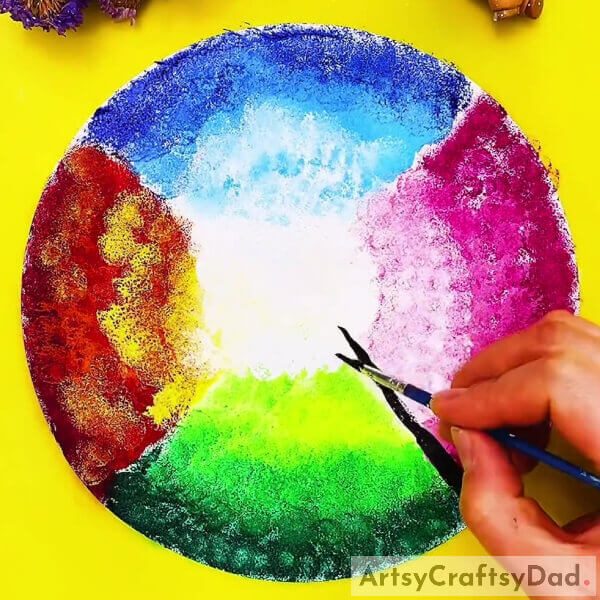
Step #11: Completing Making Tree Trunks
Complete making the tree trunks of the remaining winter and autumn backgrounds, as you made on the backgrounds previously. See the image for reference.
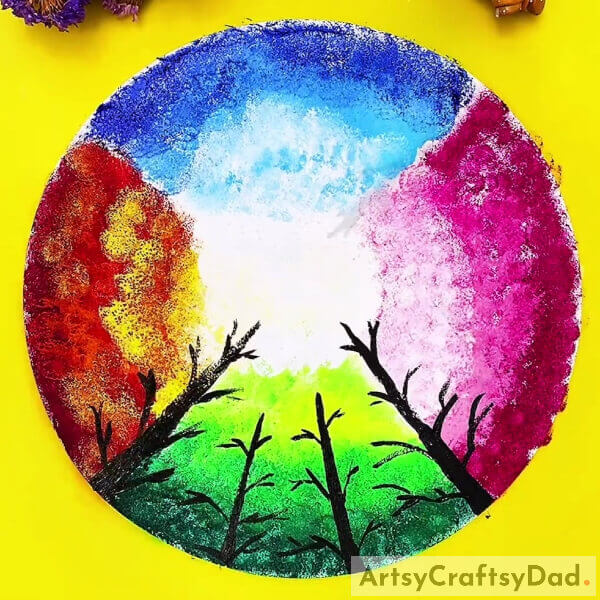
Step #12: Making Leaves Of The Summer Trees
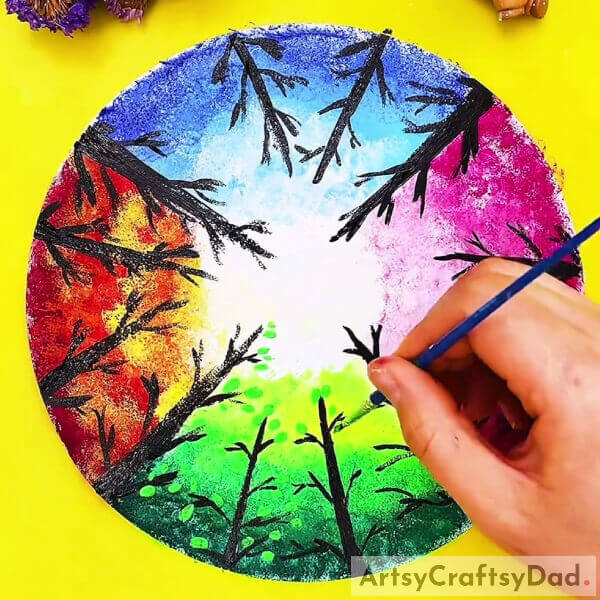
Dip the paintbrush into light green paint and make the tiny leaves on the branches of the trees randomly and dip again in the lime green paint and make the leaves on the light green part of the background to make the leaves visible there.
Step #13: Making The Leaves Of The Spring Trees
Mix the light pink paint with some white paint to obtain a lighter pink paint, dip the paintbrush into that paint, and make the leaves of the spring trees randomly to the tree branches. See the image for reference.
Step #14: Completing Making The Spring Tree Leaves

Dip the paintbrush into dark pink paint and make the tree leaves of the spring trees over the lighter shade of the background.
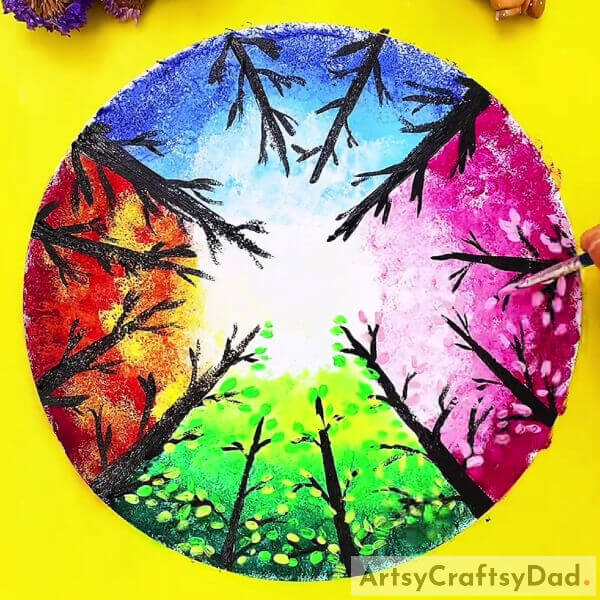
Step #15: Completing The Details Of Winter And Autumn Background
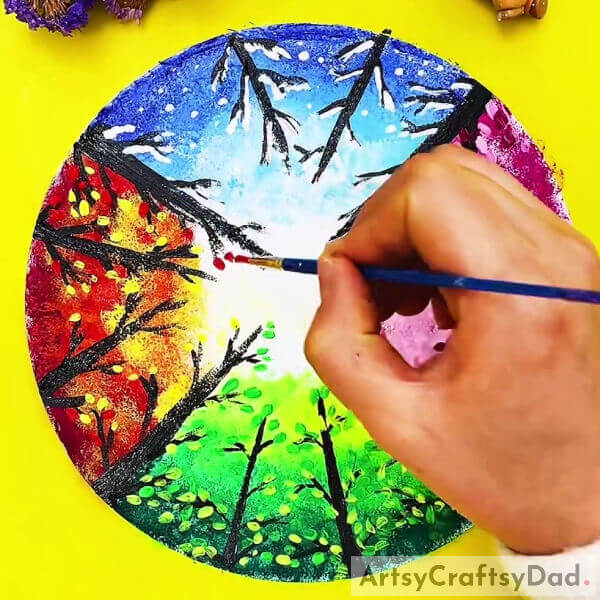
Dip the paintbrush into white paint and make strokes over the tree branches to make them look like snow. Also, make some dots over the winter background randomly to make them look like falling snow.
Now, dip the paintbrush into yellow paint and make the leaves to the branches of the autumn trees and make red paint leaves on the lighter shade of the autumn background. See the image for reference.
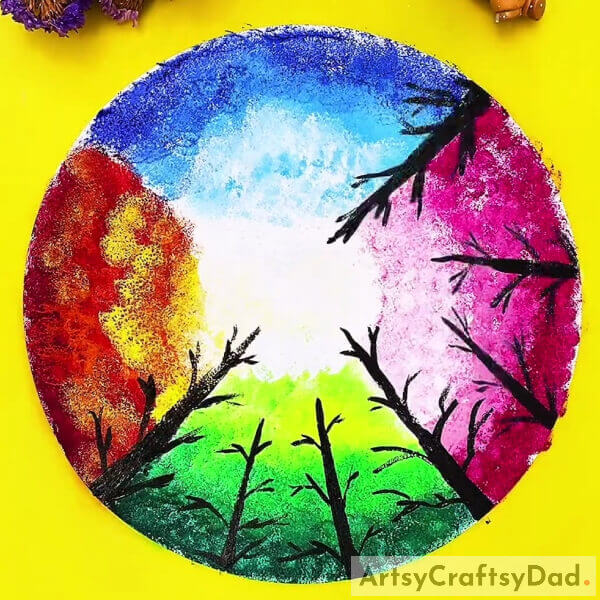
This Is The Final Look Of Your All 4 Seasons Trees Painting!

Tada! Are you stunned too? Because I’m! This painting is literally amazing!
It’s time to show it off to your friends and family and let everyone be proud of your creations and skills! Everybody will love your creation and will definitely admire it! You can also decorate this in your room! Also, you can customize the size of this painting! Just imagine what a giant painting would look like in your room! I would feel like getting lost in the beauty of nature and would stare the whole day at it! Ahh, what a mesmerizing view! You should try it out!
We are hoping you loved the article! If so, give it a like and share it with your friends and see who can make the best one! Also, drop your feedback in the comments section below!
You May Also Like
- 10 Amazing Christmas Trees For This Festival Season
- Peacock Stamp Painting With Hacks Tutorial
- Beautiful White Cherry Blossom Painting Art Tutorial
- Balloon Stamping Painting Ideas
- How to make different types of Christmas trees


