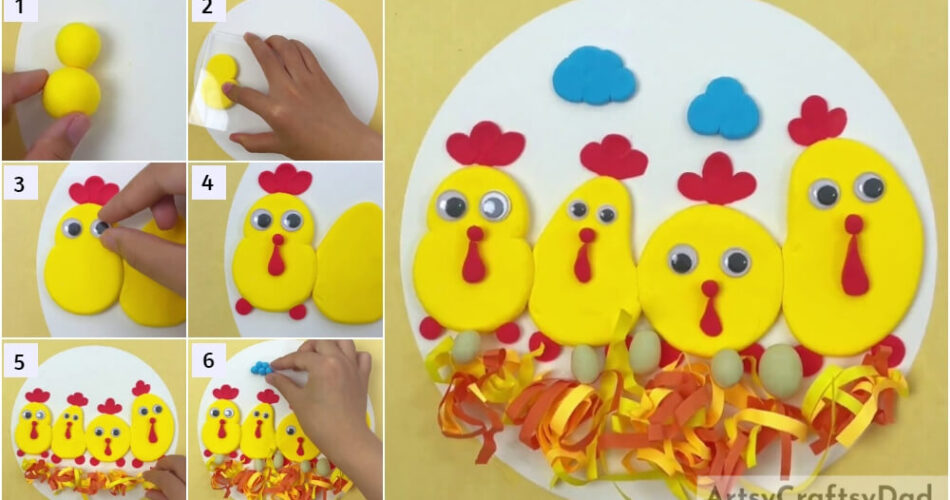
Giving birth to the young ones is the most beautiful creation of life! So, This tutorial has a craft on hens laying eggs in a nest!
Hey! Today, we have a learning craft for you! Hens laying eggs in their nest! This step-by-step tutorial will guide you to make this craft using paper, clay, and some other basic craft materials that you already have at home! This craft is perfect for kids to understand the beautiful creation of nature which every mother does! This tutorial will guide you on each and every step of this craft-making even in the materials you will require! Have a fun time making this craft with us, let’s begin!
Adorable Hens In Nest Clay And Paper Craft Tutorial
Must Read: How to Make Decorative Easter Eggs
Supplies & Tools
- Colored Paper Sheets (White, Red, Yellow, And Orange)
- Scissors
- Glue
- Polymer Clay Shaping Tool
- Colored Clay (Yellow, Red, White, And Blue)
- Googly Eyes
Clay Hens Instructions
Step #1: Making The Hen’s Body
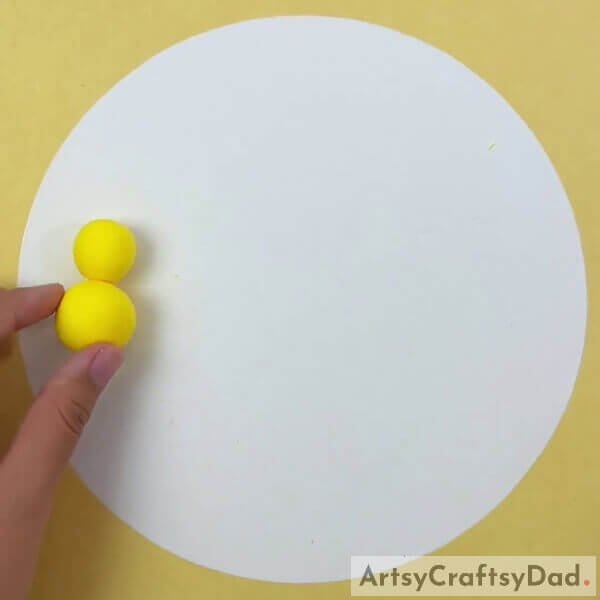
Begin this craft by taking a white paper sheet, yellow clay, and a pair of scissors. Cut down the white paper sheet into a circle to make the base for the craft using scissors. Now, dough 2 clay balls from the yellow clay, one smaller than the other. Stick the smaller one over the bigger one on the mid-left of the base as shown in the image. This will be the hen’s body.
Step #2: Flattening The Hen’s Body On The Base
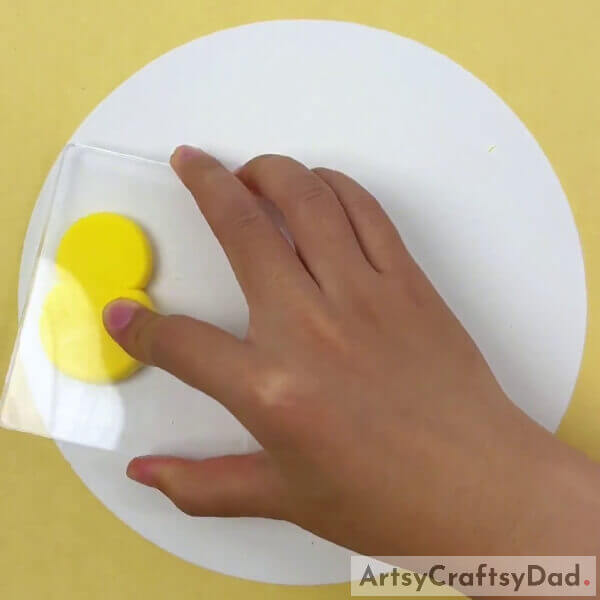
Using a polymer clay pressing tool, press the hen’s body clay balls to flatten them over the base.
Step #3: Making Another Hen’s Body

Following the same, make another flattened hen’s body beside the already made one by flattening the 2 clay balls, the upper one a little on the side. See the image for reference.
Step #4: Making The Comb And Eyes Of The Hen

Take red-colored clay and dough 3 tiny balls of it. Place the balls a little above the hen on the base and press and drag the balls on the top of the hen in the middle to form the comb of the hen. Stick 2 googly eyes by pressing them over the hen side by side to make the eyes of the hen.
Step #5: Making The Beak, Wattle, And Foot Of The Hen

Dough a small cylindrical shape of red clay and make it stick to stand over the hen below and in between the eyes to form the beak of the hen. Dough a drop shape from the red clay and stick it right below the beak to make the wattle of the hen. Dough 2 tiny clay balls from the red clay and stick them below the hen on the base on both sides to make the feet of the hen.
Step #6: Adding Features Of The Other Hen
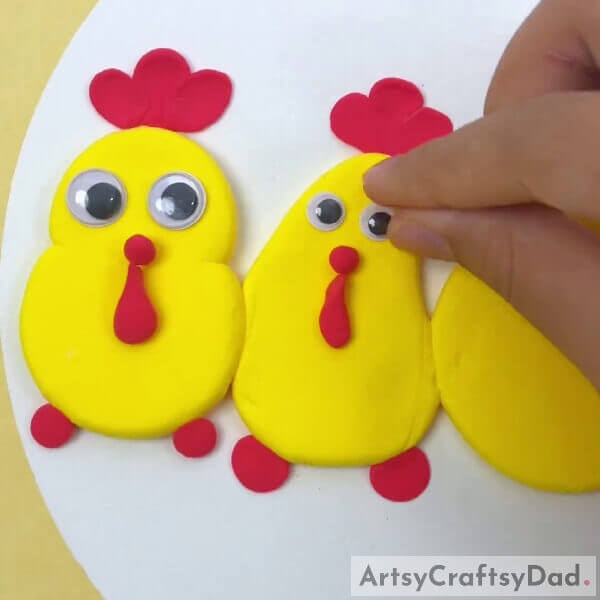
As you made the previous hen, make the comb, beak, eyes, wattle, and foot of the other hen too which is beside the already completed one.
Step #7: Making More Hens And Applying Glue Beneath Them

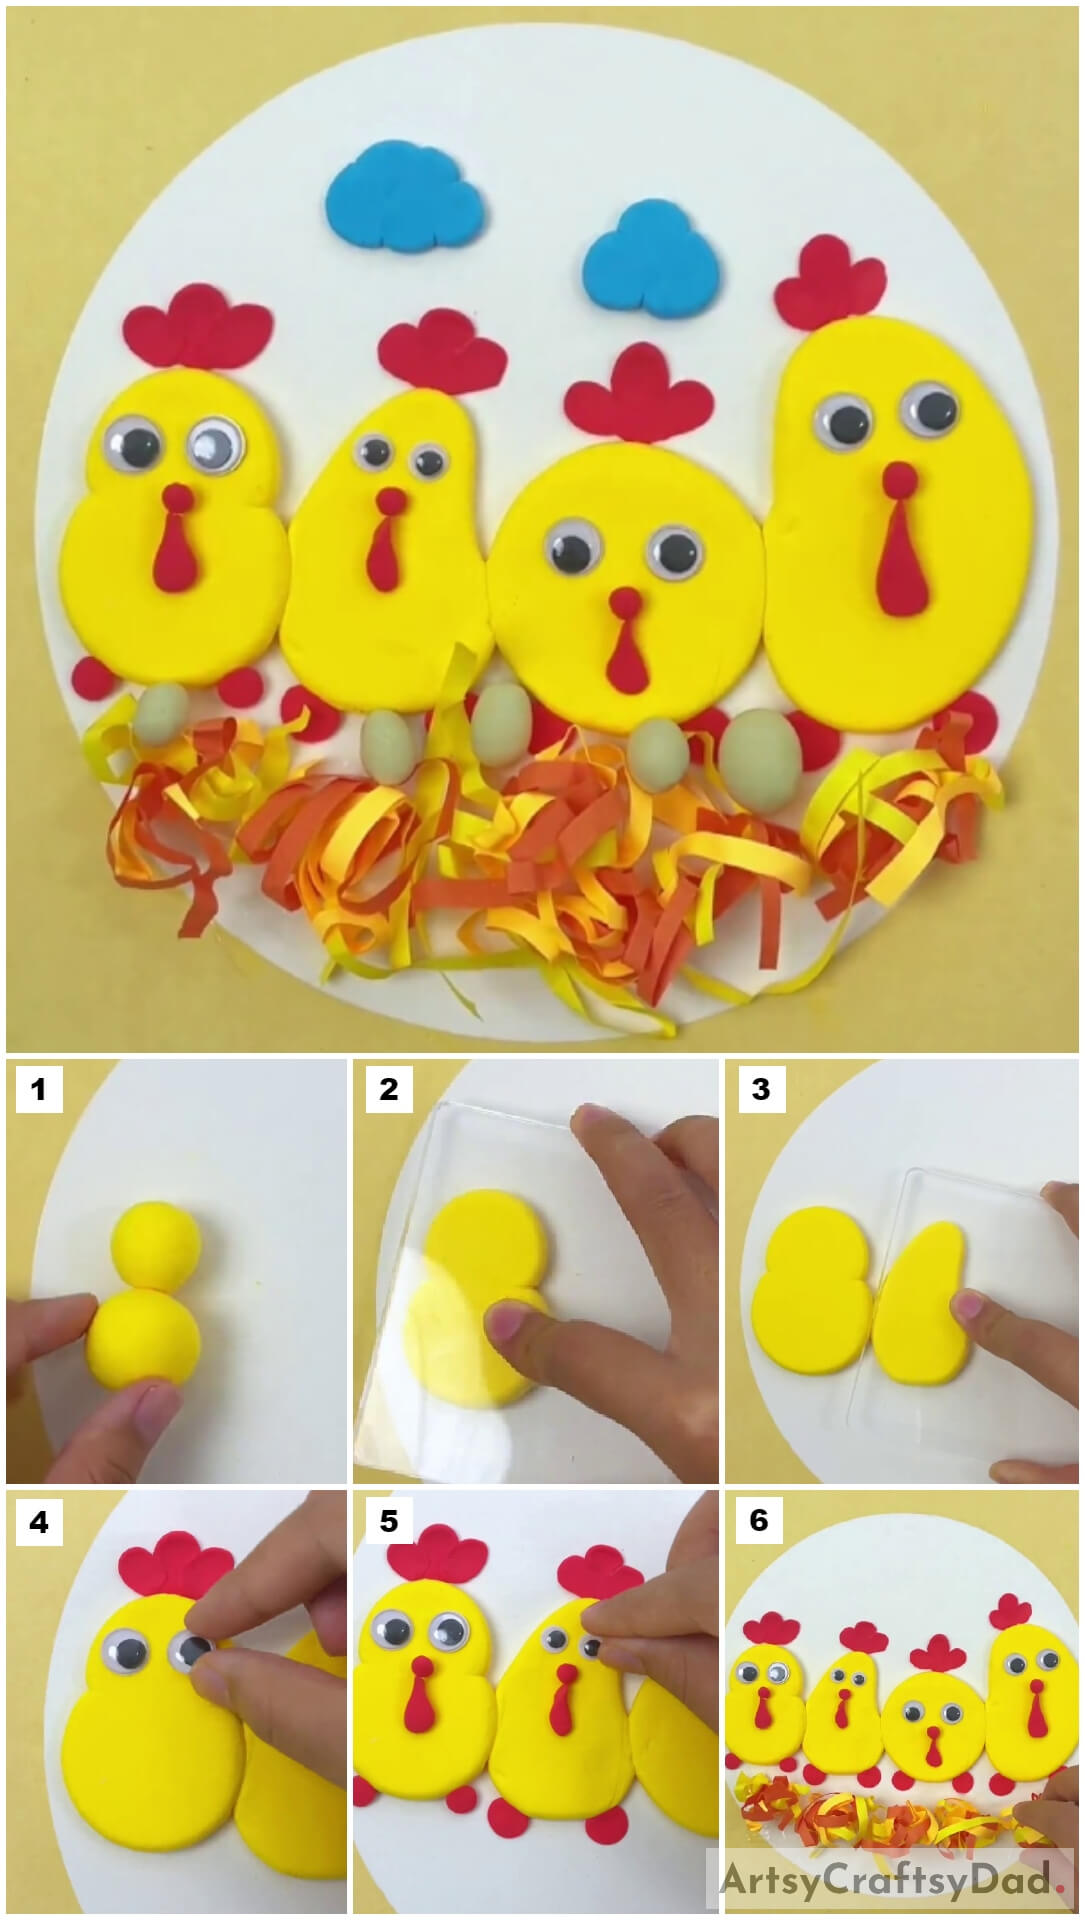
Make 2 more hens beside the already made one, and make the 3rd hen with a circular body and the 4th one with an oval-shaped body. Follow the previous steps for reference. Now, apply glue beneath the hens on the base evenly.
Step #8: Making Nest Beneath The Hens

Cut out thin paper strips from the yellow paper sheet, orange paper sheet, and red paper sheet with scissors, Further cut them into small pieces, and make 5 bunch of these paper strips by rolling and molding them. Stick these crumbs of paper strips over the base where the glue was applied side by side below the hens. Now, spread these crumbs all over the base at the bottom to form the nest beneath the hens.
Step #9: Making Clouds And Eggs
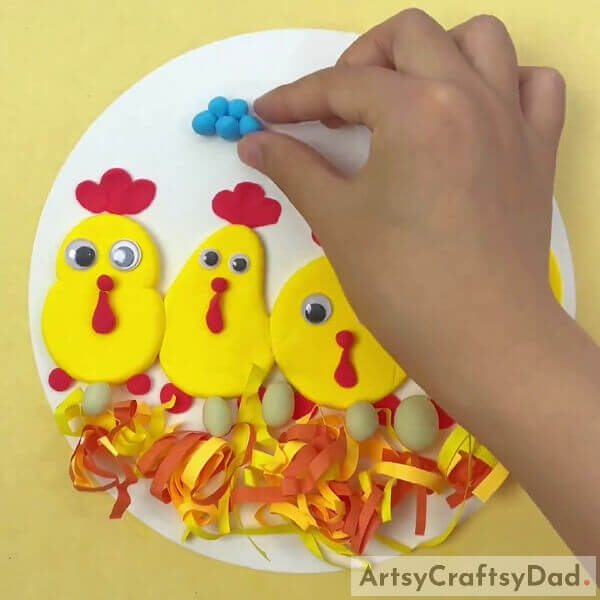
Dough the white clay into ovals to form tiny eggs and place these eggs below the hens on the nest randomly.
For the clouds, dough tiny blue clay balls and arrange them closely in a cloud shape above the hens on the base.
Step #10: Shaping The Clouds

Make another cloud by placing the clay balls on the base and using the polymer clay pressing tool press and flatten these clouds to shape them.
This Is The Final Look Of Your Clay Hens In Nest Laying Eggs Craft!
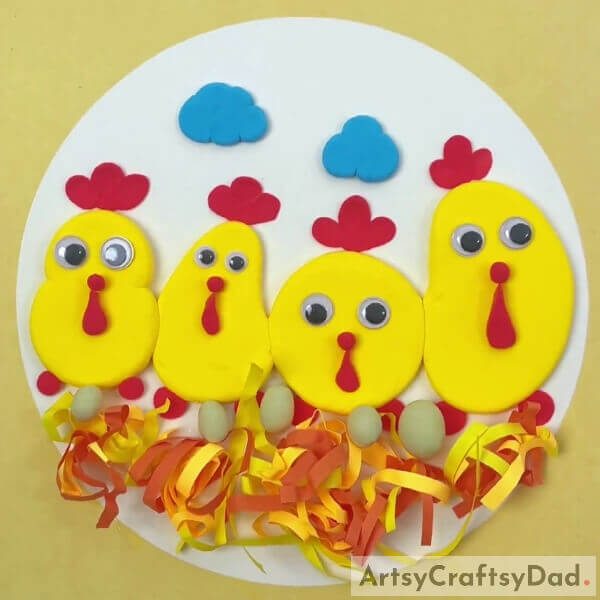
Yes, you did it! You have finally made your cute clay hens in a paper nest and laying clay eggs!
You can now use this craft as your school craft project and see everyone being envious of you being the teacher’s favorite! Ypou teacher will definitely like the appreance and concept of this craft! This craft can also be used to explain the hen lifecycle. You can also customize this craft by carving the feathery texture over the clay hen using the clay shaping tools! Make it as unique as you are! Your imagination is the limit!
Hope you liked the article and the craft idea! Share it as much as you can to keep us encouraged to keep bringing such crafts for you! Also, give you feedback in the comments section!
You May Also Like
- Clay Snails On Leaves Craft Tutorial For Kids
- Clay-Paper Sunflower Garden Craft Tutorial
- Clay Chicks In Garden Craft Tutorial
- Clay Heart Leaf Tree Craft Tutorial For Kids
- Simple Paper Tearing Flowers Craft Tutorial


