Make a designer paper fish easily with us! This step-by-step tutorial will guide you to make the same easily and flawlessly!
We are glad you came by! This is a step-by-step tutorial article to make a paper craft of a designer fish! This craft is full of motor skills and creativity which makes this craft a fun learning one! The craft can also be said as a sensory activity to do with the kids in the boring afternoon time! You will be guided on each and every step of this craft making with easy instructions that will lead to flawless results! So, what are you waiting for? Let’s make it with us!
Easy To Make Fish Craft Using Paper For Kids
Must Read: Paper Cutting Cute Tigers Craft Tutorial For Kids
Supplies & Tools
- Colored Paper Sheets (Blue, Yellow, And Pink)
- Scale
- Pencil
- Scissors
- Glue
- Googly Eye
Paper Cutting Fish Instructions
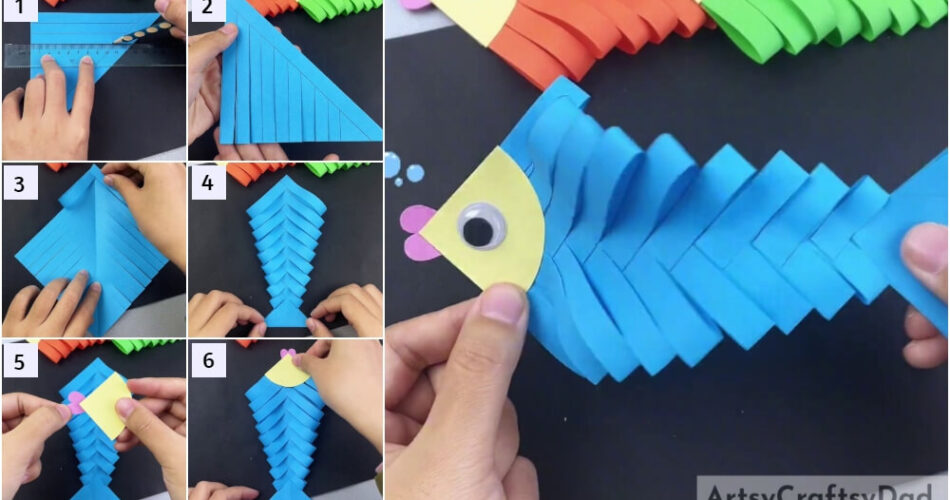
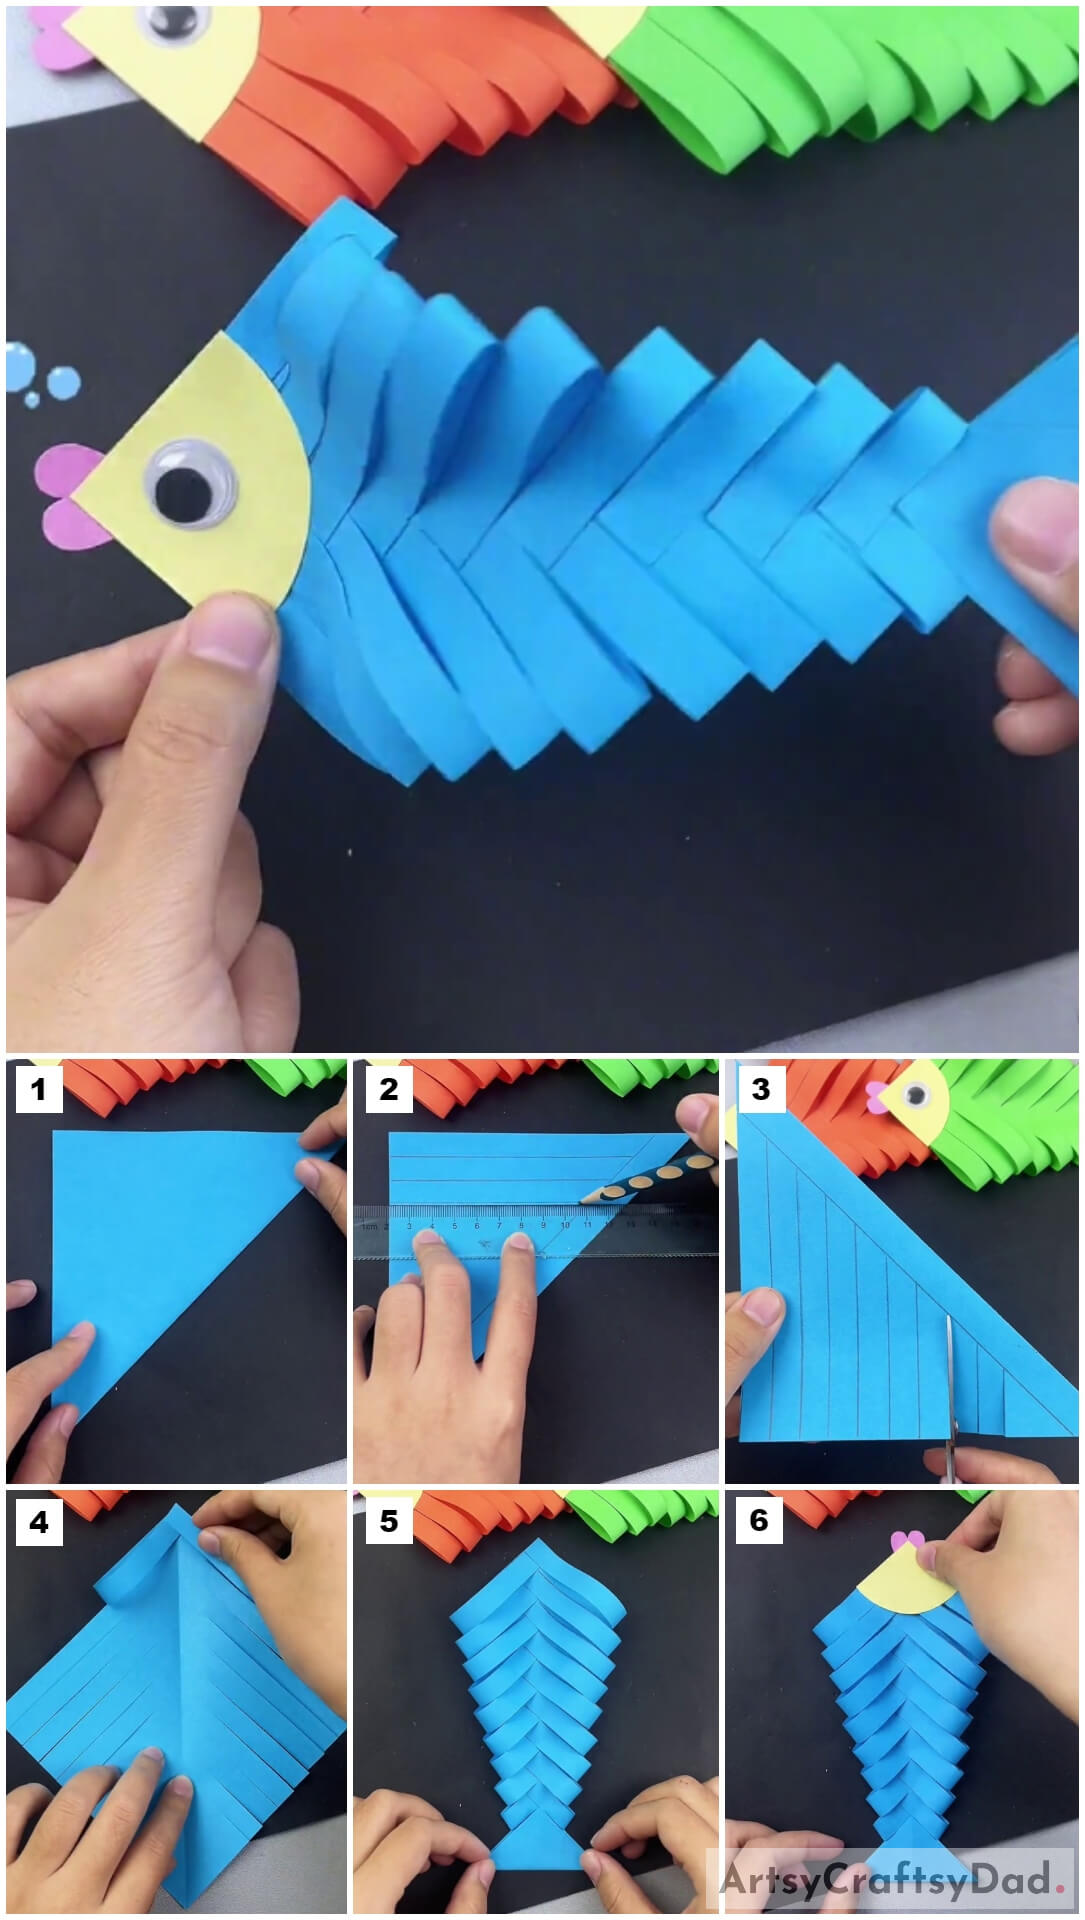
Step #1: Folding The Square Sheet Diagonally
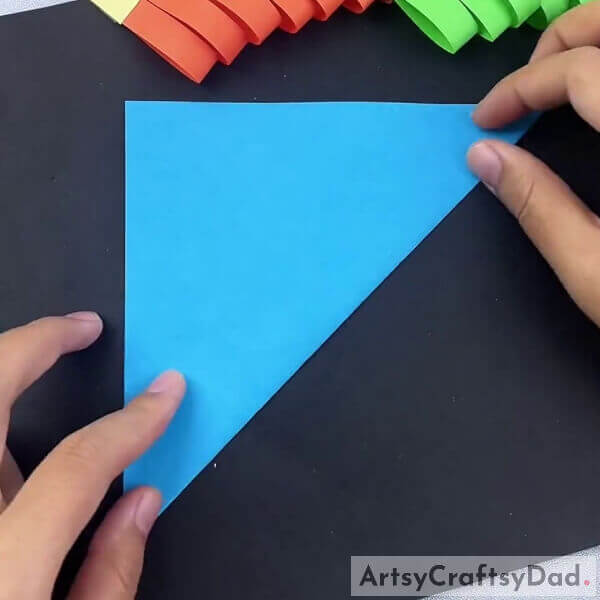
Begin this craft by taking a blue square paper sheet and folding it in half from one corner to the opposite one, diagonally.
Step #2: Drawing Lines
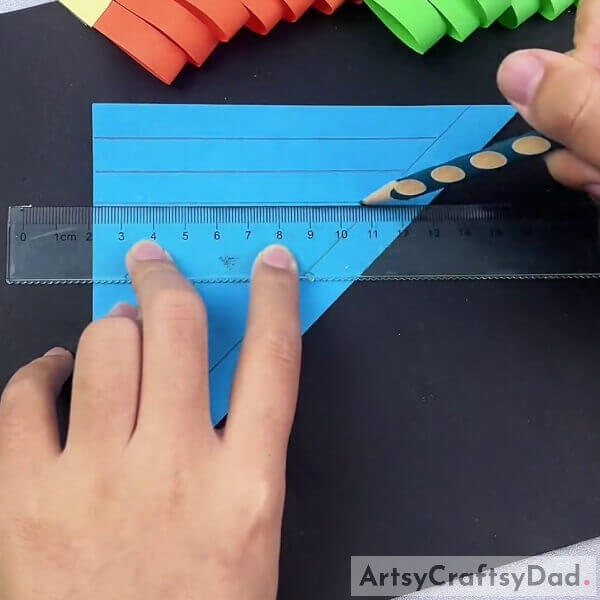
Using a scale and pencil, draw a line along the folded side of the paper by leaving a little gap. Now, draw horizontal lines at similar gaps from each other as the slanting line on the folded side. See the image for reference.
Step #3: Cutting Along The Horizontal Lines
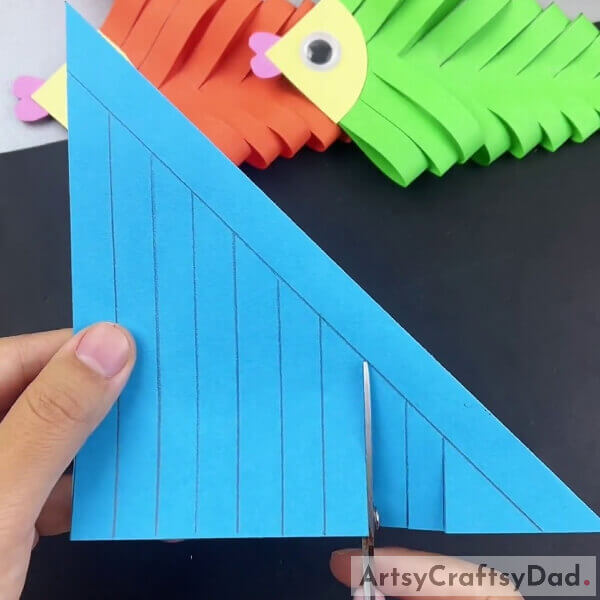
Using scissors, cut along the horizontal lines till the slanting line on the folded side. See the image for reference.
Step #4: Completing Cutting Along The Lines
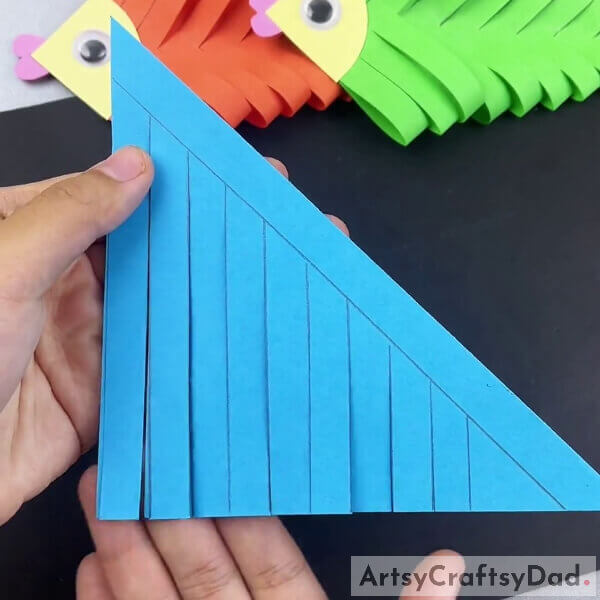
Using the scissors, cut along each and every horizontal line drawn. Make sure to cut both the sides of the folded paper.
Step #5: Sticking the Strips To The Middle
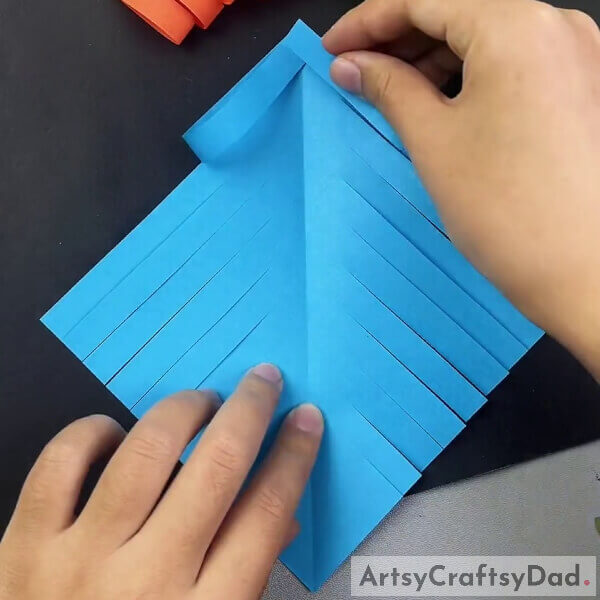
Unfold the folded paper and you will see various cut strips on the sides of the paper. Turn the paper sheet in a diamond shape keeping the longer strips upward and the smaller ones downwards. Now, take the first set of strips and take them to the center keeping the ends of them one over the other, and stick them the same way using glue.
Step #6: Making A Fish Shape
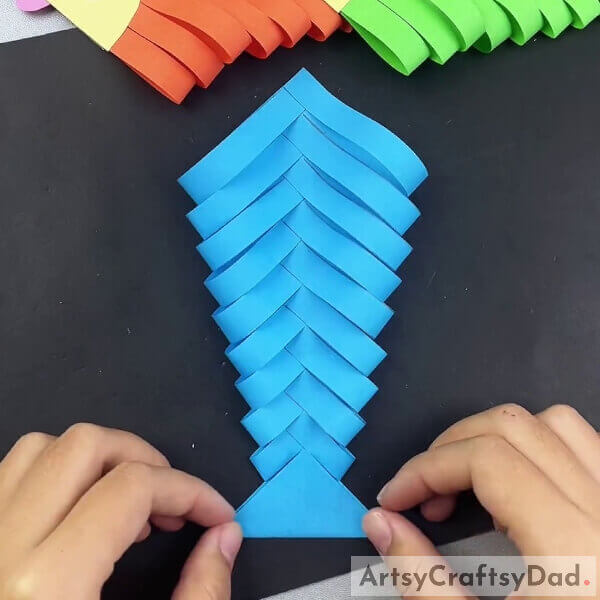
Do the same to stick all the remaining sets of strips in the middle. Then stick the bottom end of the diamond shape over the top end of it using glue to make a fish shape all together and the bottom triangle will represent the tail of it. See the image for reference.
Step #7: Making The Face With Mouth Of The Fish
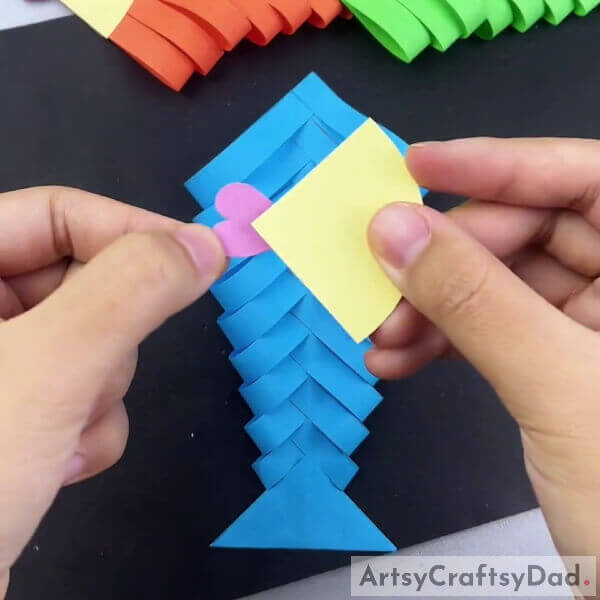
Using scissors, cut out a triangle from the yellow paper sheet and cut a bulging outward curve on one side of it. Now, cut out a small heart shape from the pink paper sheet and using glue stick the heart from the back of the pointed edge of the yellow cut-out keeping the curves of the heart coming out as shown in the image. This will be the face with the mouth of the fish.
Step #8: Pasting The Face To The Body Of The Fish
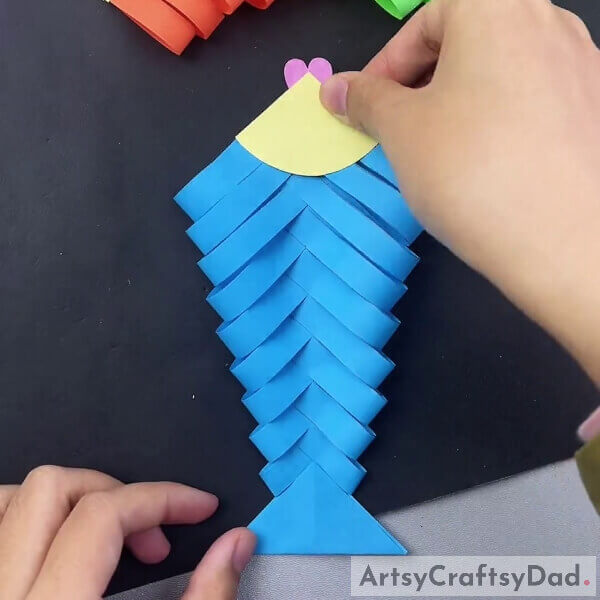
Paste the face to the body of the fish from the other side of its tail using glue. See the image for reference.
This Is The Final Look Of Your Designer Fish!
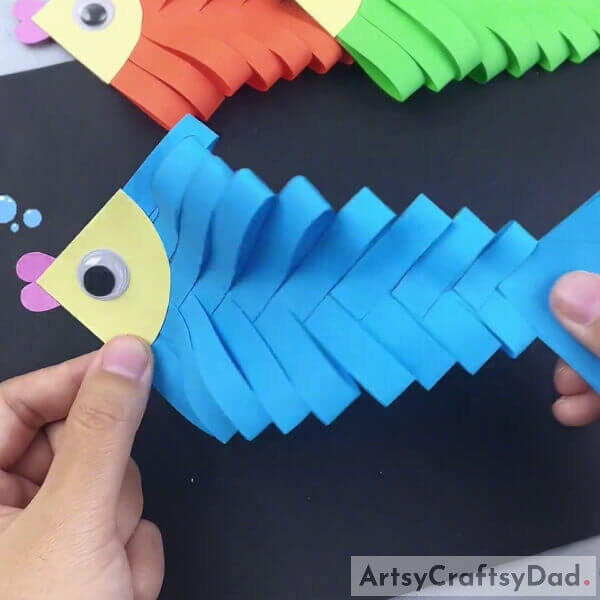
For the last step, stick a googly eye on the face of the fish using glue as shown in the image.
Congratulations! You have finally made your paper designer fish successfully!
You can now decorate this craft in your own small aquarium and have a fantastic craft decor for your room! You can also use this craft as your school craft project and flaunt it in front of everyone in your class! This craft can also be a classroom activity for children to make them learn about the fish and even have a sensory activity! You can also customize your designer fish in any way you like, add more designs, textures, colors, or anything to it to make it more unique!
Hope you had fun making this craft! If so, give it a like and share it with your friends! Also, give your feedback in the comments section!
You May Also Like
- Fish Underwater View: Fruit Foam Net & Clay Craft Tutorial
- Leaf Fish Swimming Underwater Craft Tutorial
- Paper Cutting Artificial Flowers Craft Tutorial
- DIY Origami Paper Designer Frock Craft Tutorial
- Popping Out Rice Balls Paper Craft Tutorial


