Have fun with clay and paper-cutting in making a fantastic craft including two 3D fish on a paper base with this step-by-step tutorial!
This DIY clay and paper fish will definitely be a hit addition to your craft collection! Have a blast creating these with the help of our step-by-step tutorial and even in the easiest way! Kiddos will love to make these fish as they are already fond of playing with clay! This craft is also a pack of fun with learning, kids will able to drive their motor skills and creativity while making this craft! Grab the listed materials and let us begin to make this awesome craft!
Clay & Paper Red Fishes Craft Tutorial For Kids
Must Read: Easy Craft Ideas from Clay/Plasticine for Easter
Supplies & Tools:
- Colored Paper Sheets (Red And White)
- Scissors
- Glue
- Googly Eyes
- Red Colored Clay
Clay Paper Fish Instructions
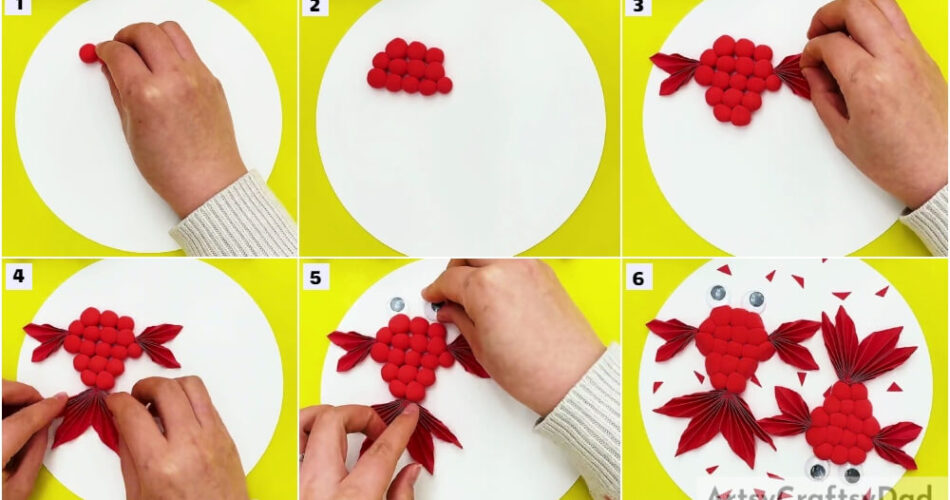
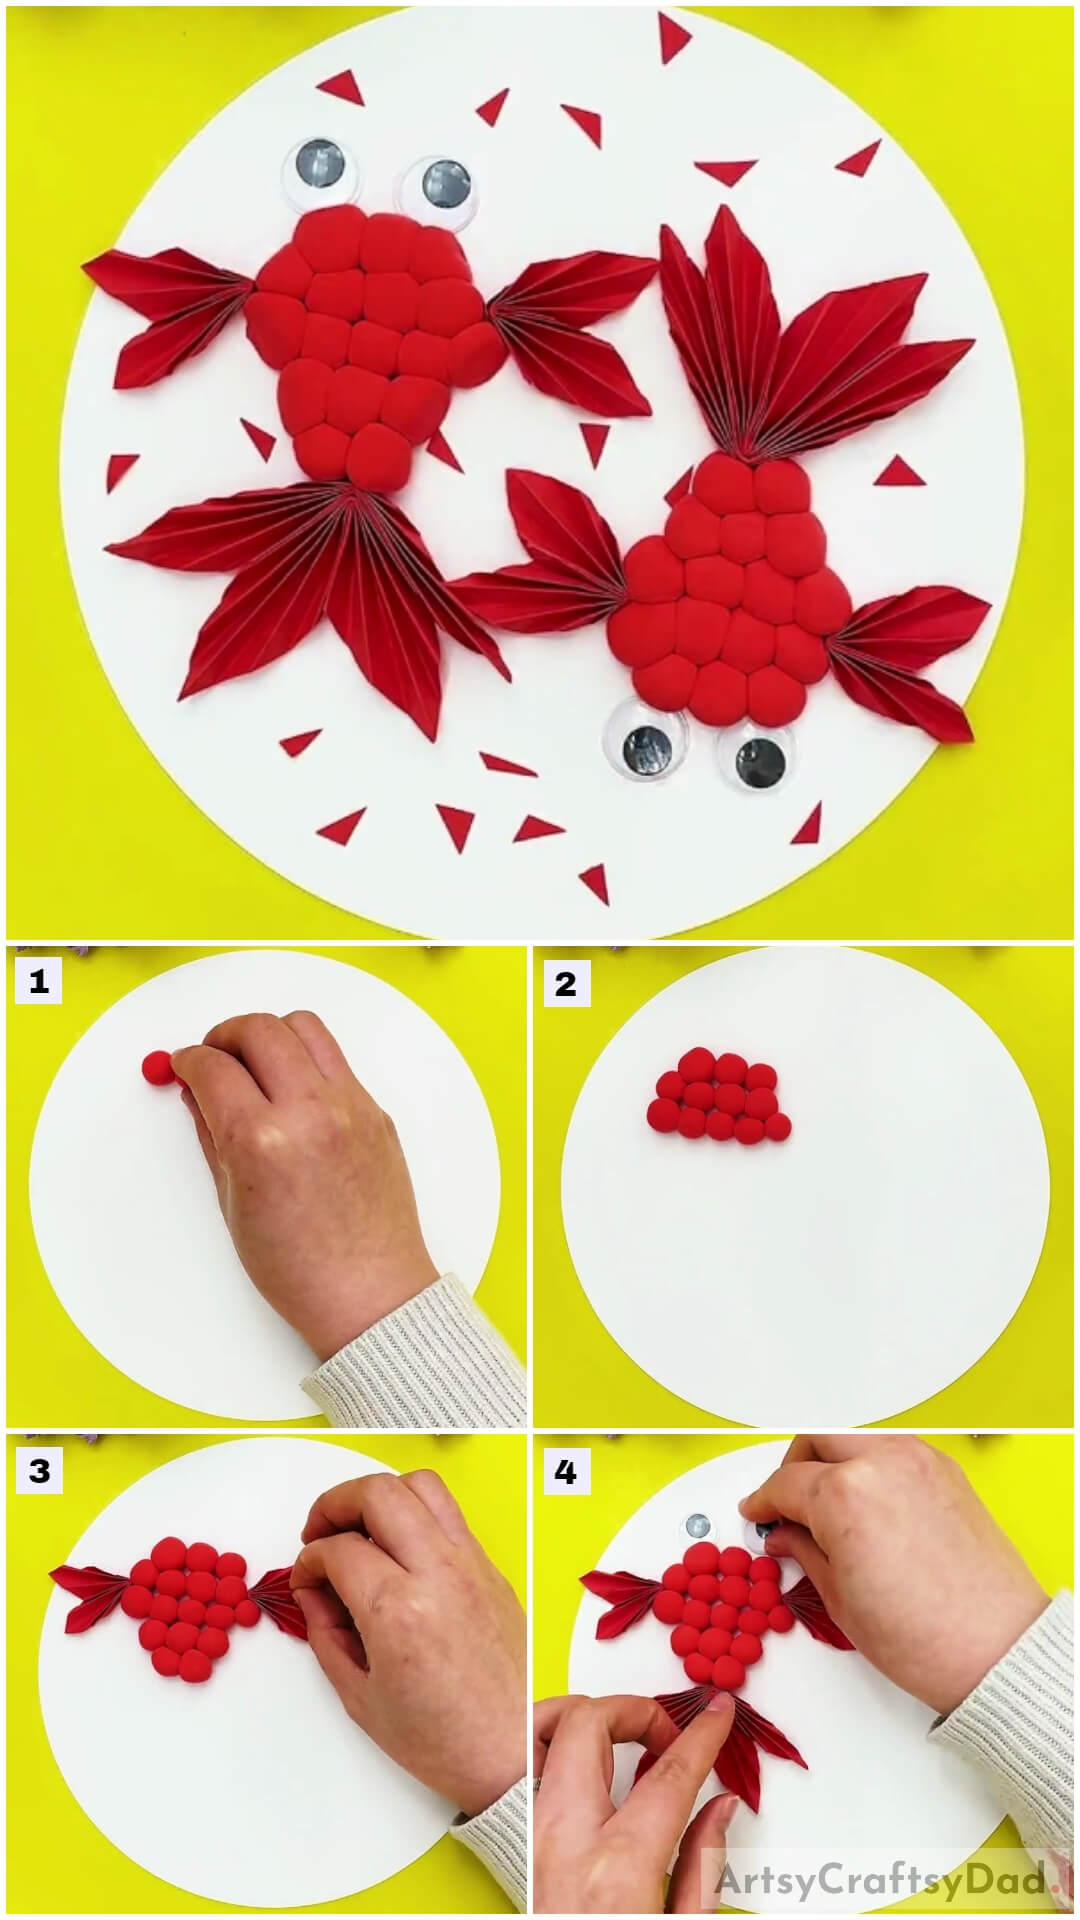
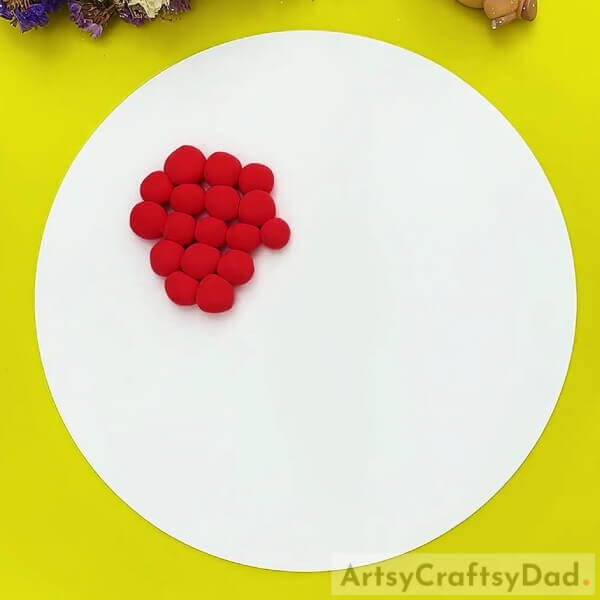
Step #1: Sticking Red Clay Balls
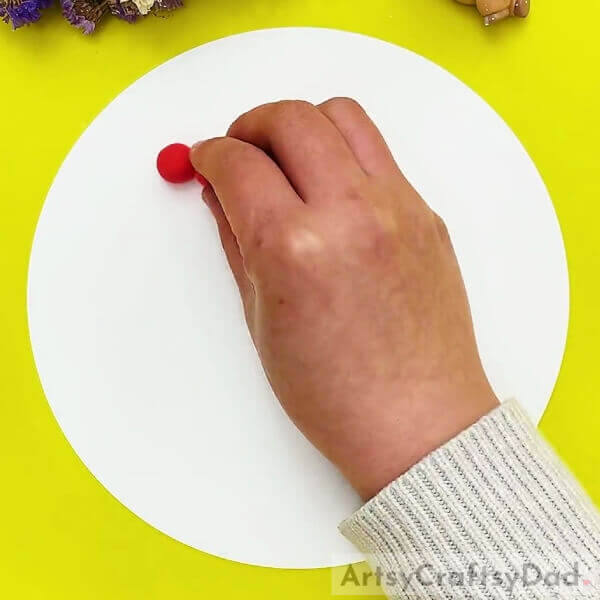
Begin this craft by taking a white paper sheet, a pair of scissors, and red clay. Using scissors, cut the white paper into a circle to make the base for your craft. Now, dough the red clay into small balls and stick them onto the base on the left side as shown in the image.
Step #2: Sticking More Clay Balls
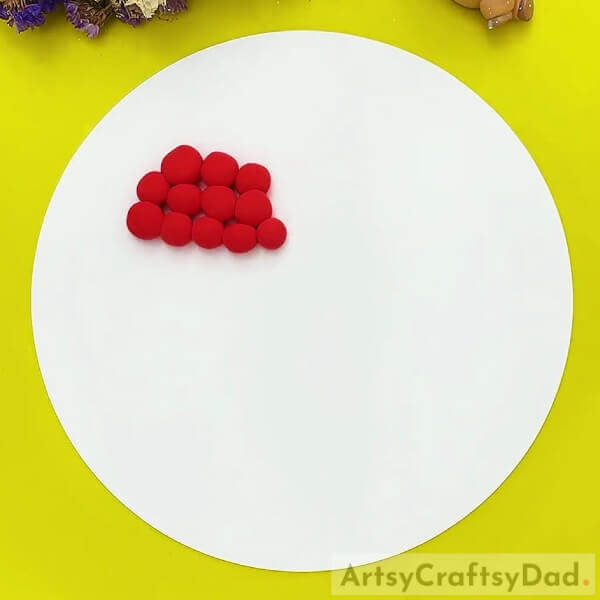
Make more clay balls and stick them close to each other as shown in the image.
Step #3: Completing Sticking The Clay Balls
Following the same, stick more clay balls to make the body of the fish as shown in the image.
Step #4: Making The Fins Of The Fish
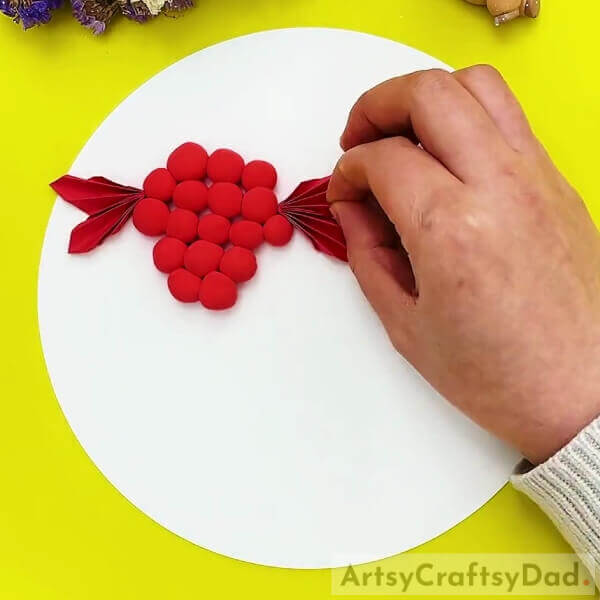
Now, take a red paper sheet strip and fold it into zig-zag strips from the longer side. Now, fold the zig-zag strips into half from the longer side and paste the folds from the between to each other using glue. Using scissors, cut the end of folded strips into 2 pointed parts to make one fin of the fish. Following the same, make the other one and stick both on the side of the fish’s body over the base using glue.
Step #5: Making The Tail Of The Fish
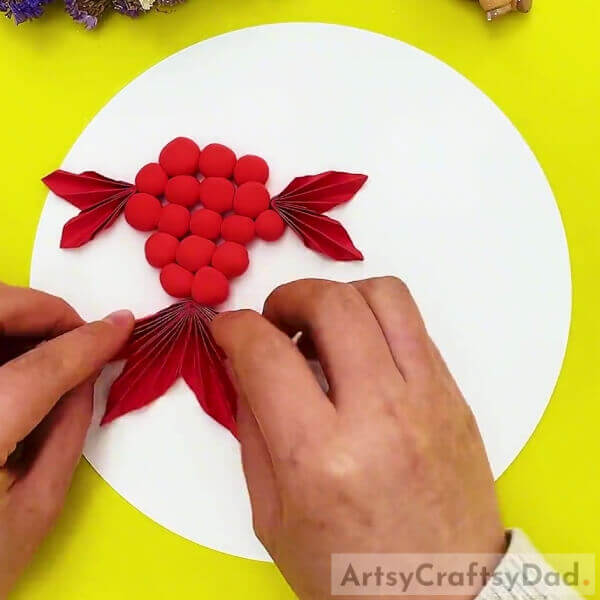
As you make the fins, you will be making the tail of the fish but this time the paper strip will be larger and broader than before. Also, cut the ends of the folded strips into 4 pointed parts. Paste the tail of the fish behind the body of the fish over the base using glue.
Step #6: Making Eyes Of The Fish
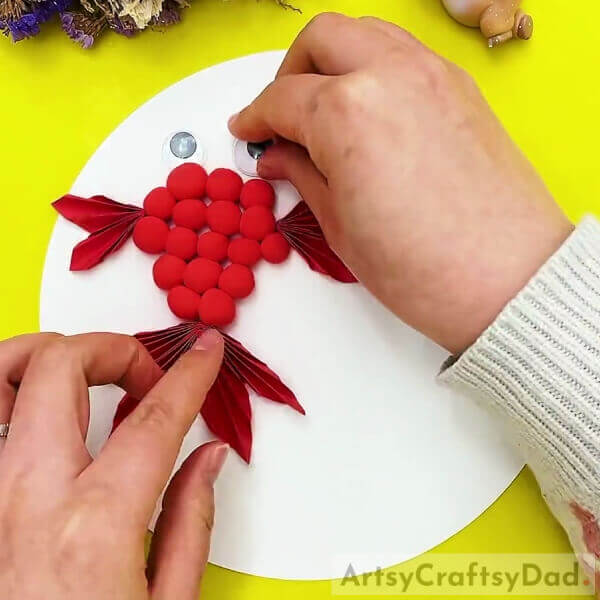
Stick 2 large-sized googly eyes above the fish’s body at the top, over the base side by side using glue to make the eyes of the fish.
Step #7: Making Another Fish
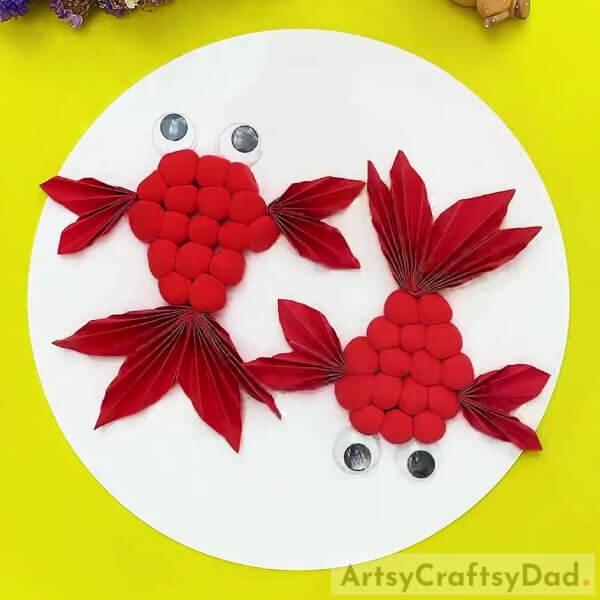
Repeat all the above steps to make another identical fish on the base but this time make it upside down to the previous one.
Yay! Your Clay And Paper Fish Is Ready!
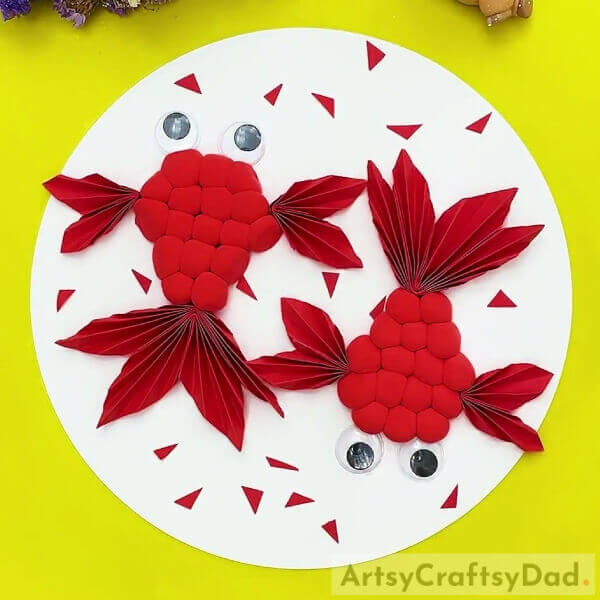
For the last step, cut out tiny triangle bits and pieces from a red paper sheet and paste them over the base randomly to cover it whole.
Tada! Here it is, the final look of your fantastic and eye-catching fish! Look at the texture detailing due to the clay and paper! They look amazing!
Well, said you so! A fantastic addition to your craft collection! You can now hang this craft on your room’s wall to use as decor or use it as a school craft project! This craft can also be a task for the classroom activity while also teaching the kiddos about fish! This craft will thrive anywhere! You can even customize your fish by using your imagination and creativity to make it as unique as you are!
We are hoping you liked the article! If so, give it a like and also share it with your friends! Don’t forget to leave a comment in the comments section to encourage us to keep bringing such crafts for you!
You May Also Like:
- 3D Wall Decoration Paper Craft Idea for Independence Day / Republic Day
- DIY Paper Quilling Elephant Craft for Kids
- How to make a Paper Flower Vase – Paper Craft Tutorial
- How to Make Peacock Clay Pot at Home
- How to make polymer clay calla lily necklace


