This tutorial will teach you how to make beautiful and graceful Pampas grass to adorn your home with simple, easy-to-follow steps. Let’s embark on this creative adventure!
Native to South America, Pampas grass with its feathery plumes and striking appearance has great ornamental value. Reap these benefits for your house by following this craft tutorial on making extraordinary Pampas grass out of very ordinary craft items like Purple Ribbons. You can do this craft with kids for a fun, enriching experience that enhances their motor skills, or try it with your friends and family to creatively apply your skills in decorating your own home. Let’s dive into this craft right away!
Purple Ribbon Pampas Craft Decor
Must Read: Ribbon Blooming Flower Craft Tutorial For Kids
Supplies & Tools
- Purple & White Ribbon
- Thin Double-Sided Tape
- Thin Stick
- Green Crepe Paper
- Green Paper Tape
- Scissors
- Glue
Ribbon Pampas Instructions
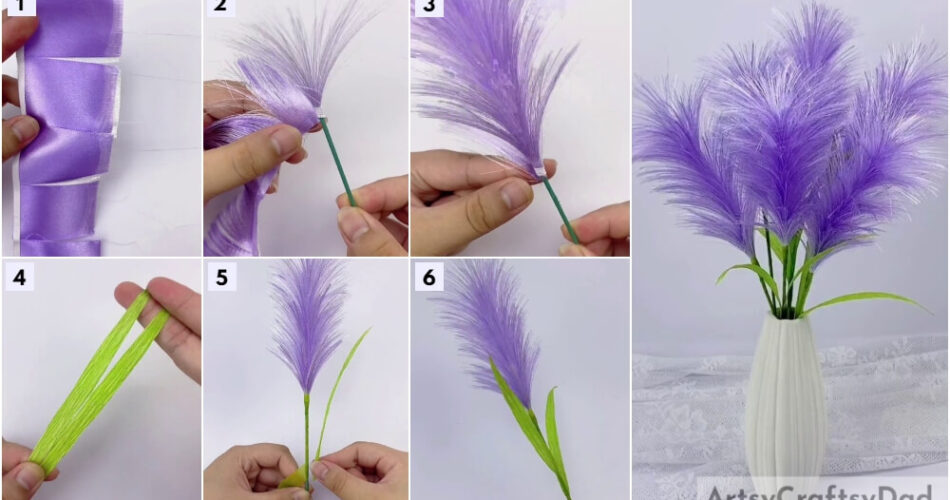
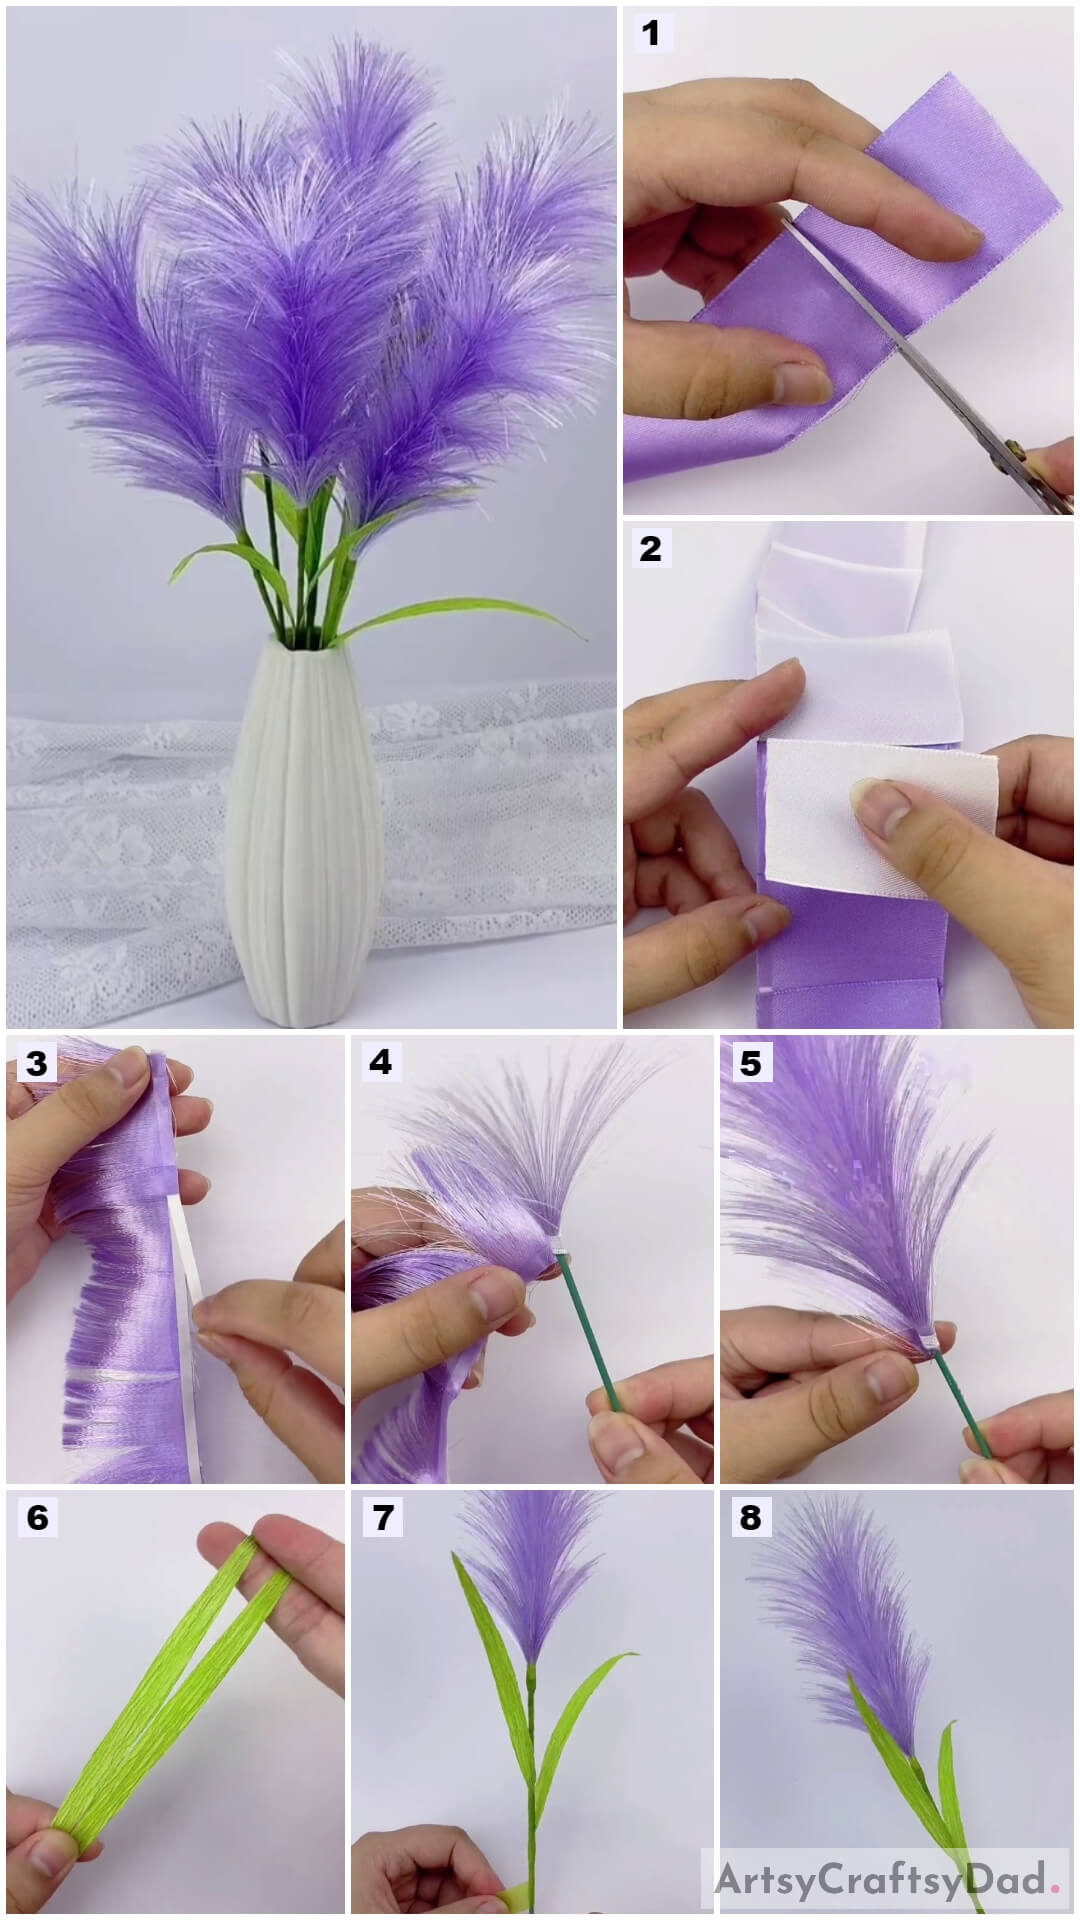
Step #1: Unravel the Purple Ribbon for the Craft
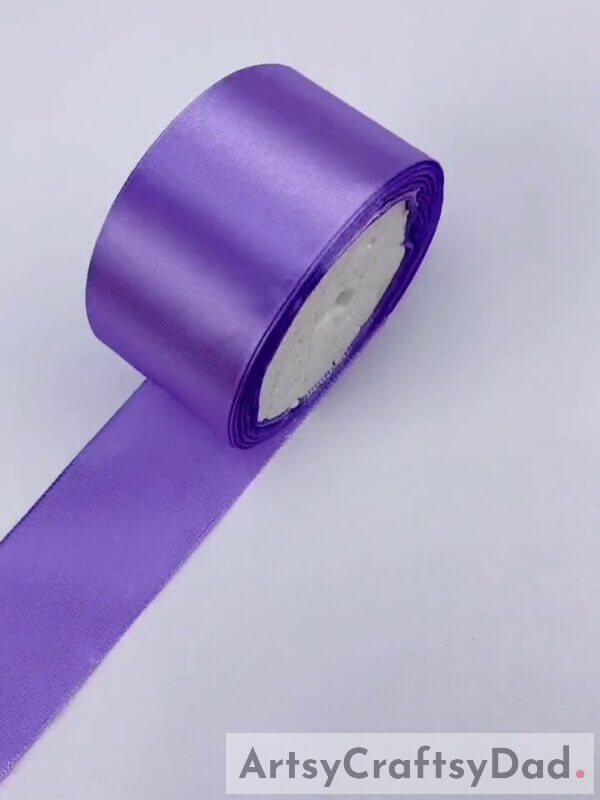
Collect all the materials you require for the craft. We will begin work with the Purple ribbon first. So unfurl the ribbon. We will be cutting smaller pieces out of this ribbon so keep a scale handy for the next step.
Step #2: Cut the Ribbon into Equal Sizes
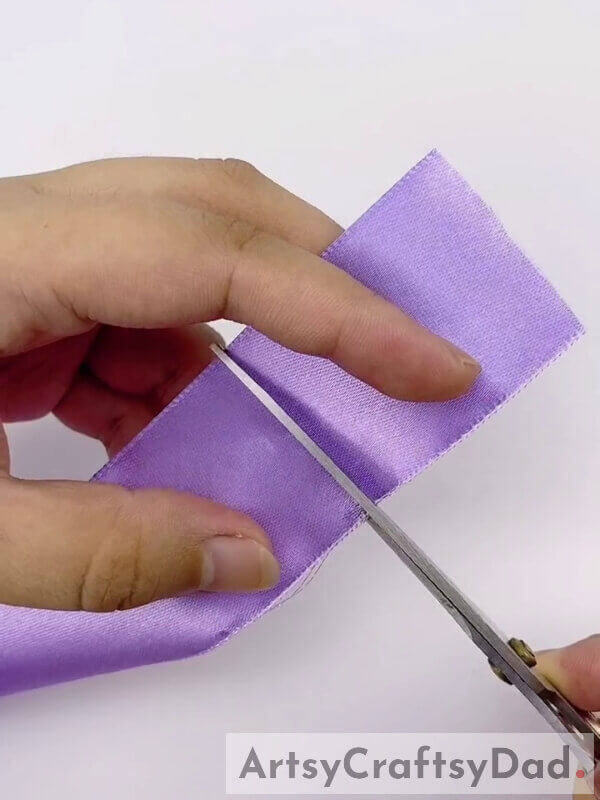
Measure 5cm of the ribbon and cut about 5 pieces of the ribbon with that length. You can cut more pieces if you want your Pampas to be longer. Let it be the length you desire.
Step #3: Stick Double-Sided Tape on the Edge of the Ribbon
Paste a thin double-sided tape along the breadth of one of the ribbon pieces. Then attach the other 4-5 same-sized ribbon pieces to the same tape, placing it side by side.
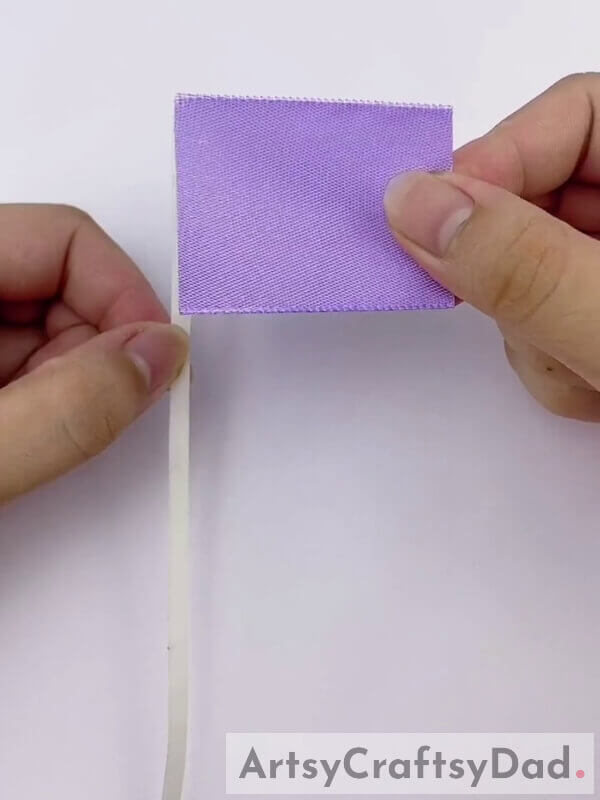
Step #4: Paste White Ribbons on the Purple Ribbons
When you have finished attaching the Purple ribbons to the tape, take a White ribbon and cut it in the same size as the Purple ribbons. Paste it behind the Purple ribbons using glue, but only stick the edges of the ribbons together, as shown in the picture.
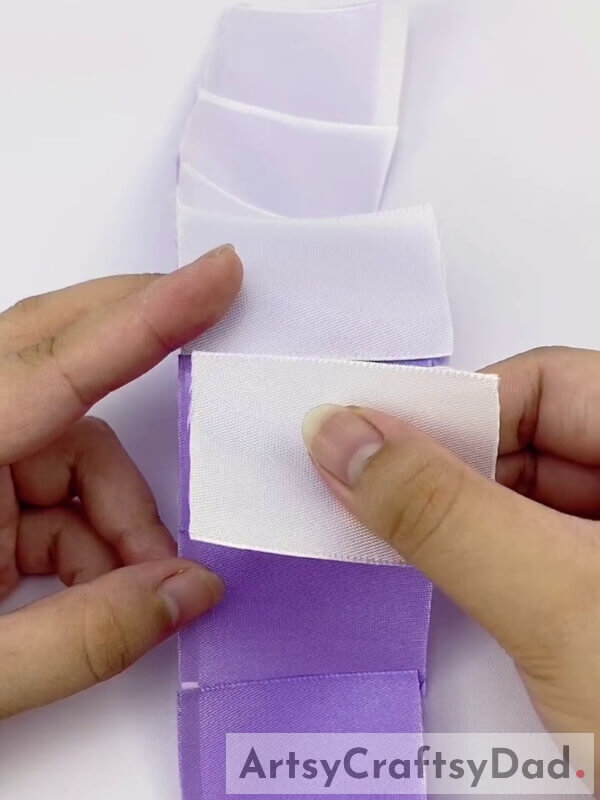
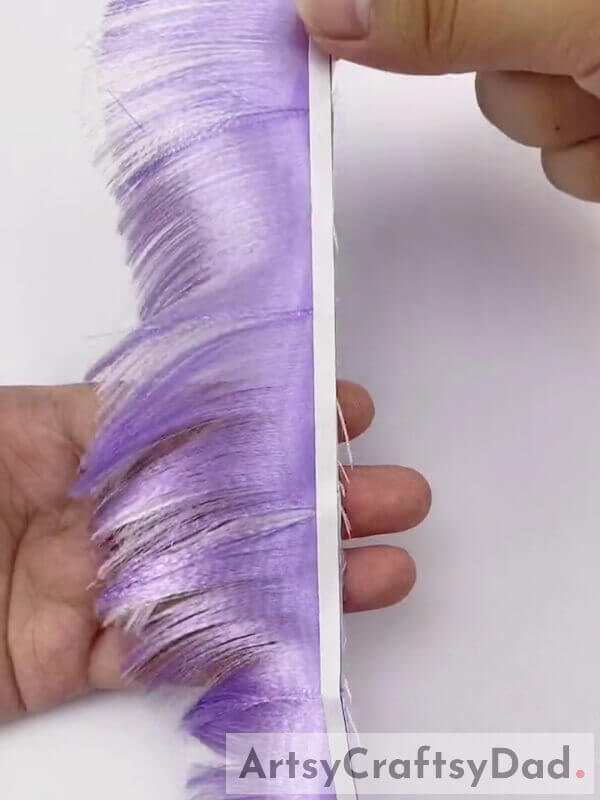
Step #5: Pull Out the Ribbon Threads to Make it Fringed
From the open side of the ribbons (the side not attached to the tape), start pulling out the loose threads of both the Purple and White ribbons to unravel the fabric and make the edges frayed. Keep unraveling until you reach the base where the ribbon meets the tape.
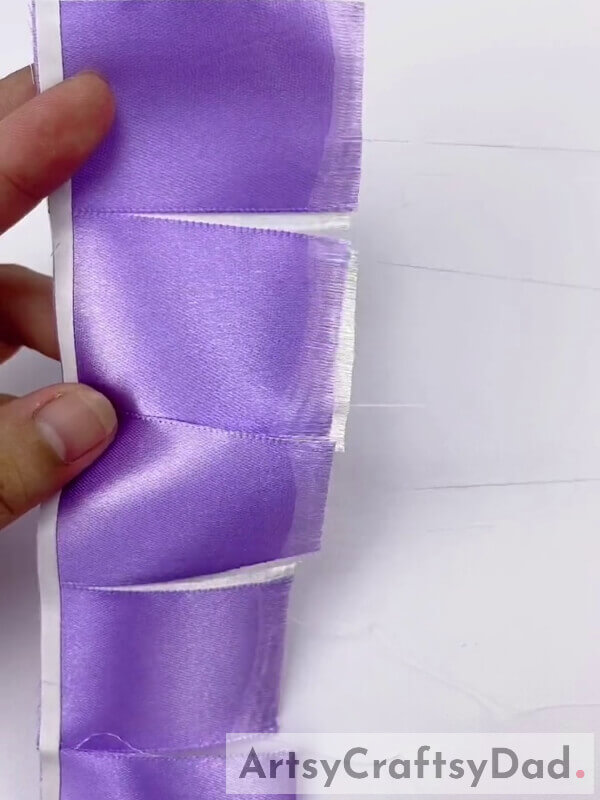
Step #6: Unravel All the Ribbons Until Fully Fringed
Pull out all loose threads to the maximum capacity, until the Purple and White ribbons both blend to become a collection of threads held together by the double-sided tape.
Step #7: Peel out the Paper Covering the Tape
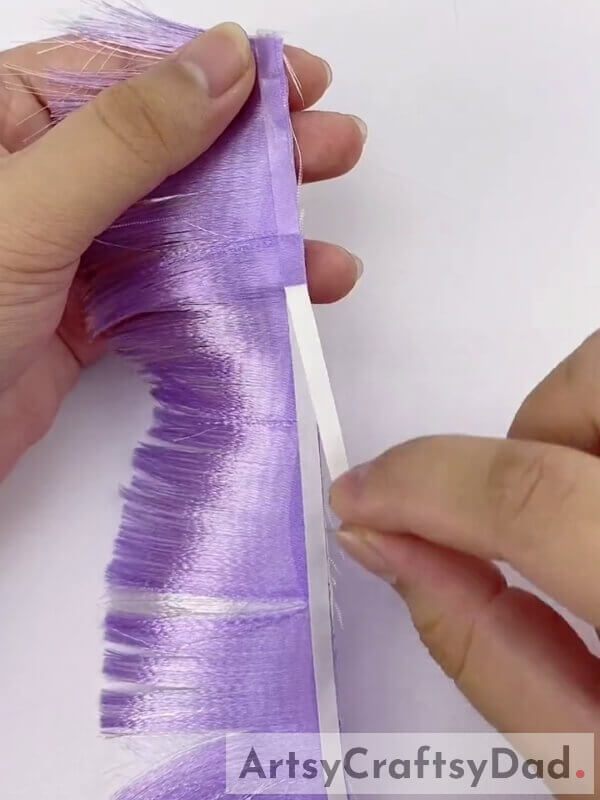
Peel out the paper covering the unused side of the double-sided tape. We will be using this sticky side to attach the colorful frills of the ribbon Pampas to its thin stem.
Step #8: Roll the Fringed Ribbon Around the Thin Stick
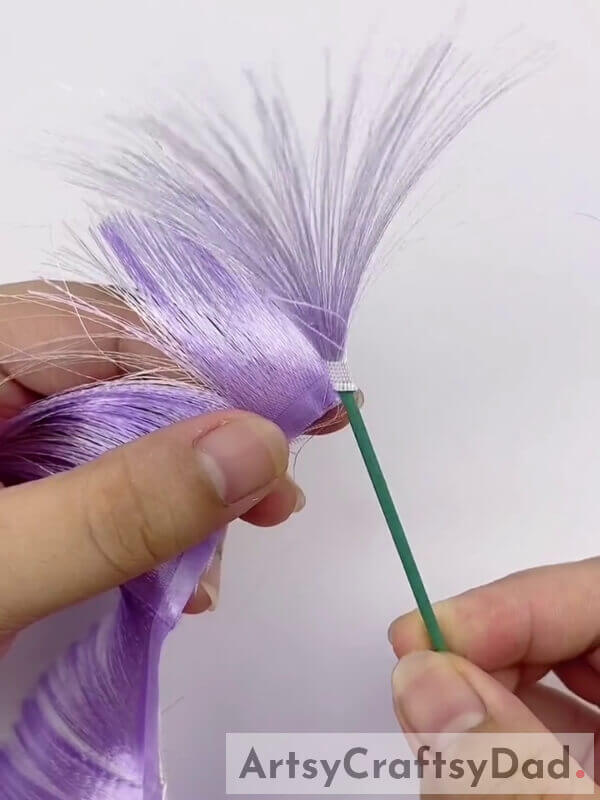
Take the thin stick, which will be used as a stem for the Pampas, and wrap the ribbon around it. The sticky, unused side of the double-sided tape that we just uncovered will stick the plant to the stem. When you roll the ribbon around the stick, make sure it wraps around the same spot.
Step #9: Finish Attaching the Ribbon Pampas to the Stem
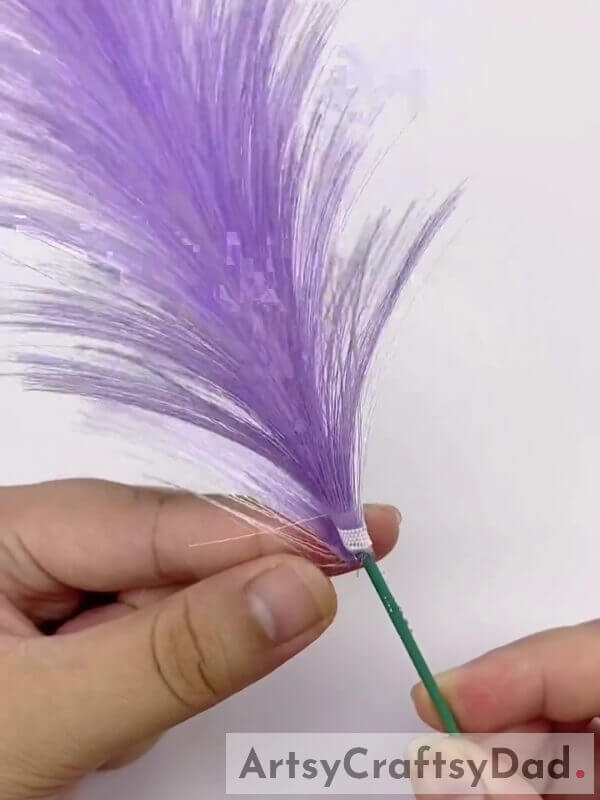
Finish taping the Pampas onto its stem, and your resulting plant should look something like the beautiful Pampas shown in the picture. The fringed ribbons will fan out to give the Pampas plant a sophisticated, fresh appearance.
Step #10: Prepare the Leaves for the Plant
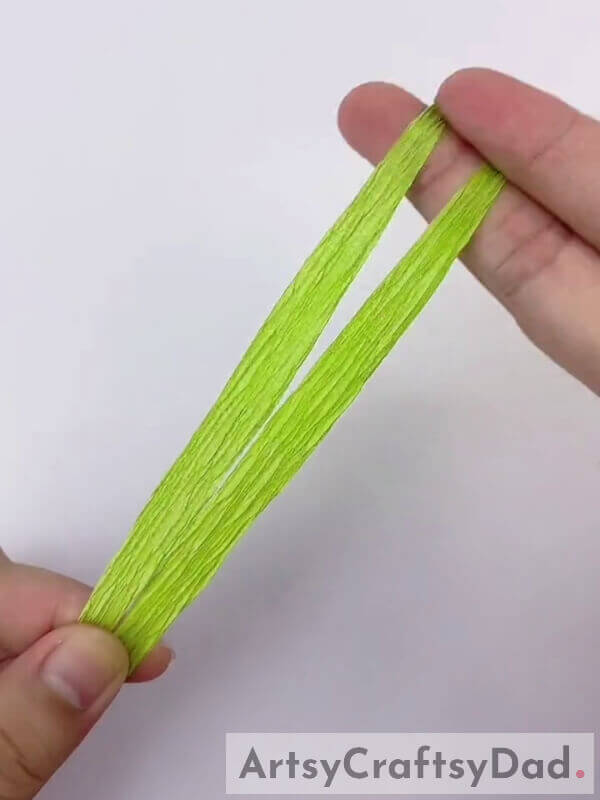
It is now time to work on the leaves. Take Green crepe paper and cut out multiple leaves in a long, thin shape. You may decide the length of the leaves in proportion to the length of the Pampas plant.
Step #11: Tape the Leaves onto the Stem
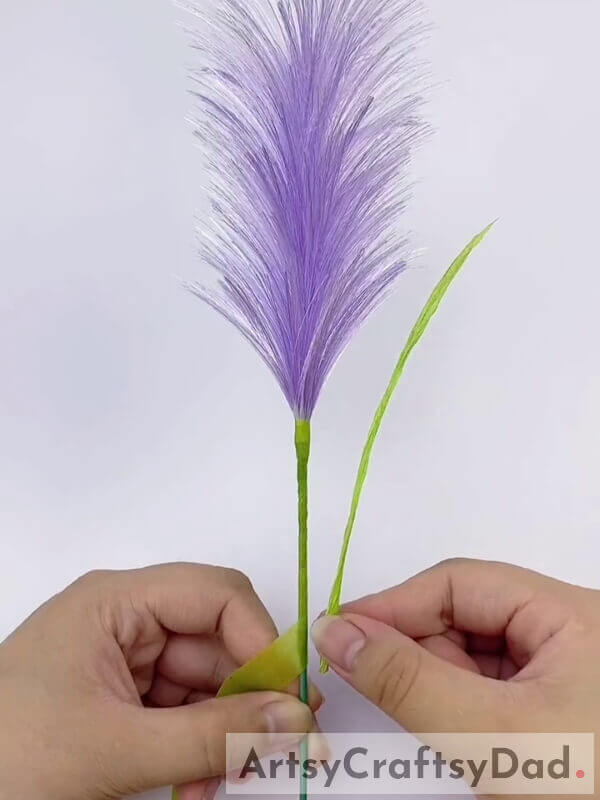
Use the Green paper tape to cover the entire surface of the stem. After that, take one leaf and stick it on the stem at an acute angle pointing upwards.
Step #12: Stick Another Leaf onto the Pampas Stem
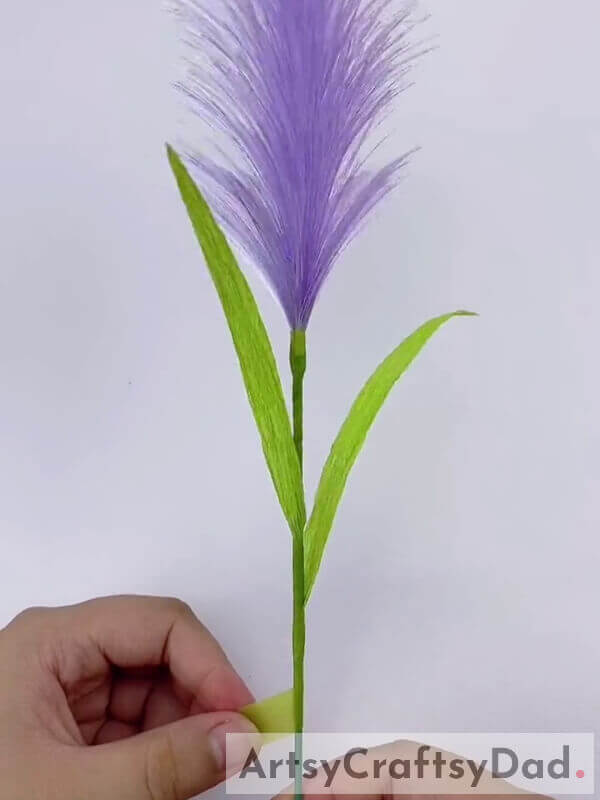
Take another crepe paper leaf that you cut out earlier and attach it in the same way as the first leaf using the Green paper tape. Let it face the opposite direction from the first leaf, as shown in the picture.
Step #13: Complete Your First Pampas Plant
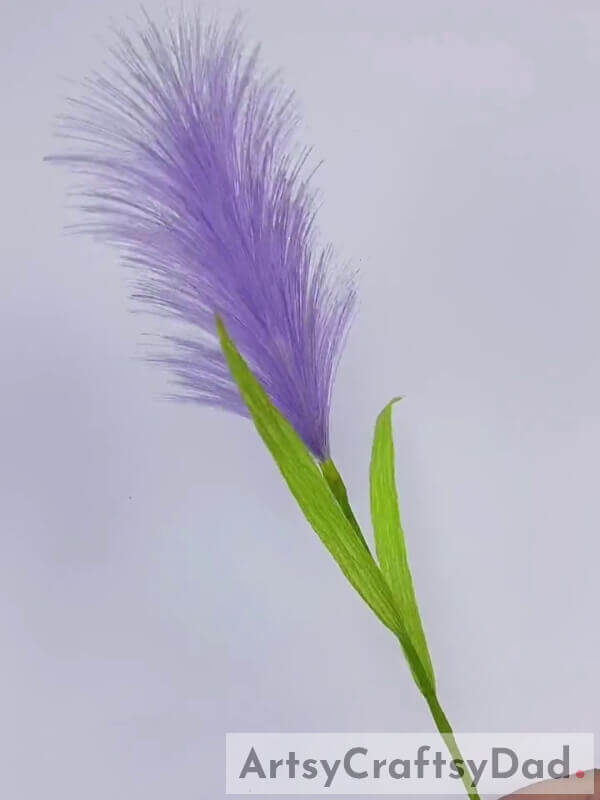
Take a step back and admire your first complete Pampas plant. Following the steps detailed above, you can make as many Ribbon Pampas plants as you want, be it to fill a vase or a bouquet. Feel free to experiment with diverse colors as well.
Your Ribbon Pampas Craft is ready to decorate!
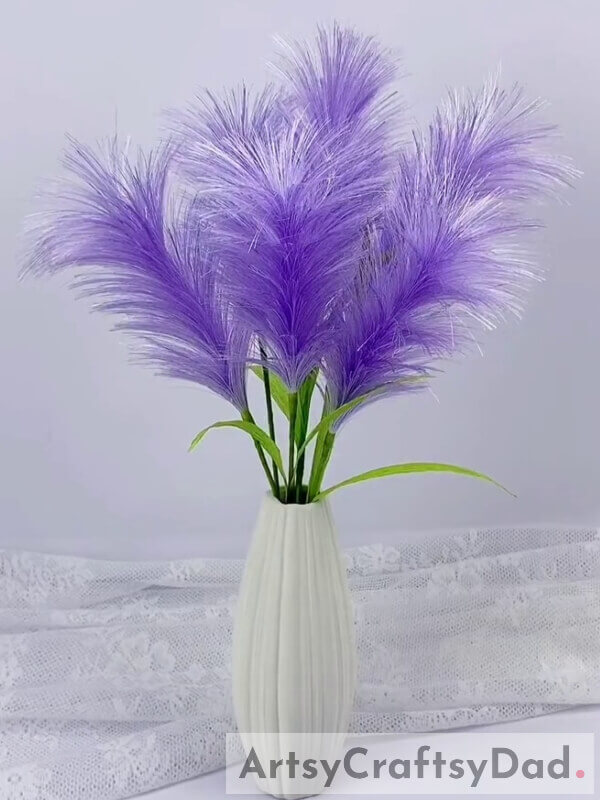
Your Purple Ribbon Pampas Craft Decor is complete and ready to beautify your home. You may place your Pampas plants inside a vase and display them in any room of your choice to give it a gentle, luxurious ambiance. Simple and inexpensive to craft, this decor idea is definitely worth sharing with your friends, colleagues, and near and dear ones.
We hope you liked the tutorial and enjoyed making this gorgeous craft. We value your input so please feel free to share your thoughts, ideas, and opinions with us in the comments section. Check out our website for other Arts and Crafts ideas like this.
Thanks for dropping by our website today!
You May Also Like
- Thread Weaving Umbrella Decor Craft Tutorial
- Ribbons Pom-Pom Flower Craft Tutorial For Kids
- Wool Thread Pom-Pom Flowers Craft Tutorial
- Cardboard Alarm Clock Model Craft Tutorial For Kids
- Diamond Flower Wreath: Fruit Foam Net & Stick Craft Tutorial