This tutorial will show you how to make winter cherry blossom artwork using craft papers and colored clay, This craft is suitable for children of all ages.
Welcome to this winter cherry blossom artwork craft tutorial! In this tutorial, we are going to learn how to make cherry blossoms with snow artwork craft using simple steps. This craft is appropriate for both kids and adults, using simple craft materials and detailed instructions from our tutorial, you can create this craft effortlessly. Let’s get started!
Cherry Blossom Tree Artwork Tutorial For Winter Season
Must Read: Clay Snails On Leaves Craft Tutorial For Kids
Supplies & Tools
- Craft Papers (Light Blue and Red Colors)
- Cardboard Sheet
- Scissors
- Glue
- Acrylic Paint (White and Brown) and Paintbrush
- Sponge Foam Brush
- Red and Yellow Color Clay
Cherry Blossom Tree Instructions
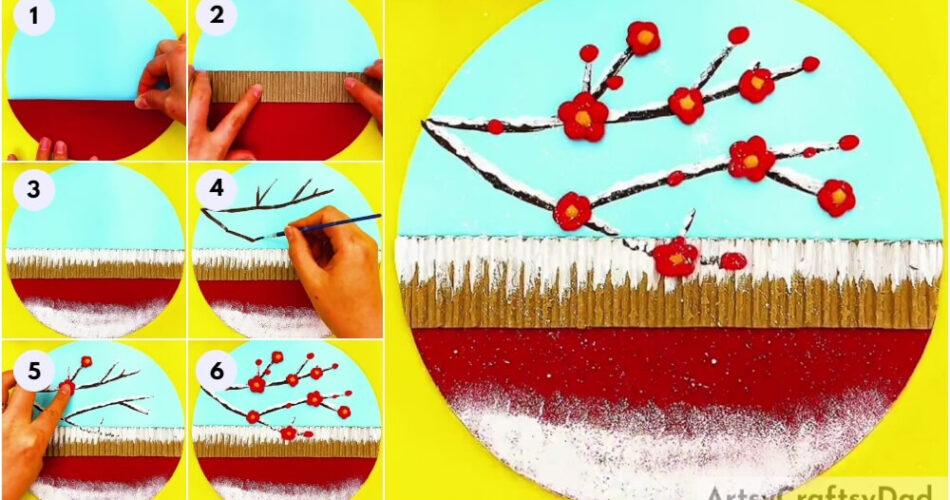
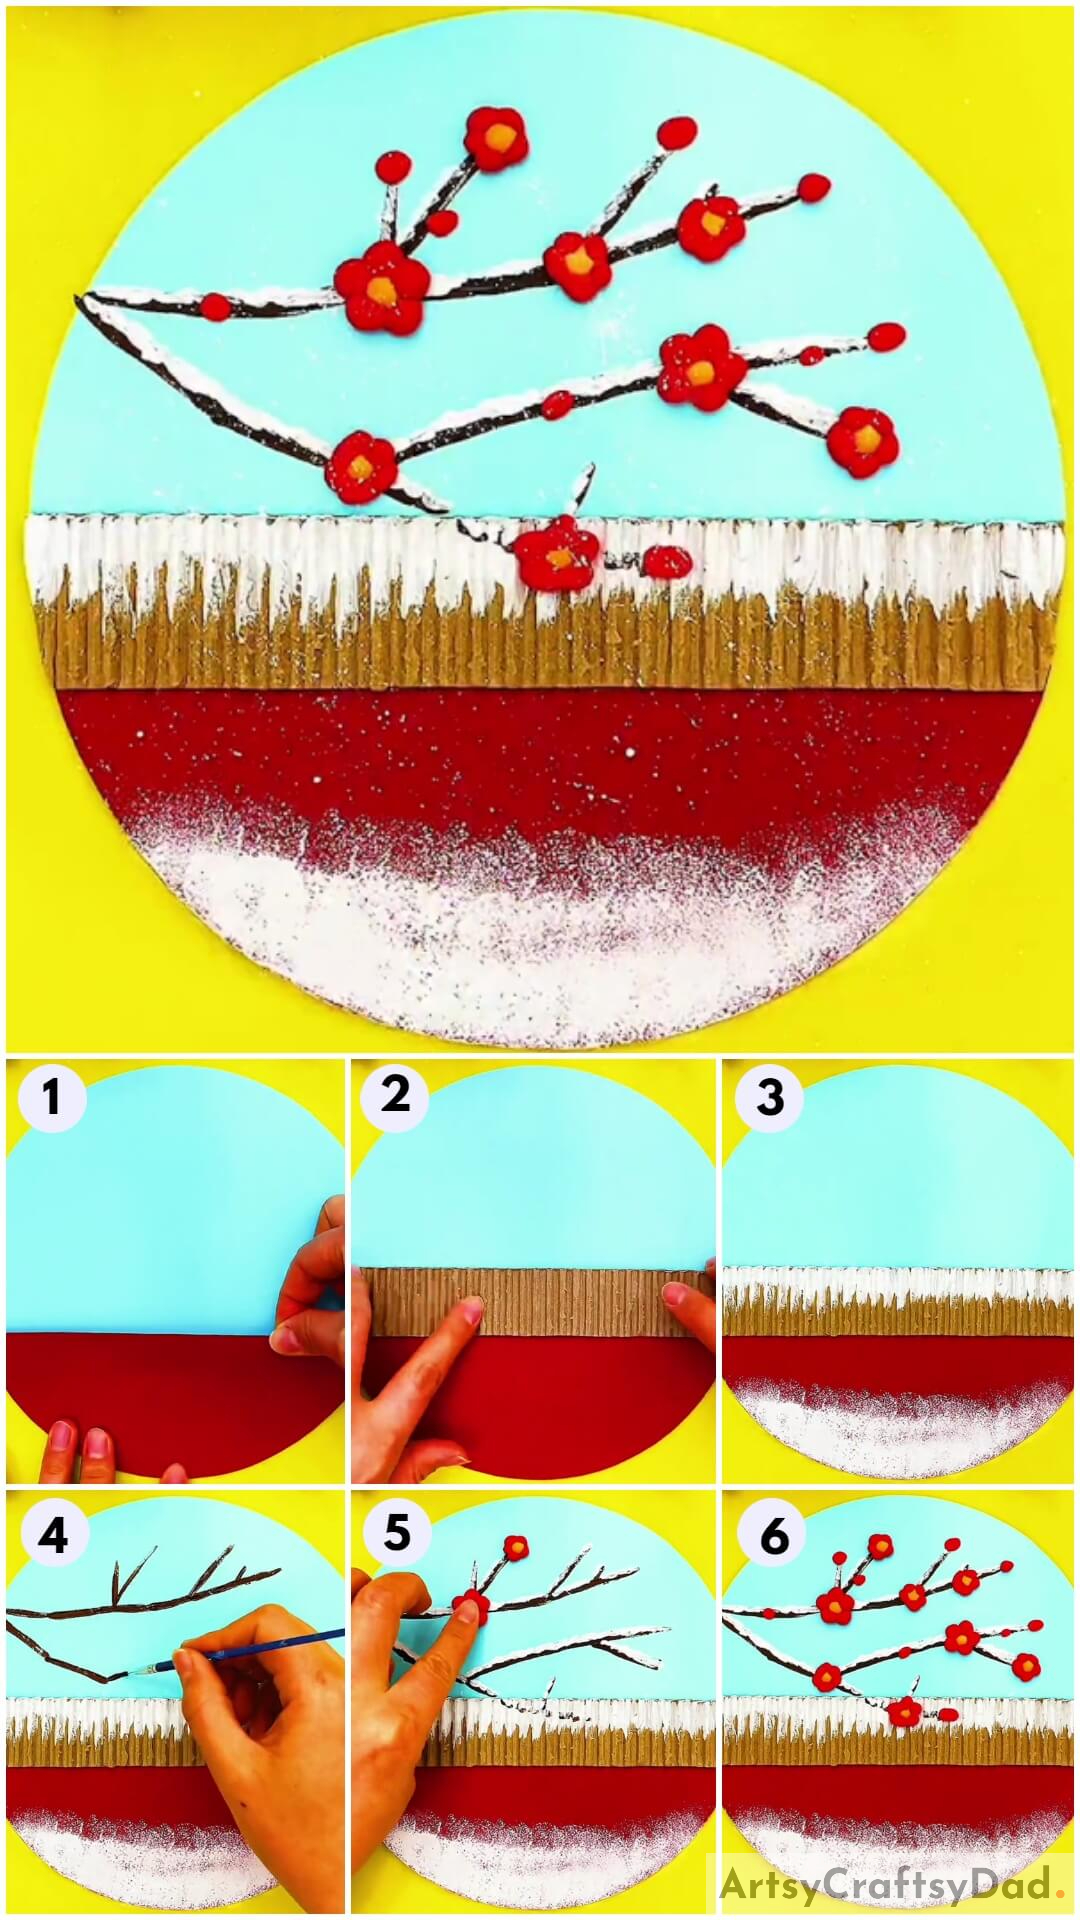
Step #1: Pasting Red Color Craft Paper On Light Blue Color Craft Paper
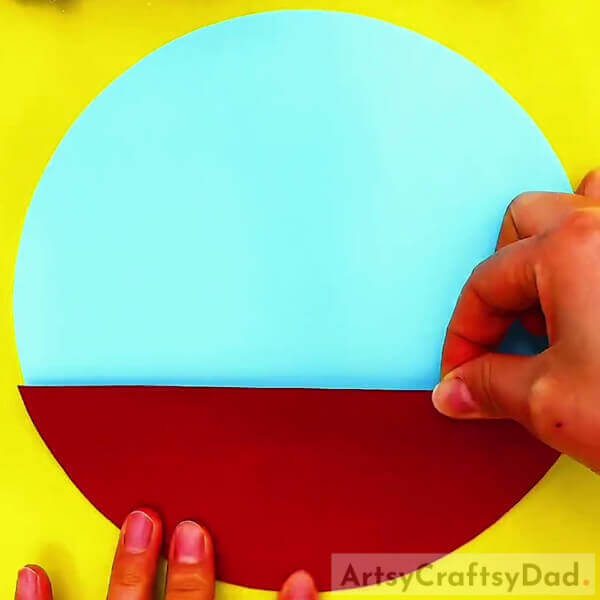
Grab your scissors and cut your light blue and red color craft papers into a circle shape. Then, cut circle-shaped red craft paper into half and paste it at the bottom of your light blue craft paper using glue.
Step #2: Pasting Piece Of Cardboard Sheet Above Red Craft Paper
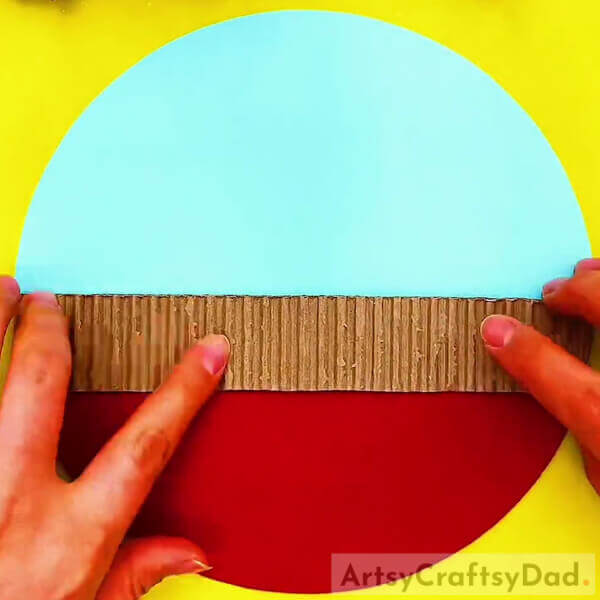
Cut a lengthy rectangle piece of paper from cardboard sheet and peel it. Then take corrugated side of cardboard sheet and paste it above your red craft paper that we paste before to create fence, then cut the extras.
Step #3: Painting Snow Using White Color Acrylic Paint

Take a sponge foam brush and dip it in white-colored acrylic paint. Then, tap it at the bottom of your red color craft paper to create snow.
Step #4: Painting Snow On A Cardboard Sheet
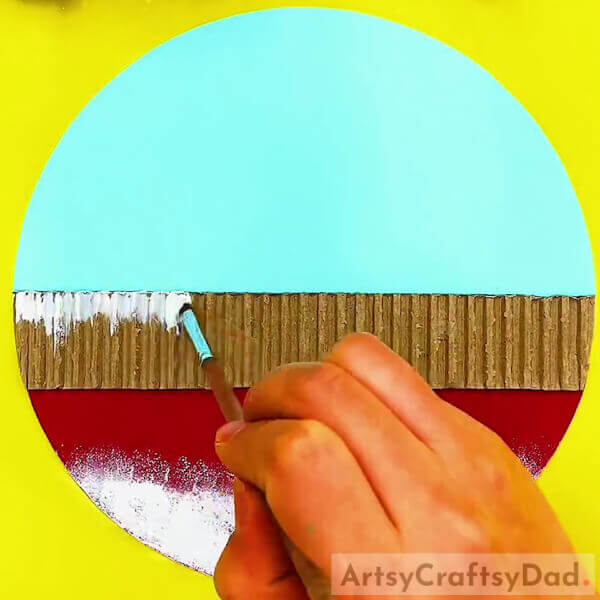
Grab your painting brush and put white paint on it. Then paint the snow at the top of the cardboard sheet to create snow on the fence.
Step #5: Completing Snow Painting
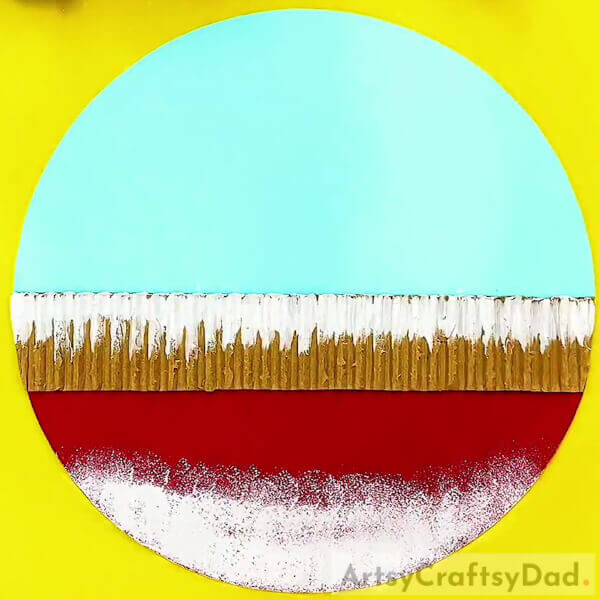
Paint snow on a cardboard sheet from left to right at the top of it. After painting snow, your painting should look like this.
Step #6: Painting Tree Branches Using Brown Colour Paint
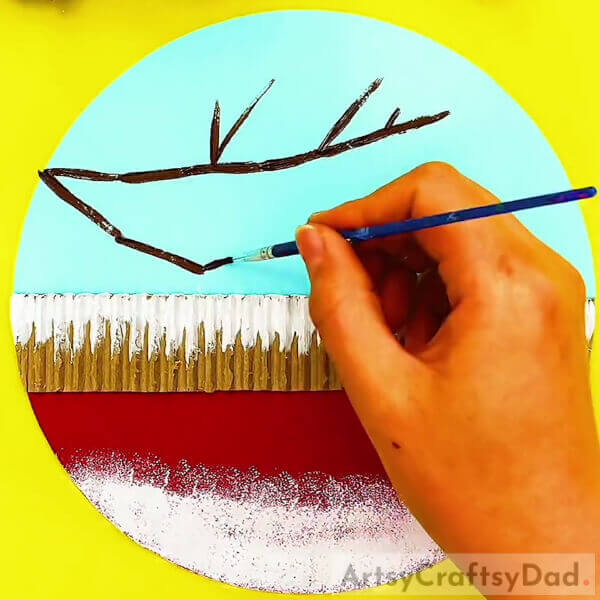
Now, dip your painting brush into brown color paint and paint brown color tree branches at the left of your light blue paper, above fence as shown in the image.
Step #7: Completing Branch Painting
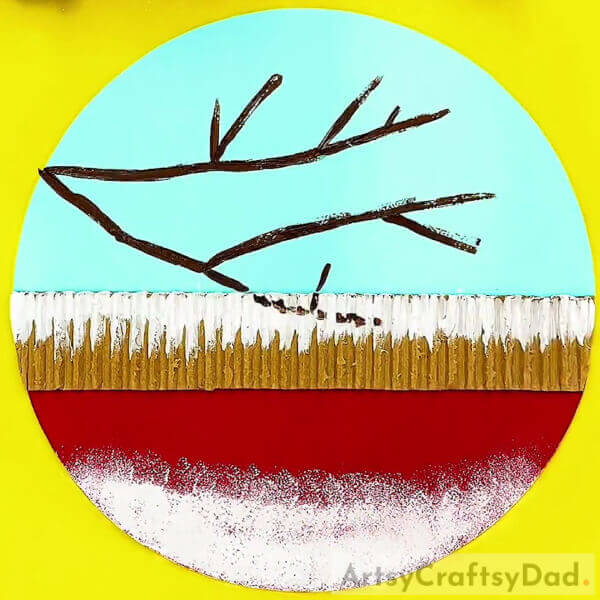
As shown in the image, draw branches using brown color paint and also paint branches on the fence too.
Step #8: Painting Snow On Our Tree Branches
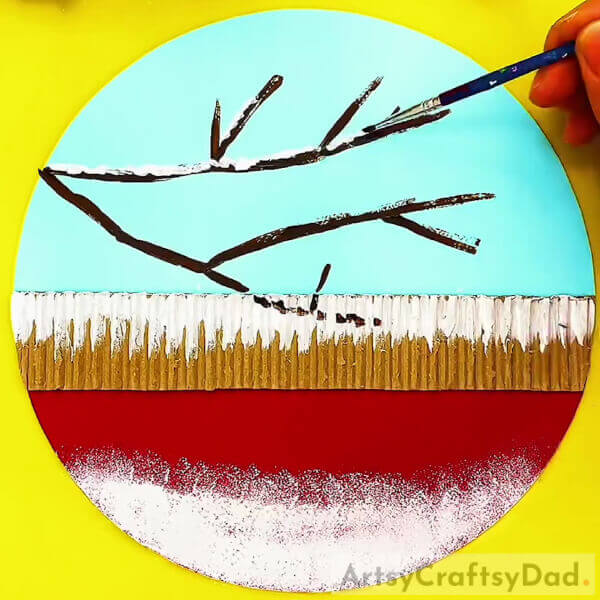
Again, take white color paint on your brush and paint snow on your tree branches as shown.
Step #9: Pasting Flowers Using Red Color Clay
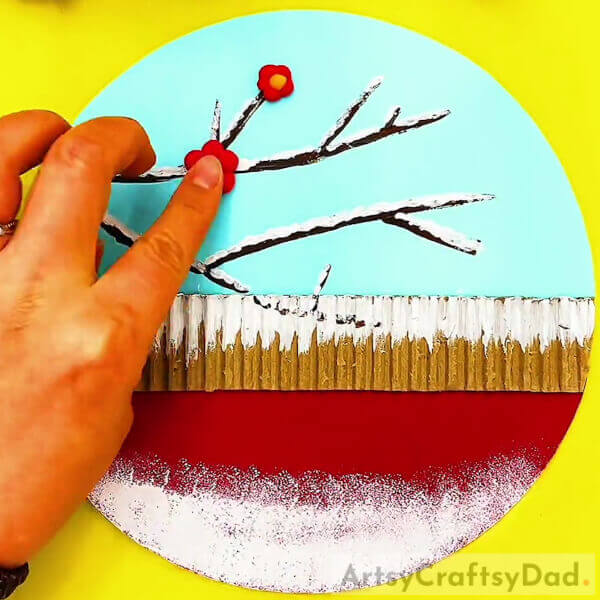
Take very small pieces of red and yellow color clay and roll them into small round shapes. Then closely put 5 pieces on tree branches in a circle shape and Put one yellow clay in the middle of those 5 pieces, then press them with your craft paper to create a flower.
Step #10: Pasting More Flowers On Tree Branches
Then randomly paste more flowers on your tree branches and also put one round-shaped red clay on branches for flower buds.
Step #11: Pouring White Color Paint On Our Craft Paper
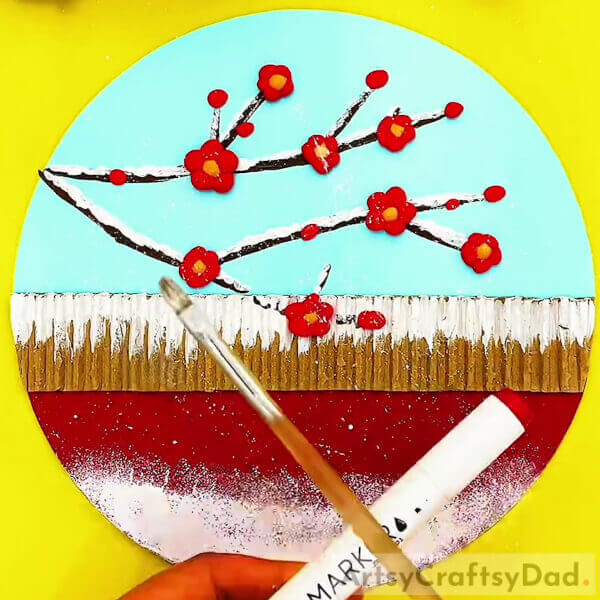
Take white color paint on your painting brush and take any pen or pencil, then tap it with your painting brush on your craft paper as shown in the image.
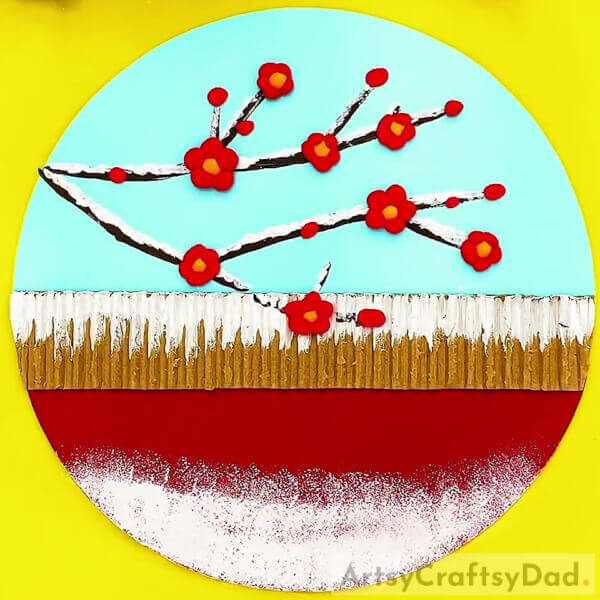
Our Winter Cherry Blossom Artwork Craft Is Ready!
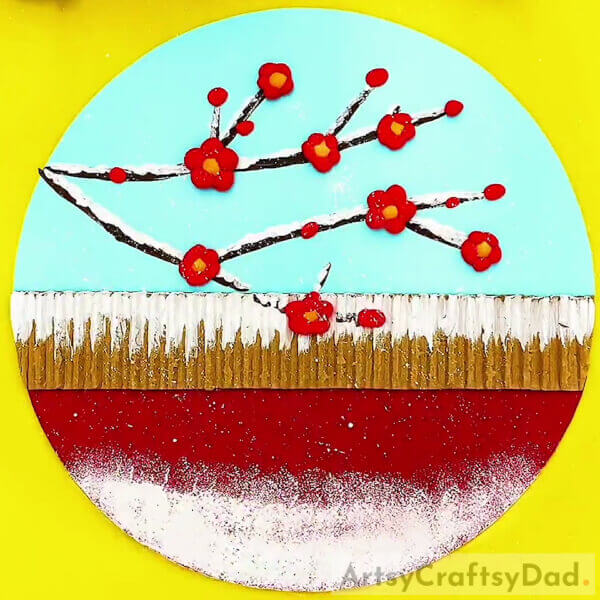
That’s all our adorable winter cherry blossom artwork craft is done! This colorful craft is very easy to create, using a few craft materials and simple steps, create this adorable craft effortlessly.
Hope you like this step-by-step winter cherry blossom artwork tutorial. We like to read your thoughts about our tutorial in the comment section. Visit more craft and art projects on our website.
Thank you for visiting our website.
You May Also Like
- Japanese cherry blossom tree from embroidery
- How to Make Cherry Blossom Flower from Satin Ribbon
- Easy Paper Plate Snowman – Winter Crafts for Kids
- Clay Heart Leaf Tree Craft Tutorial For Kids
- Easy Town Landscape Drawing Tutorial For Kids


