Explore a designer apple paper craft step-by-step tutorial to craft a designer apple paper. This activity is for you to learn a new technique.
This designer apple paper craft step-by-step tutorial welcomes all creative minds. This tutorial will walk you through all the steps to make a designer apple paper. The following tutorial is going to be easy to understand for kids as well as adults. Kids as well as adults, can perform this interesting and fun activity. While doing this activity, children would learn a new method of art and craft. Happy crafting!
Easy Designer Apple Paper Craft Tutorial For Kids
Must Read: Paper Heart Origami Craft Tutorial For Kids
Supplies & Tools
- Red Origami Sheets
- A Pair of Scissors
- Tape
- Green Cloth
- A Wooden Stick
- A Fruit Foam Net
Paper Designer Apple Instructions
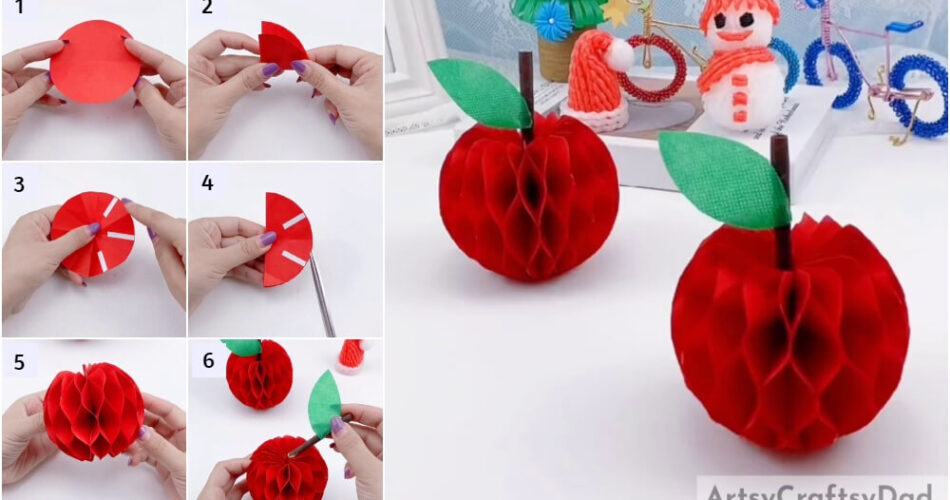
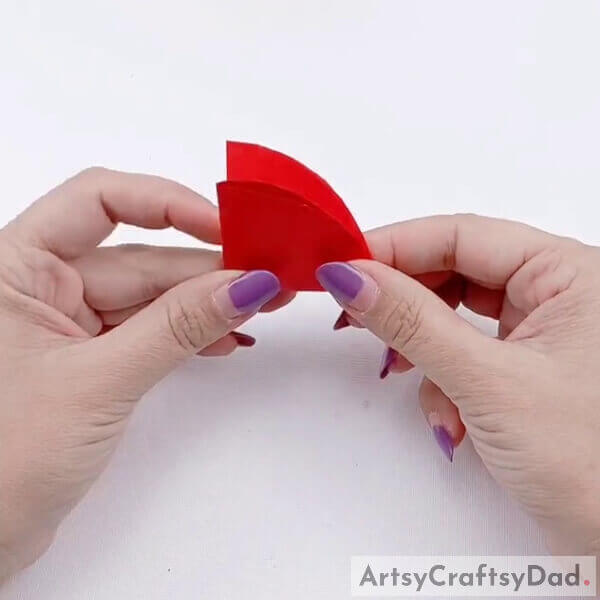
Step #1: Cutting the Origami Sheets
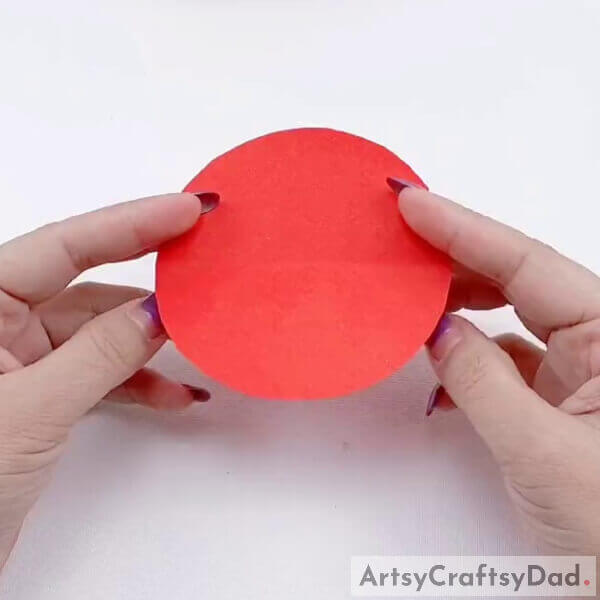
With the help of scissors cut the thirty-six origami sheets into thirty-six circles.
Step #2: Folding It Twice
Fold the circles twice, first fold them in half and fold them again in half.
Step #3: Folding It In Half

After the previous fold, fold the origami again in half.
Step #5: Opening The Folds & Paste Double Sided Tape
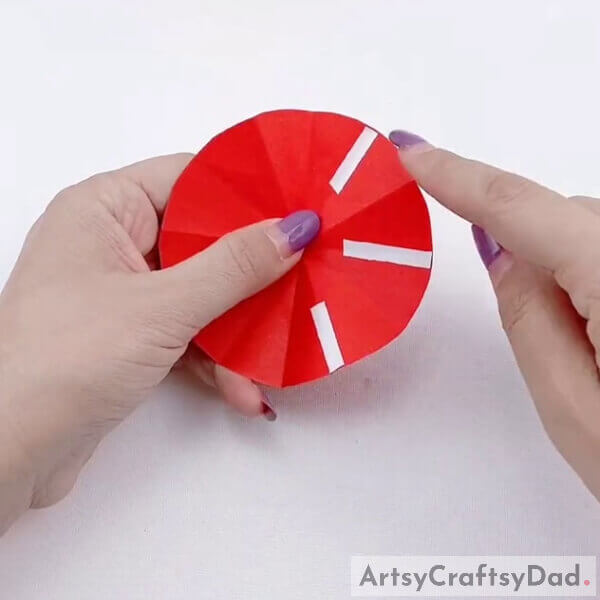
Now, open the folds. You will see the triangular sections are formed. Apply tape on it.
Step #6: Appling Tape On the Other Side
Apply tape on the circles. First, apply three strips of tape on the one-half side. Then, apply two strips of tape on the second half side of the circles. Also, apply a strip of tape on the center of the two strips of semicircles.
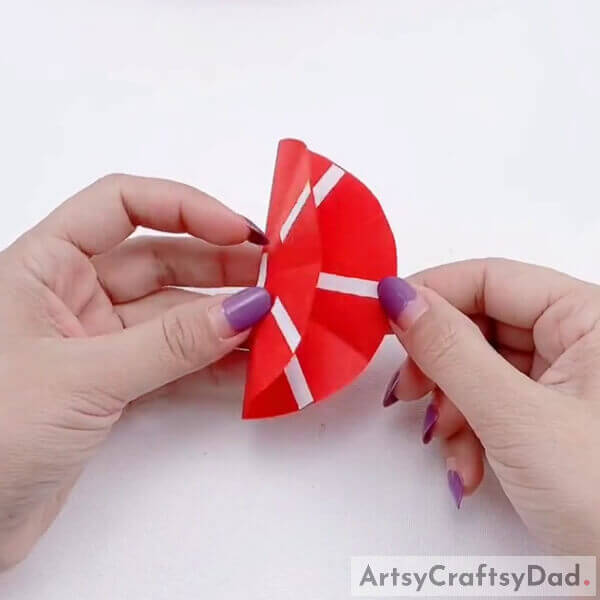
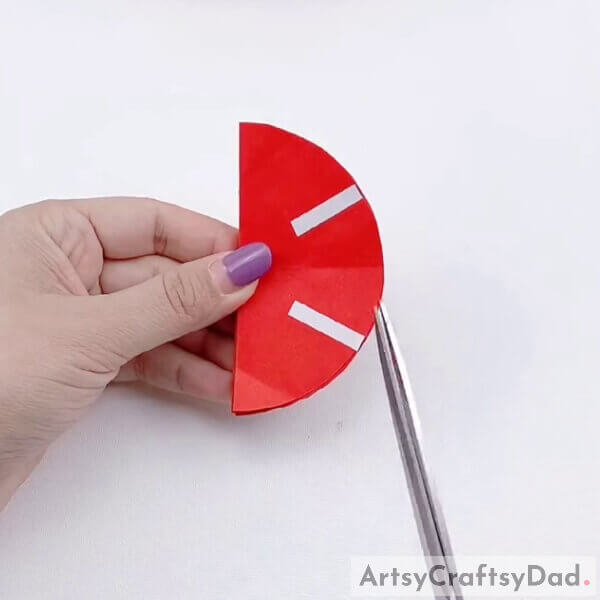
Step #7: Cutting All The Circles In Half
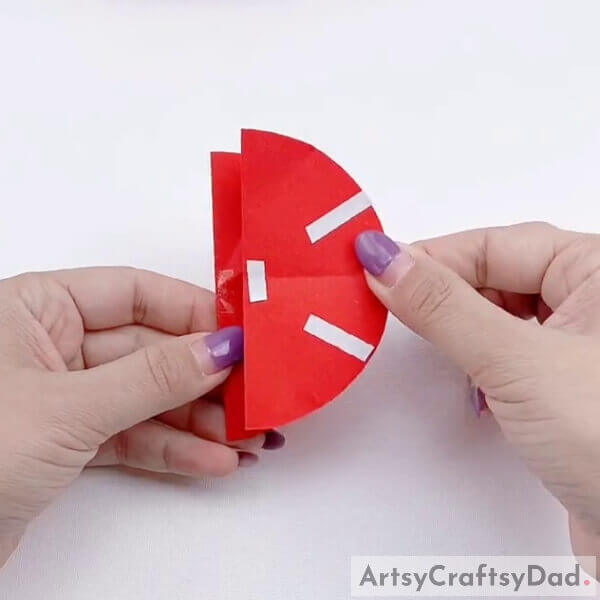
With the help of a pair of scissors, cut all the circles in half.
Step #8: Pasting Alternatively
Now, paste the three strips of semicircle on the two strips of semicircle. Keep repeating this process and paste all the circles in this manner.
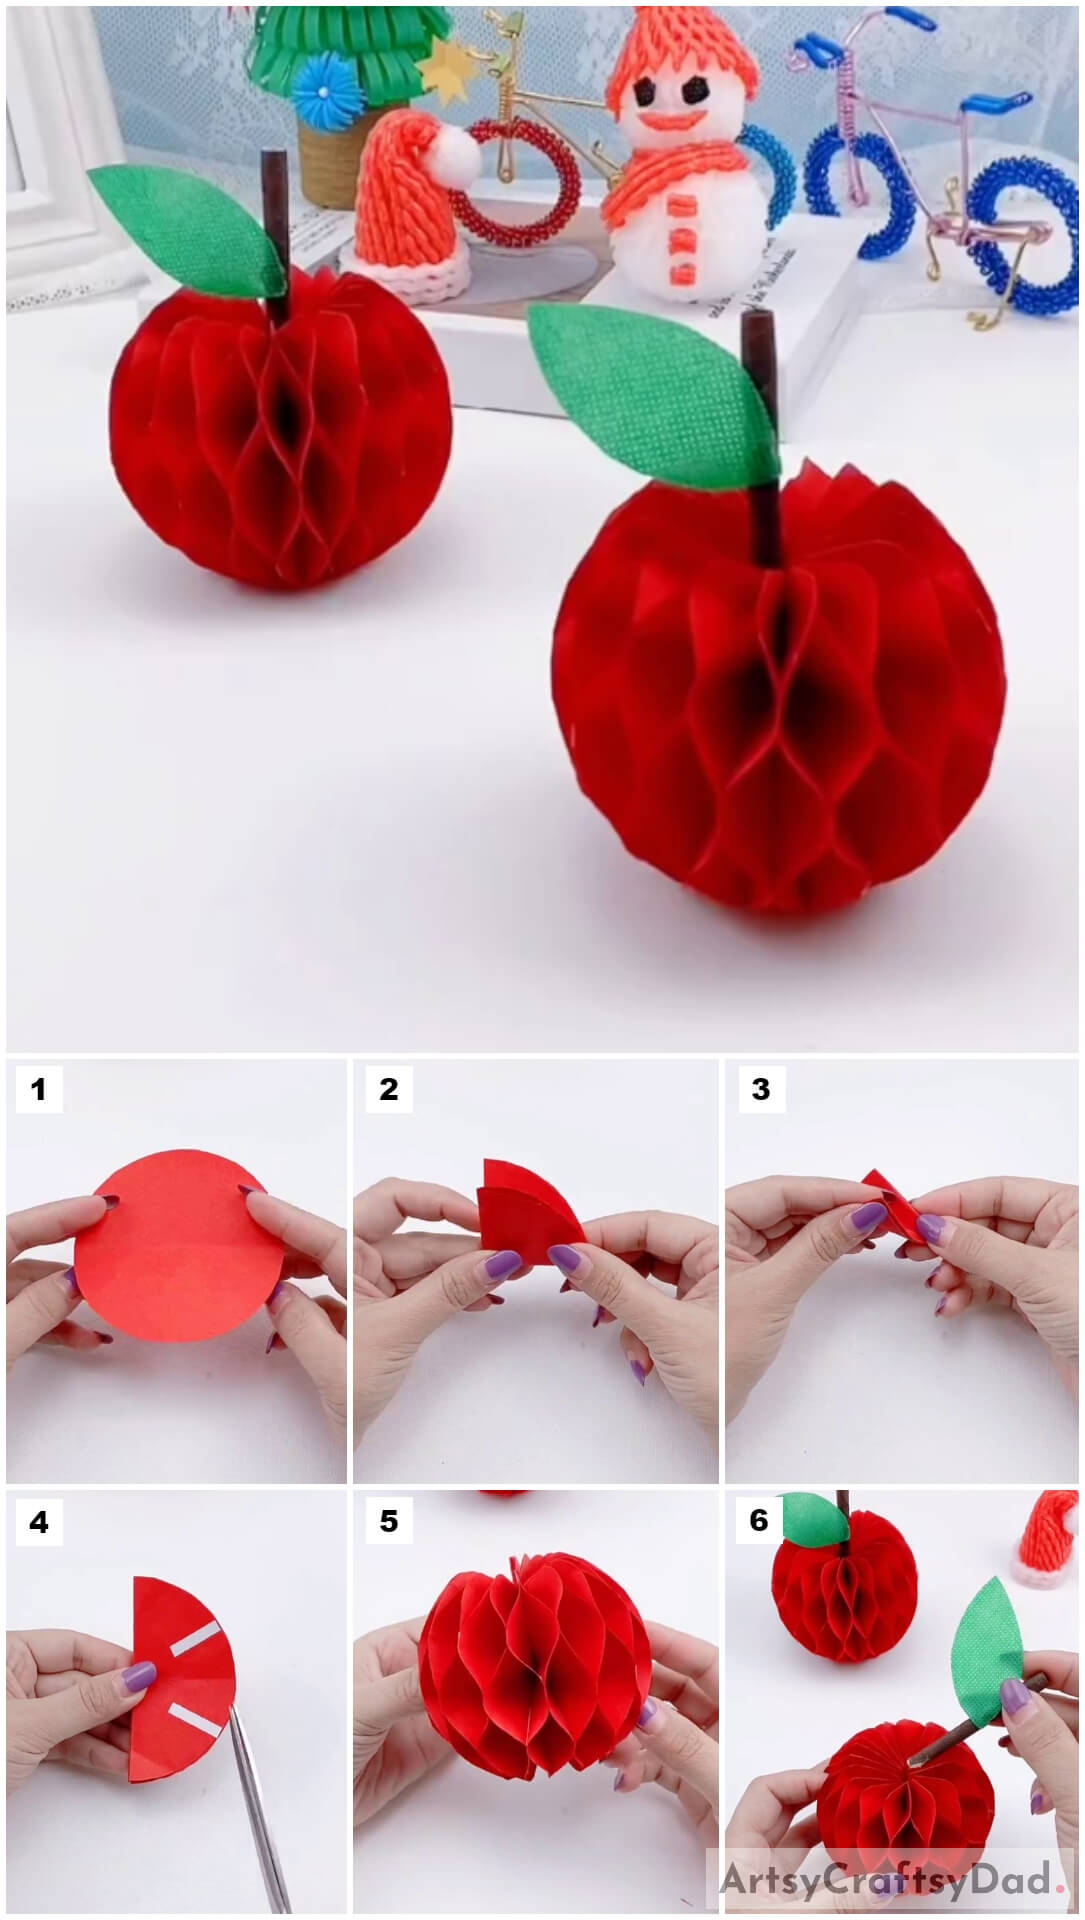
Step #9: Stretching Semi Circles At The End and Paste Them Together
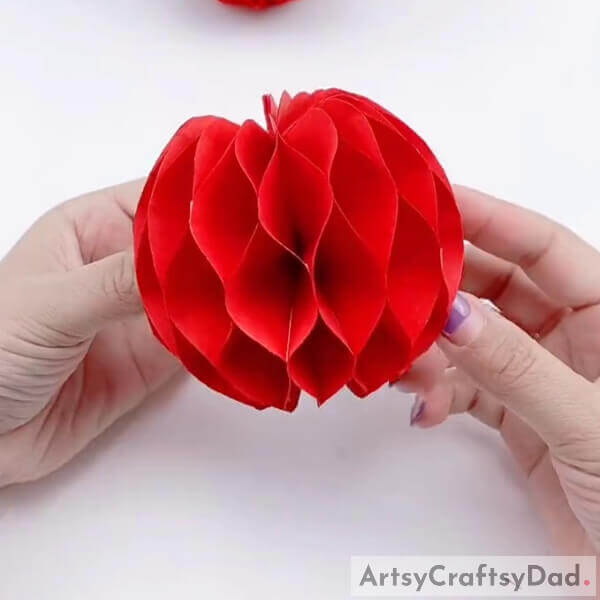
After pasting all the circles, let it dry. Now, stretch the semicircles at the end and paste them together. Look at the given picture for the reference. It should look like the design on the fruit foam net.
Step #10: Pasting Stem & Leaf On Top Of The Apple
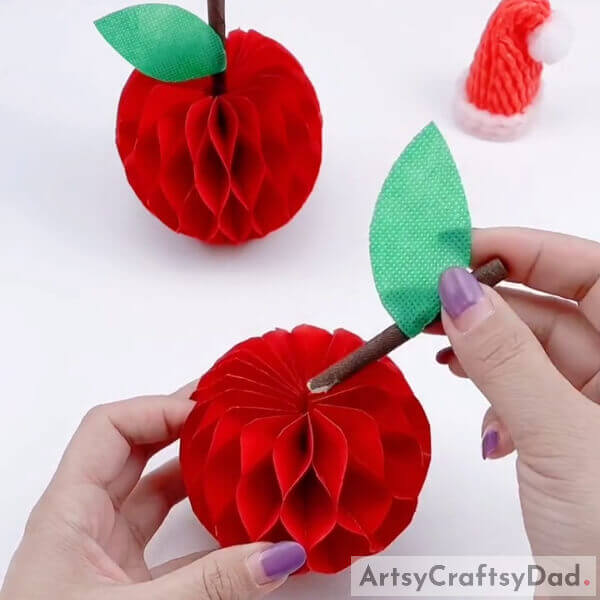
Cut a green cloth into the shape of a leaf. Paste the leaf on the wooden stick. Further, paste this wooden stick on top of the designer apple paper.
Designer Apple Paper Craft Tutorial – For Kids
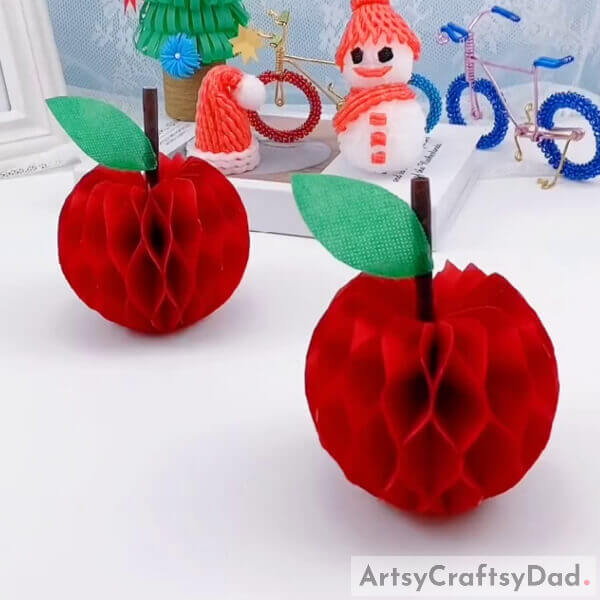
With this, you have come to the end of the designer apple paper craft tutorial. This was a good learning experience for kids as they learned about origami folding and crafting a designer apple by the folding method. This craft idea would teach students about origami folding skills, they will end up polishing their skills. This must be fascinating for kids of 9-14 years of age. This designer apple looks adorable. Kids have learned about a new mechanism from this tutorial. They can use it as room decor.
Hope you liked this designer apple paper craft step-by-step tutorial. Do not forget to share your comments and inform us about your experience. Make sure to revisit our website!
Thanks for visiting our website.
You May Also Like
- Fruit Foam Net Apple Craft Tutorial For Kindergartners
- Paper Flower Garden Craft Tutorial For Kids
- Cardboard Alarm Clock Model Craft Tutorial For Kids
- Colorful Hedgehog Paper Craft Tutorial For Kids
- Ribbon Blooming Flower Craft Tutorial For Kids


