Discover the joy of creating your very own beautiful clay flower garden with this beginner-friendly craft tutorial. Learn step-by-step techniques to mold and shape clay into vibrant and lifelike flowers that will add a touch of nature to any space. Unleash your creativity as you explore various colors and textures to personalize your garden. Join us on this artistic journey and start crafting your own stunning clay flower garden today!
Are you looking for a creative and fun craft project to try? Look no further than the beautiful clay flower garden craft tutorial for beginners. This tutorial will guide you step-by-step through the process of creating stunning clay flowers that can be used to decorate your home or gift to loved ones. Whether you are a seasoned crafter or just starting, this tutorial is perfect for all skill levels. So gather your supplies and let’s get started on this delightful and rewarding craft project.
Flower Garden Craft Made With Clay For Beginners
Must Read: Beautiful Clay Flower Vase Craft Tutorial For Beginners
Supplies & Tools
- Colored Clays (Yellow, Dark Green, Light Green, White, Dark Orange, Light Orange, Black, and Red)
- Acrylic Glass
- Glue
- Clay Tools
Clay Flower Garden Craft Instructions
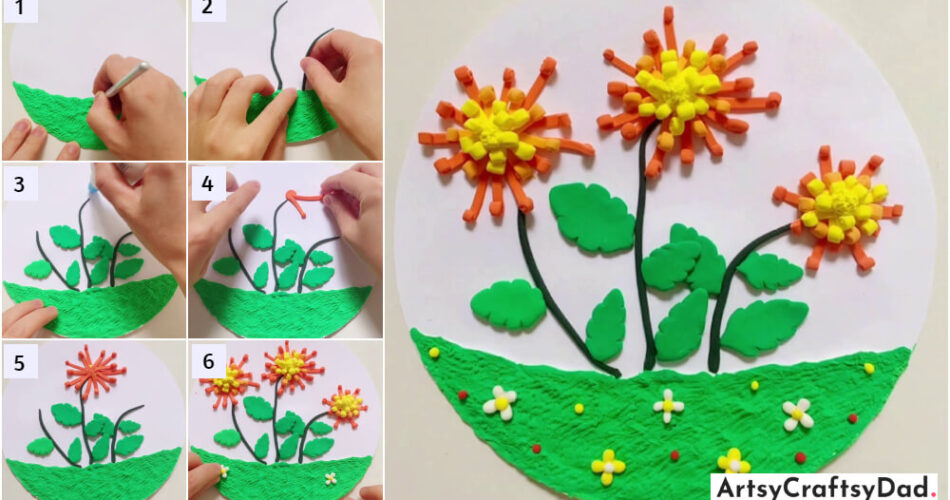
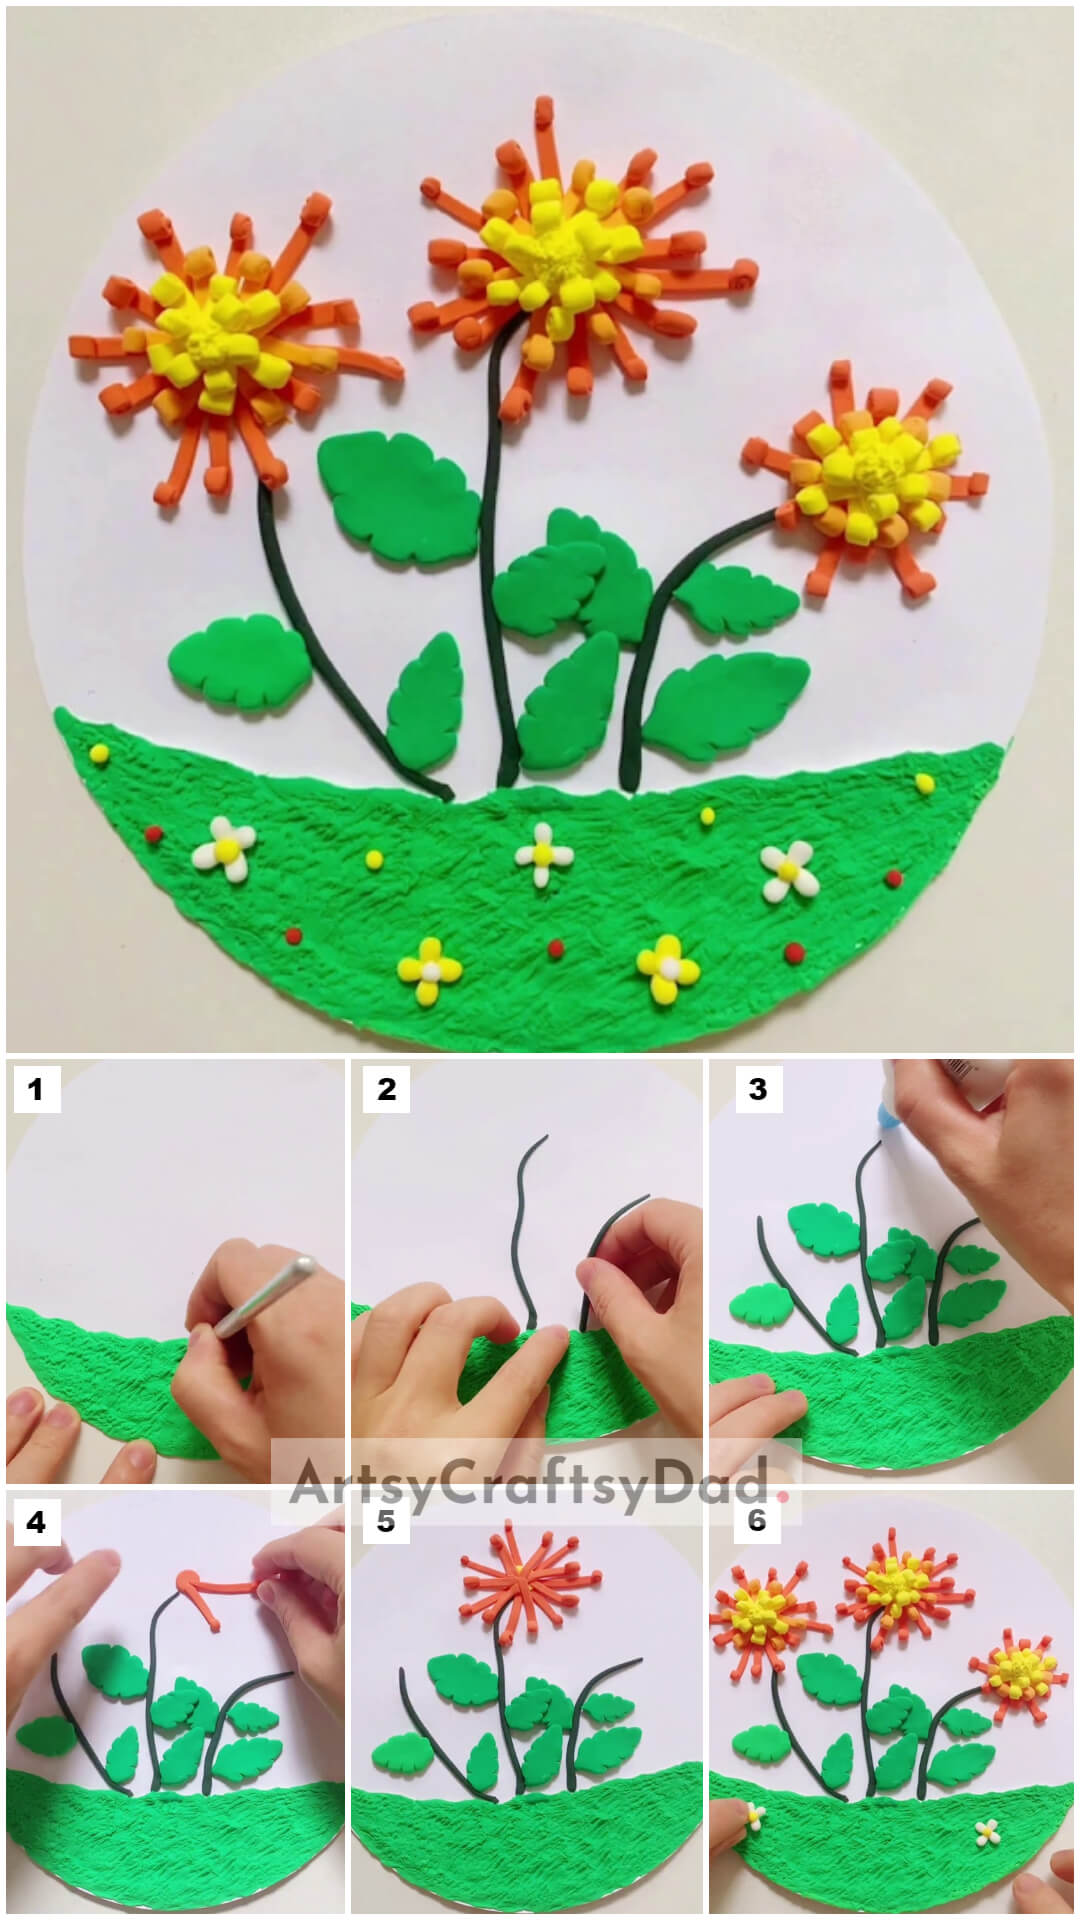
Step #1: Taking a Light Green Color Clay
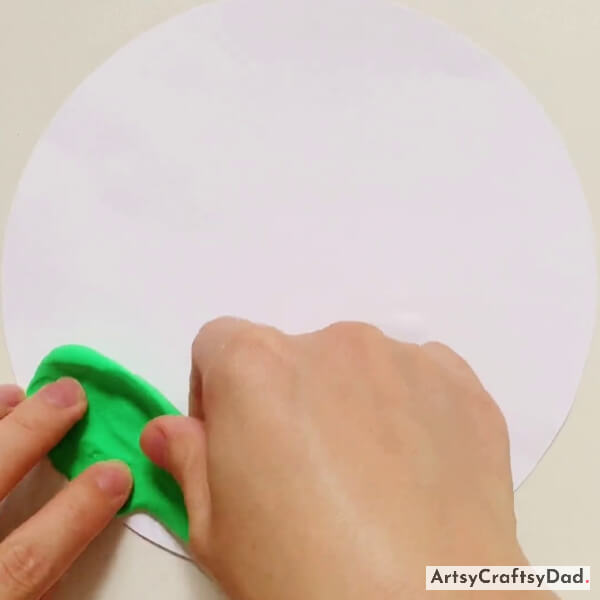
Take a white round paper board as a base. Now, take a piece of light green color clay & paste it on a white circle board.
Step #2: Making Patterns on Clay Using Clay Tool
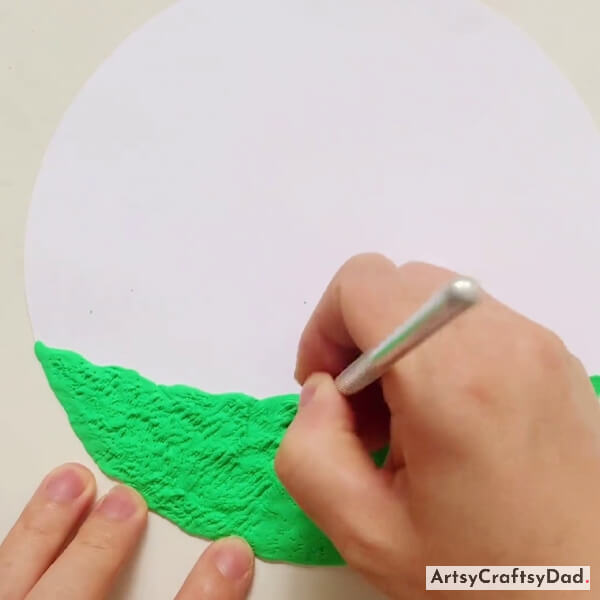
Make a bushy grass on green clay by using a clay tool.
Step #3: Making Stems for the Flowers
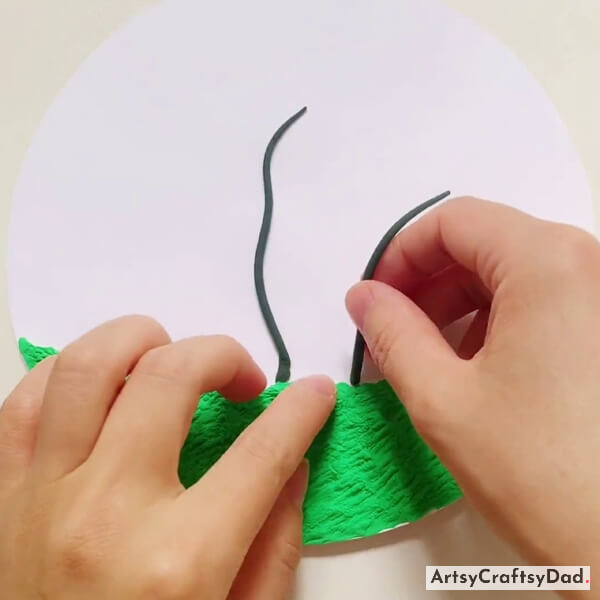
Now, take dark green color clay and make two stems of flowers in thin lines & Paste these stems over the top of the grass.
Step #4: Making Patterns of Leaf
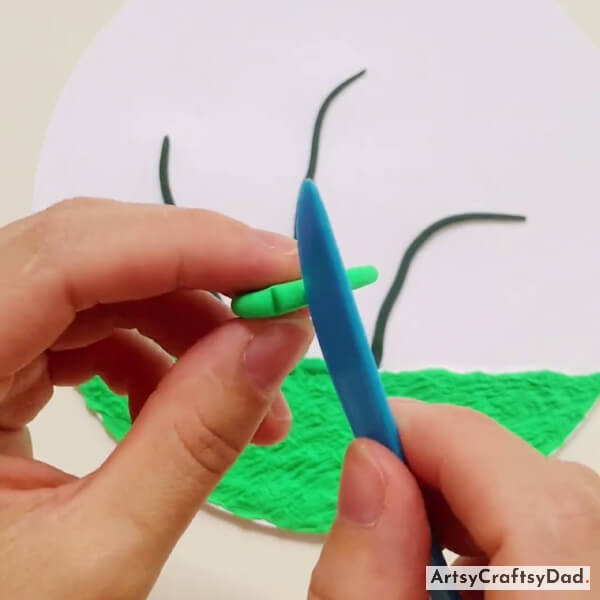
Take a piece of light green color clay. Now, give it the shape of a leaf and make patterns on the edge of the leaf by using a plastic knife.
Step #5: Pasting Leaf on Stem

Paste the green leaf on the stem
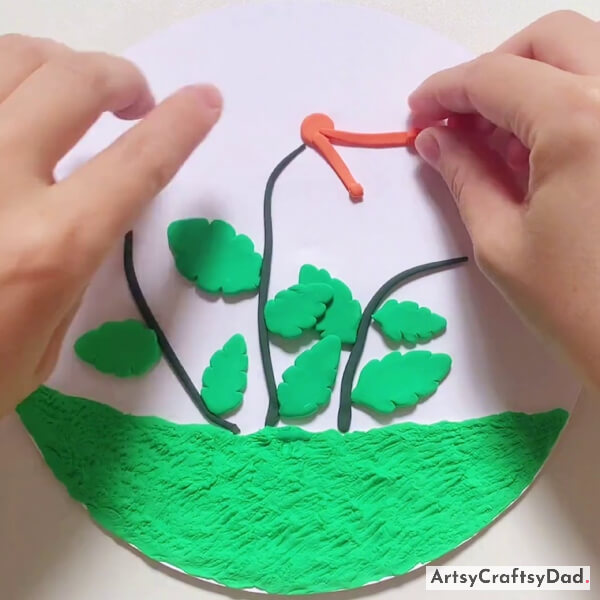
Step #6: Pasting More Leaves
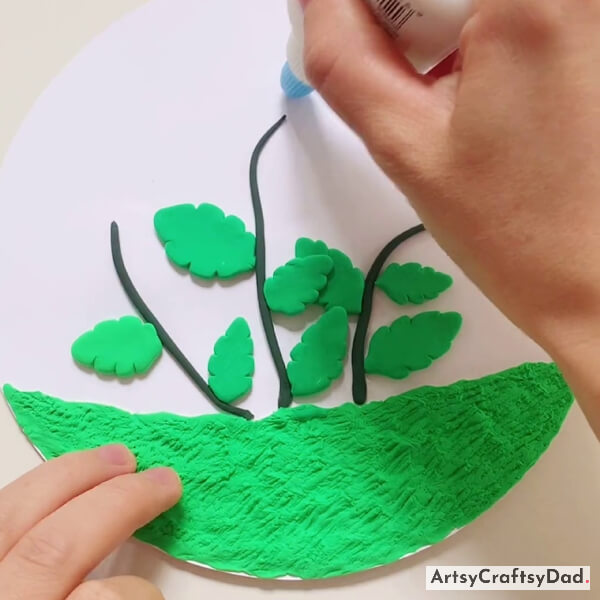
Make leaves by following the same process and paste all the leaves over three stems of flowers. Now Apply glue over the top of the middle stem.
Step #7: Pressing Dark Orange Clay Thin Line

Take a small piece of dark orange color clay & then press the dark orange color clay thin line by using acrylic glass.
Step #8: Rolling Clay Tip Inside
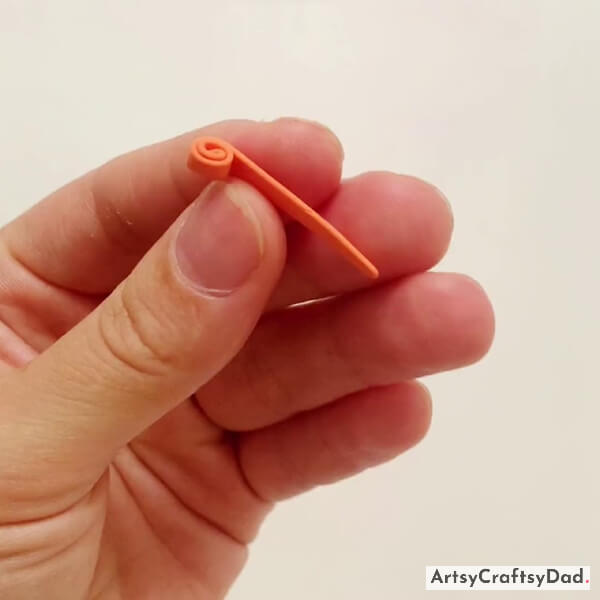
After pressing the clay, roll it toward the inside from the tip of the clay.
Step #9: Making Flower Petals
Make petals for flowers from dark orange color clay and paste them on the top of the middle stem.
Step #10: Completing Dark Orange Clay Petals
Now, paste some more rolled dark orange clay petals at the top of the middle stem in a circular manner. Now, take yellow color clay make a circle shape, and paste it over the dark orange clay in a circular pattern, and then we paste some rolled dark orange clay petals over the yellow circle with the help of glue.
Step #11: Pasting Light Orange and Yellow Clay Petals
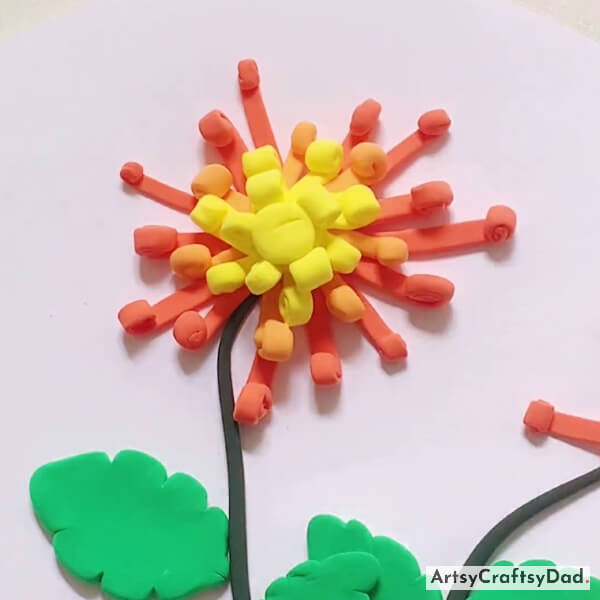
Now, take some light orange color clay and make small petals & paste it over the dark orange clay petals. Now follow the same process to make yellow color clay petals but smaller than light orange clay petals and paste them over the light orange clay petals in a circular manner. After that take a small yellow color clay circle and paste it above the center of the yellow color clay petals.
Step #12: Making Patterns on Yellow Clay Circle
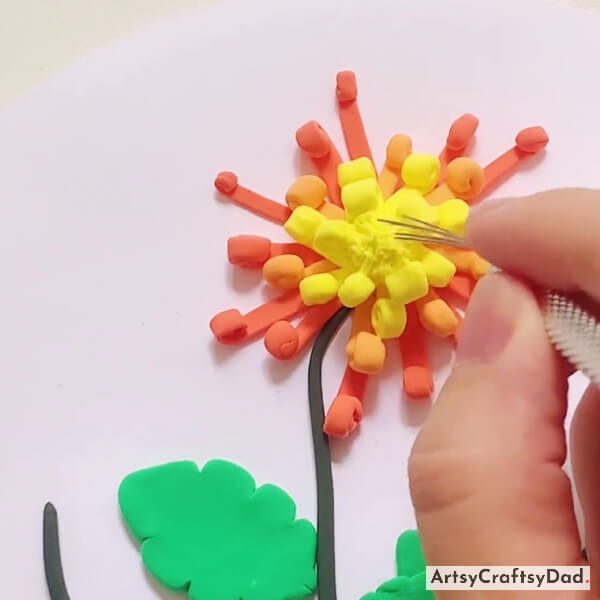
Now make some patterns in the middle of the yellow clay circle as shown in the image above. Here our flower is ready.
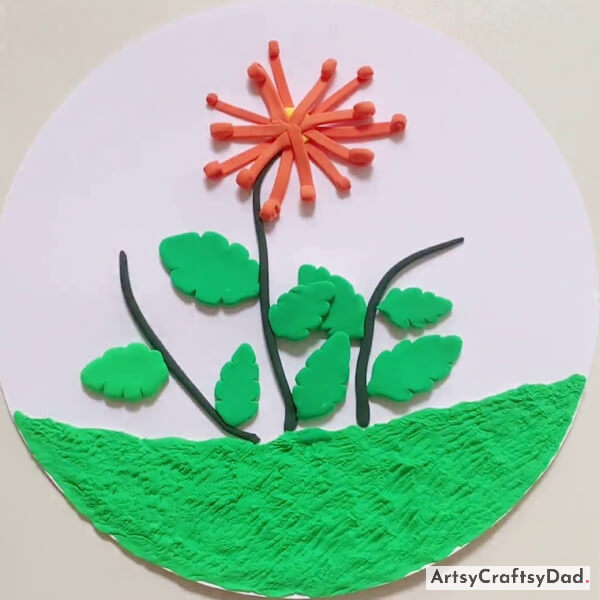
Step #13: Making Small White Flowers
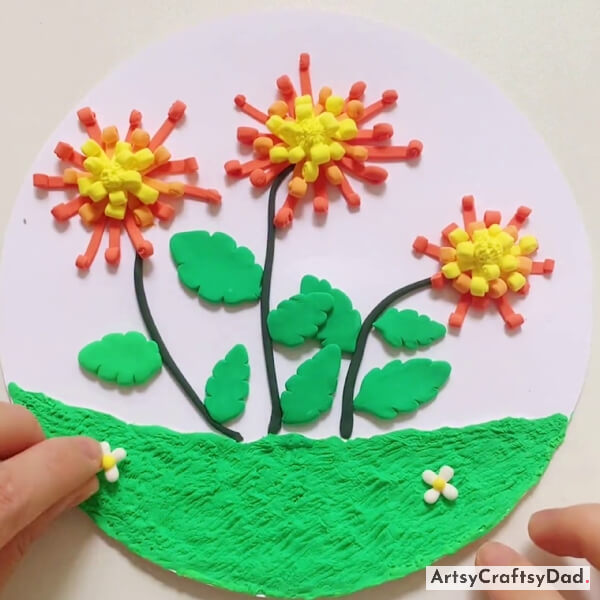
Make two more flowers by following the same process. Now by using white color clay make two small white flowers and using yellow color clay make two little circle shapes and put them over the middle of the white flowers one by one.
Tadda! Our Clay Flower Garden Craft is Ready!
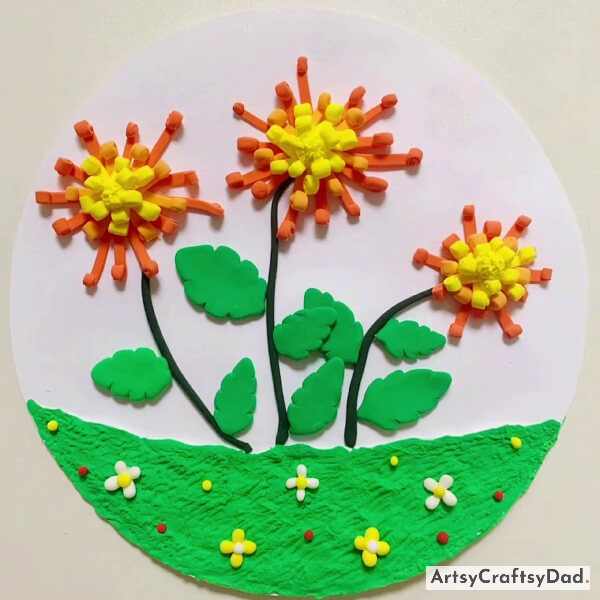
Decorate grass by using different colored clays as shown in the above figure. Now our final masterpiece flower garden craft is ready. Hurry, our beautiful clay flower garden clay craft is ready now.
This step-by-step craft tutorial for kids offers a fun and engaging way for children to explore their creativity and develop their fine motor skills. By following the instructions, children can create their realistic-looking flower garden clay craft. This tutorial not only provides a hands-on activity but also encourages imagination and problem-solving skills. Whether it is done as a solo project or as a group activity, this craft tutorial is sure to bring joy and satisfaction to children as they proudly display their finished clay art. Don’t forget to drop your feedback in the comment section because we love to hear your thoughts about our crafts. Keep visiting our site in the future also.
Thank you for visiting us!
You May Also Like
- Red Flower Garden With Bees Clay Craft Tutorial
- Clay Flower Garden With Bees Craft Tutorial
- Chrysanthemum Flower Garden: Clay & Pistachio Shells Craft Tutorial
- Clay Chicks In Garden Craft Tutorial
- Paper Flower Garden Craft Tutorial For Kids


