Learn how to create a beautiful clay cherry and paper cup pot with leaves craft with this easy-to-follow tutorial. This DIY project is perfect for beginners and will add a touch of charm to any home décor. Get creative and explore your artistic side with this fun and engaging craft.
Hey, are you searching for something creative? Clay cherry & paper cup pot with leaves craft is a fun and creative way to explore your artistic side using simple materials like clay and paper. This tutorial will guide you through the step-by-step process of creating beautiful cherry clay art pieces that can be used as decorations or gifts. Whether you are a beginner or an experienced crafter, this tutorial offers easy-to-follow instructions and tips to help you create stunning clay cherries that will impress everyone. So, grab your supplies, and let’s dive into the exciting world of cherry clay art & crafts!
Clay Cherry With Paper Cup Pot & Leaves Craft
Must Read: Clay Snails On Leaves Craft Tutorial For Kids
Supplies & Tools
- Clay
- Paper Cup
- Green Color Paper
- Black Pen
- Scissors
- Glue
Clay Cherry & Paper Cup Pot With Leaves Tutorial
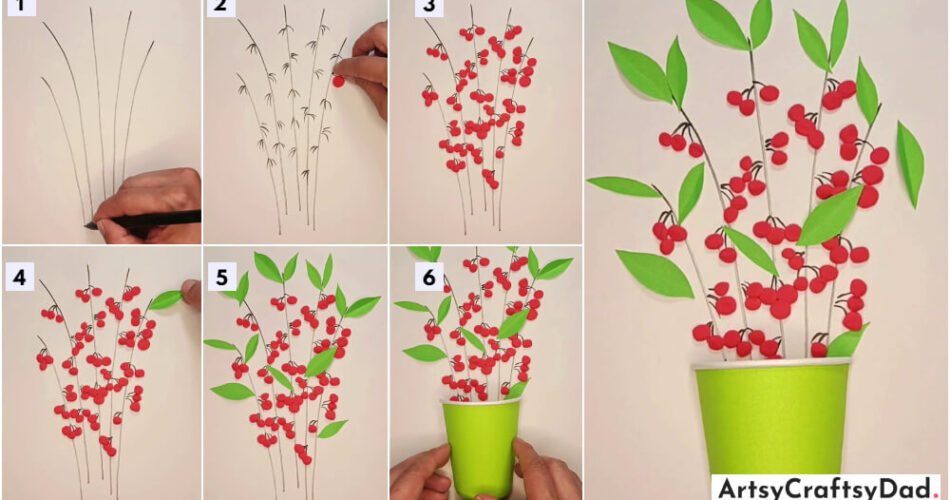
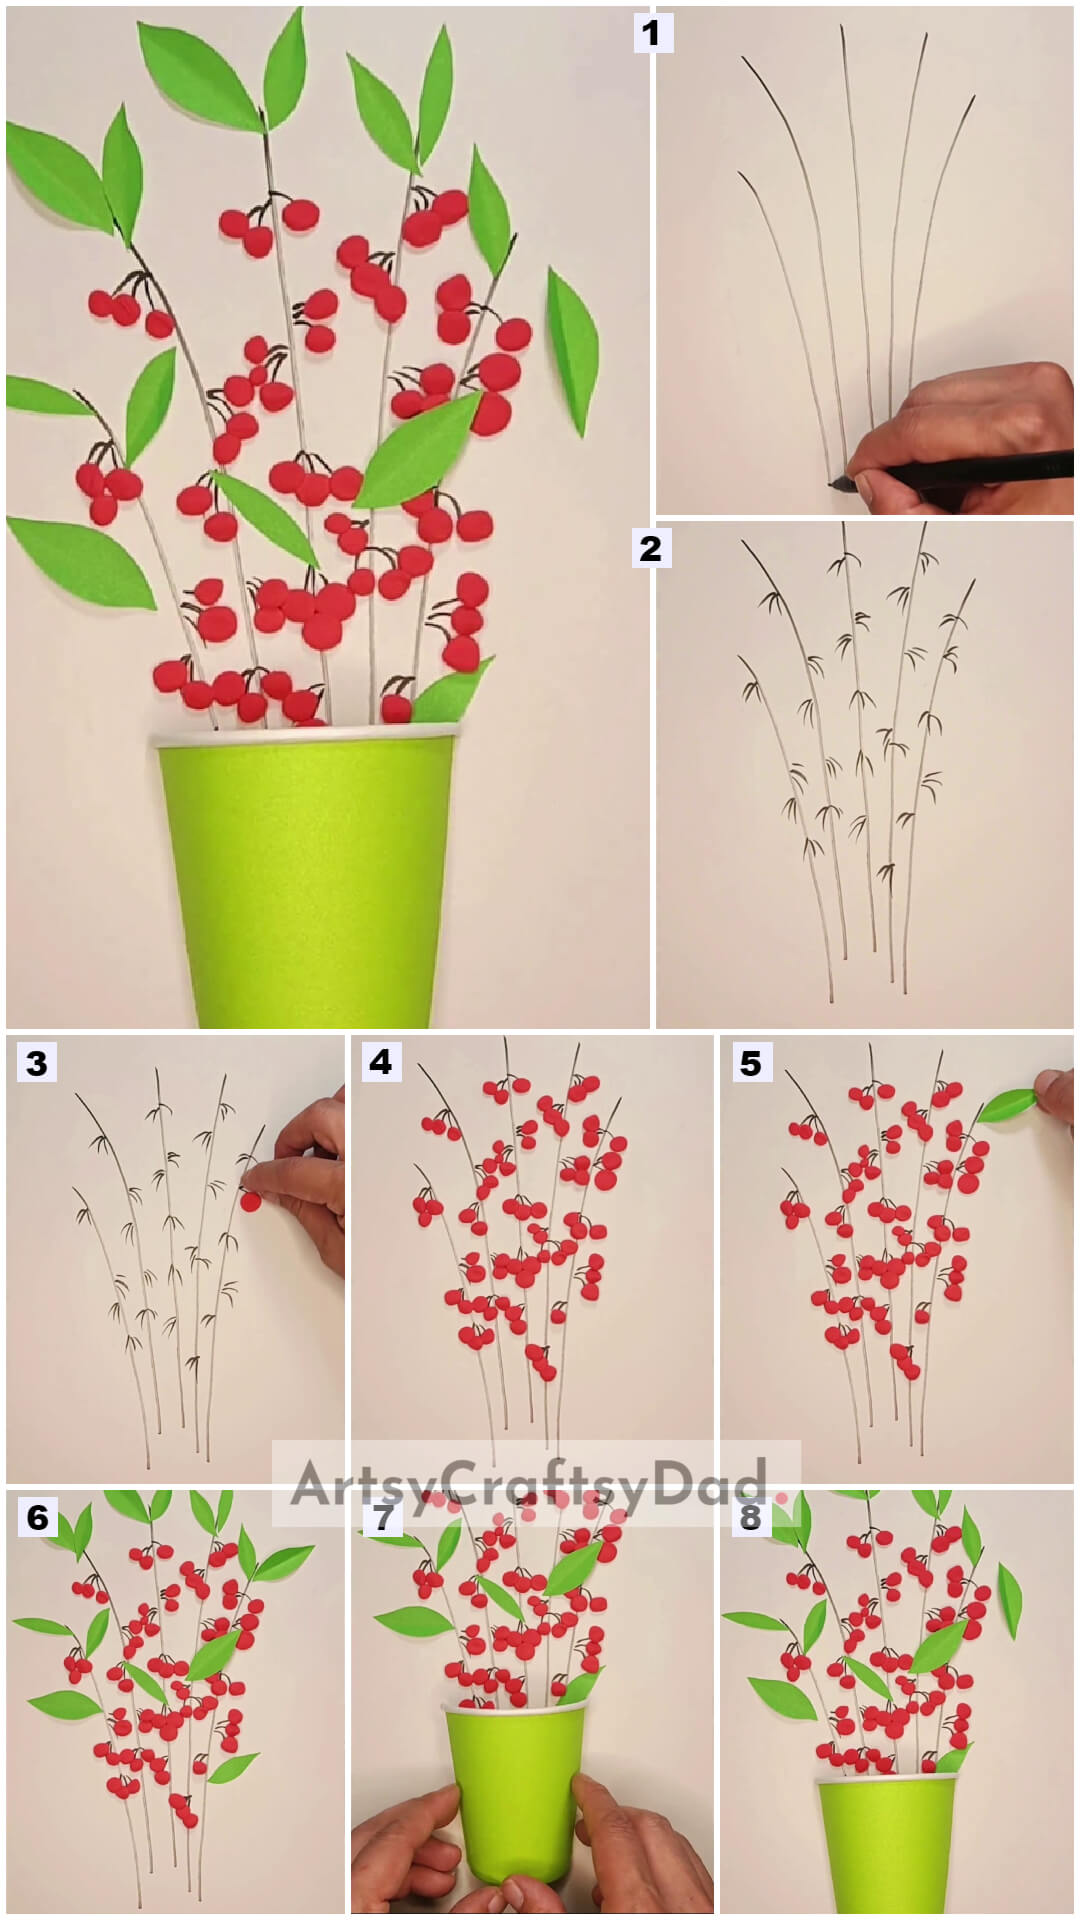
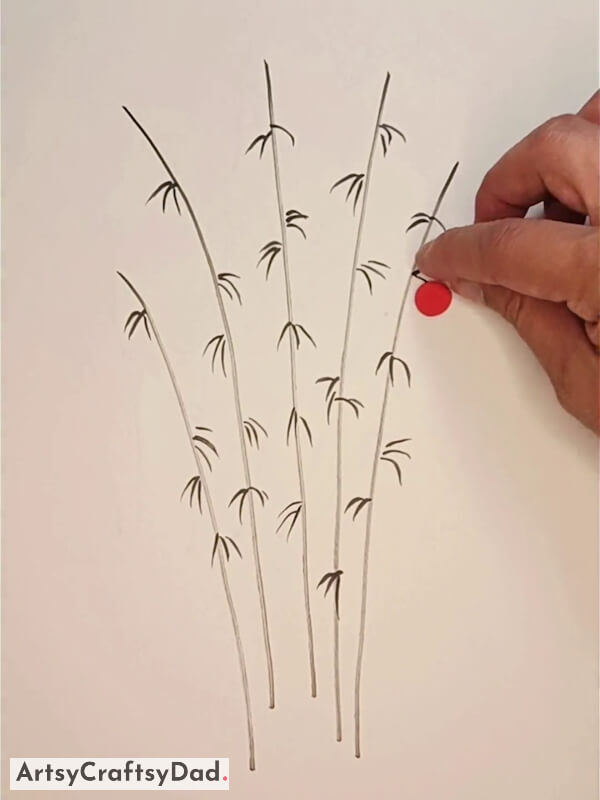
Step #1: Drawing Stems of Plant
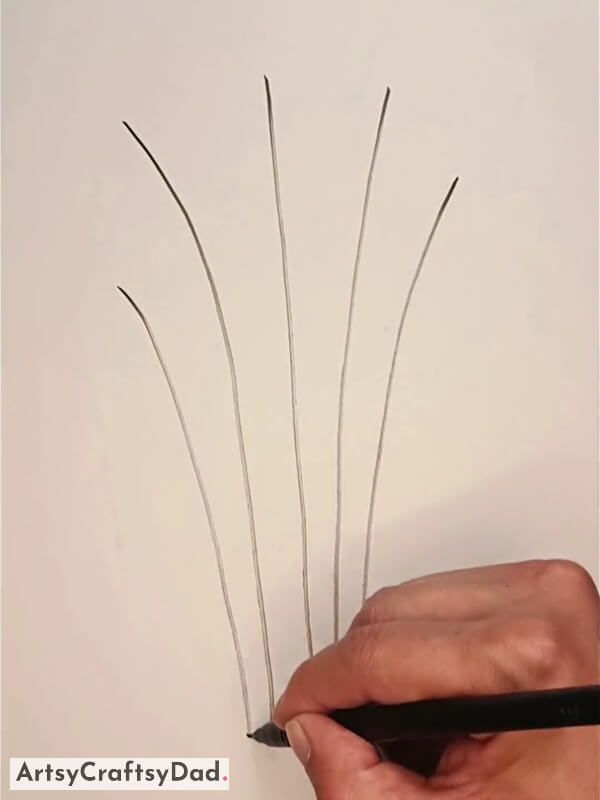
Take a piece of white paper as a base & draw curvy lines of stem with the help of a black pen
Step #2: Drawing Filaments Around the Stems
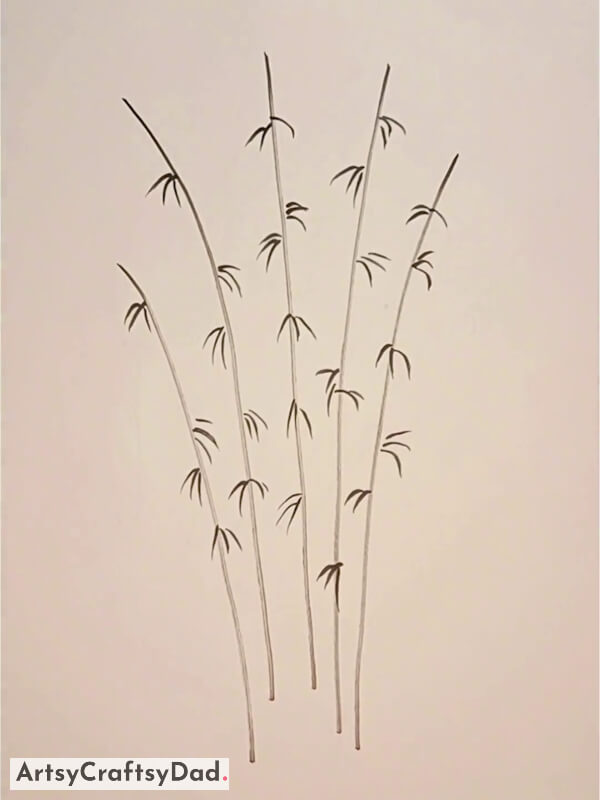
Now, draw filaments around the stems with the help of a black pen.
Step #3: Making Clay Cherry on Filaments
Now, take a piece of red clay & make a little circle in a cherry shape, and then paste it over the tip of one filament.
Step #4: Pasting More Cherries
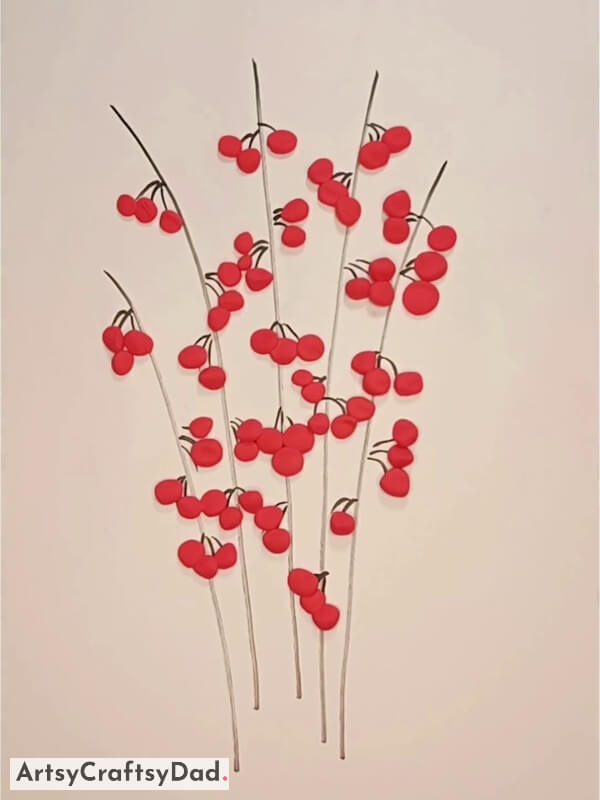
Now, make more cherries from red clay & paste them on the tip of all filaments.
Step #5: Making a Leaves Using Green Paper
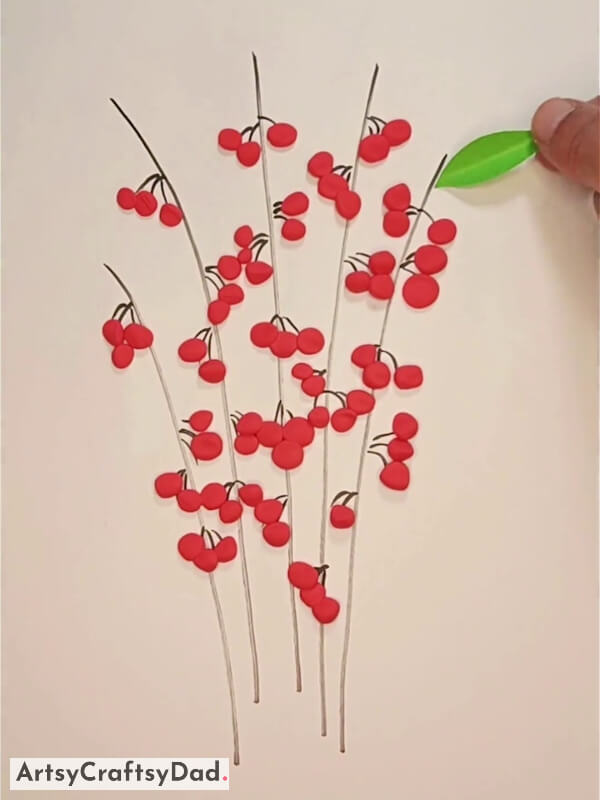
Now, take a green color paper & draw leaves from a pencil on it, and then cut it out using scissors. Now paste it over the top of the stem which is on the right side with the help of glue.
Step #6: Pasting More Green Paper Leaves
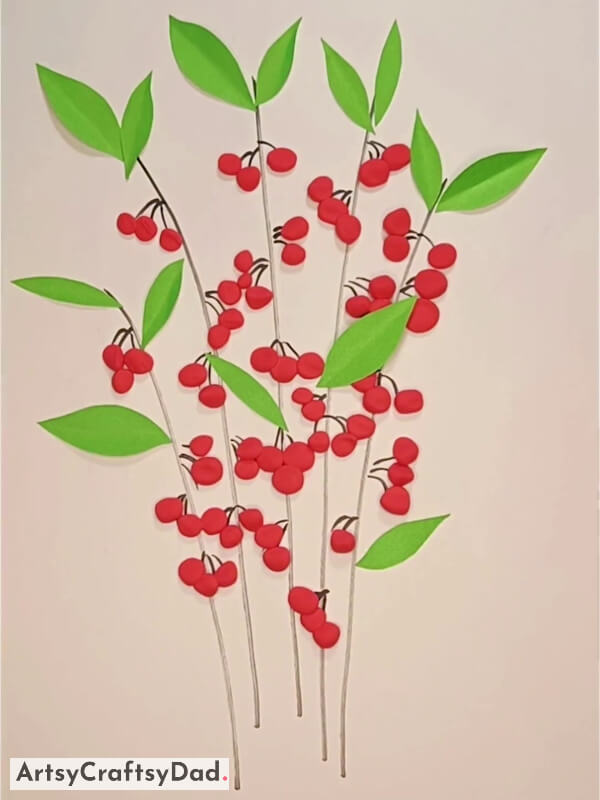
Draw & cut some more leaves from green color paper and paste them on all the stems.
Step #7: Cutting Vertically Half Cut Paper Cup
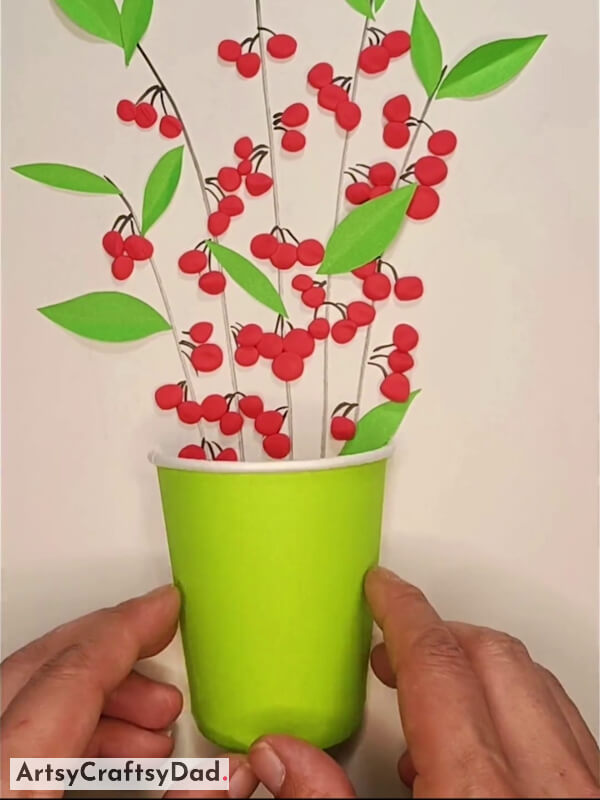
Take a green color paper cup & cut it vertically from the middle & paste it below the stems of cherries.
This Is The Final Look Of Our Cherry Clay Craft!
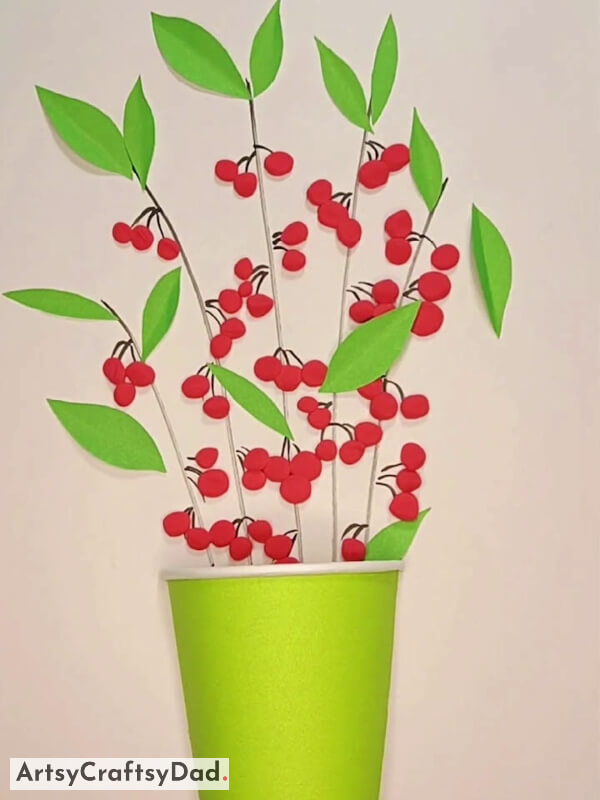
Finally, our clay cherry & paper cup pot with leaves craft is ready!
Our clay cherry & paper cup pot with leaves craft tutorial is ready to decorate your home. I hope you have enjoyed the process of making this. This tutorial will guide you through the step-by-step process of creating beautiful cherry clay art pieces that can be used as decorations or gifts. You could share this with your family & friends to impress them with your artwork. Whether you are a beginner or an experienced crafter, this tutorial offers easy-to-follow instructions and tips to help you create stunning clay cherries that will impress everyone.
Don’t forget to share our website with your family & friends & let them enjoy making more crafts. Please drop your feedback in the comment section because we feel good to hear your new ideas & thoughts for our crafts.
Thank you for visiting us!
You May Also Like
- Paper And Clay Snow Town Landscape Craft Tutorial
- Paper Cup And Clay Crowns Craft Tutorial For Beginners
- Hens In Nest Laying Eggs: Clay And Paper Craft Tutorial
- Paper And Clay Tree Craft Tutorial For Beginners
- Red Fishes With Clay And Paper Craft Tutorial


