Looking for a fun and educational craft activity for your kids? Check out this amazing clay turnip craft tutorial! Our step-by-step instructions will guide your little ones in creating adorable turnip sculptures using clay. Join the fun and start crafting today!
Are you looking for a fun and creative craft project to do with your kids? Look no further! In this tutorial, we will show you how to make an amazing clay turnip craft. This craft is not only enjoyable to make, but it also allows children to explore their creativity and develop their fine motor skills. With simple materials and step-by-step instructions, you and your children will have a blast creating these adorable clay turnips. So gather your supplies and get ready to embark on a crafting adventure that your kids will remember for years to come!
Stunning Turnip Using Clay Craft For Kids
Must Read: Clay Poached Egg Craft Tutorial For Kids
Supplies & Tools
- Polymer Colored Clay (Red, Green, White )
- Transparent Acrylic Sheet
- White Craft Paper
- Scissors
- Plastic Knife
Turnip Clay Instructions
Step #1: Working With Clay
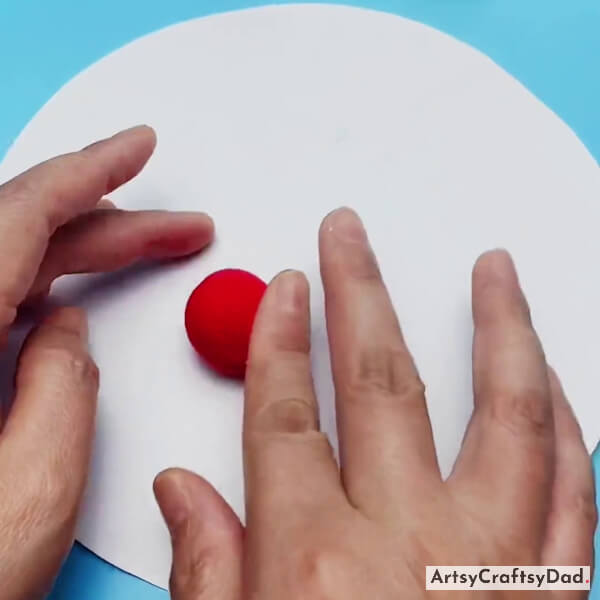
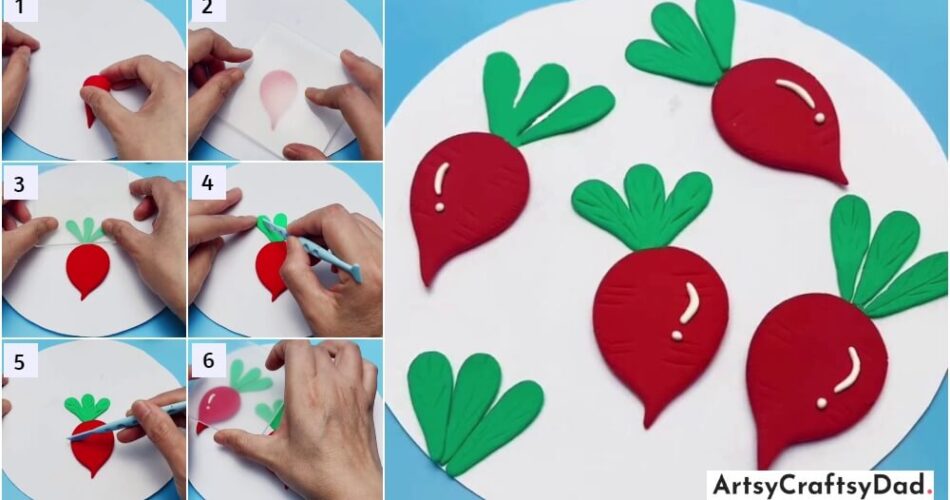
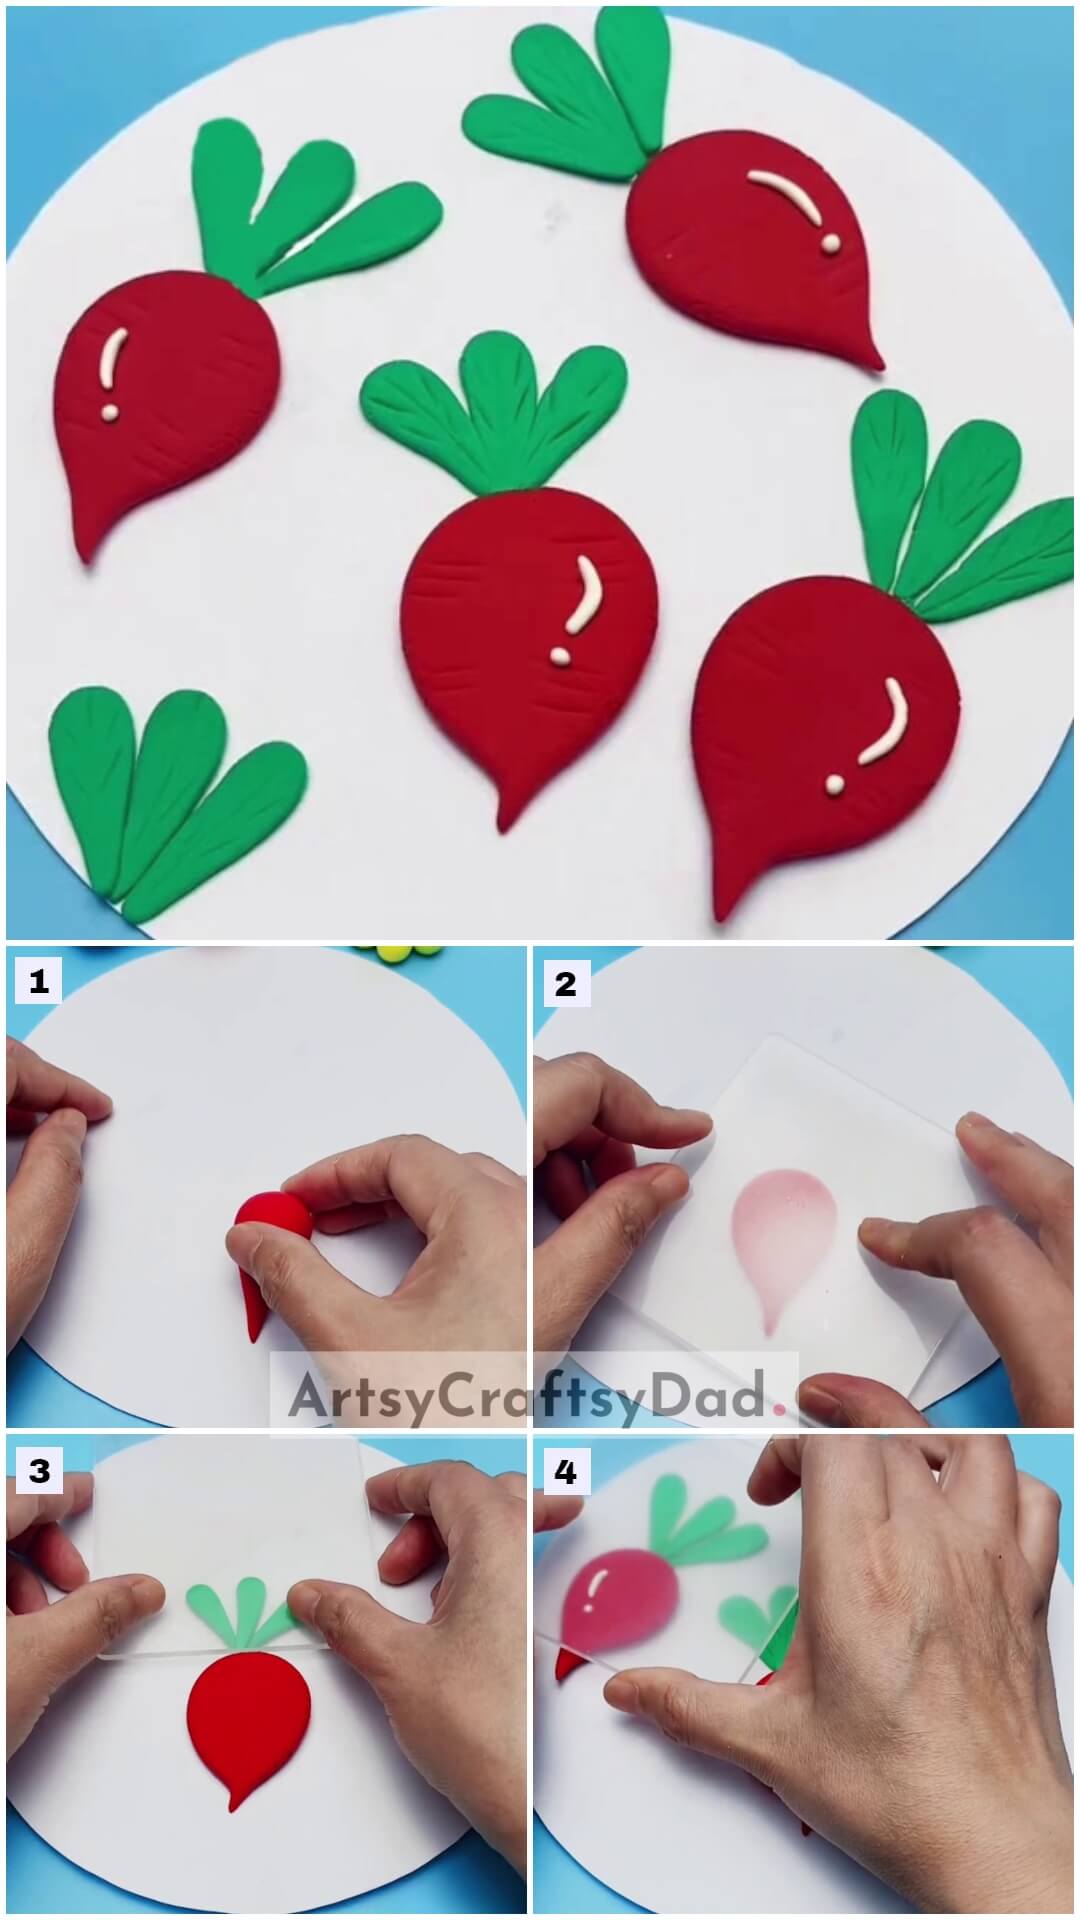
First, take a white craft sheet & cut it into a circle & use it as a craft base. Take a small piece of red clay and shape it into a round ball to form the body of the turnip.
Step #2: Giving Turnip Shape To Clay
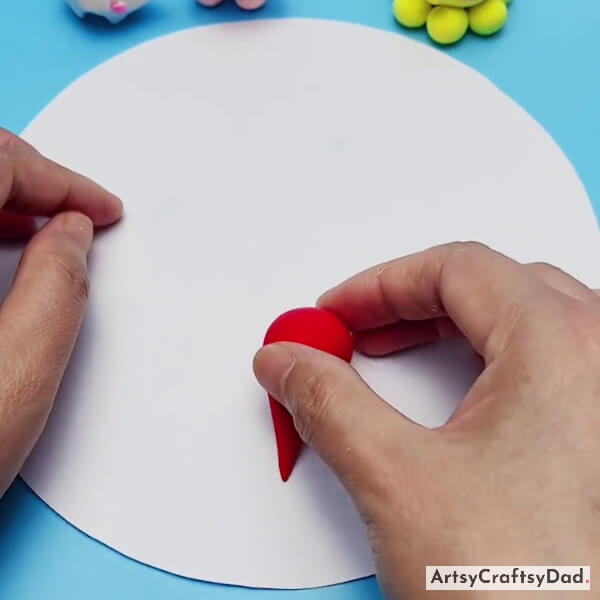
Now, roll it into a cone shape to form the turnip.
Step #3: Pressing Turnip
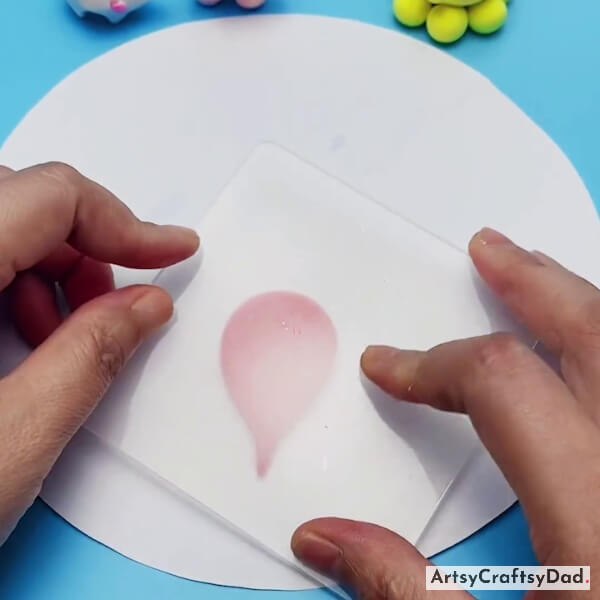
Now, use an acrylic sheet and press clay to make a turnip-like shape.
Step #4: Making Leaves
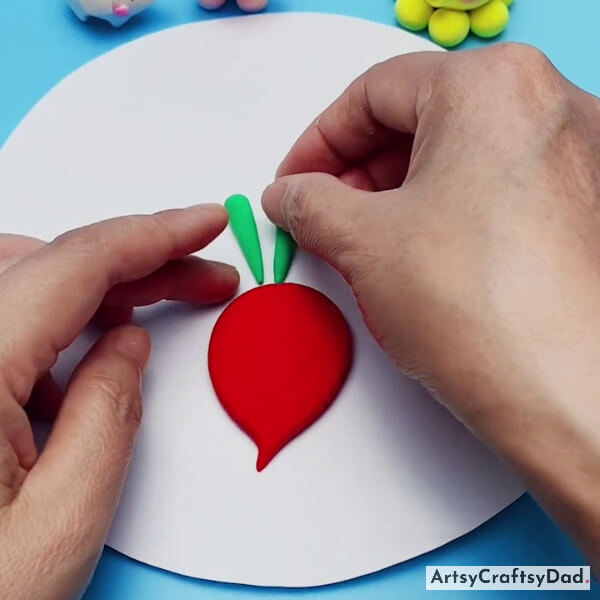
Now, take some small pieces of green clay & make two small layers as leaves & paste them on the top of the turnip.
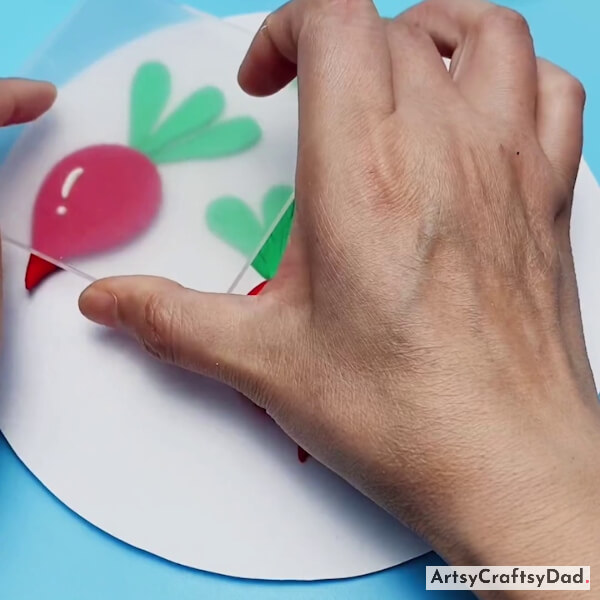
Step #5: Pressing Leaves
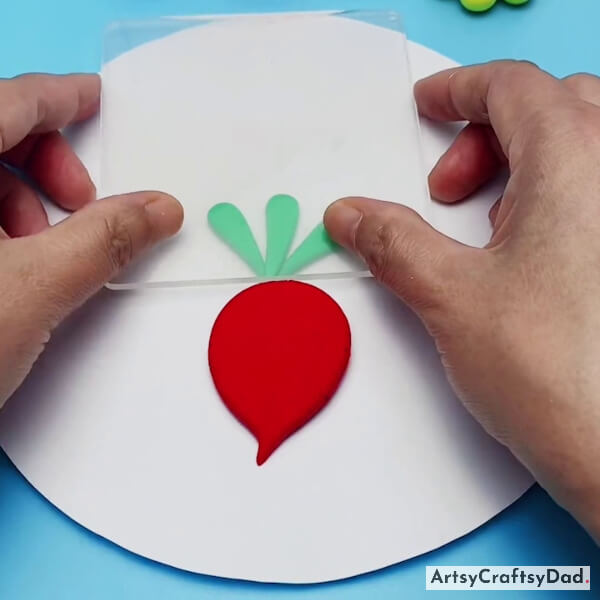
Now, press those layers to give them leaves shape by using an acrylic transparent sheet.
Step #6: Creating Texture On Leaves
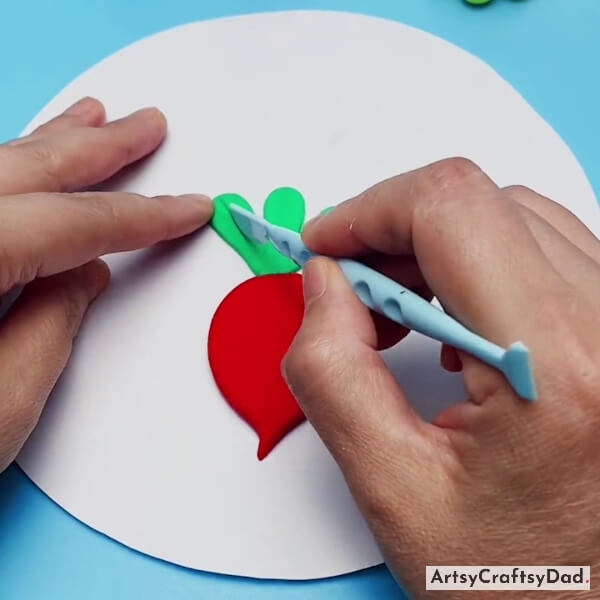
Now, take a knife tool and start creating textures on the turnip leaves to make them realistic.
Step #7: Creating Texture On Turnip
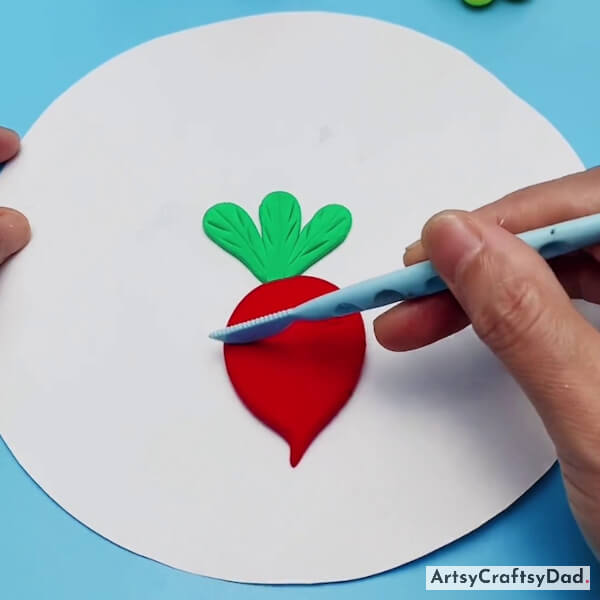
Now, start to make some horizontal lines on the turnip to give it a realistic effect.
Step #8: Making More Turnips
Now, make some more turnips using the same steps as above mentioned.
This Is The Final View Of Our Clay Turnip Craft!
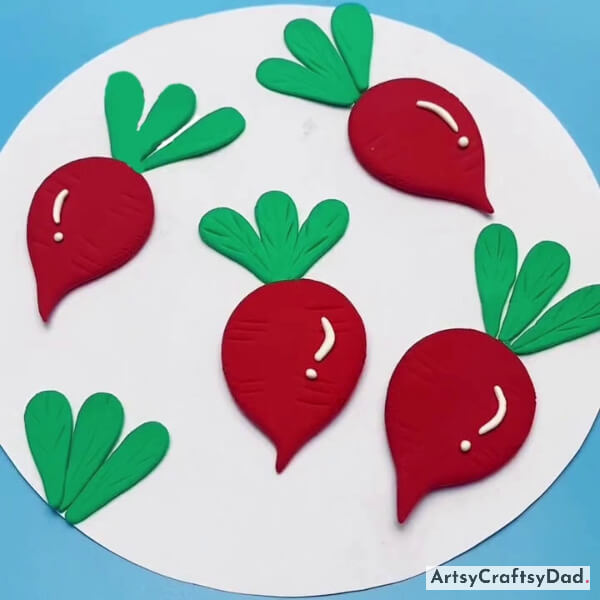
Now, take white clay & make a thin curvey strip by rolling it & also a small dot. Now, paste this thin curvey strip on turnip & paste a dot under the curvey thin strip. Repeat the same process for the rest of all turnips. Now, take green clay & make turnip leaves by the same process that we made for other turnips. Finally, our clay turnip craft is ready!
We have created a turnip craft that looks amazing. This clay turnip craft tutorial for kids is a fantastic way to engage children in a creative and educational activity. Not only does it provide an opportunity for them to explore their artistic abilities, but it also allows them to learn about different fruits and vegetables in a fun and interactive manner. Please share your feedback in the comment section because we love to hear your thoughts about our craft.
Thanks for visiting our website.
You Might Also Like This
- Colorful Clay Cactuses Craft Tutorial For Kids
- Clay Flower Vase Model Craft Tutorial For Kids
- White Clay Flowers Craft Tutorial For Kids
- Clay Snails On Leaves Craft Tutorial For Kids
- Clay Circles Landscape Craft Tutorial For Kids


