Learn how to create your beautiful paper tree with this easy DIY tutorial for beginners. Perfect for adding a touch of nature to your home decor or as a fun project to do with kids. Get creative and customize your tree with different colors and patterns of paper. Follow these step-by-step instructions to bring some handmade charm into your space.
Are you looking for a fun and easy craft project to try out? Look no further than this DIY paper tree craft tutorial for beginners! Whether you’re new to crafting or looking for a simple project to do with your kids, this tutorial will guide you through the steps to create your adorable paper tree. With just a few supplies and some creativity, you’ll have a beautiful decoration to display in no time. Let’s get started on this fun and festive craft project!
Lovely Tree Craft Using Colorful Papers For Kids
Must Read: Colorful Snails Paper Craft Tutorial For Beginners
Supplies & Tools
- Colored Papers (Brown, Pink, Red, Yellow, Green, Orange, Sky-Blue)
- Scissors
- Glue
- Black Marker
Paper Tree Craft Instructions
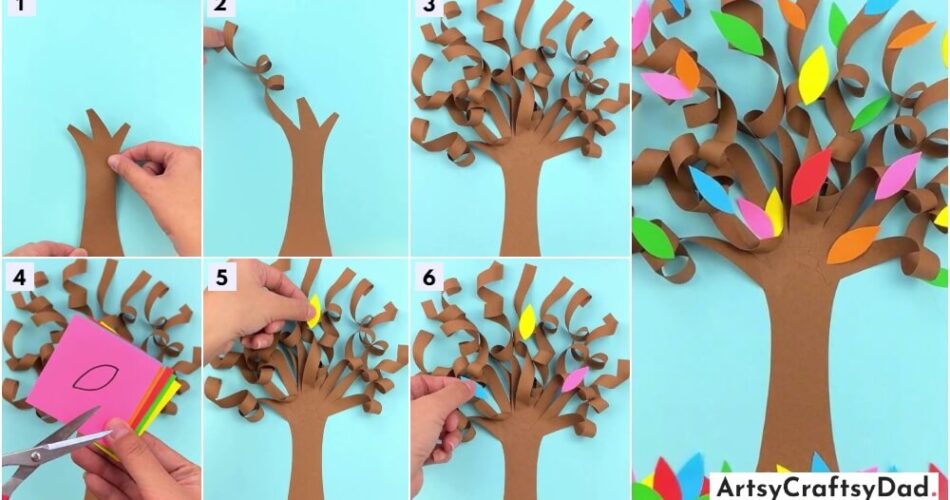
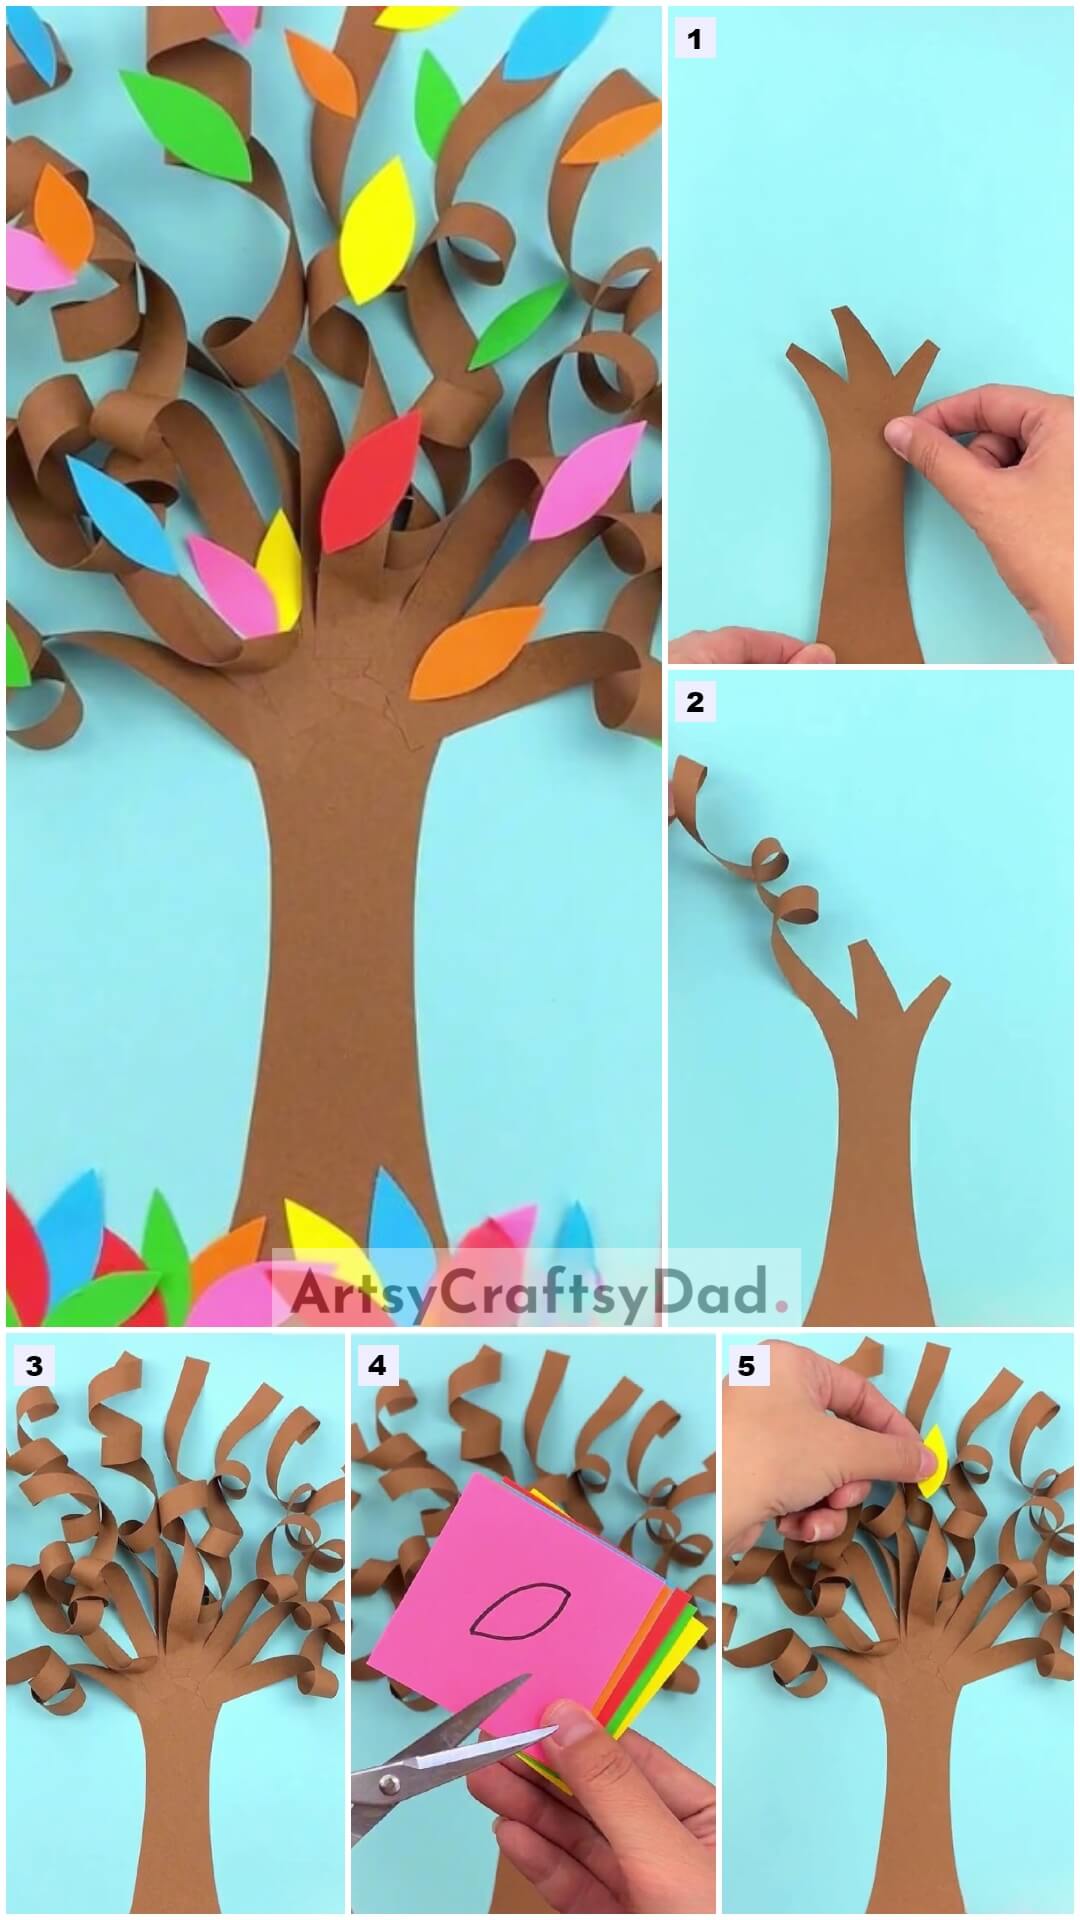
Step #1: Making Trunk Of Tree
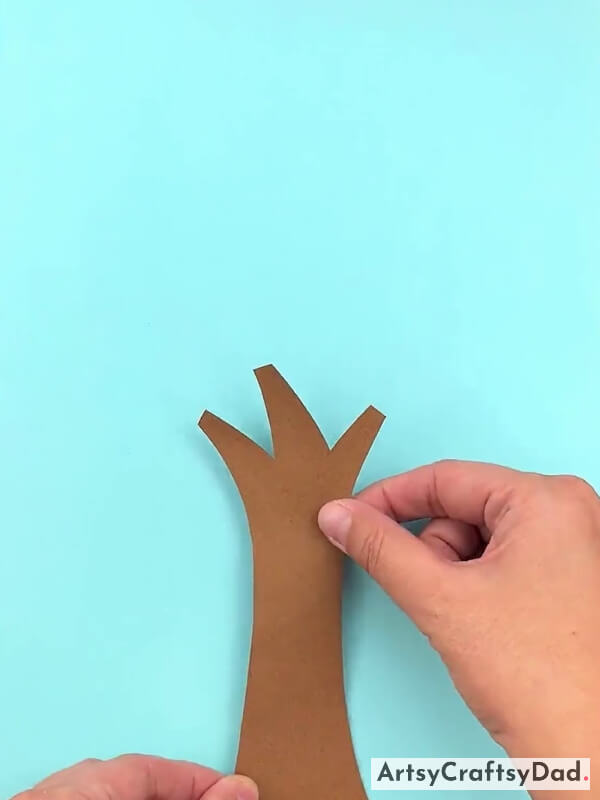
First, take a sky-blue craft paper & use it as a craft base. Now, take a brown craft paper & cut it into a tree trunk shape & paste it on the craft base using glue.
Step #2: Working With Paper Strap
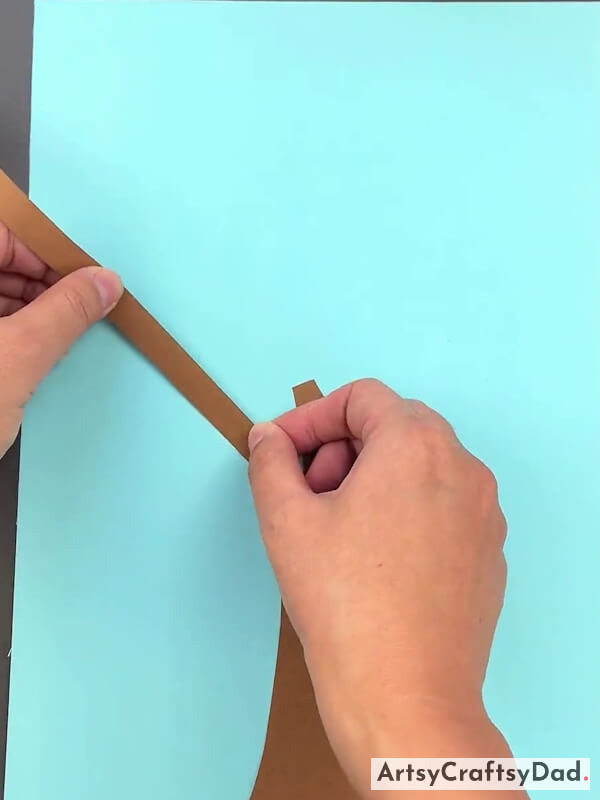
Now, paste only the lower end of the paper strap (not the complete strap) on the top of the tree trunk.
Step #3: Making Tree Branch
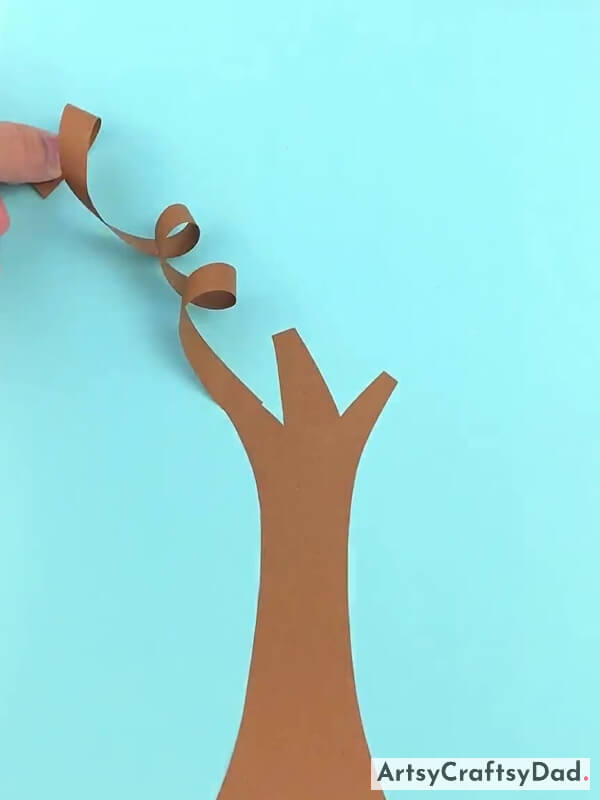
Now, curl the paper strap to make a tree branch.
Step #4: Making One More Tree Branch
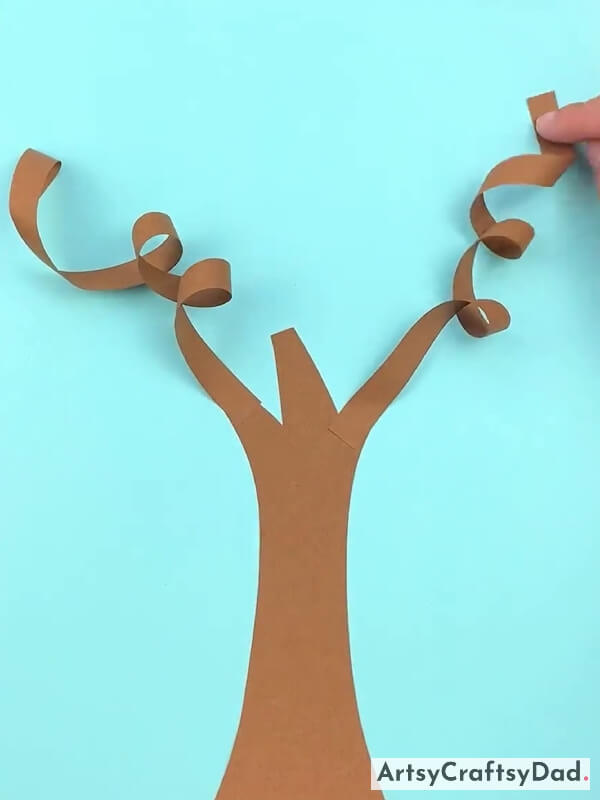
Make one more tree branch using the same steps.
Step #5: Making More Branches Of Tree
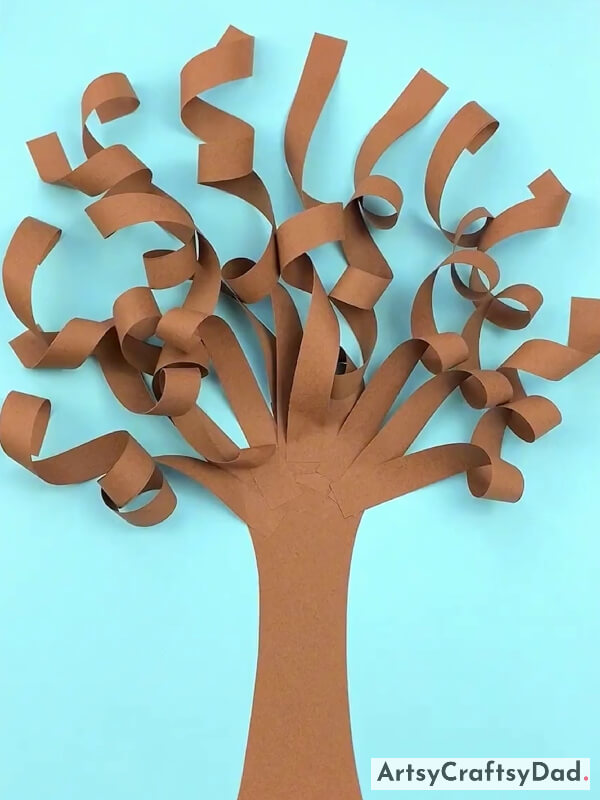
Make some more tree branches to make a complete tree-like shape.
Step #6: Drawing & Cutting Leaves
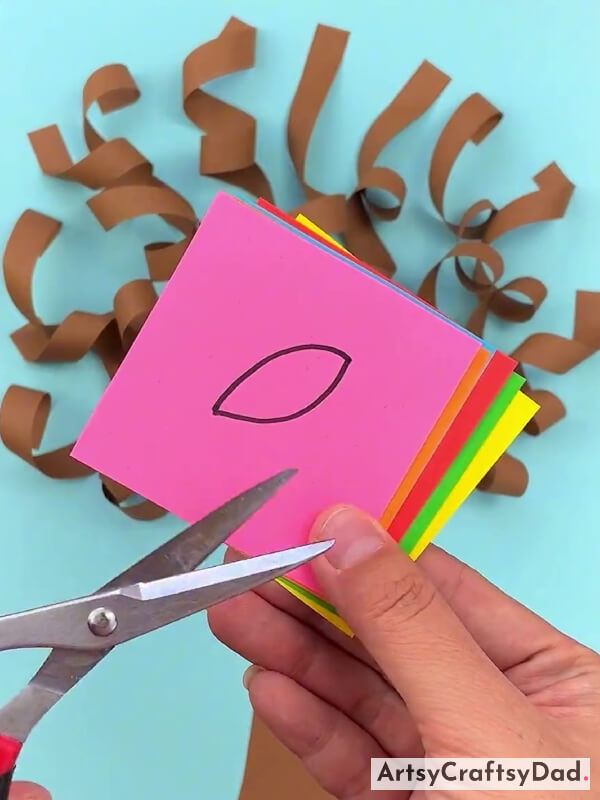
Take different colored craft papers & draw the leaf shapes on the different colorful papers by using a black marker. Then cut out leaf shapes using scissors.
Step #7: Pasting A Leaf
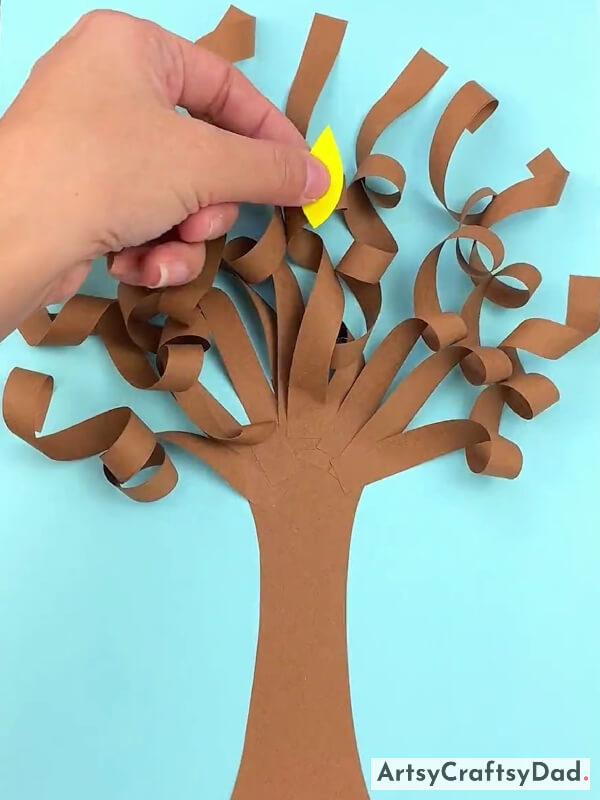
Take a yellow color paper leaf and paste it on the tree branch using glue.
Step #8: Pasting More Leaves
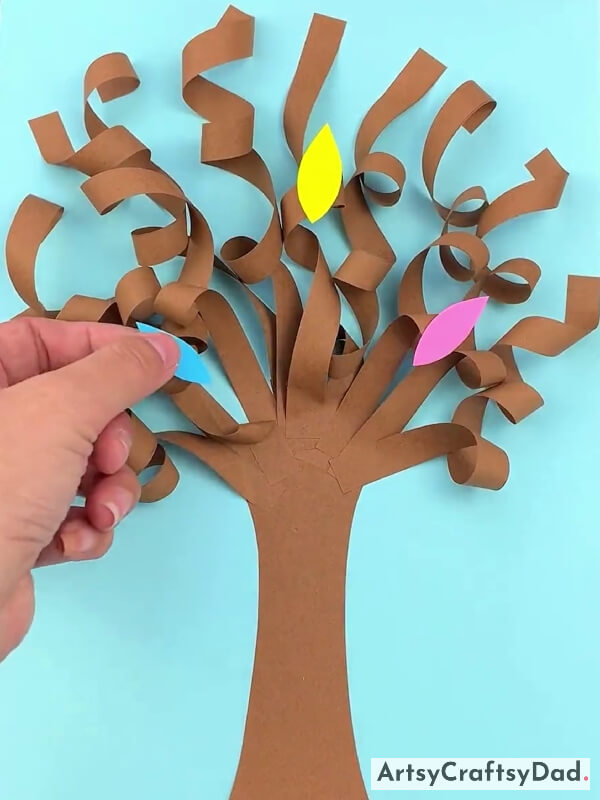
Paste some other colored paper leaves on the branches.
Step #9: Pasting All Remaining Leaves

Paste all the remaining colorful paper leaves on the tree branches as shown in the above image.
Yeah! Our Final Craft Is Ready Now!
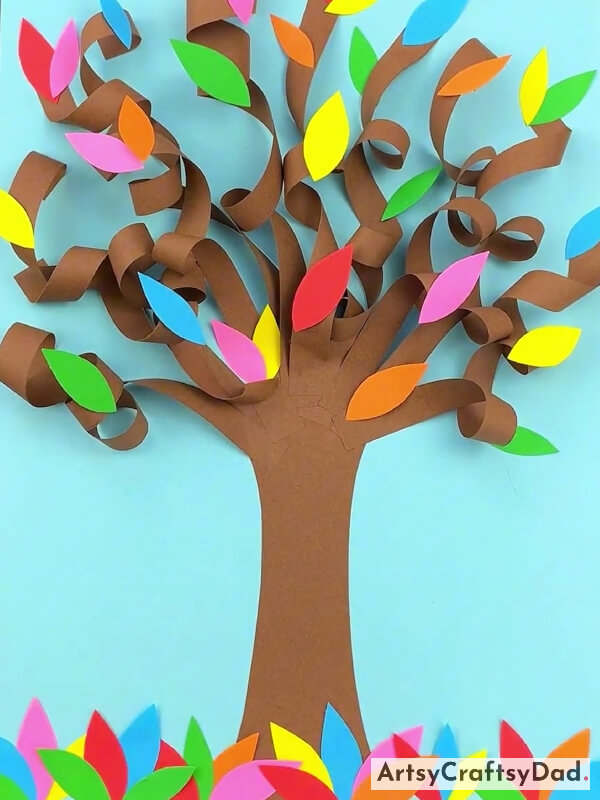
Paste some leaves under the tree to create the ground. This is what our paper tree craft with colorful leaves looks like.
Our colorful tree paper craft is finished here. I hope you have enjoyed the process of making tree crafts without any difficulty. This paper tree craft with colorful leaves tutorial for beginners is a fantastic way to unleash one’s creativity while also honing their crafting skills. Whether it’s for personal enjoyment or a fun activity to engage in with friends and family, this tutorial provides a delightful opportunity to bring nature’s beauty indoors and add a touch of color to any space. Please share your thoughts in the comment section because we love to hear your ideas & thoughts about our craft.
Thanks for visiting our website!
You Might Also Like This
- Clay Cherry & Paper Cup Pot With Leaves Craft Tutorial
- Hand Outline Cute Tree Drawing Tutorial For Beginners
- Sunflower Paper Tearing Craft Tutorial For Beginners
- Colorful Paper Rainbow Wall Hanging Craft Tutorial For Kids
- Paper Cup And Clay Crowns Craft Tutorial For Beginners


